¶ MyISP App
- Overview
- Downloading the app
- Logging in
- Dashboard
- Services
- Finance
- Payment gateways
- Tickets
- Statistics
- Documents
- Profile
- White-labeling
¶ Overview
The MyISP portal app is the mobile version of the Splynx Customer portal.
It was designed to provide the best possible customer service, letting your clients manage their account, services, and payments from a phone instead of a web browser.
Through the app, customers can check their balance and usage, pay invoices online, order new products, raise support tickets, and review their documents — all from the same set of modules available on the Customer portal.
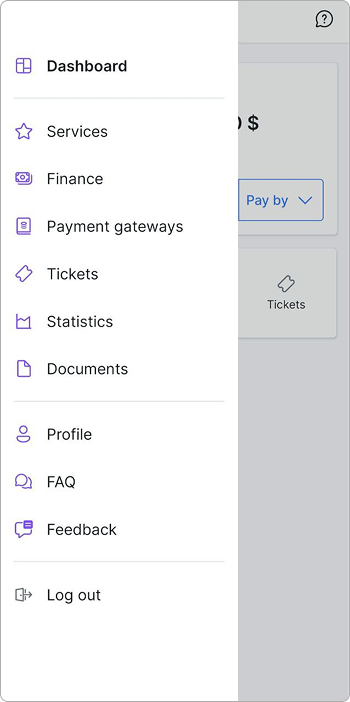
The modules shown in the app, and the fields inside each module, are controlled from Config → Main → Portal.
¶ Downloading the app
The MyISP portal app is free and available for both major mobile platforms. Use the following links:


The download links can also be displayed on the Customer portal login page. To enable them, go to Config → Main → Portal → Customer Mobile app and turn on the Enabled option.
¶ Logging in
Customers log in with the same credentials they use on the Customer portal. Depending on your configuration in Config → Main → Portal → General settings, the Authentication field can be either the customer's Email or Login.
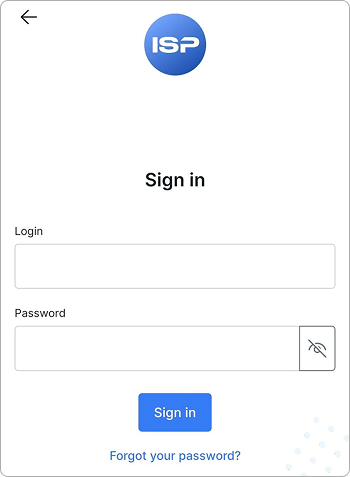
If password reset is enabled, customers can recover access directly from the app using an SMS or Email check code, according to the reset method you selected.
¶ Dashboard
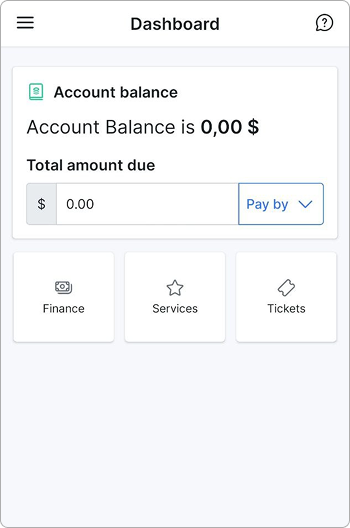
The Dashboard is the home screen of the app. It shows the customer's account balance together with key account and usage information.
¶ Services
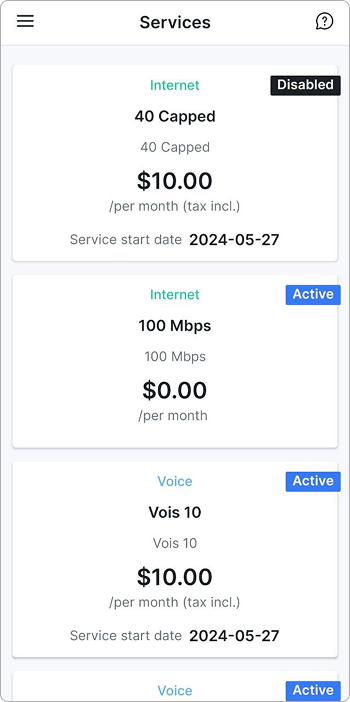
The Services section lists the customer's active services: Internet, Voice, Recurring, or Bundle.
¶ Viewing a service
Tapping a service opens the View service screen with the details of that service — Plan, Description, Price, and Start date. The set of fields displayed here is defined in Config → Main → Portal → Services.
¶ Service actions
The kebab menu (⋮) in the top-right corner of the View service screen contains the actions the customer is allowed to perform on the service:
Request to change— sends a request to change the service, for example to switch to another tariff plan. The request goes to the administrative portal, where an administrator approves or declines it.Pause service— puts the service on hold.
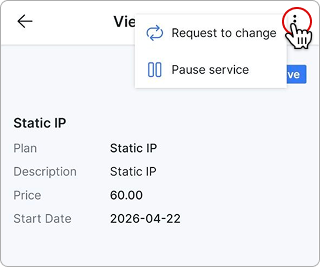
Both actions are optional. They appear only when the corresponding permissions are enabled in Config → Main → Portal → Services.
For more details, see My services.

¶ Finance
The Finance section gives customers a complete view of their billing and lets them pay online.
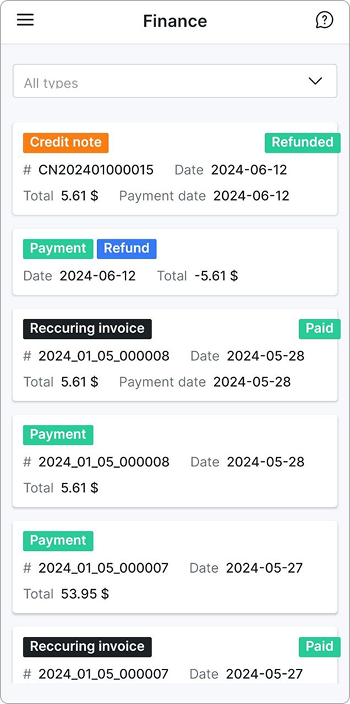
Customers can:
- Review finance documents — invoices, proforma invoices, payments, credit notes, and statements (each category can be hidden or shown).
- Check transactions — a transactions table with optional
Debit/Credit,Movement, andInvoice numbercolumns. - Pay online — settle invoices using a credit card or a payment gateway.
- Manage payment accounts — add, view, or remove saved cards and bank accounts.
- Set up recurring payments — create an automatic payment subscription using a saved card or a payment gateway account.
- Download PDF — save finance documents, such as invoices and credit notes, as PDF files to the device.
¶ Viewing an invoice
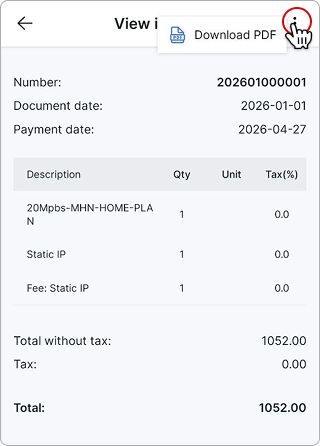
Tapping an invoice opens the View invoice screen. It shows the document Number, the Document date, the Payment date for paid invoices, and the table of invoice lines with Description, Qty, Unit, and Tax(%) for each item. The Total without tax, Tax, and Total amounts are displayed at the bottom.
¶ Downloading an invoice as PDF
To save a copy of the document to the device, open the invoice, tap the kebab menu (⋮) in the top-right corner, and tap Download PDF.
¶ Paying an invoice
Unpaid invoices show a Pay button at the bottom of the View invoice screen. Tapping it opens the Select payment gateway window, where the customer selects one of the available gateways — for example Pay by AuthorizeNet, Pay by Ippay, Pay by Stripe, Pay by Netcash, or Pay by M-Pesa — and confirms with Pay. The Pay button stays inactive until a gateway is selected.
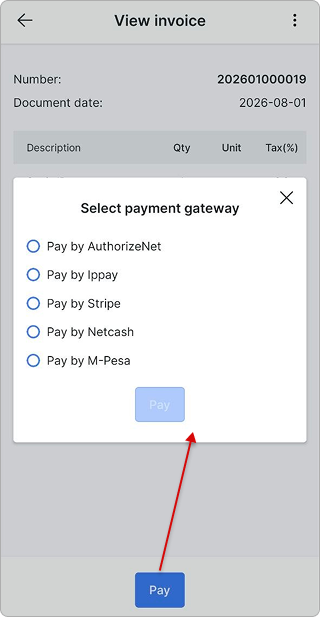
The window lists only the gateways that are installed and active on your Splynx instance and available to that customer, so what your clients see depends on the add-ons you have configured.
Suggested reading: Invoices, Payments, Credit notes, Statements, Transactions, and Proforma invoices.
¶ Payment gateways
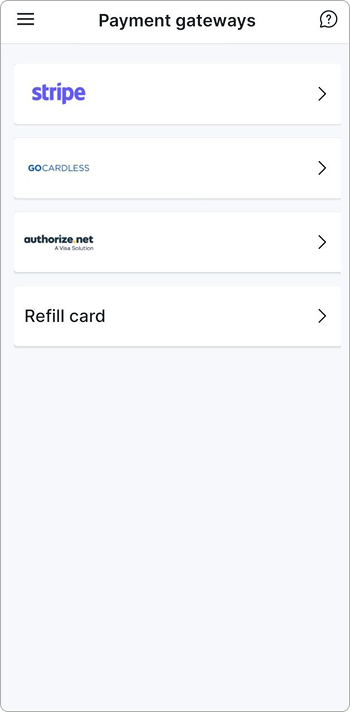
In the Payment gateways section, customers can add, update, or remove the payment gateway accounts used to pay for their services.
¶ Tickets
The Tickets section is the support channel inside the app. Customers can create a ticket by clicking the Create a ticket button, check its status, exchange messages with a support representative, and close the ticket once resolved.
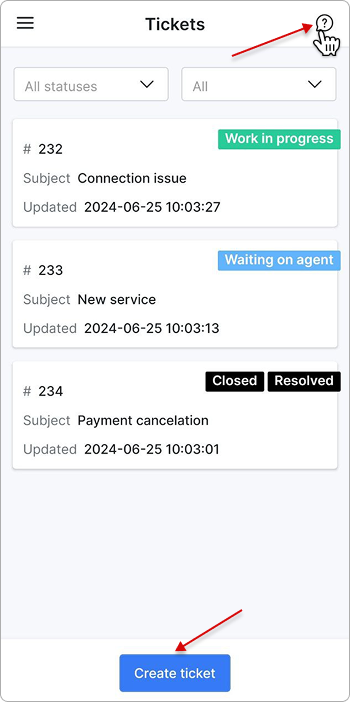
The fields shown for each ticket — such as ID, Priority, Status, Group, Type, Assigned to, and the created/updated dates — are configurable in Config → Main → Portal → Tickets.
¶ Working with a ticket
Tapping a ticket opens the View ticket screen. The header shows the ticket ID and a colored status label, such as Work in progress. Tapping Show details expands the remaining ticket fields enabled for the portal.
The conversation is displayed below as a chat: each message shows the author, the date and time, and the message text. To reply, the customer types a message and taps the send icon in the bottom-right corner. The attachment icon in the bottom-left corner adds a file to the message — a screenshot or a photo of the equipment, for example.
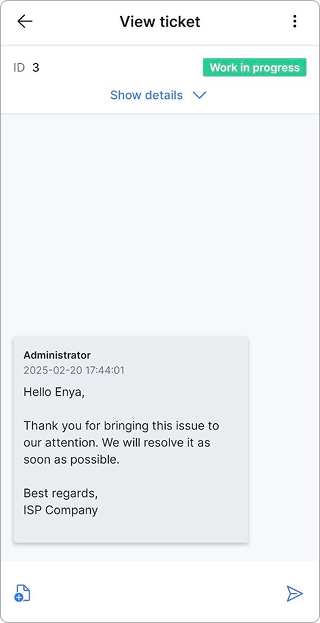
The kebab menu (⋮) in the top-right corner contains the actions available for the ticket, such as closing it once the issue is resolved.
The Messages module, when enabled, delivers announcements and notifications from the ISP to the customer.
¶ Statistics
In the Statistics section, customers can review their usage for a selected period.
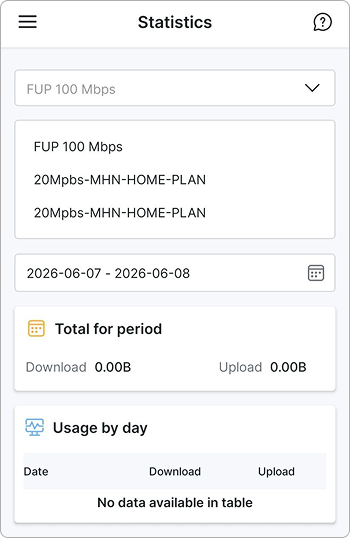
- Internet — daily usage graphs, usage totals, the bandwidth graph, detailed FUP statistics, current speed limits, monthly limits (CAP), and per-session statistics including the session termination cause.
- Voice — totals for calls, messages, and data, plus a detailed table of voice records.
Each item is optional and is turned on or off in Config → Main → Portal → Internet Statistics and Voice Statistics.
¶ Documents
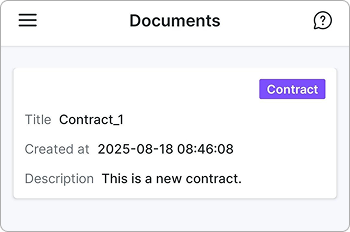
In the Documents section, customers can view and download documents shared with them, such as signed contracts and other files. When a contract is signed, the customer receives a notification with the contract attached as a PDF.
¶ Profile
The Profile section lets customers view and, where permitted, edit their personal and contact information — for example Name, Email, Phone, and address fields. They can also change their account password, select a language in Settings, and review the F.A.Q.
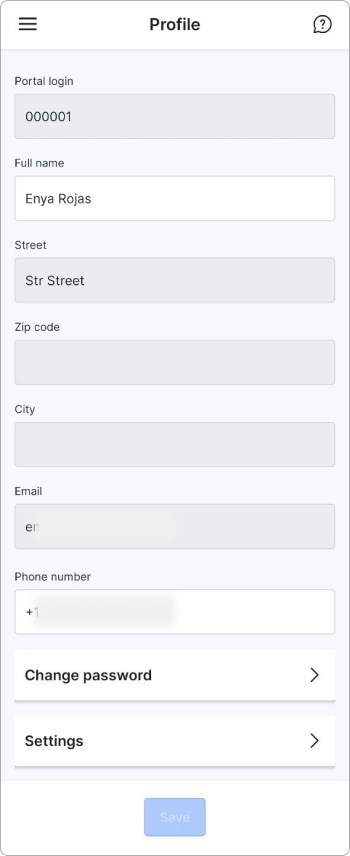
For each field, you can grant View, Edit, or both. To require confirmation before saving changes, enable the Request Password option in the portal configuration.
¶ White-labeling
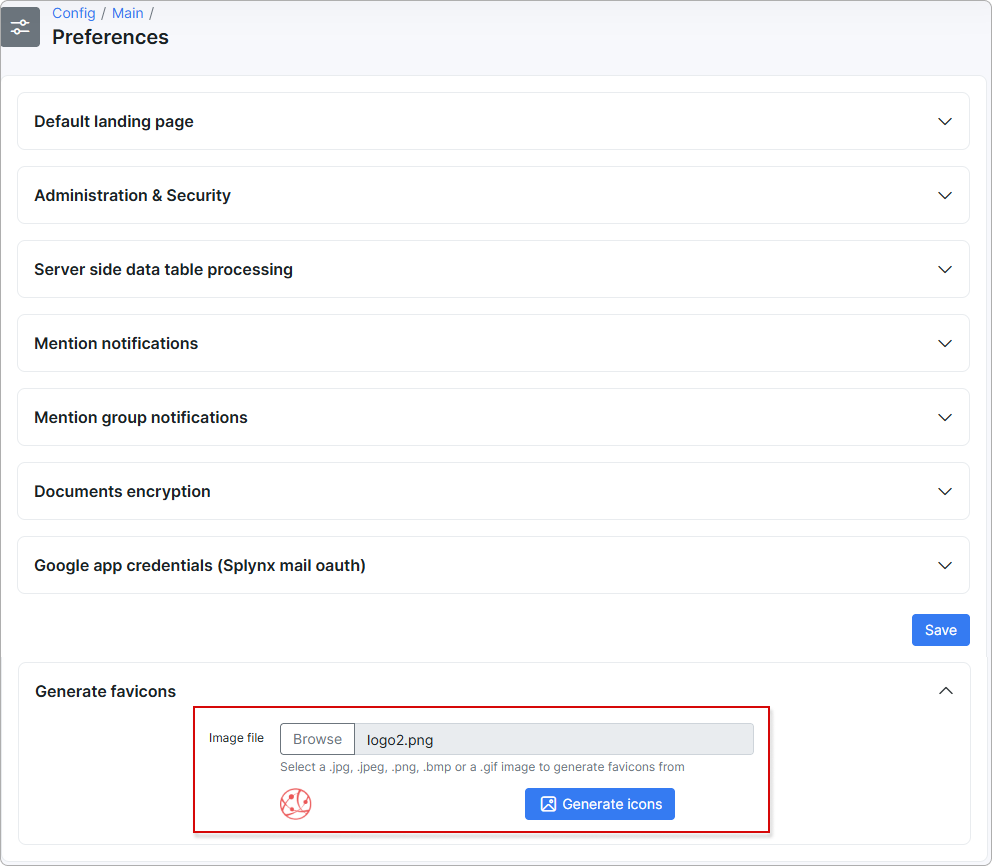
You can replace the default app icon with your own branding. Generate a favicon and contact the Splynx Remote Support team to add your icon to the mobile app, so your customers see your branding on their phone.
The recommended icon format is PNG with a minimum size of 192x192.