¶ One-Time plans
- Overview
- Creating a plan
- Ordering a one-time service on the Customer portal
- Table management
- Financial documents
¶ Overview
These are non-recurring charges used regularly which include services like, call out fees, the initial connection of customers, materials used in conduit, etc.
¶ Creating a plan
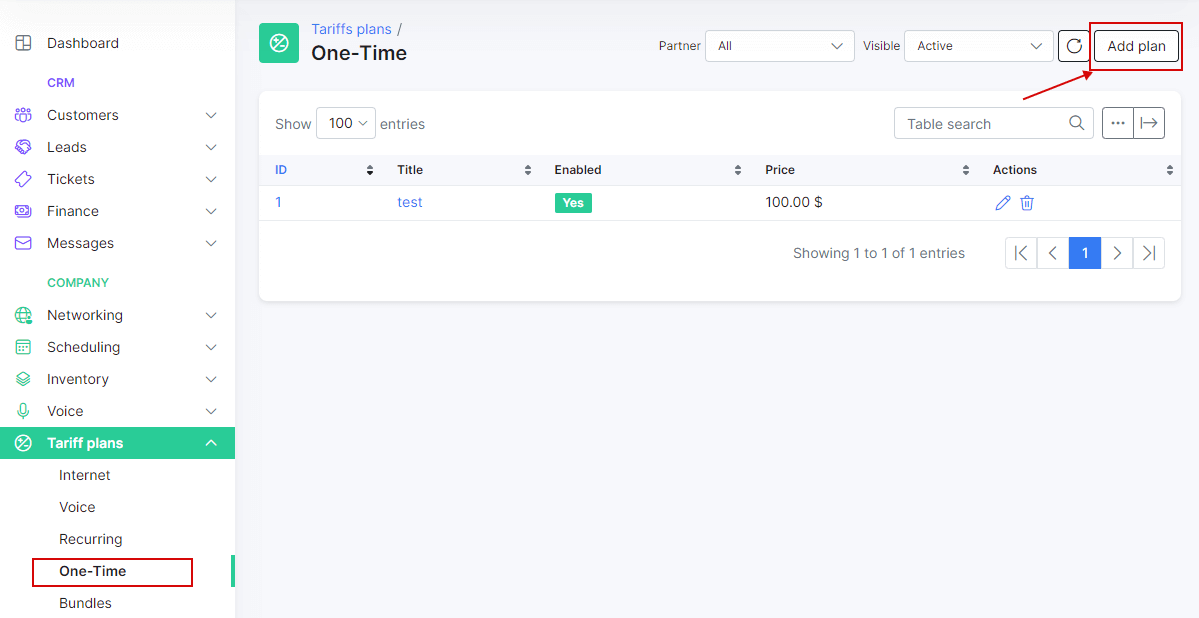
To create a new One-Time plan, navigate to Tariff plans → One-time and click on Add plan.
You will be redirected to an add plan page where you need to fill in the following parameters to create a new one-time plan.
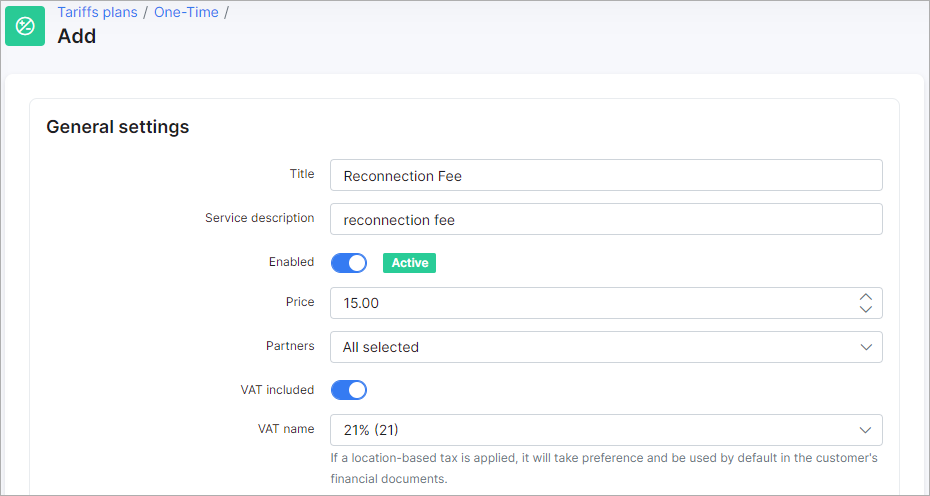
- Title - the name of the tariff plan in the list of One-Time plans.
- Service description - a brief description of the One-time plan.
- Enabled - enables/disables the active status of the One-Time plan.
- Price - the price for the service.
- Partners - the partners this plan will be available to.
- VAT included - whether VAT is included in the price of the plan or not.
- VAT name - the percentage of the VAT.
 To be able to set your VAT percentage amount, you need first add it in Config → Finance → Taxes. Then you can select it in VAT field. For more information see Taxes.
You can automatically create transaction categories for the respective tariff plan.
To learn more, please read Load categories from tariffs
Once the one-time plan is created, it is possible to edit or delete it with the icons in Actions column of the one-time plans list:  or
or 
¶ Plan availability
-
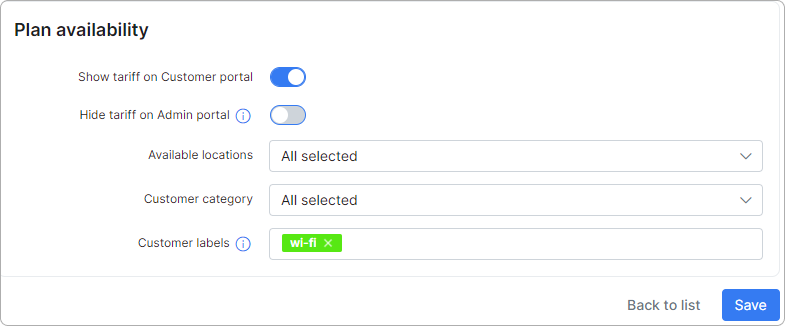
Show tariff on Customer portal - enable this option to make the tariff appear for ordering by customers;
-
Hide tariff on Admin portal - if a customer's location, category, and/or label is different from the tariff's values, the tariff will not be available to add as a service when the option if enabled;
-
Available locations - select available locations;
-
Customer category - select the customer category (Individual, Business or All);
-
Customer labels - select labels if you want this tariff to be available only for customers with the selected labels. Labels allow you to manage efficiently the availability of services for ordering on the Customer portal.
¶ Ordering a one-time service on the Customer portal
You can make one-time services available for ordering on the Customer portal.
When the Show tariff on Customer portal option is enabled, follow these steps to order the one-time service through the Customer portal:
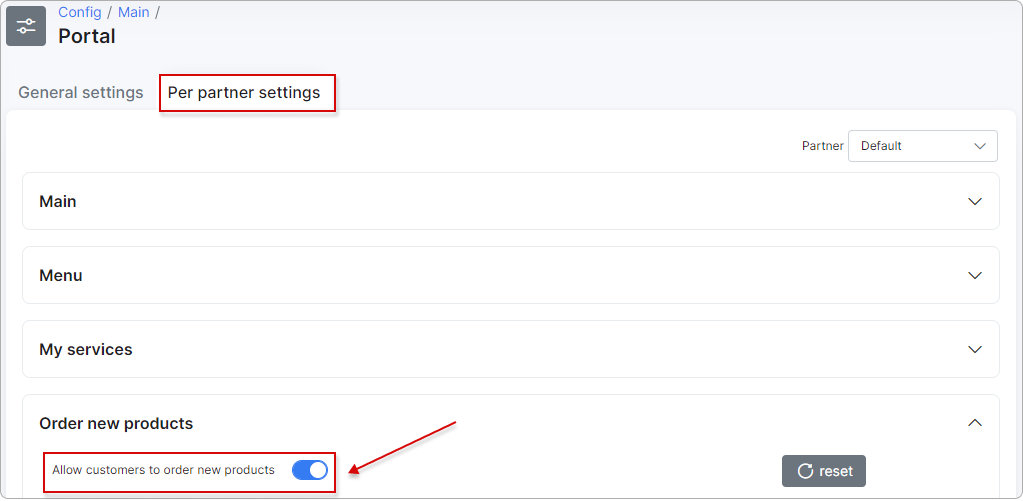
- Please ensure that customers are allowed to order new products in the Portal config.
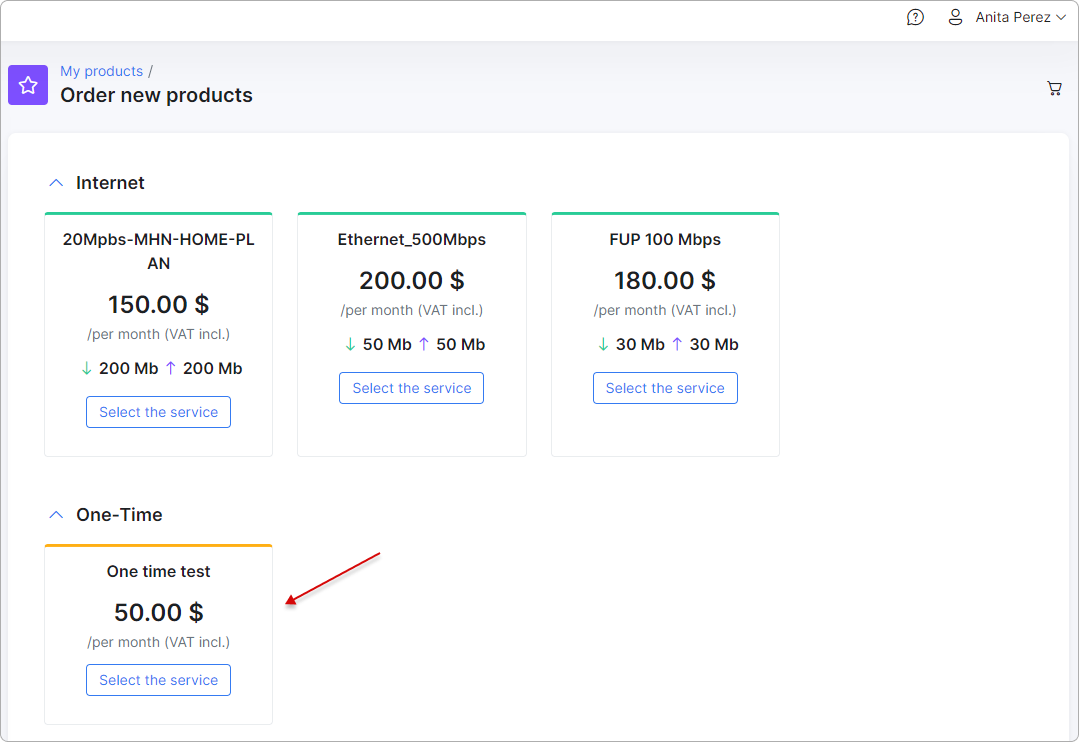
- To order a new one-time service, navigate to the Orders section on the Customer portal and select a one-time service from the available options:
- Depending on the portal configurations and the customer's chosen payment method, they can either make an immediate payment for the selected service or place an order and pay for it later using their preferred method.
Enable this option to accept payments via payment gateway:
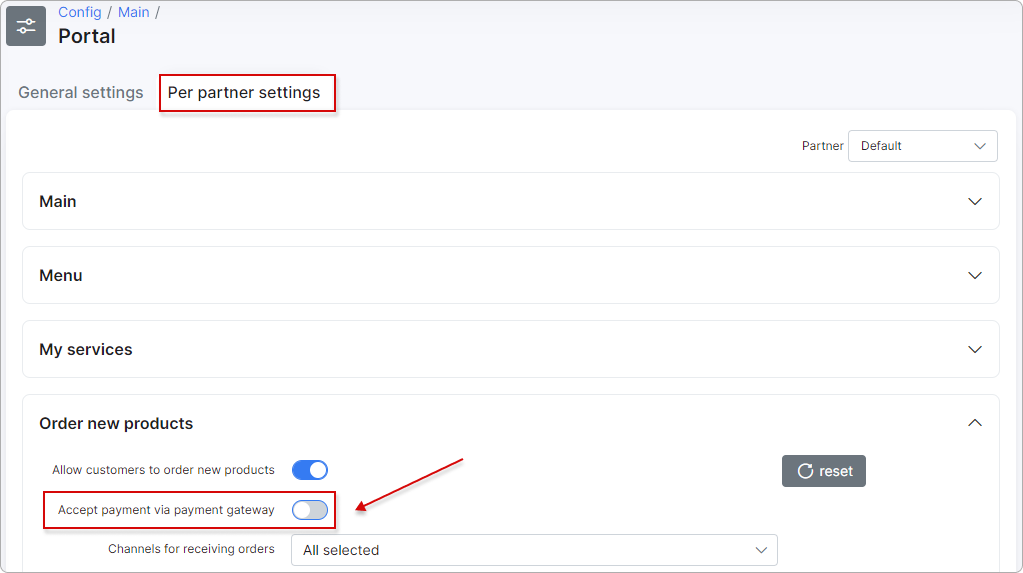
If the selected one-time service is paid through the payment gateway, the invoice will be generated immediately and marked as Paid on both the Admin portal and the Customer portal:

If the payment gateway is unavailable for the customer, they can place an order to be received by the admin. In such a case, a one-time invoice will be created automatically, but its status will be Unpaid, allowing the customer to pay for it later:

Please refer to the Order new products article to obtain more information on the process of ordering products through the Customer Portal.
¶ Table management
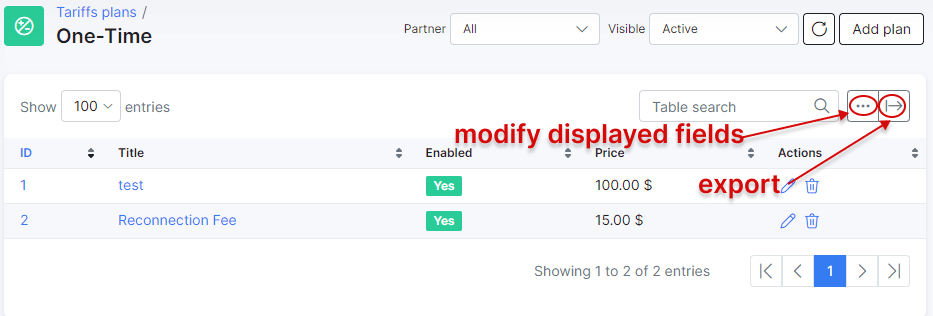
Like all tables in Splynx, you can modify the appearance of content to be displayed and export the table into Excel, CSV or PDF formats. You can also choose to copy or print the table:
¶ Financial documents
After the One-Time plan is created, you can do the following:
1. Add one-time invoice
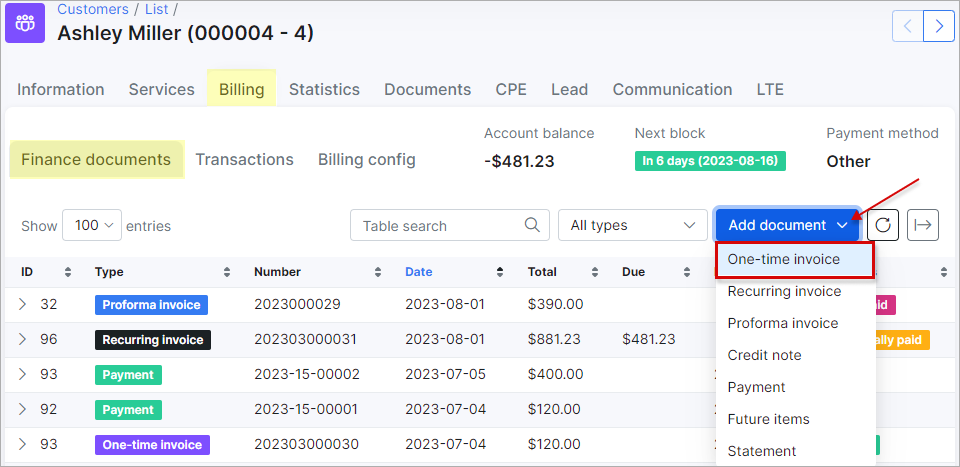
In the customer's Billing → Finance documents tab there is an option to add One-time invoices:
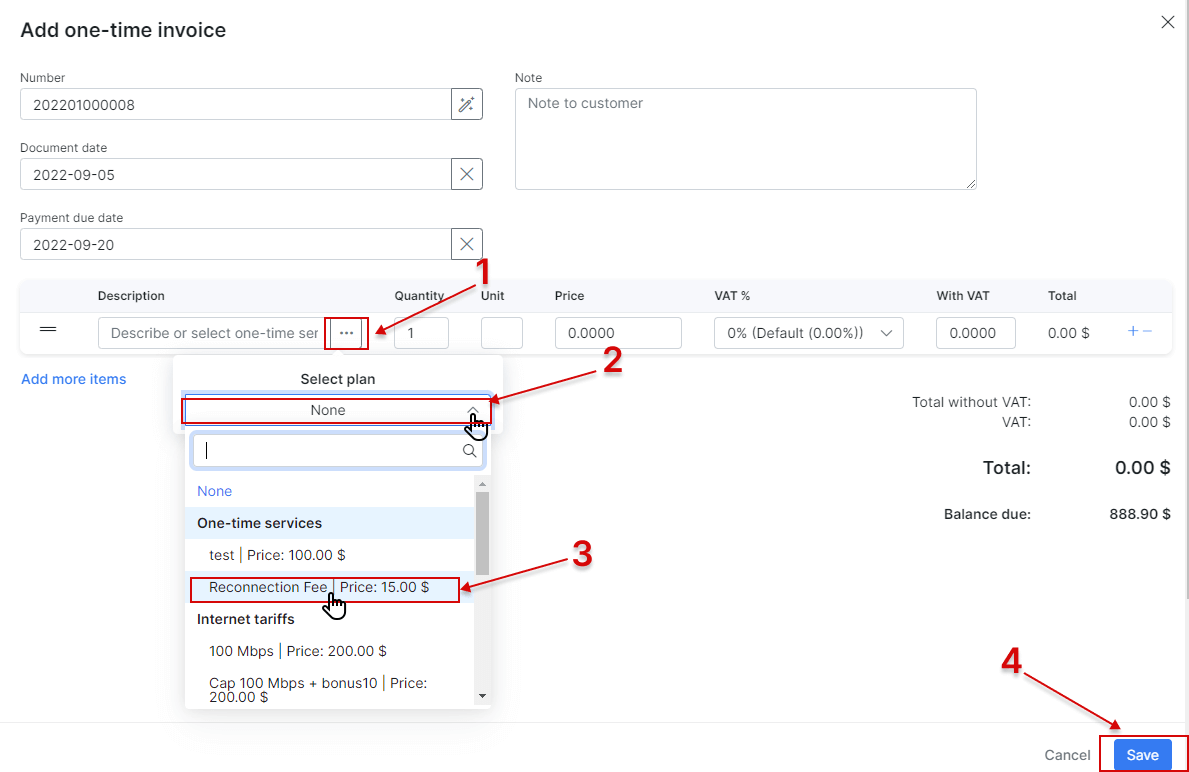
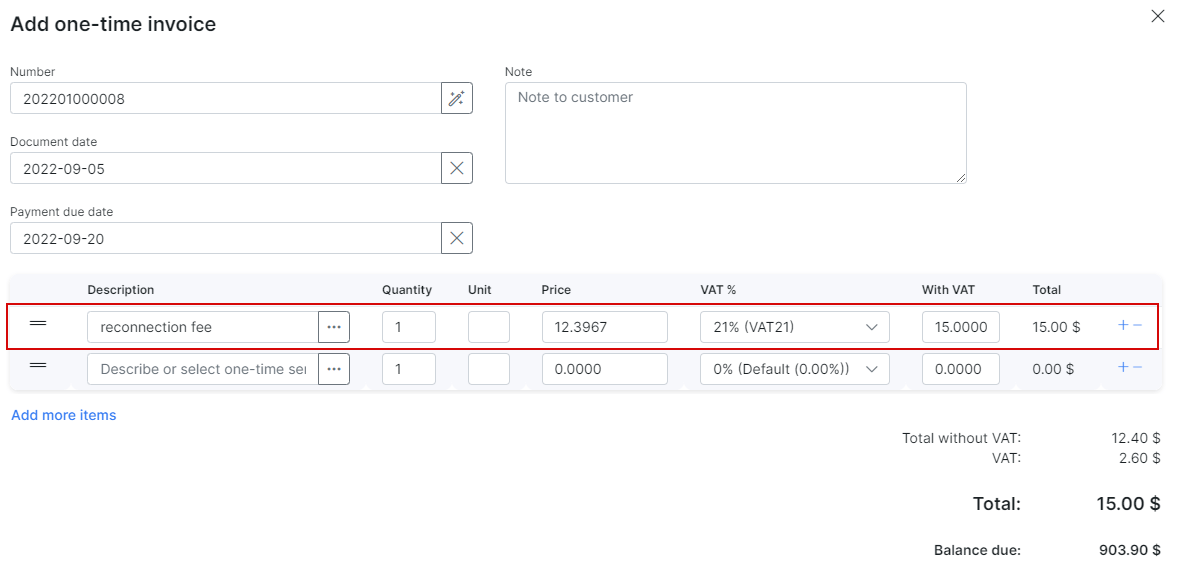
When creating One-time invoice you can select One-time plans as items, and all the data pertaining to the selected plan will be auto-filled as depicted in the image below:
2. Add Proforma invoice
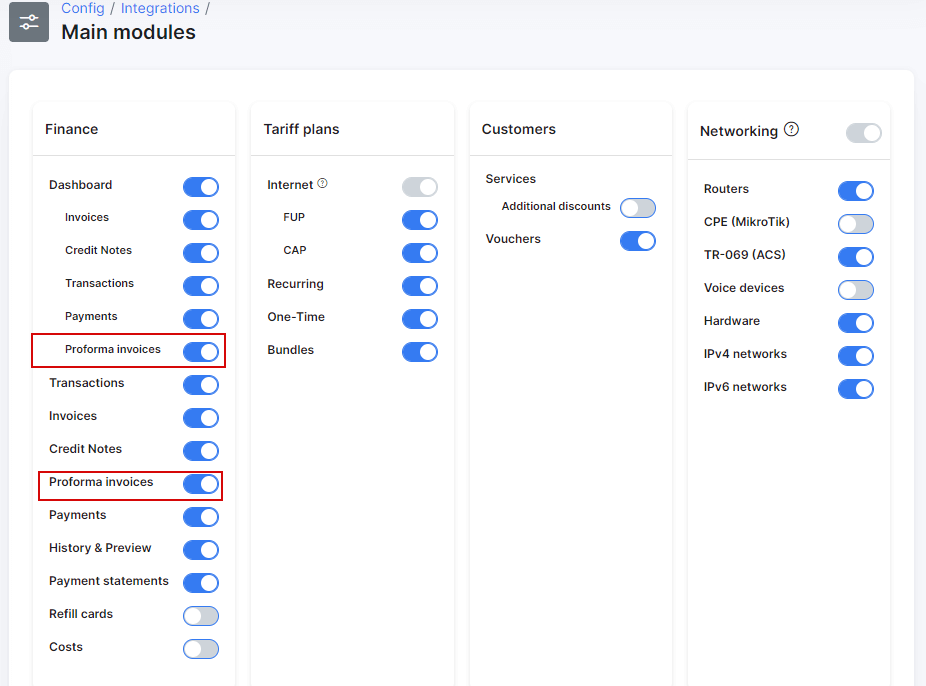
 Please make sure that you have proforma invoices enabled under Finance in Config → Integrations → Main modules:
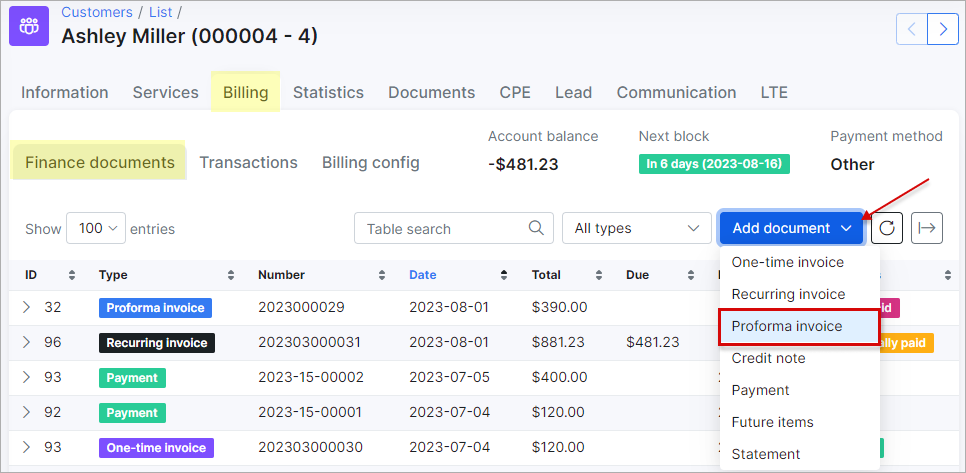
Just like with One-time invoices, the same logic can be used for proforma invoices. Navigate to the customer's Billing → Finance documents tab and add a proforma invoice:
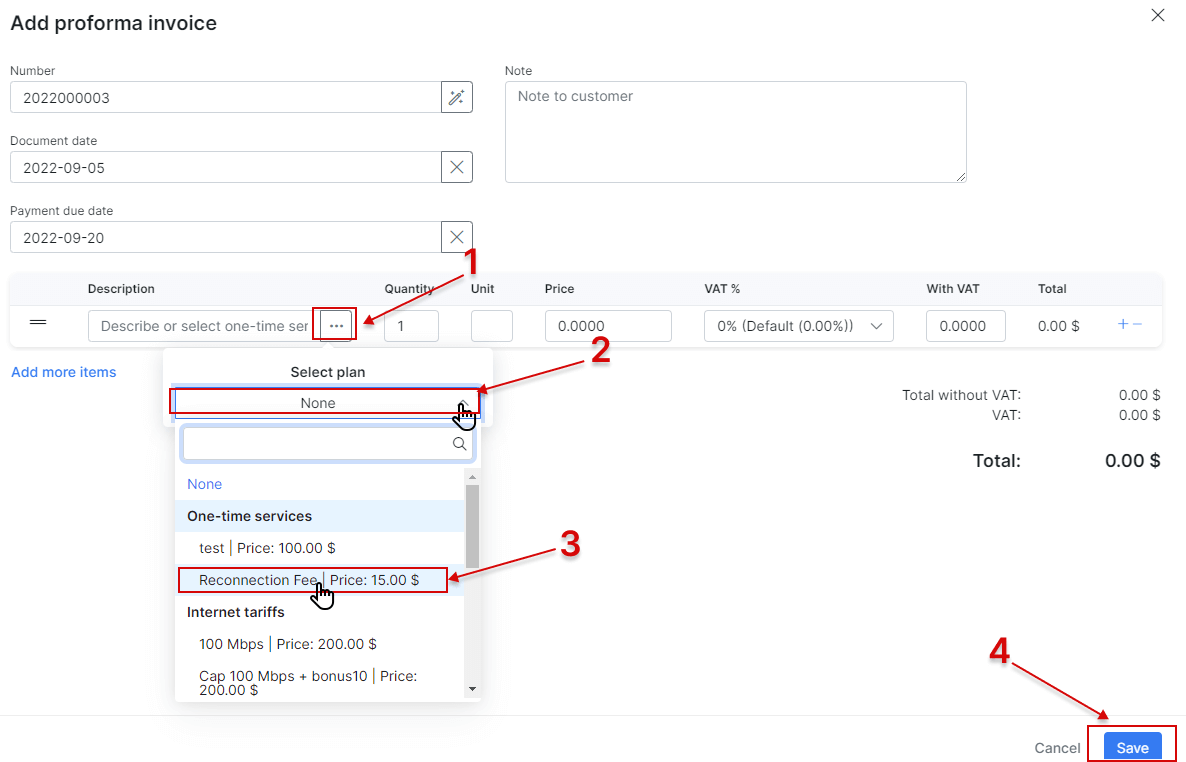
In the proforma invoice creation page, same as with One-time invoices, you are able to select One-time plans as items on the proforma invoice:
