¶ List (Leads)
¶ Overview
This section displays a list of all leads, filtered by the administrators responsible for those leads (by default, My Leads):
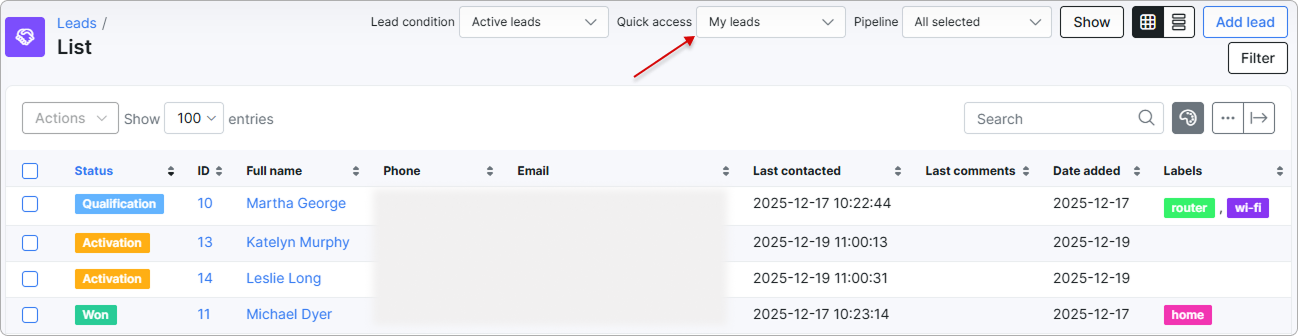
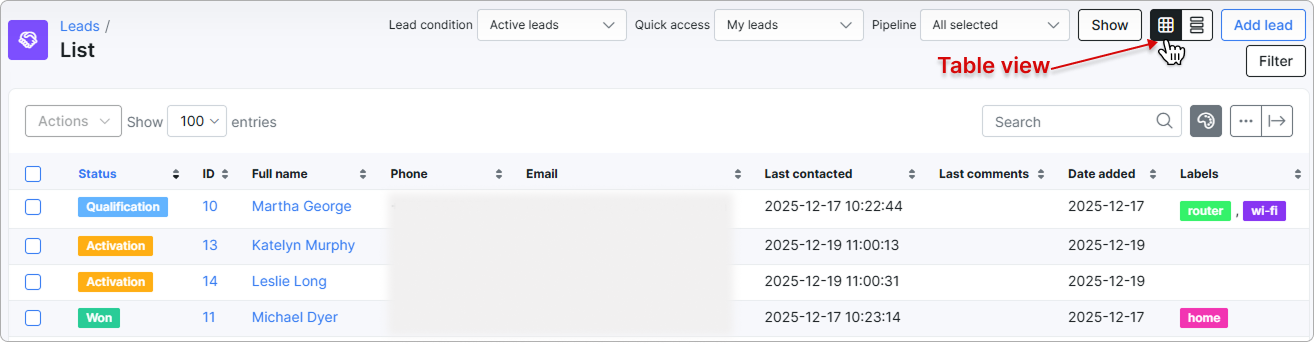
The table displays lead names, statuses, contact details, the date the lead was added, labels, and other related information.
You can view a lead by clicking the Full Name or ID. This opens the lead page, where all lead-related details can be viewed or edited.
¶ Filters
To quickly filter leads by Condition, related Admin (Quick Access), or Pipeline, select the required parameters and click Show:

For advanced filtering, click the Filter button, enter the required details, and then click Apply:
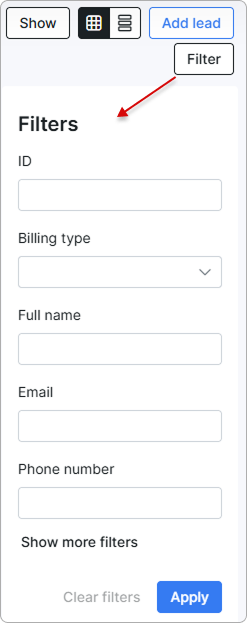
The default panel includes the most common filters:
- ID — Find a lead by its unique system identifier.
- Billing type — Show only leads with the selected billing type (Recurring or Prepaid).
- Full name — Search leads by full or partial name.
- Email — Filter leads by full or partial email address.
- Phone number — Filter leads by full or partial phone number.
Click Show more filters to reveal additional fields:
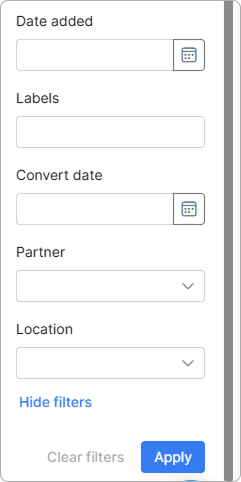
- Date added — Show leads created within the selected date range.
- Labels — Filter leads by one or more labels selected from those created for Customers/Leads.
- Convert date — Show leads converted to customers within the selected date range.
- Partner — Show only leads belonging to a partner selected from the existing list.
- Location — Show only leads assigned to a location selected from the existing list.
¶ Mass actions
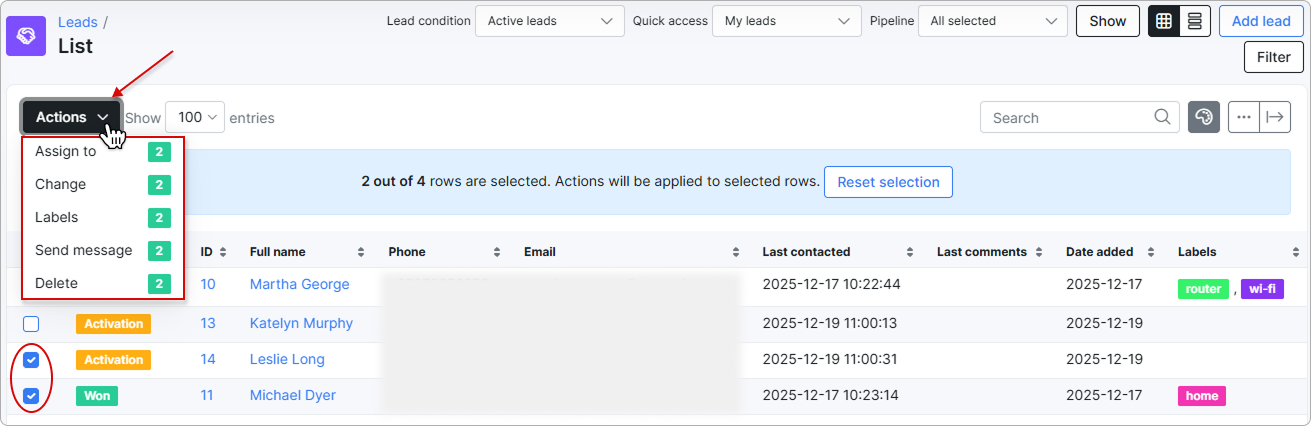
You can apply actions in bulk to leads by clicking the Actions button at the top left of the table:
-
Assign to — assign the selected leads to one admin.
-
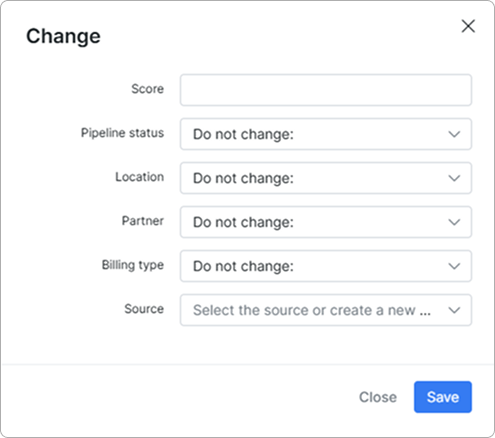
Change — modify the following parameters for the selected leads:
- Labels — update labels for the selected leads. The new label(s) will be added to the existing ones:
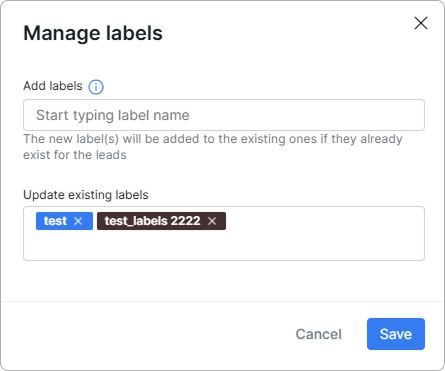
 To create labels for leads, navigate to Config → System → Labels and select the
 Leads/Customers module.
-
Send message — send email or SMS messages in bulk to the selected leads. When Send to is set to Email, the form shows a Send from picker for choosing the outgoing mailbox the campaign goes out from. Options follow the
{Sender email} ({Category})format; only mailboxes available to the current admin (and the lead's partner where applicable) that are enabled in Outgoing mailboxes are listed. The full field list (including Notification category, Subject, Message, Templates and Attachments) is documented under Mass sending. -
Delete — remove the selected leads from the list:
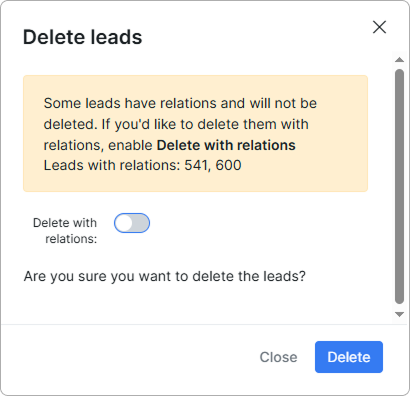
To delete leads that have related data, enable Delete with relations.
¶ Table view and Workflow
Leads can be displayed either as a table or a workflow:
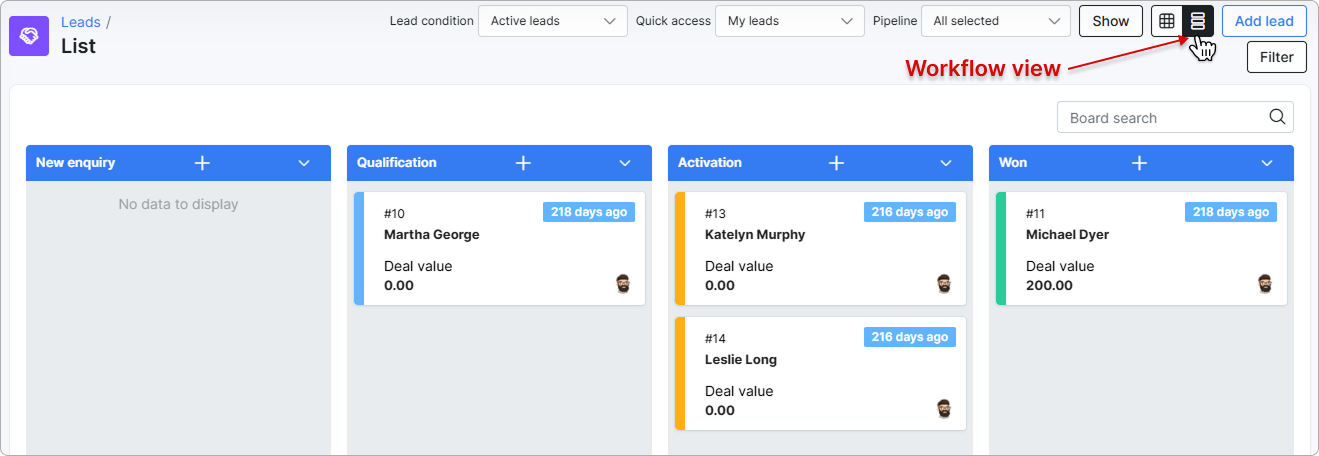
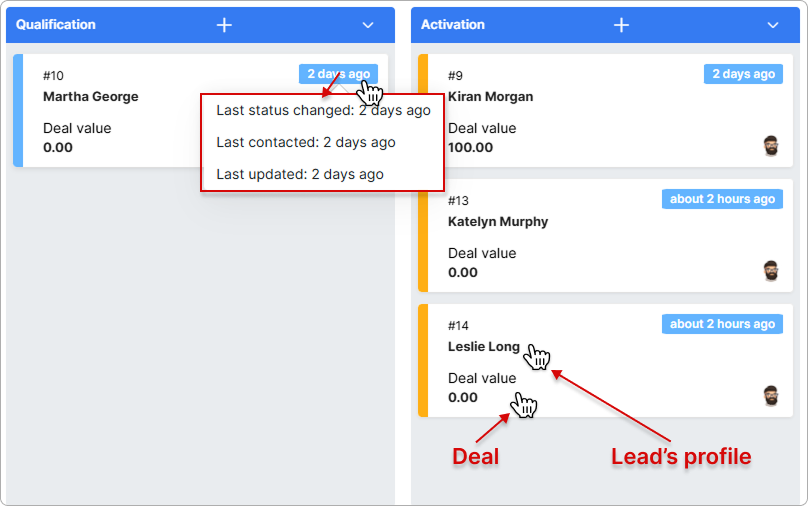
In Workflow mode, each lead is displayed under its respective status as a card containing lead details.
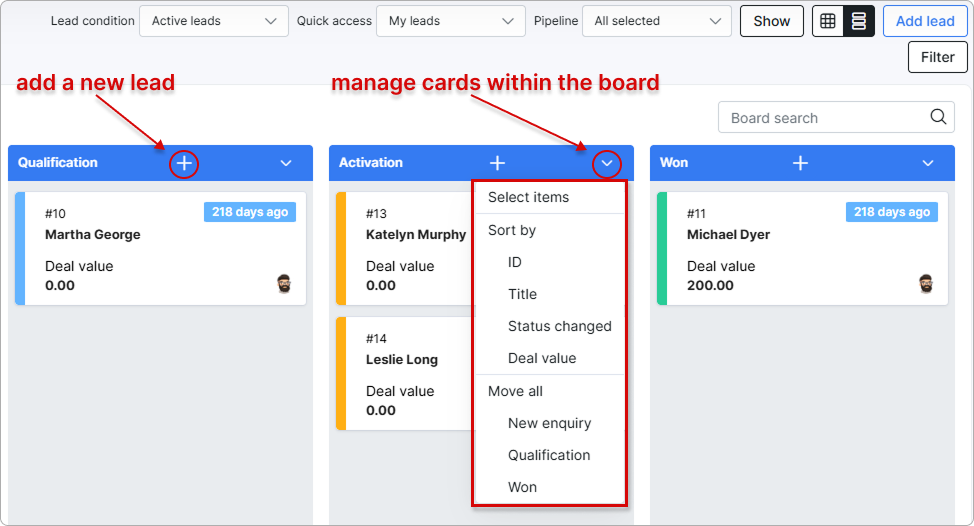
You can add a new lead for each status, select items, sort leads by ID, Title, Status changed, or Deal value, and move all leads to other status columns.
By hovering over the time status, you can view details such as when the lead’s status was last changed, when the lead was last contacted, or last updated.
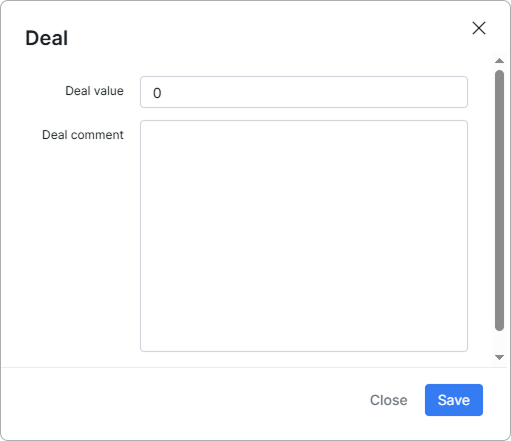
By clicking the deal value, you can change the deal:
The lead’s profile can be viewed by clicking the lead’s name.
¶ Totals
The Totals section under the leads list displays statistics for lead statuses, their number, and sum of deals:

¶ Table management
You can manage the leads table by changing row colors by status, arranging columns in the desired order, and exporting data from the table.
¶ Colored rows
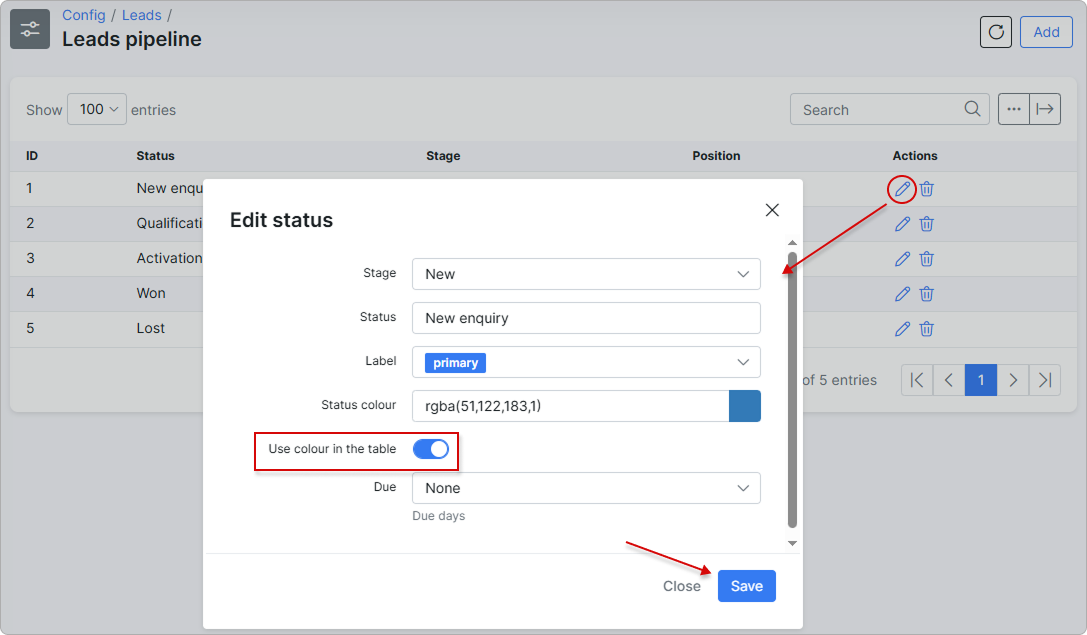
To apply row colors to leads, enable this option for each lead status in Config → Leads → Leads Pipeline:
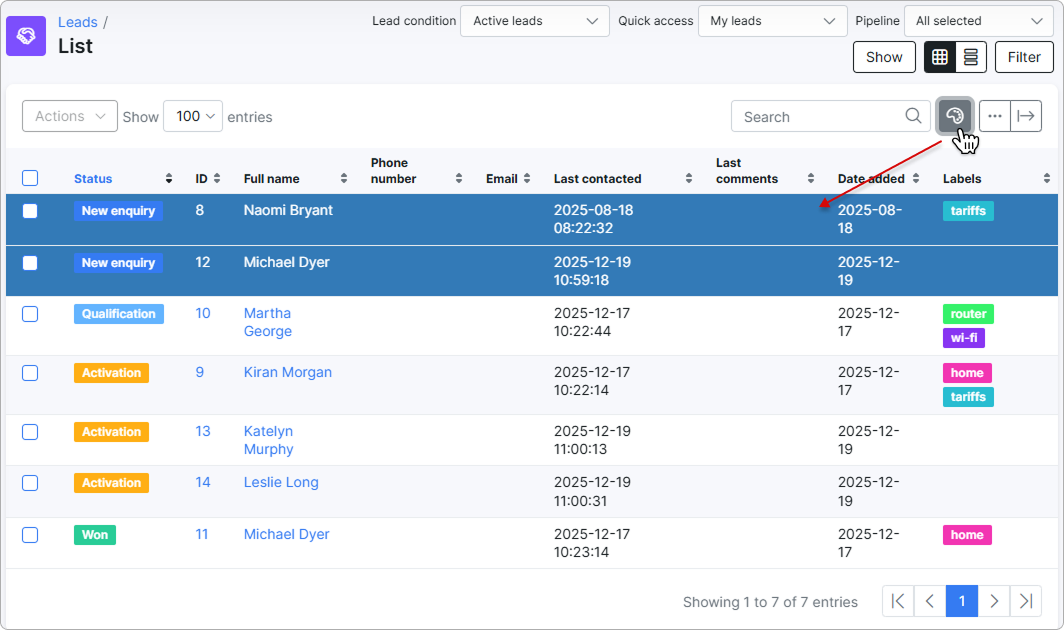
Then click the color palette button at the top of the leads table. The selected colors are applied to the corresponding statuses:
¶ Column display
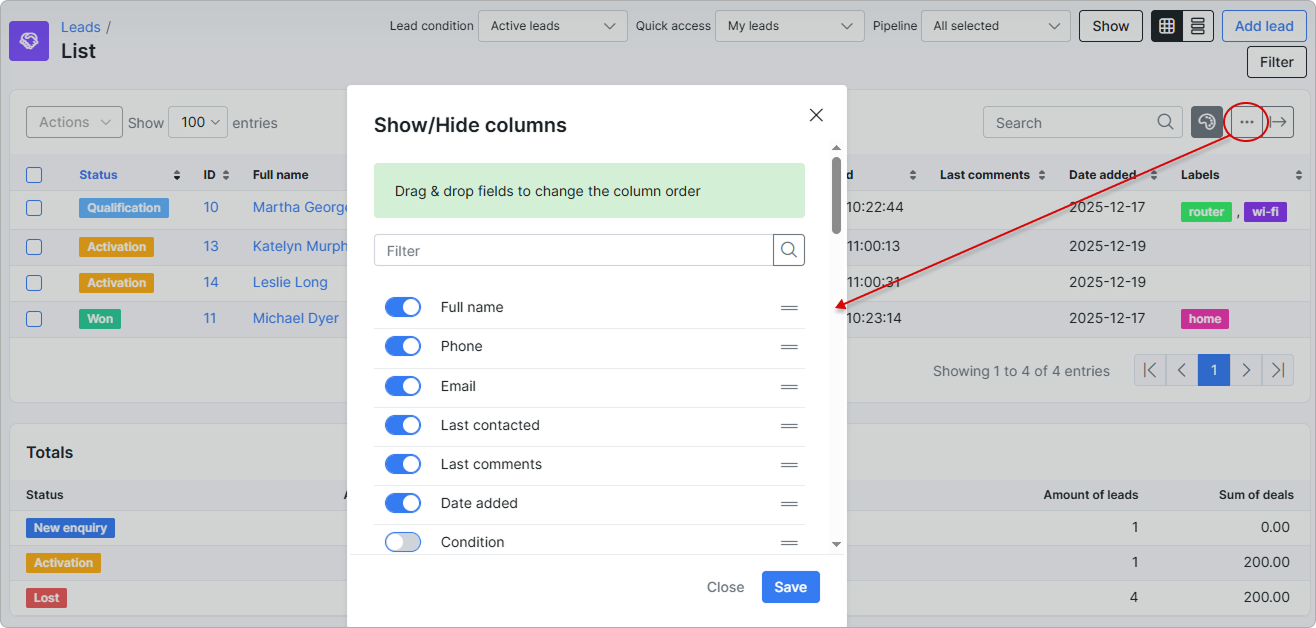
By clicking the breadcrumbs button, you can change the column order in the leads table and add or remove columns from the list.
Drag and drop rows with column names to change their order in the table.
¶ Data export
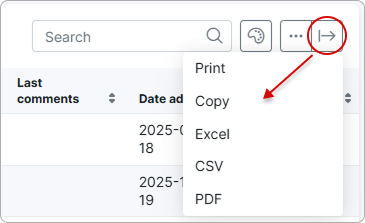
All data from the leads table can be exported in the available formats and methods by clicking the arrow button at the top right of the table: