Networking → Routers - In this section, you can add and configure your routers which will manage Authentication, Accounting and Bandwidth management (Network Access Servers).
To add a new router navigate to Networking → Routers → Add:
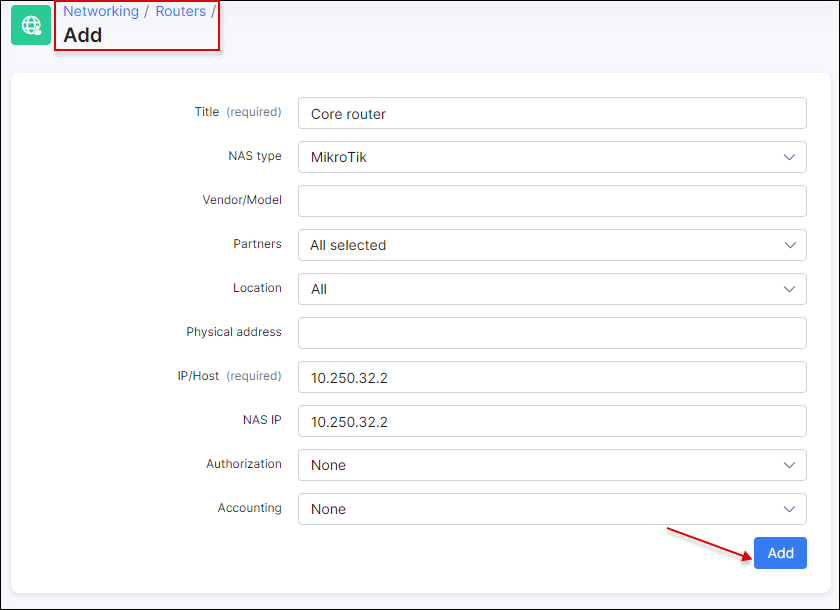
Here you need to specify:
-
Title (required) - name of the router;
-
NAS type - select a NAS type for the new router. NAS types can be managed via Config → Networking → NAS types;
-
Vendor/Model - specify the vendor and model of the router;
-
Partners - select the partners that can manage this router;
-
Location - select location of the router;
-
Physical address - specify the physical address of the router;
-
IP/Host (required) - Router's IP address or DNS hostname. Splynx will connect to this IP to manage router and Splynx Radius server expects packets with matching source IP address to come from this device.
-
NAS IP - value of RADIUS attribute NAS-IP-Address that router's RADIUS client includes in requests to the server, usually the same as IP/Host value. On MikroTik routers - value can be set by specifying Src. Address in RADIUS server entry settings.
-
Authorization - select the type of authorization for the router:
- None - useful for non-standard scenarios;
- Firewall IP-MAC filter - Mikrotik API will be used to add/manage firewall filter rules to the router. This can be useful for Static IP address assignment - when a customer sets the IP address on the equipment manually;
- DHCP (Leases) - Mikrotik API will be used to add/manage DHCP leases on the router. Do not forget to set the MAC addresses in the customer's internet service;
- PPP/DHCP (Radius) - if PPP/DHCP server on the router will use Radius authorization;
- PPP (Secrets) - Mikrotik API will add/manage PPP secrets on the router. Customer's internet service login/password will be used to create a secret;
- Hotspot (Users) - Mikrotik API will add/manage Hotspot users on the router Customer's internet service login/password will be used to create a user;
- Hotspot (Radius) - if Hotspot server on the router will use Radius authorization.
You can find collection of articles on customer authentication via this link.
-
Accounting - select the type of accounting for the router:
-
API accounting - Splynx will login to the router via MikroTik API every 5 minutes (can't be changed) and gather traffic statistics from IP Accounting snapshot table.
 Since MikroTik has removed IP Accounting starting from RouterOS 7.x firmwares - use older firmwares for this method or choose another accounting type;
 -
Radius accounting - Splynx will receive accounting statistics from the router via Radius accounting packets. Interval (Interim-Interval) can be set per each NAS type config via Config → Networking → Radius → Accounting interval.
-
NetFlow accounting - Splynx will collect NetFlow data received from this router. You can find more information in the following articles: NetFlow accounting, How to configure NetFlow accounting in Splynx.
-
PLEASE NOTICE:
- Even if Authorization is set to "None" or API authorization method is chosen - Splynx Radius server will still accept authorization and accounting requests coming from the router.
- In order for API Authorization/Accounting to work - Mikrotik API connection should be enabled and working properly (configured in the Mikrotik tab of Router settings).
- If you wish for customer's Internet service to be processed via API Authorization/Accounting - make sure that Permanent IP and correct Router is set in the service.
Once the router is added, you will be able to change the following parameters:
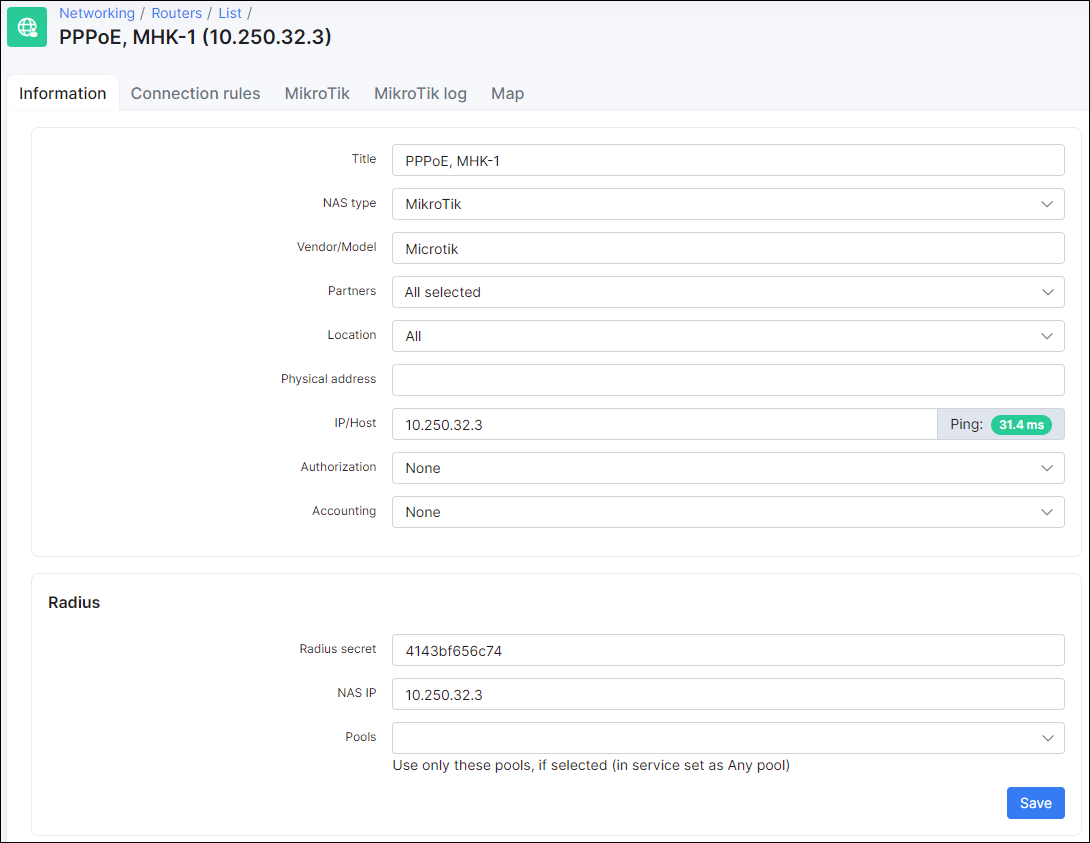
Next to IP/Host field you'll see a "Ping" tool which indicates whether a router is reachable from Splynx via ICMP and displays latency of the latest ping from Splynx to your device.
¶ RADIUS
-
Radius secret - Radius secret (field "Secret" under RADIUS server on a Mikrotik);
-
NAS IP - Value of RADIUS attribute NAS-IP-Address that router's RADIUS client includes in requests to the server, usually the same as IP/Host value. On MikroTik routers - value can be set by specifying Src. Address in RADIUS server entry settings.
-
Pools - if selected, only use the selected pools for this router. If you want to use all available pools - do not select any. Pools can be created under Networking → IPv4 Networks.
¶ ROUTER CONTENTION
Here you can add/edit router contention:
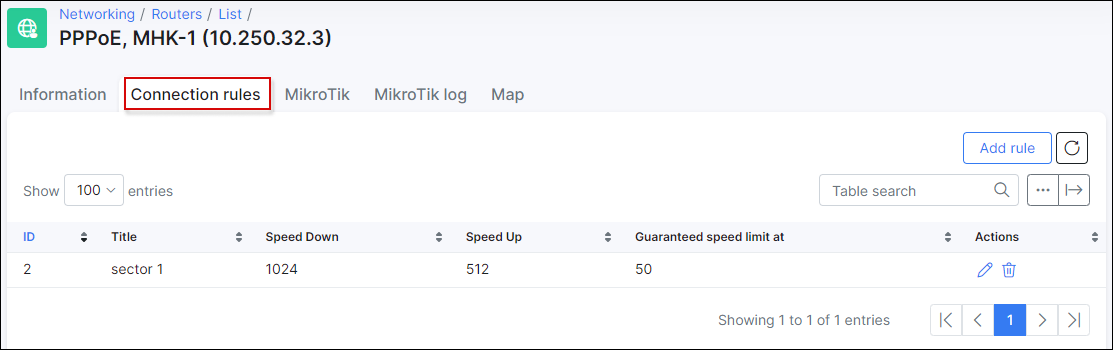
More info regarding router contentions can be found in the following article: Mikrotik queue speed limits.
¶ Mikrotik
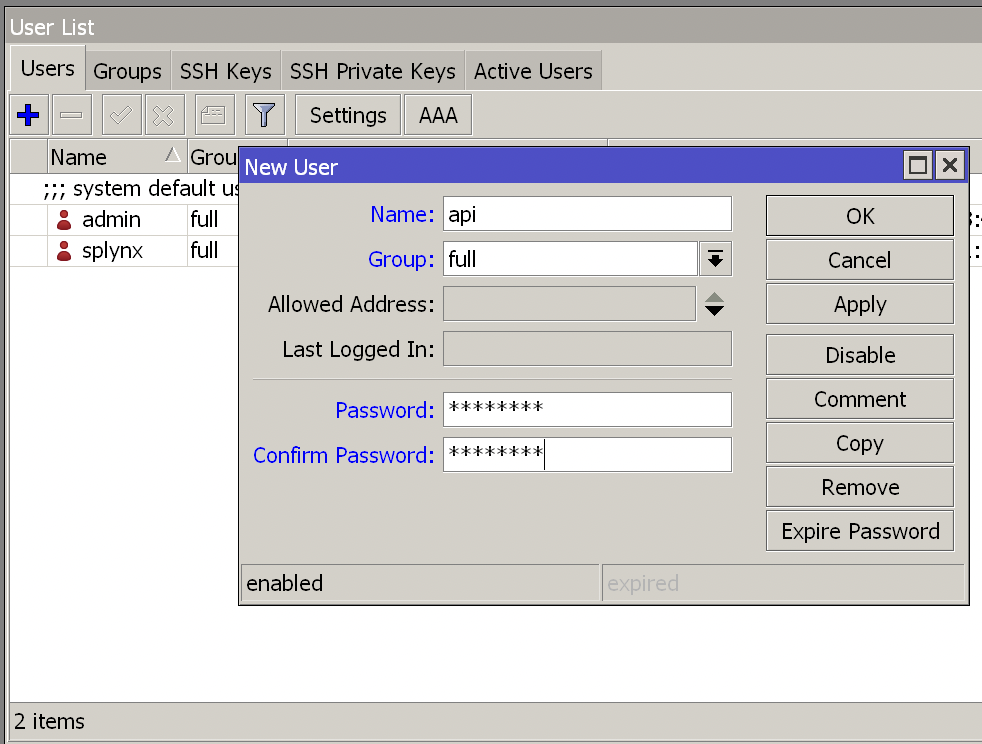
In this section the API connection between the Mikrotik router and Splynx is managed. To use this function we have to create a new user within the Mikrotik under (System - Users) as seen below:
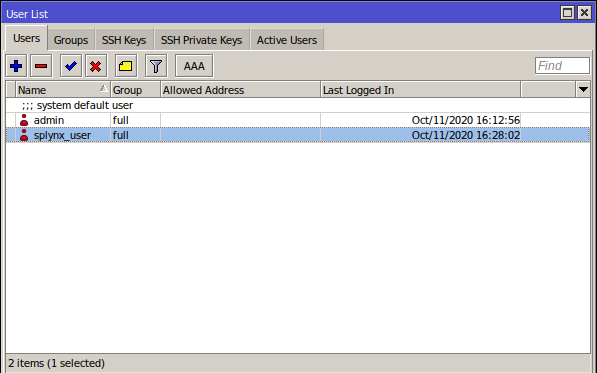
We'll use splynx_user to link the router with Splynx:
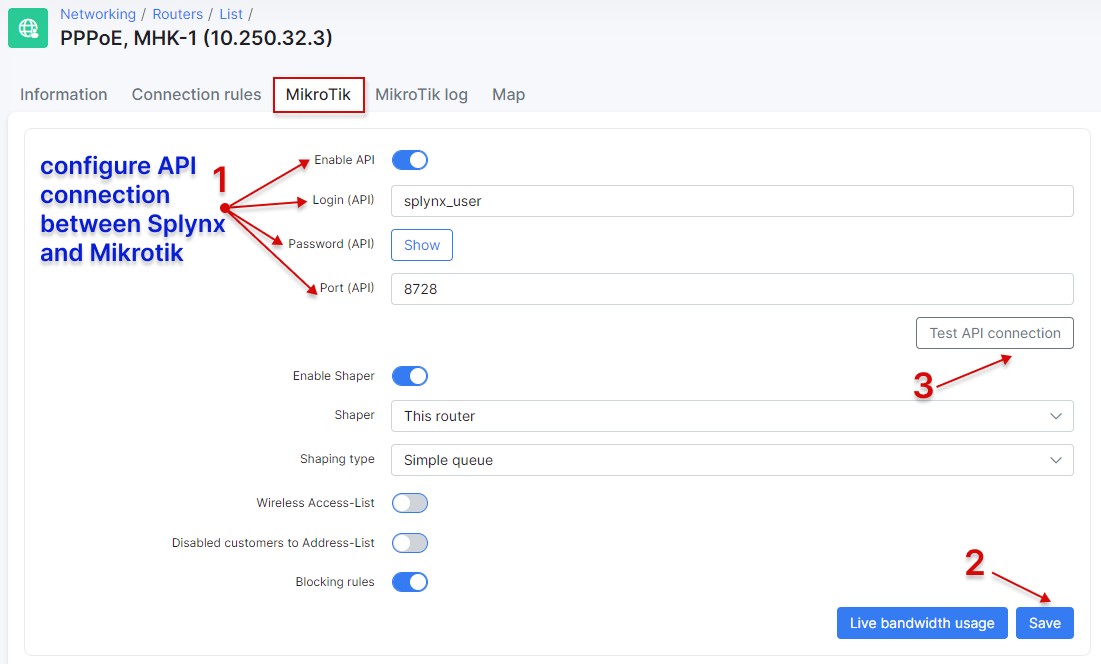
We configured all parameters in step 1 (on the screenshot), saved the configuration in step 2 and test the connection in step 3 where we got the result Successful.
Additional parameters to configure:
-
Enable shaper - enable/disable Mikrotik API shaping (Radius rate limiting should be disabled (commands should be negated "#" - when enabling this);
-
Shaper - select where the API bandwidth rules should be applied;
-
Shaping type - select queue structure type. More info about shaping can be found here.
-
Wireless access list - if enabled, and the service of a customer has a MAC address specified, the MAC address of the service will be added under Wireless - Access list on the Mikrotik;
-
Disabled customers to Address-List - used for API authorization. This option changes the blocking behavior. If disabled, credentials of blocked customers will not be added to the router(hotspot users, PPP secrets firewall rules and DHCP leases), if enabled, blocked customers IP addresses will be placed in the respective address list;
-
Blocking rules - enable/disable blocking rules. If enabled, Splynx will push a series of firewall filter rules to the router to enforce the suspension of blocked customers' services.
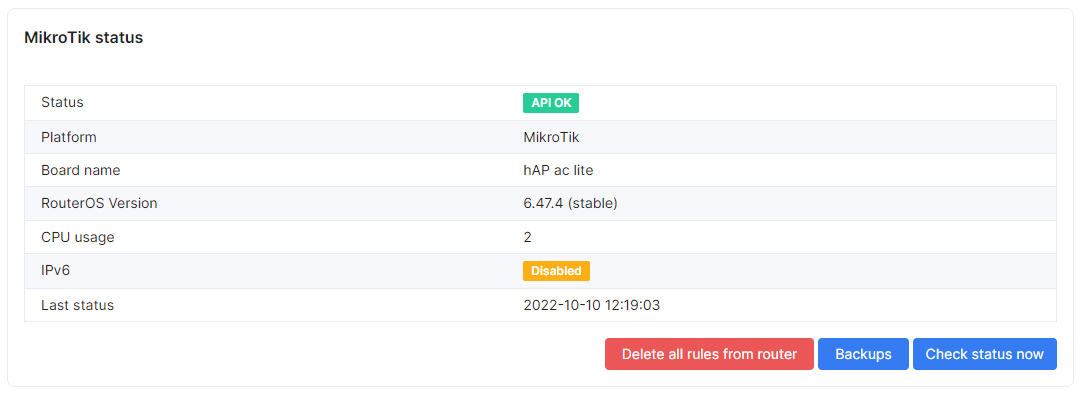
In the Mikrotik status window you can see the latest status of the API connection, router model, ROS version, CPU usage, status of IPv6 and date & time of the last received status.
There are 3 more buttons:
-
Delete all rules from router - by click on this button all API rules will be removed from a router. If you need to use this, click on it and immediately disable "Enable API";
-
Backups - by clicking on this button you will see available backups of the router;
-
Check status now - forces Splynx to check the status.
Please make sure to set correctly the Splynx API user group (for Splynx MikroTik API & Backup processing):
When MikroTik router is connected with Splynx via API for the first time, Splynx will login to the router and create backup of router’s config via MikroTik API and FTP services.
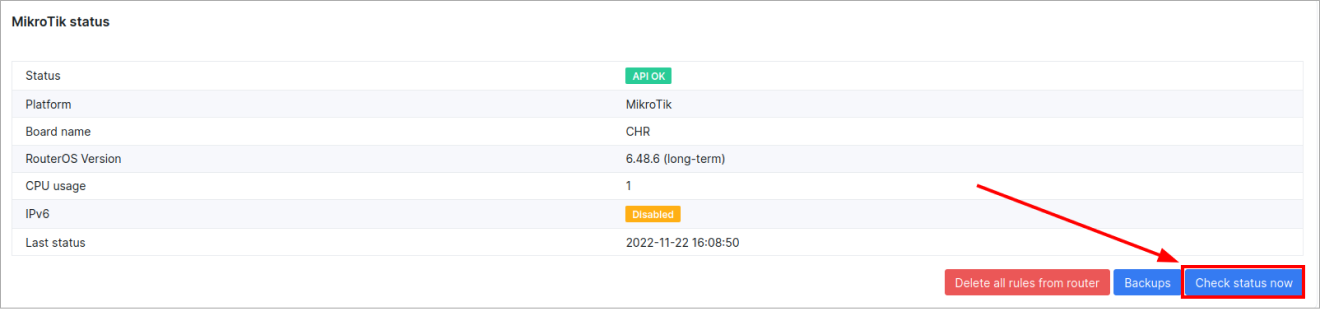
Afterwards, every 5 hours Splynx will login to the MikroTik to check its "Status" (to gather info about the router):

Upon making API connection to check “Status”, only if there are differences found in present router config with previously made backup - new backup of router config will be made.
You can also manually force to update router “Status” by pressing Check Status now button.
¶ Mikrotik log
Here you can find Mikrotik logs:
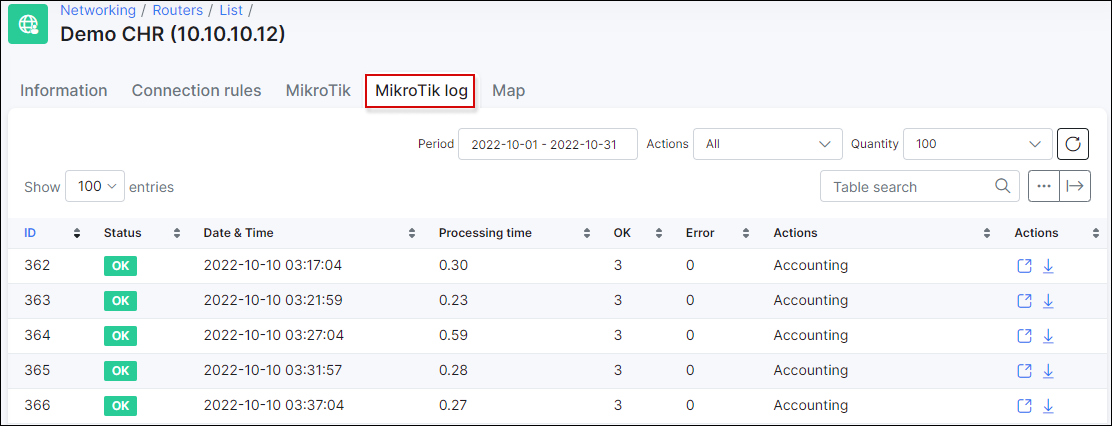
Files can be viewed or downloaded.
¶ MAP
Under this tab you can configure the geolocation of a router on the map by specifying the geo data for the router.
Splynx supports different router models from different producers. Below are configuration tutorials for vendors that are used most often and supported by us: