¶ Routers
¶ Overview
Networking → Routers — in this section you can add and configure the routers (Network Access Servers) that handle Authentication, Accounting, and Bandwidth management for your customers.
¶ Adding a new router
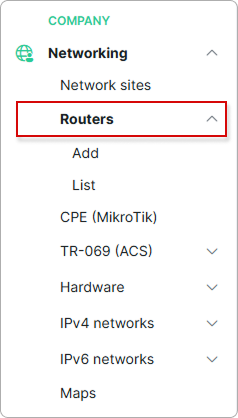
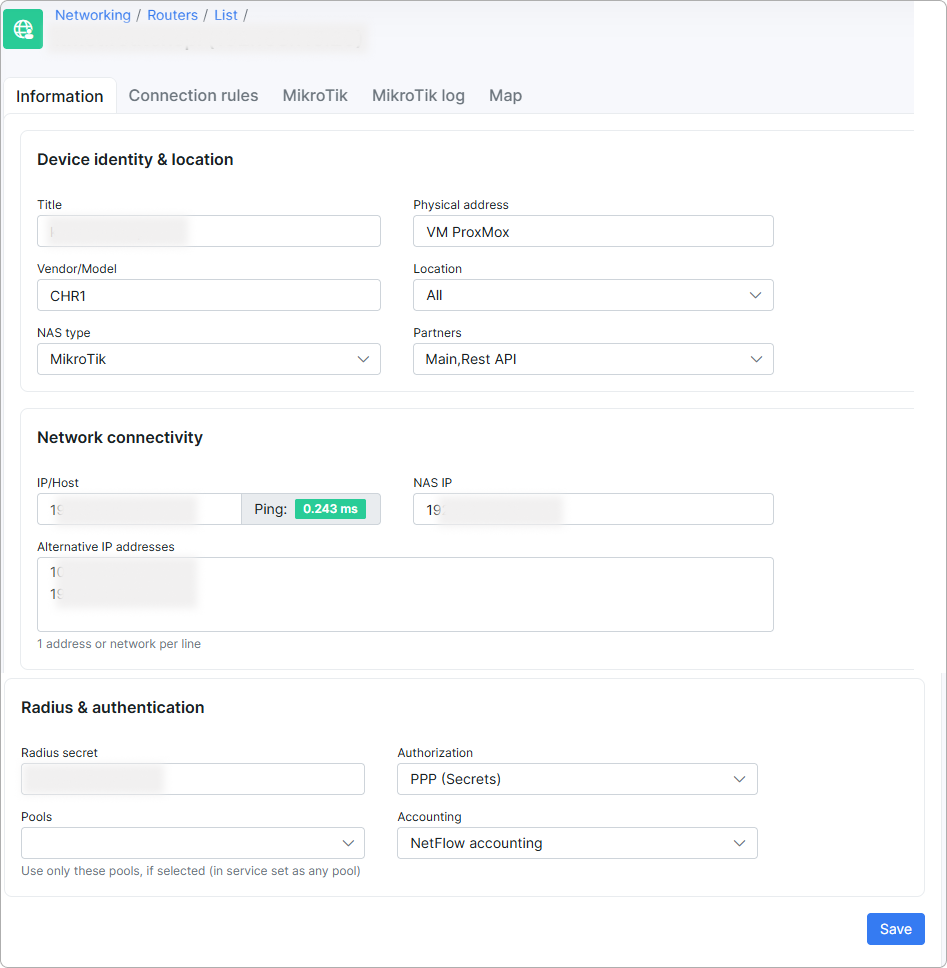
To add a new router, navigate to Networking → Routers → Add. The router's settings on the Information tab are organized into three sections — Device identity & location, Network connectivity, and Radius & authentication:
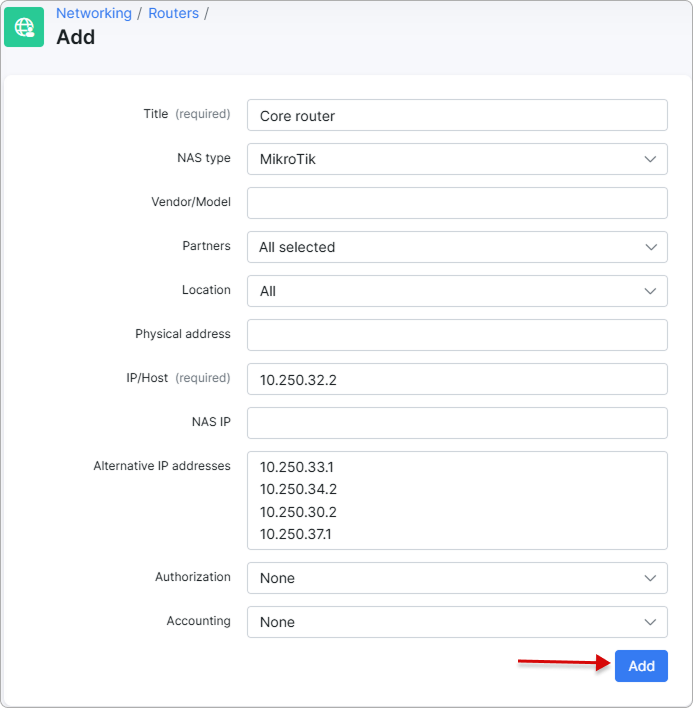
Once the router is saved, you can return to the Information tab at any time to change any of these parameters:
¶ Device identity & location
This section describes the router and where it lives in your organization.
- Title (required) — the name of the router as it appears in Splynx.
- Physical address — the physical or site address where the device is installed (for example, VM ProxMox).
- Vendor/Model — the vendor and model of the router (for example, CHR1).
- Location — the location the router is assigned to.
- NAS type — the NAS (Network Access Server) type for the router. NAS types are managed via Config → Networking → NAS types (NAS types).
- Partners — the partners allowed to manage this router.
¶ Network connectivity
This section defines how Splynx reaches the router and how the router is identified in RADIUS requests.
- IP/Host (required) — the router's IP address or DNS hostname. Splynx connects to this address to manage the router, and the Splynx Radius server expects packets with a matching source IP to come from this device.
- NAS IP — the value of the RADIUS NAS-IP-Address attribute that the router's RADIUS client includes in its requests, usually the same as the IP/Host value. On MikroTik routers, this value is set by specifying Src. Address in the RADIUS server entry settings.
- Alternative IP addresses — additional IP addresses of the NAS that can be used for a failover setup. By default, the NAS connects to Splynx through a VPN and uses the VPN-assigned IP address. When the failover server is active, the NAS typically connects via a different private IP address. This field can also be used in setups with certain load balancers, where the router's IP address may change. Enter one address or network per line.
Next to the IP/Host field, the
Pingtool indicates whether the router is reachable from Splynx via ICMP and displays the latency of the latest ping from Splynx to the device.
¶ Radius & authentication
This section controls how Splynx authenticates and accounts for customers connecting through the router.
-
Radius secret — the RADIUS shared secret (the Secret field under the RADIUS server on a MikroTik).
-
Authorization — the authorization method used for the router:
- None — useful for non-standard scenarios;
- Firewall IP-MAC filter — the MikroTik API is used to add/manage firewall filter rules on the router. Useful for static IP assignment, when a customer sets the IP address on the equipment manually;
- DHCP (Leases) — the MikroTik API is used to add/manage DHCP leases on the router. Do not forget to set the MAC addresses in the customer's internet service;
- PPP/DHCP (Radius) — use when the PPP/DHCP server on the router uses Radius authorization;
- PPP (Secrets) — the MikroTik API adds/manages PPP secrets on the router. The customer's internet service login/password is used to create the secret;
- Hotspot (Users) — the MikroTik API adds/manages Hotspot users on the router. The customer's internet service login/password is used to create the user;
- Hotspot (Radius) — use when the Hotspot server on the router uses Radius authorization.
Read more about Authentication of customers.
-
Pools — if selected, only the chosen IP pools are used for this router. To use all available pools, leave this field empty. Pools are created under Networking → IPv4 Networks.
-
Accounting — the accounting method used to gather traffic statistics:
- API accounting — Splynx logs in to the router via the MikroTik API every 5 minutes (this interval can't be changed) and gathers traffic statistics from the IP Accounting snapshot table.
Since MikroTik removed IP Accounting starting from RouterOS 7.x firmware, use an older firmware for this method or choose another accounting type.
- Radius accounting — Splynx receives accounting statistics from the router via Radius accounting packets. The interval (Interim-Interval) can be set per NAS type via Config → Networking → Radius → Accounting interval (Radius).
- NetFlow accounting — Splynx collects NetFlow data received from this router. See NetFlow accounting and How to configure NetFlow accounting in Splynx.
Even if Authorization is set to "None" or an API authorization method is chosen, the Splynx Radius server will still accept authorization and accounting requests coming from the router.
For API Authorization/Accounting to work, the MikroTik API connection must be enabled and working properly (configured in the MikroTik tab of the router settings).
If you want a customer's internet service to be processed via API Authorization/Accounting, make sure a Permanent IP and the correct Router are set in the service.
¶ Additional information
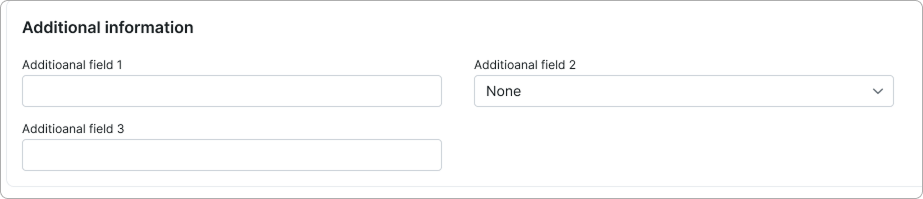
If a router has additional fields configured, a new section containing them appears at the bottom of the Information tab:
¶ Router contention
Here you can add or edit router contention:
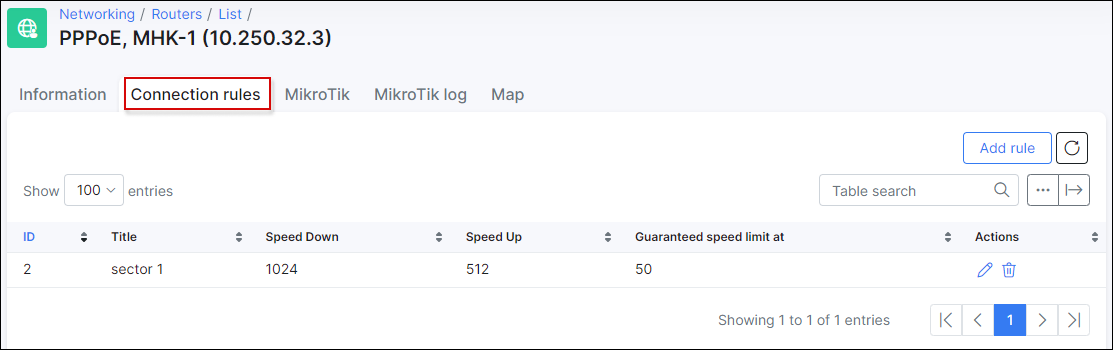
More information about router contentions is available in MikroTik queue speed limits.
¶ MikroTik
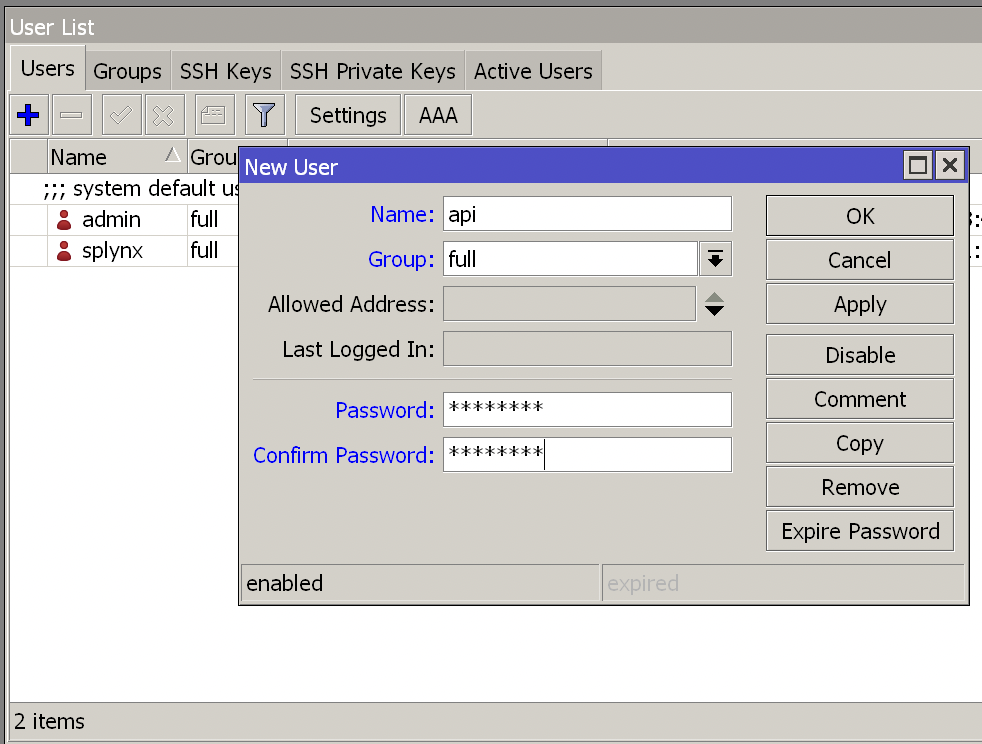
In this section, you manage the API connection between the MikroTik router and Splynx. To use this function, create a new user on the MikroTik under System → Users, as shown below:
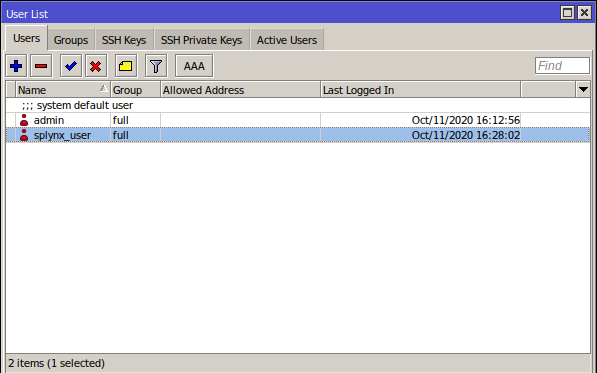
Use splynx_user to link the router with Splynx:
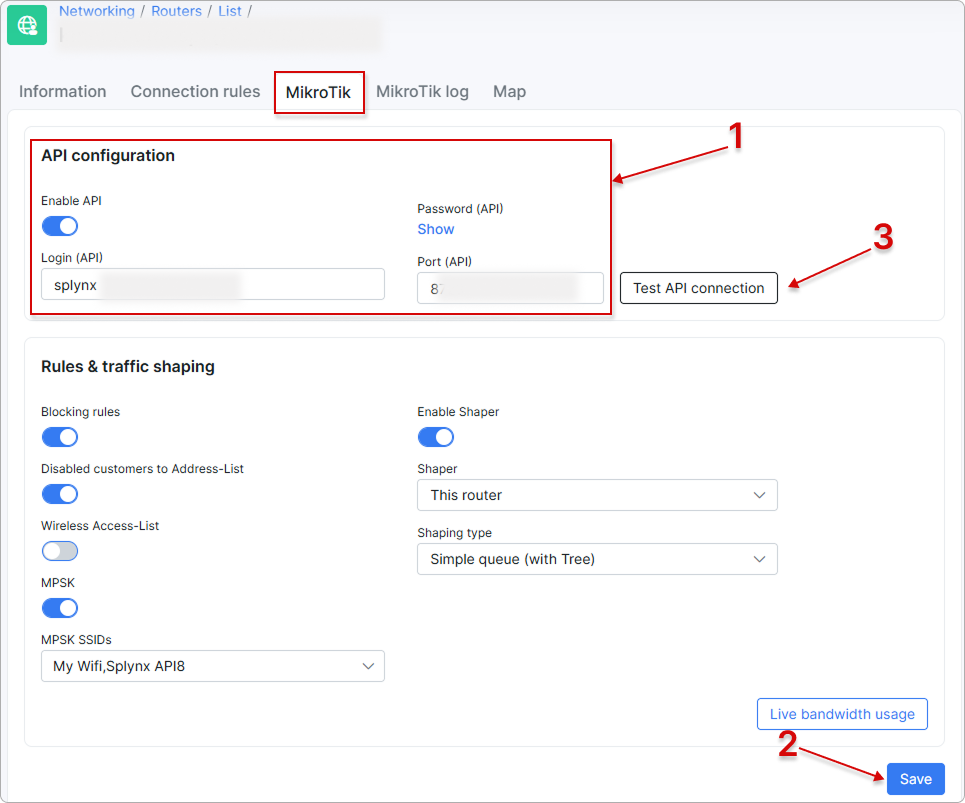
Configure all parameters (step 1 on the screenshot), save the configuration (step 2), and test the connection (step 3) — a Successful result confirms the connection works.
Additional parameters to configure:
-
Enable shaper — enable or disable MikroTik API shaping. When enabling this, disable Radius rate limiting (negate the commands with
#); -
Shaper — select where the API bandwidth rules should be applied;
-
Shaping type — select the queue structure type. More info about shaping can be found in Bandwidth management.
-
Wireless access list — if enabled, and the service of a customer has a MAC address specified, the MAC address of the service will be added under Wireless - Access list on the MikroTik;
-
Disabled customers to Address-List — used for API authorization. This option changes the blocking behavior. If disabled, credentials of blocked customers are not added to the router (hotspot users, PPP secrets, firewall rules, and DHCP leases); if enabled, blocked customers' IP addresses are placed in the respective address list;
-
Blocking rules — enable/disable blocking rules. If enabled, Splynx will push a series of firewall filter rules to the router to enforce the suspension of blocked customers' services.
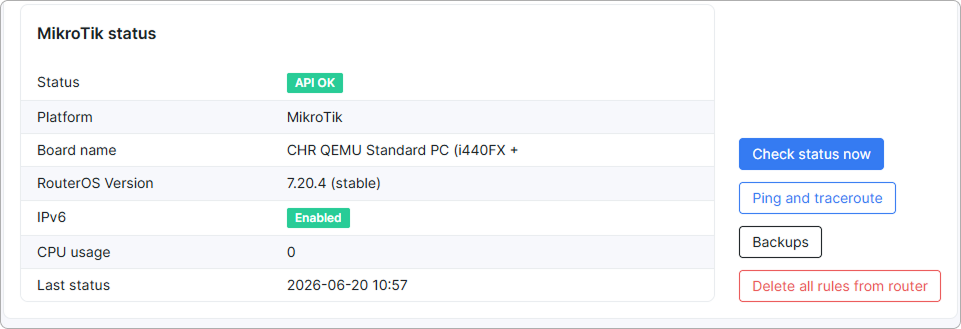
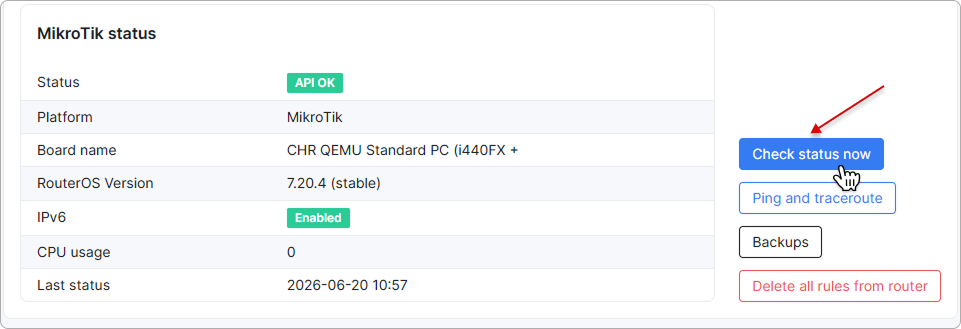
In the MikroTik status window you can see the latest status of the API connection, router model, ROS version, CPU usage, status of IPv6 and date and time of the last received status.
There are 4 more buttons:
-
Check status now— forces Splynx to check the status. -
Ping and traceroute— see Ping and traceroute. -
Backups— by clicking this button you will see available backups of the router; -
Delete all rules from router— clicking this button removes all API rules from a router. If you need to use this, click it and immediately disable Enable API;
Make sure to correctly set the Splynx API user group (for Splynx MikroTik API and Backup processing):
When a MikroTik router connects with Splynx via API for the first time, Splynx logs in to the router and creates a backup of the router's config via the MikroTik API and FTP services.
Afterwards, every 5 hours Splynx logs in to the MikroTik to check its status (to gather info about the router):
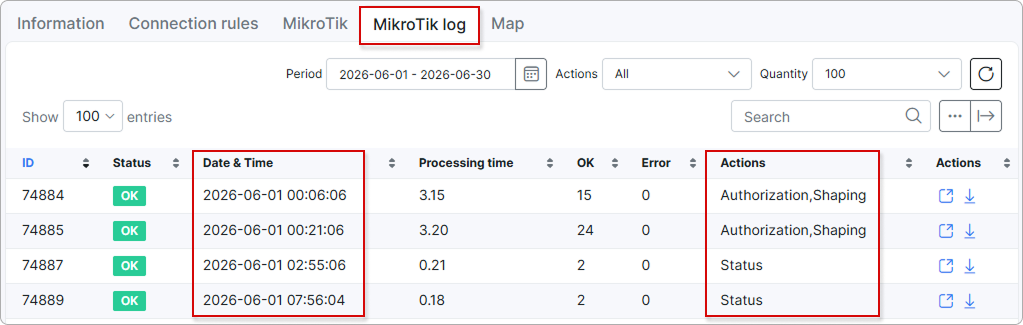
When the API connection checks the status, Splynx makes a new backup of the router config only if it finds differences between the current config and the previous backup.
You can also force a status update manually by pressing the Check status now button.
¶ MikroTik log
Here you can find MikroTik logs:
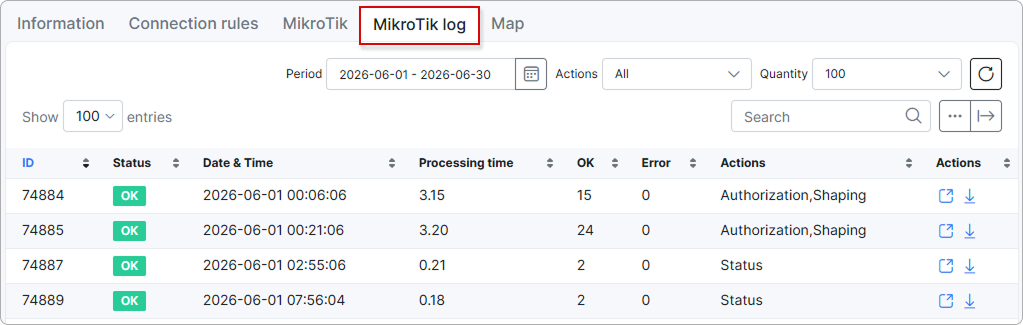
Files can be viewed or downloaded.
¶ Map
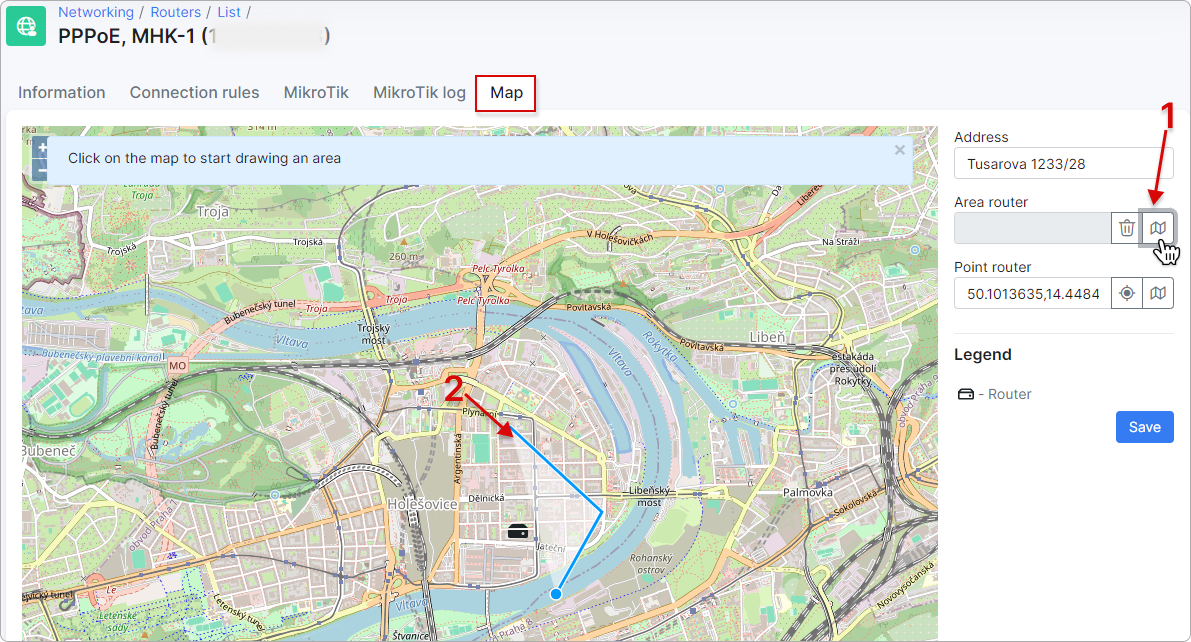
Under this tab, you can configure the router's geolocation on the map by specifying the geo data and adding the router area.
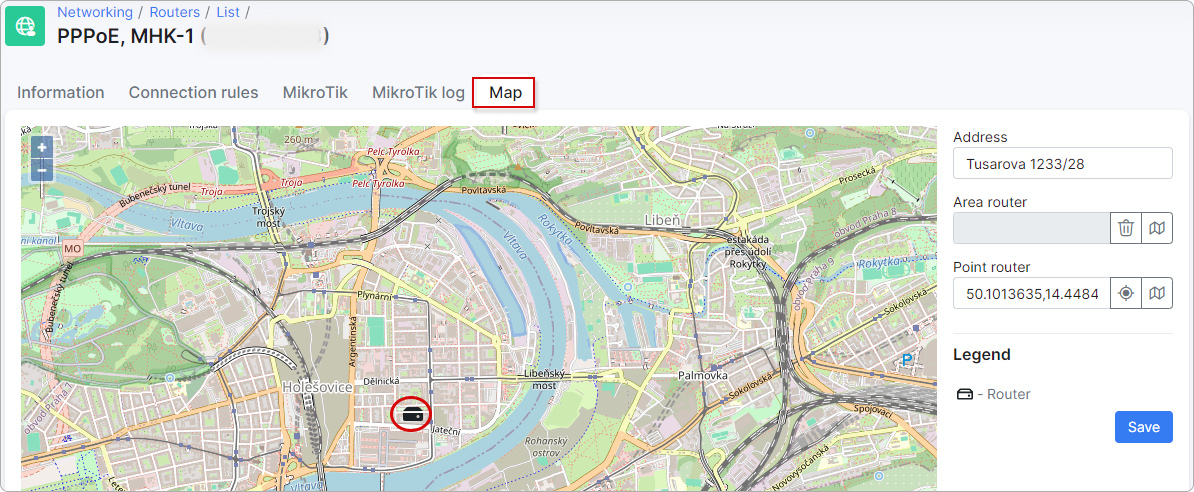
 - Place the router on the map by clicking this button.
 - Set the coordinates according to the specified address above.
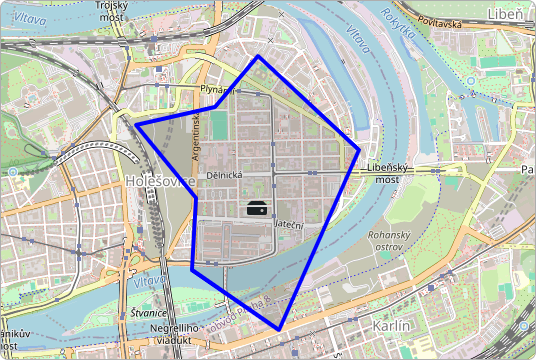
To start drawing an area for the router, click the map icon next to the field and trace the area on the map: