¶ Quickbooks accounting
- Overview
- Installation
- Quickbooks account
- Settings
- General settings
- Starting with QuickBooks
- Mapping settings
- Exporting customers
- Exporting invoices and credit notes
- Exporting payments
- Examples
- Quickbooks logs
- Quickbooks tweaks
¶ Overview
Splynx QuickBooks is the add-on of Splynx which is used to synchronize customers, invoices and payments with the Quickbooks accounting gateway.
Please, contact our support team (support@splynx.com) to enable this accounting integration.
¶ Installation
The add-on can be installed in two ways:
- via the command-line interface (CLI) and the following commands:
apt update
apt install splynx-quickbooks
- via the Web UI of your Splynx server in
Config → Integrations → Add-ons:

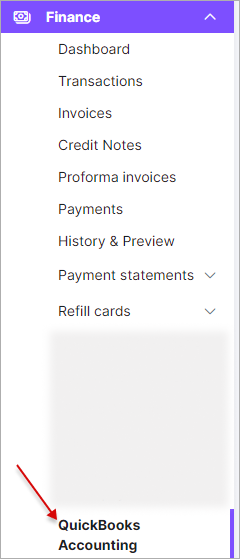
After the installation process is completed, the QuickBooks Accounting item will appear under the Finance section:
¶ Quickbooks account
After that, it is necessary to obtain a Quickbooks Online account to start the integration (the screenshots related to Quickbooks were taken from its developer sandbox environment).
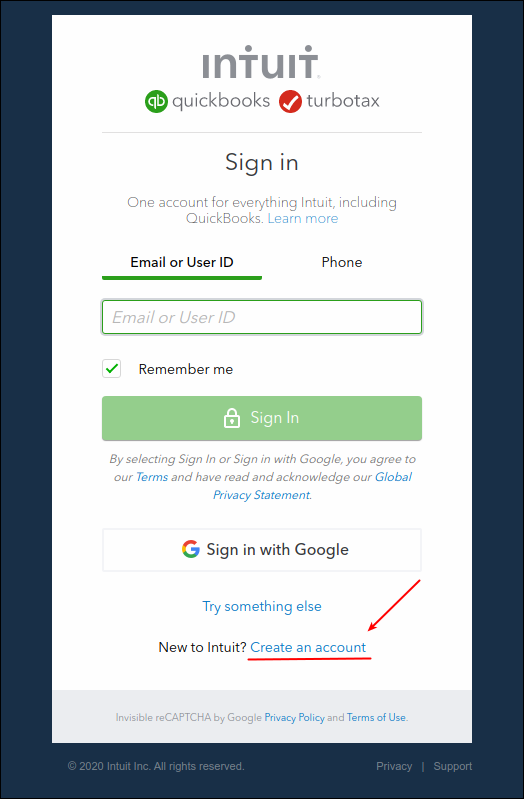
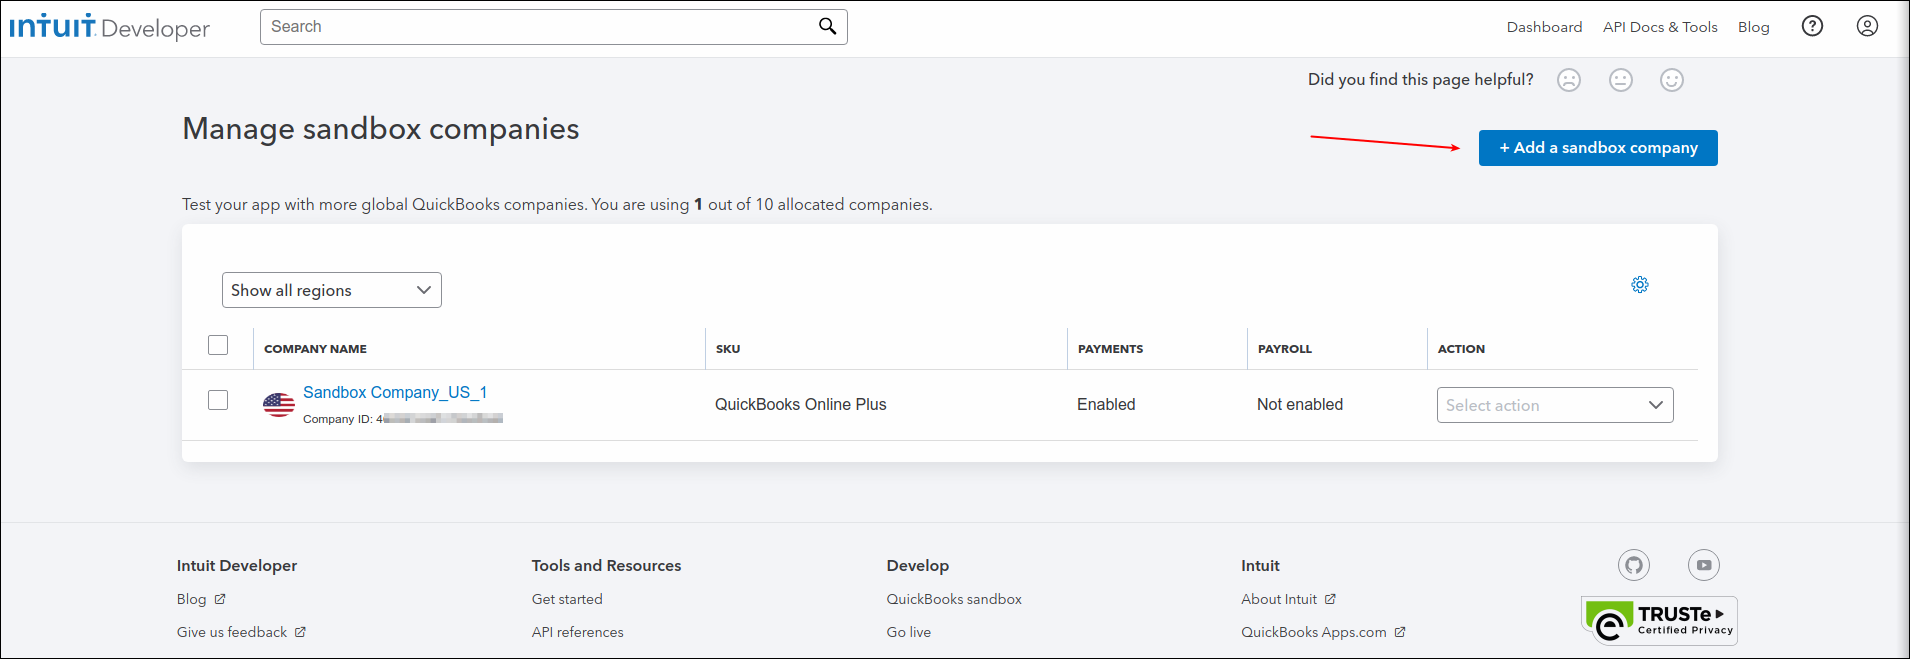
Create your company:
¶ Settings
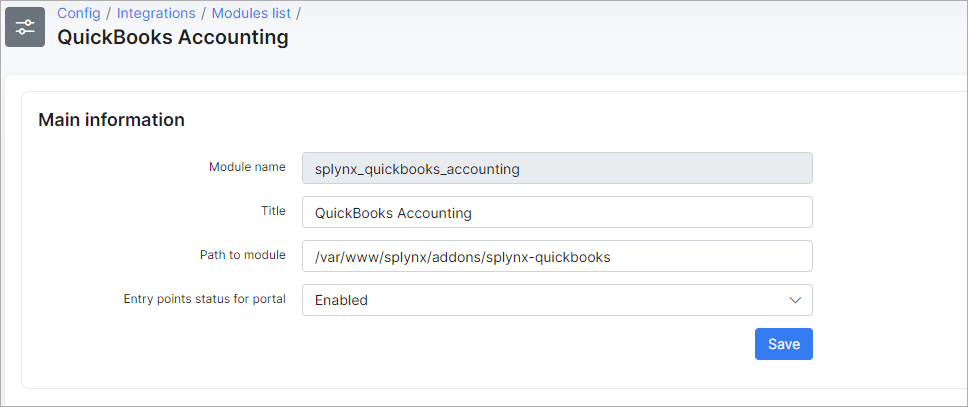
The settings of QuickBooks Accounting add-on is located in Config → Integration → Modules list. Click the Edit button under the Actions column:
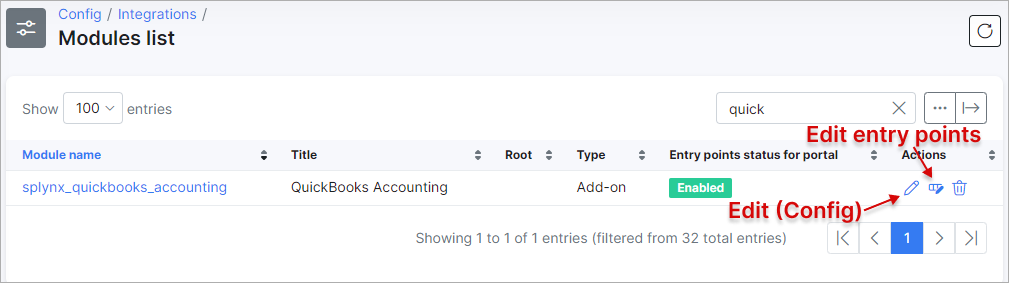
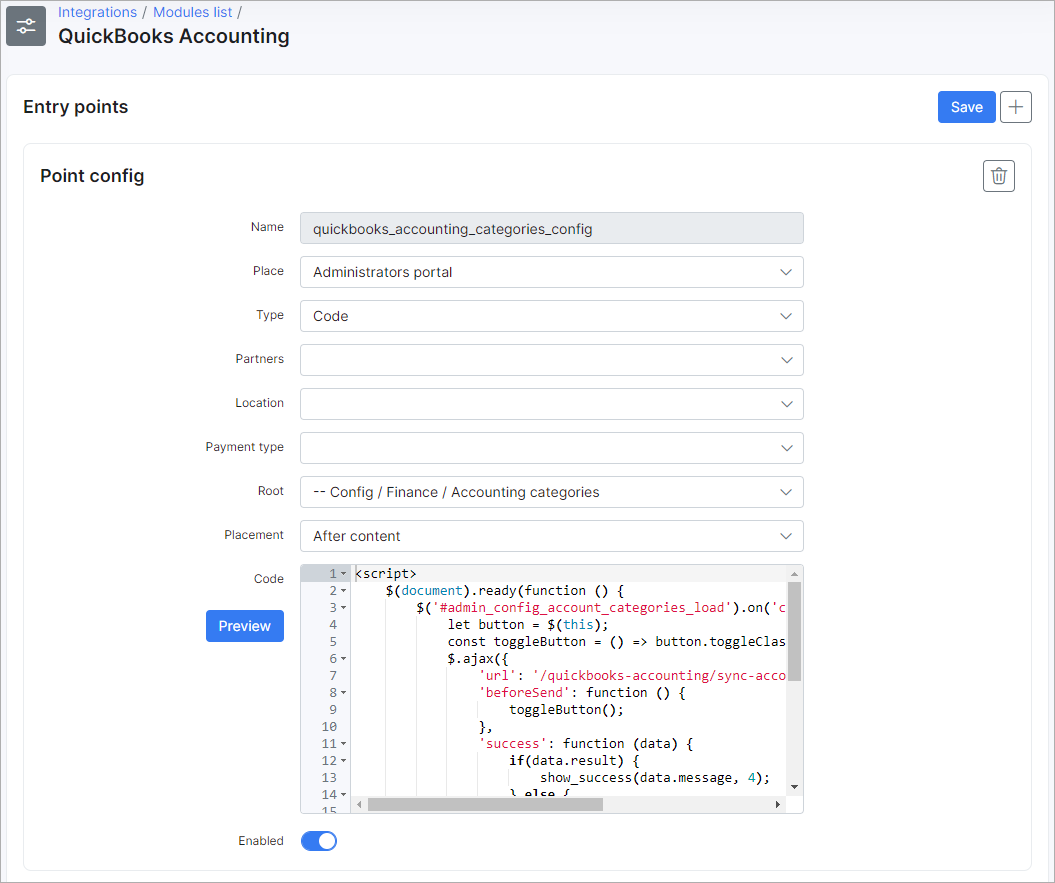
To open the configuration of add-on entry points, click the Edit entry points icon:
¶ General settings
The general configuration of the QuickBooks integration module can be viewed and edited here:
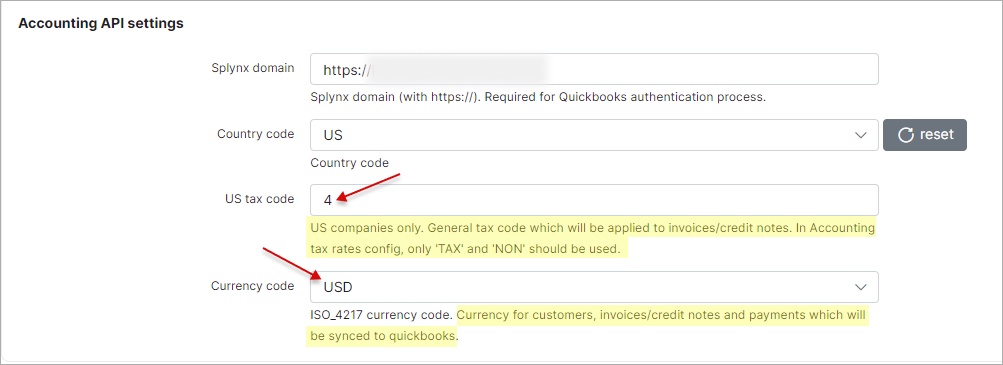
¶ Accounting API settings
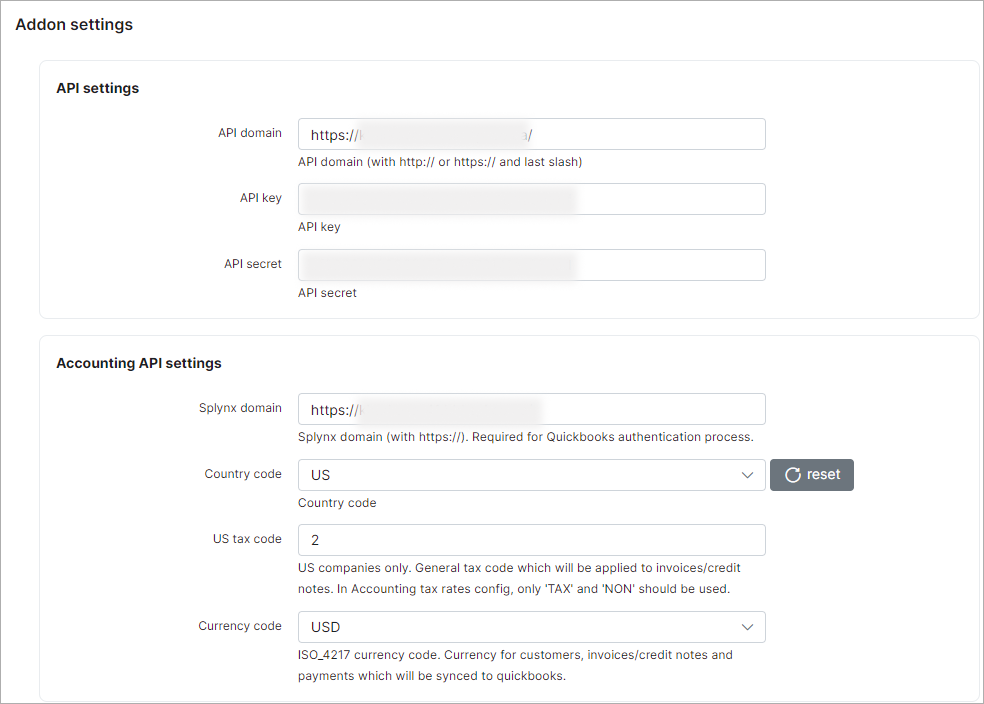
Splynx domain - the Splynx domain must be the same as the API domain URL but without the last slash "/". HTTPS is required!;
Country code - choose the required country code (US, FR or Other);
US tax code - (for US companies only) specify the tax code which will be applied to invoices. The id can be obtained from Config → Finance → Accounting tax rates;
Currency code - the currency that will be used for customers, invoices and payments.
¶ Synchronization settings
-
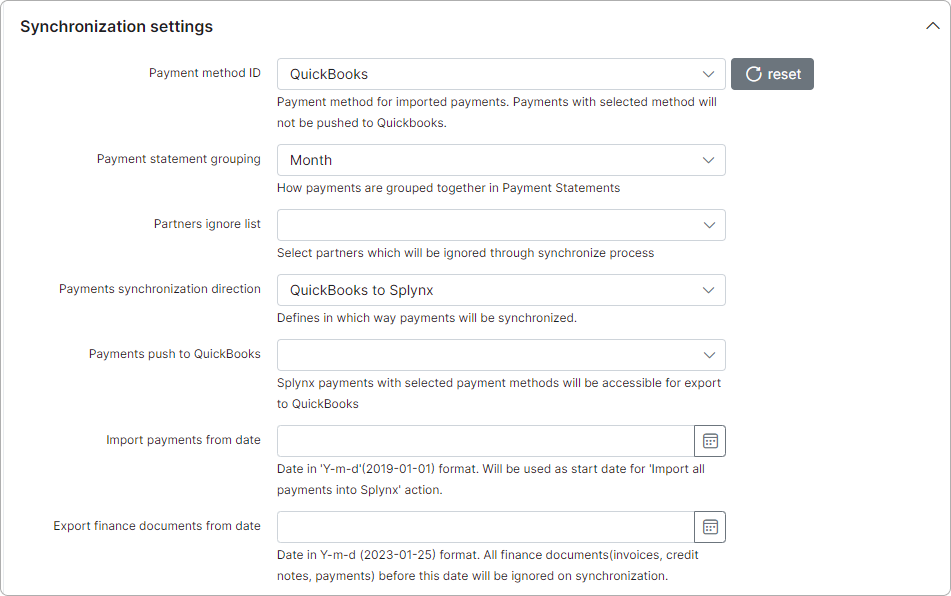
Payment method ID - select the payment method for imported payments;
-
Payment statement grouping - group payment statements by "Month" or "Day";
-
Partners ignore list - select the partners whose customers, invoices, and payments will be ignored in the sync process. The customers, invoices and payments of the selected partners WILL NOT be synced with QuickBooks;
-
Ignore inactive customers - toggle this option to exclude inactive customers and their financial documents during sync. However, if a customer was synced before deactivation or manually paired, their financial documents will still be included;
-
Payments synchronization direction - define the direction of syncing payments: QuickBooks → Splynx, Splynx → QuickBooks or Bidirectional;
-
Payments push to QuickBooks - select the payment methods to sync with QuickBooks. This selection only applies if the selected method for syncing payments is set to Splynx → QuickBooks.
 Please refrain from selecting QuickBooks in the list of payment methods to sync, as doing so will result in payments being pulled from QuickBooks.
-
Import payments from date - specify the date in
Y-m-dformat, e.g. 2023-05-01, which will be used as the start date for importing all prepayments to Splynx; -
Export finance documents from date - set a date in
Y-m-dformat, e.g. 2023-01-01 from which the finance documents will be synchronized. Any finance documents created before this date will be ignored during the export. The synchronization process will check the Date field in the finance document.
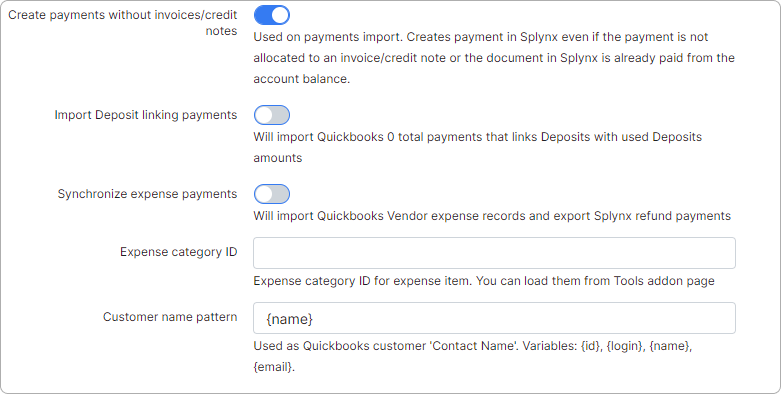
- Create payments without invoices/credit notes - the toggle allows you to enable/disable the creation of payments in Splynx when a customer doesn't have an invoice or credit note (e.g., for partial payments in QuickBooks). When the toggle is disabled, only payment statements will be created in Splynx. This toggle is used for payments import.
In some cases can lead to duplicate payments. Use this option with caution.
-
Import Deposit linking payment - if enabled, it will import Quickbooks 0 total payments that links Deposits with used Deposits amounts.
-
Synchronize expense payments - if enabled, it allows you to import Quickbooks Vendor expense records and export Splynx refund payments.
-
Expense category ID - indicate the expense category ID for the expense item.
-
Customer name pattern - used to set a customer's name pattern during the sync to QuickBooks where it will be represented as
Display name as. The next variables can be used:{id}, {login}, {name}, {email}. By default:{name}.
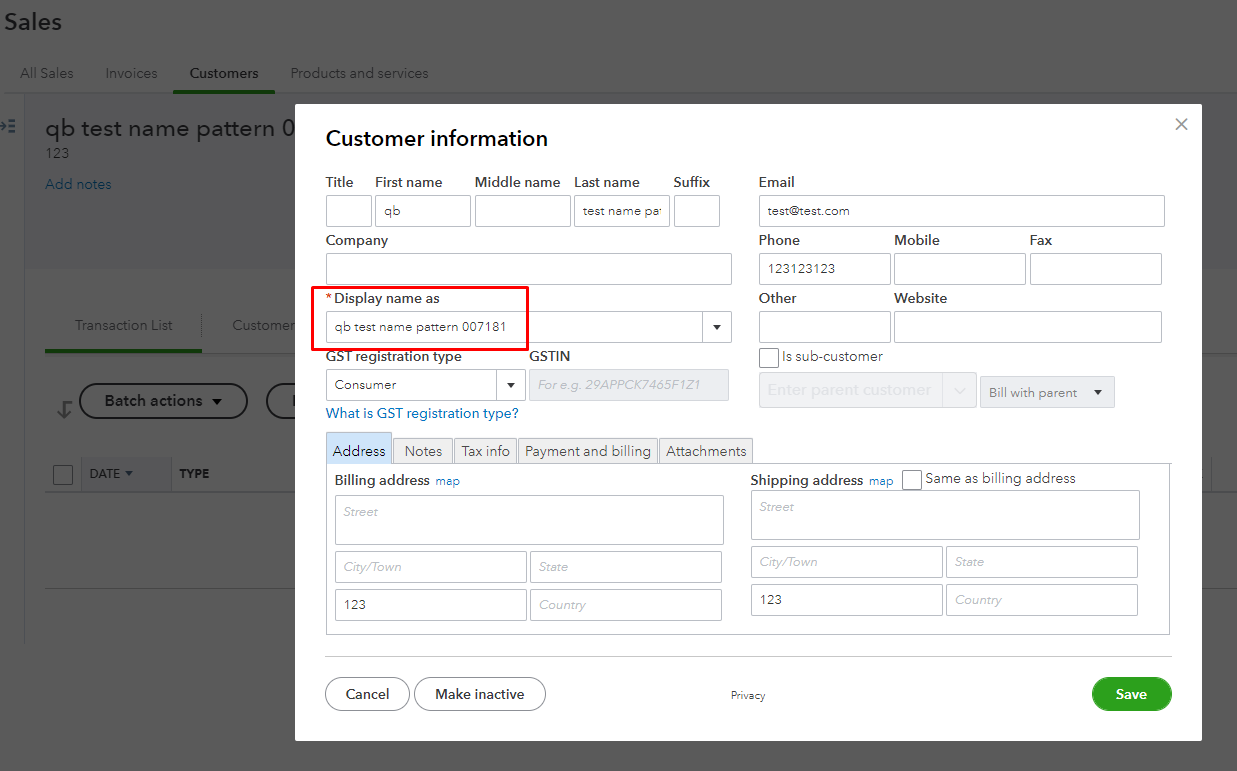
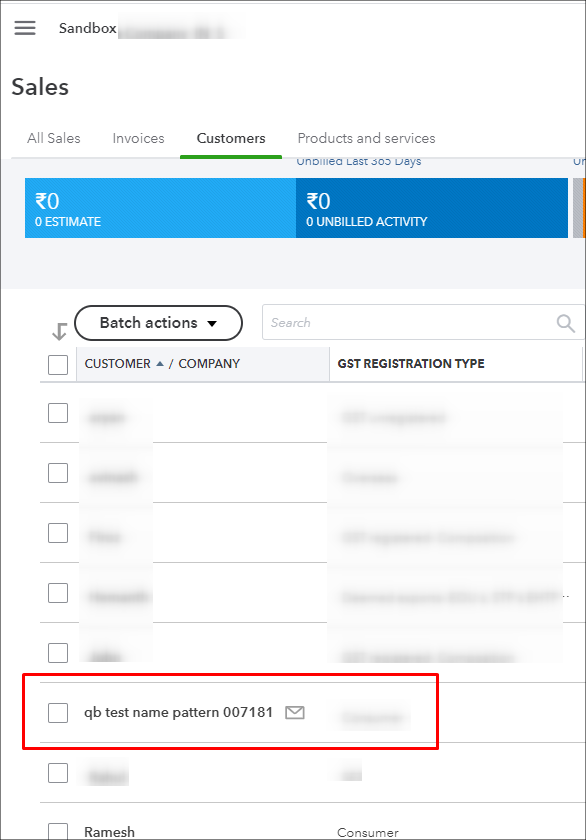
Example: Display name
¶ Cron settings
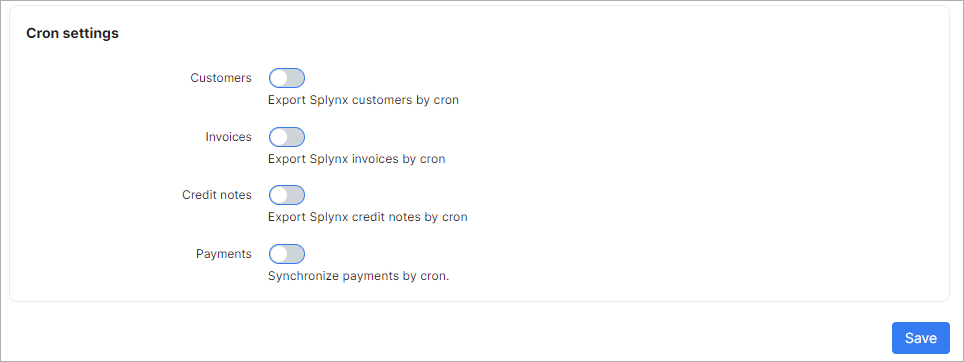
 All cron toggles are disabled by default.
Customers - enables/disables automatic syncing of customers;
Invoices - enables/disables automatic syncing of invoices;
Payments - enables/disables automatic syncing of payments.
It is recommended to leave all settings in the "Cron Settings" section disabled for the initial set up of the add-on to avoid automatically syncing all these elements via cron jobs. The first import and export should be done manually in Finance → QuickBooks Accounting.
¶ Starting with QuickBooks
Click the QuickBooks Accounting item under the Finance section:
First, we need to connect the add-on to our Quickbooks account:
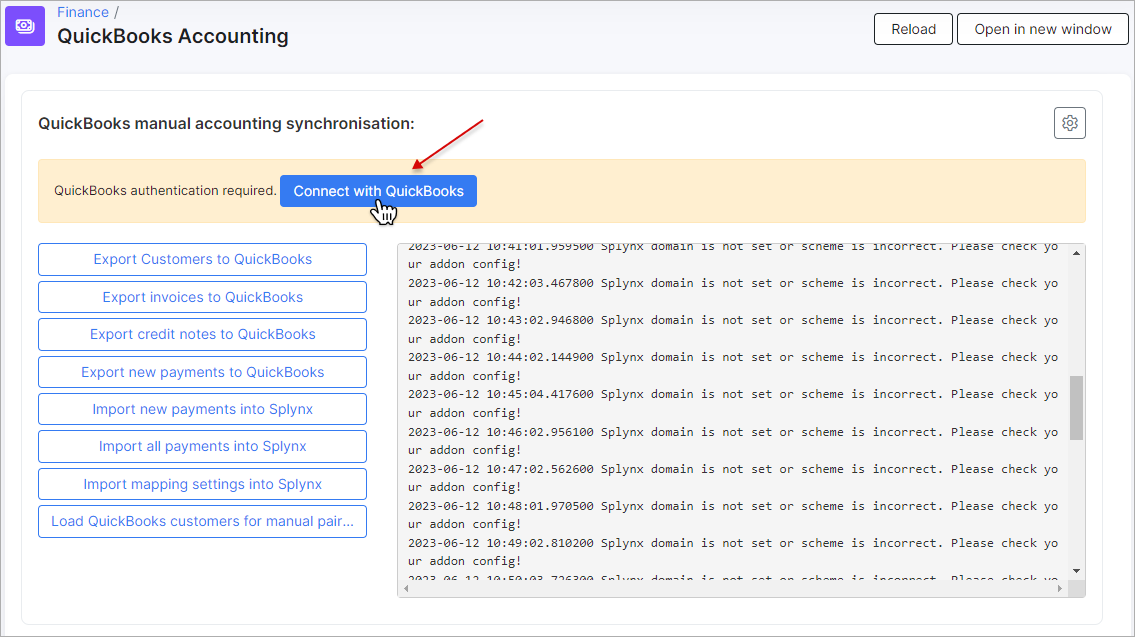
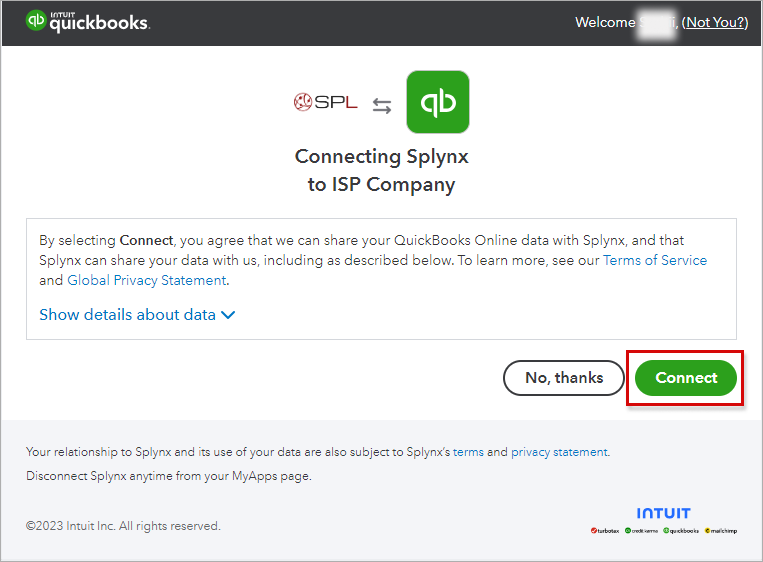
Click the Connect with QuickBooks button, enter your account credentials and press Connect to allow Splynx to view and update the date on the QuickBooks side:
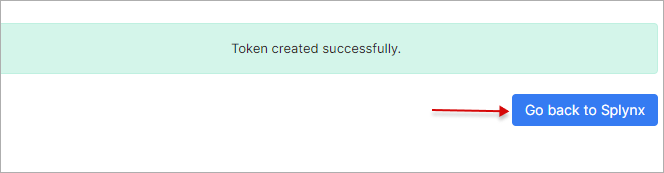
When it's connected, the token will be created:
We can add/edit Taxes, Products and Services in Quickbooks:
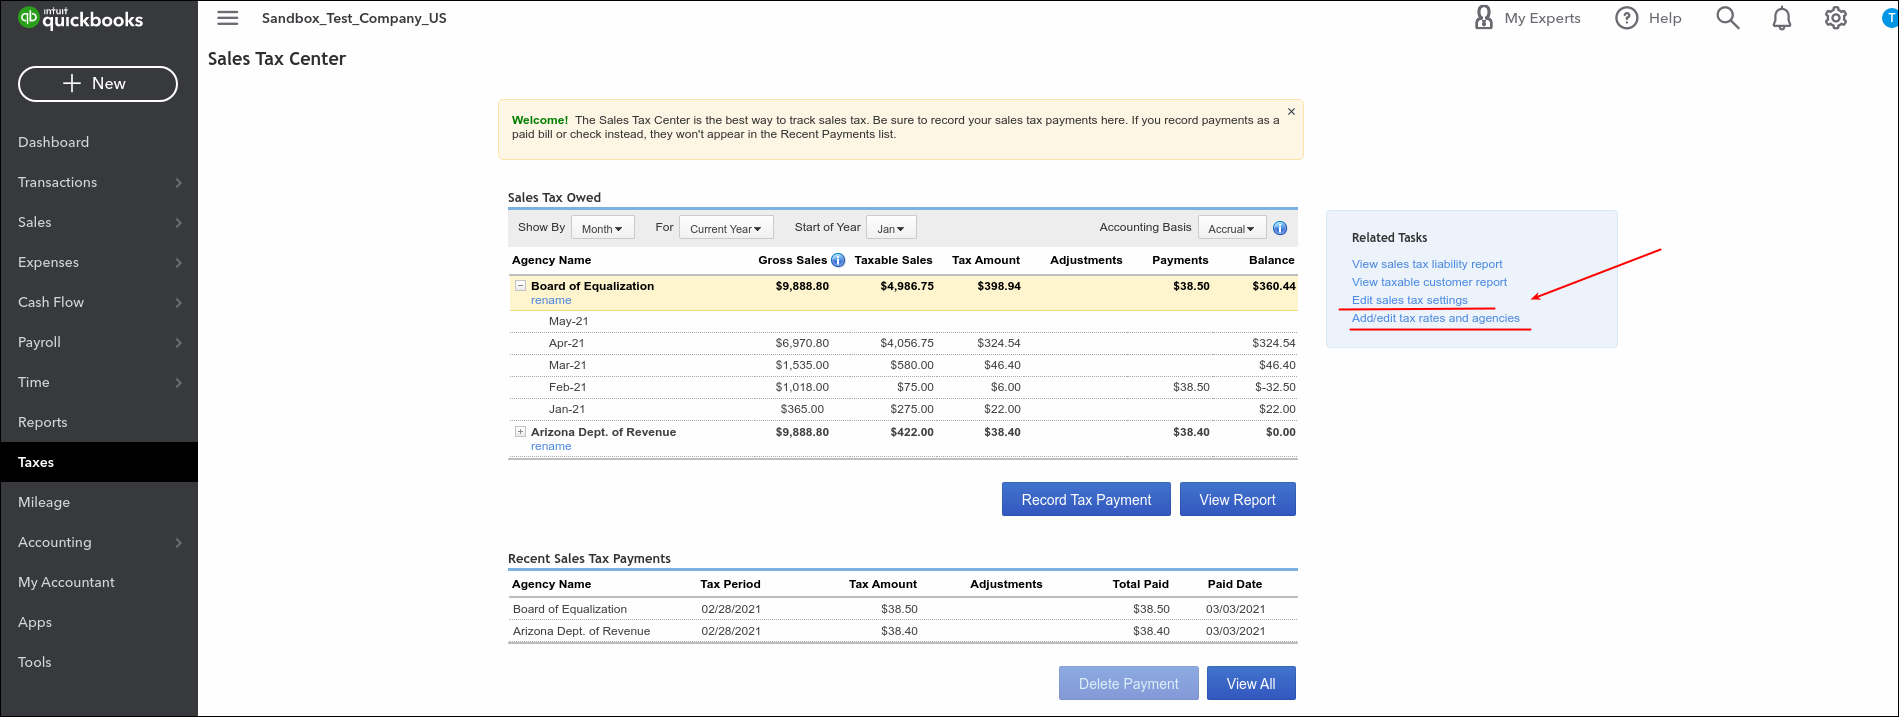
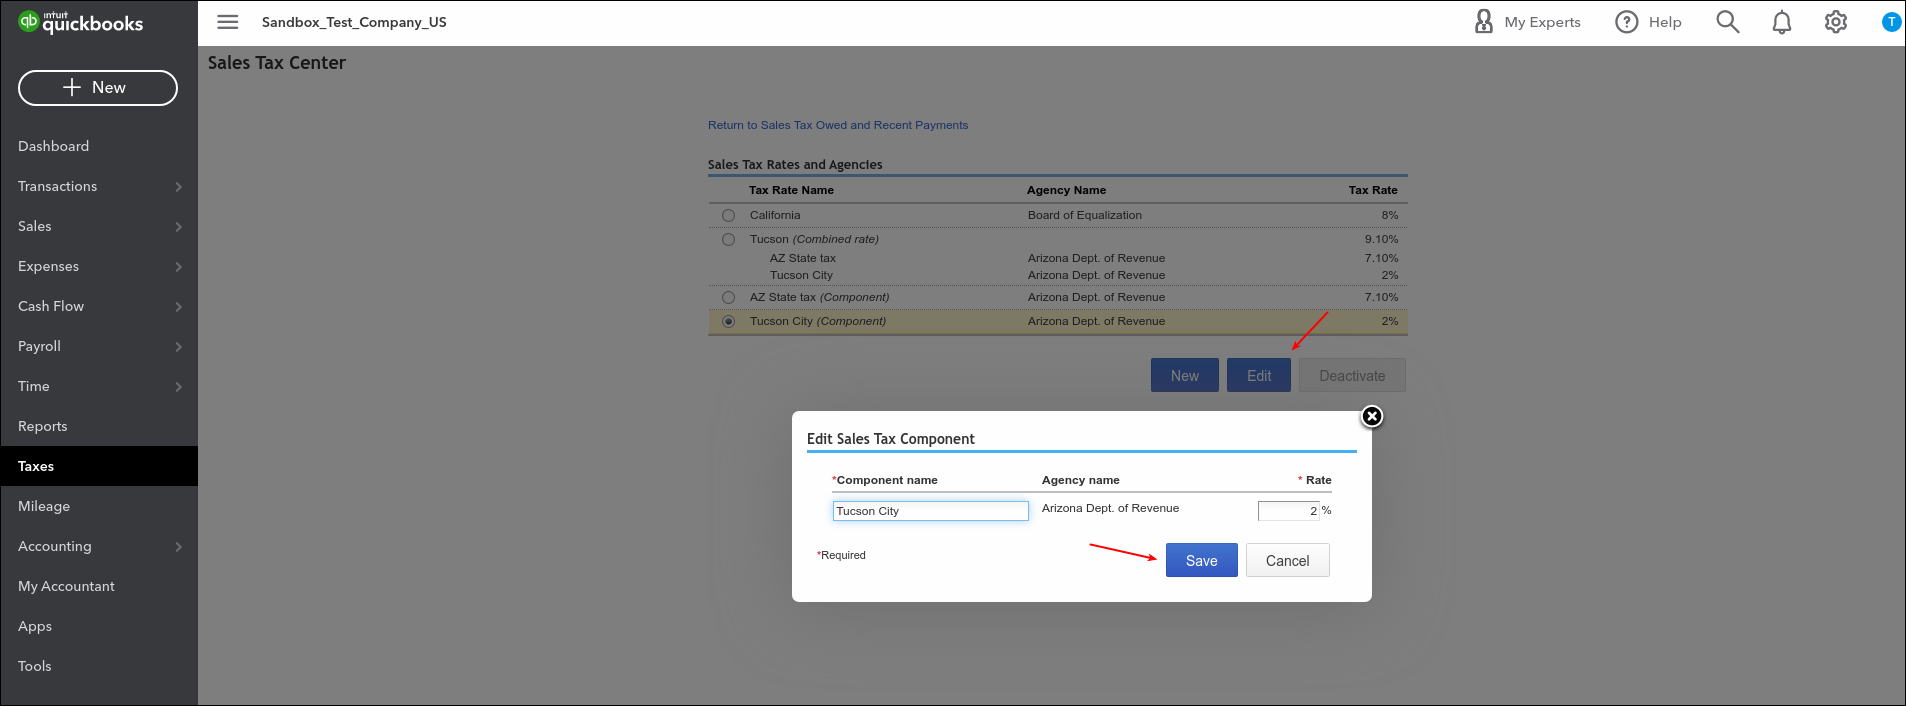
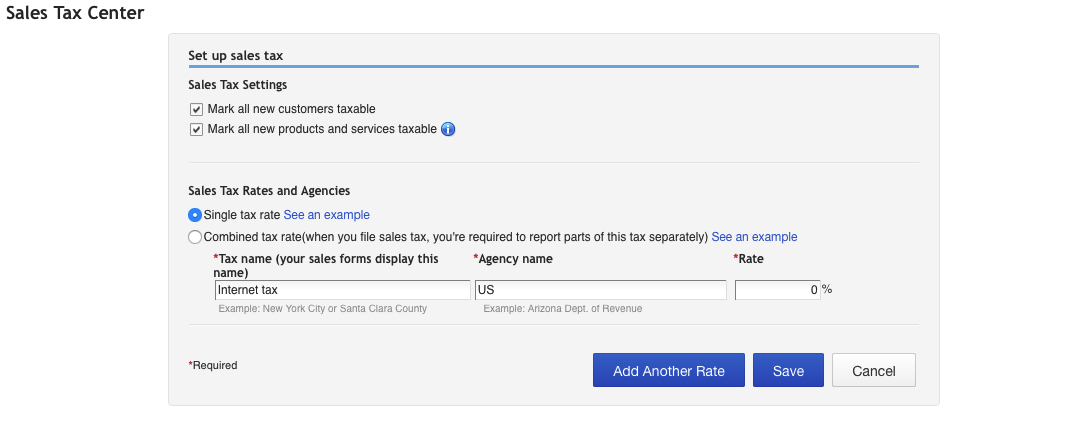
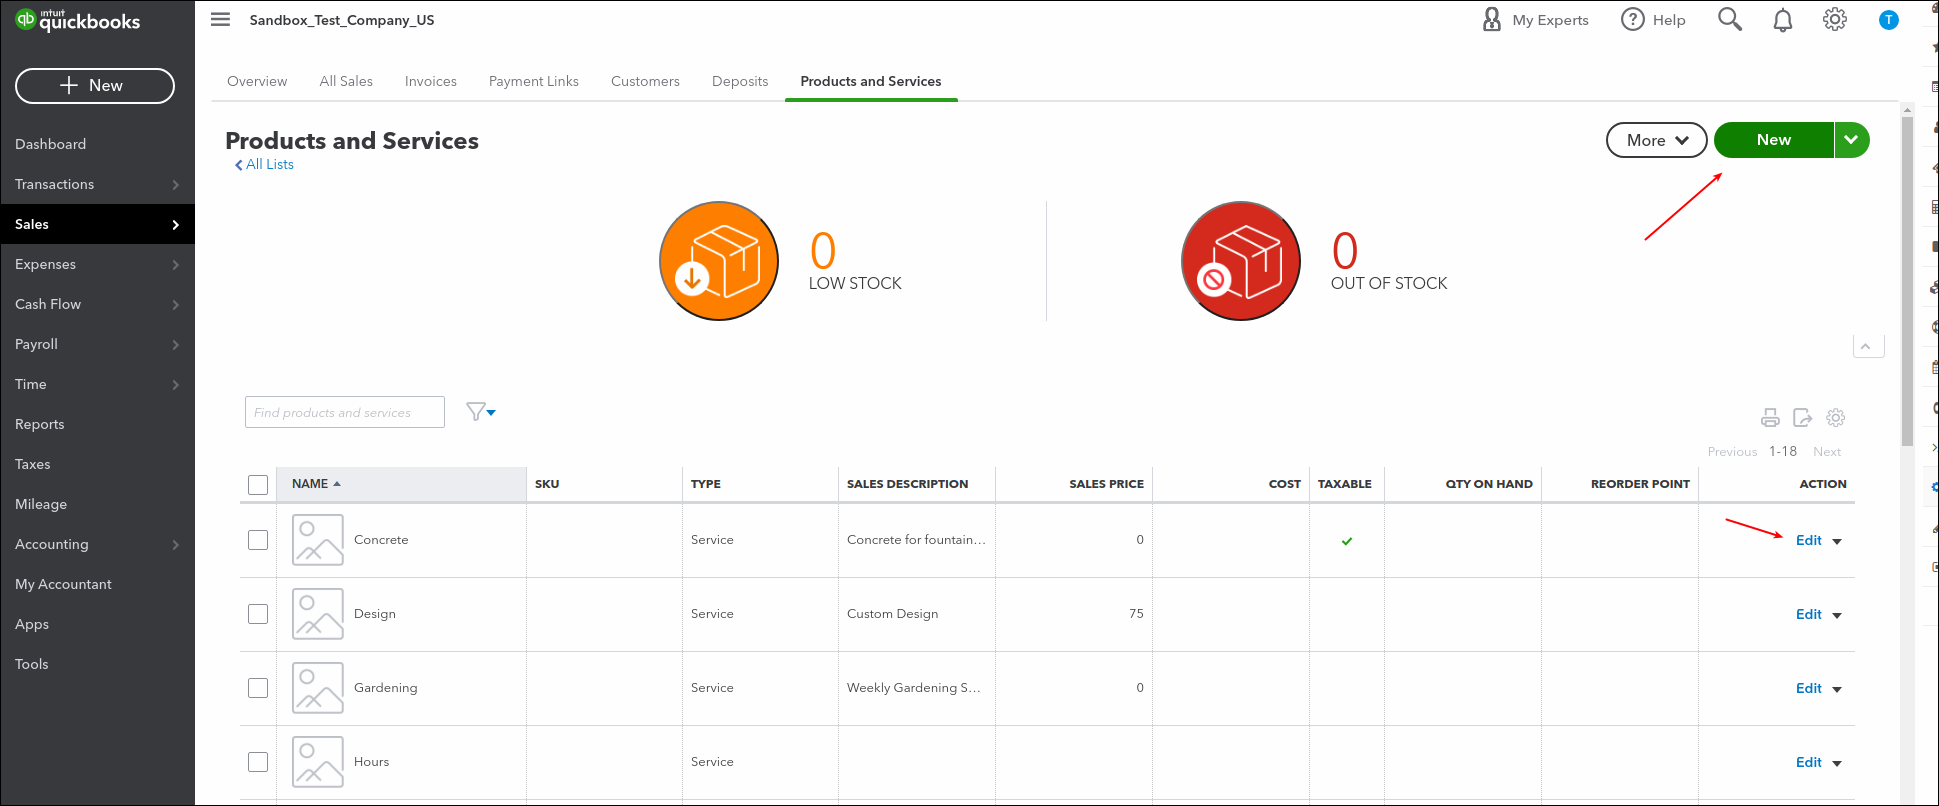
The taxes should be the same as the taxes in Splynx (Config → Finance → Taxes) to work properly.
¶ Mapping settings
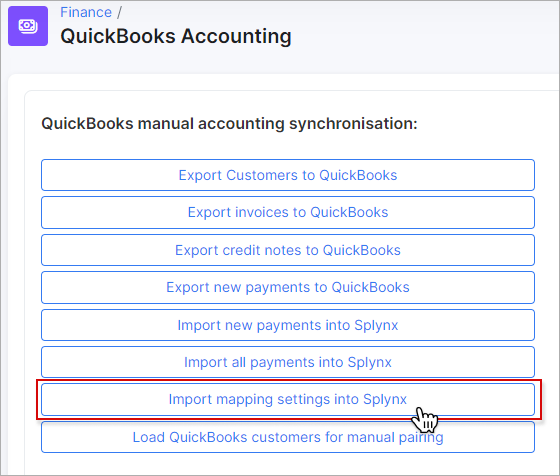
Now, in Finance → QuickBooks Accounting run Import mapping settings into Splynx
2021-05-13 09:04:28.413400 Start accounting categories synchronization
2021-05-13 09:04:31.119300 Accounting synchronization completed
2021-05-13 09:04:31.119500 Done!
2021-05-13 09:04:31.119900 Start tax rates synchronization
2021-05-13 09:04:32.157200 Tax rates synchronization completed
2021-05-13 09:04:32.157300 Done!
2021-05-13 09:04:32.157400 Start accounting bank accounts synchronization
2021-05-13 09:04:33.162500 Accounting bank accounts synchronization completed
2021-05-13 09:04:33.162600 Done!
After successful synchronization, make changes to Accounting categories, Accounting bank accounts and Taxes settings in Config → Finance:

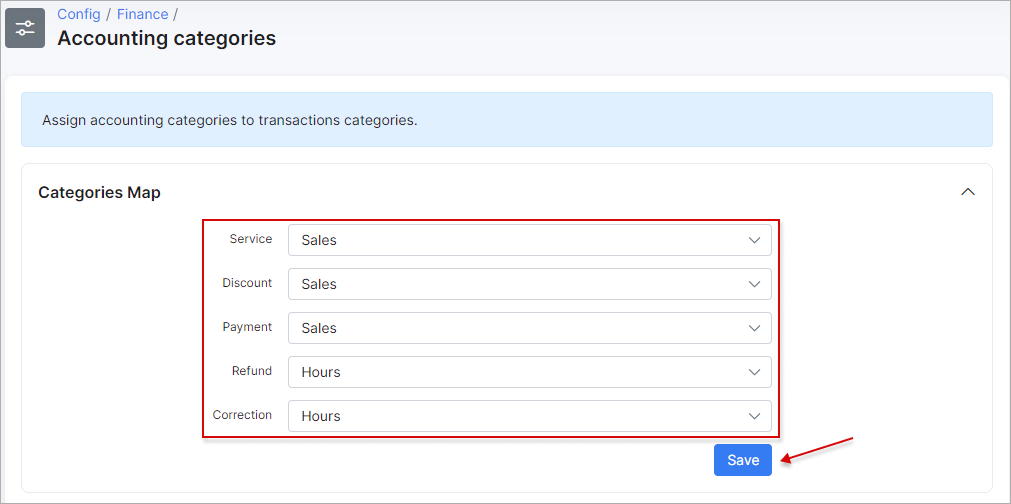
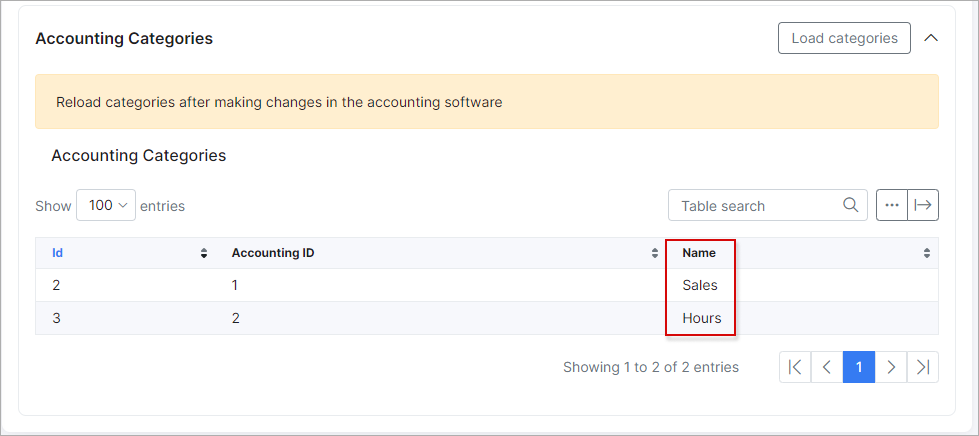
¶ Accounting categories
All accounting categories from QuickBooks (Sales → Products and Services) must be assigned to transactions categories in Splynx (Config → Finance → Transaction categories). This can be done in two ways:
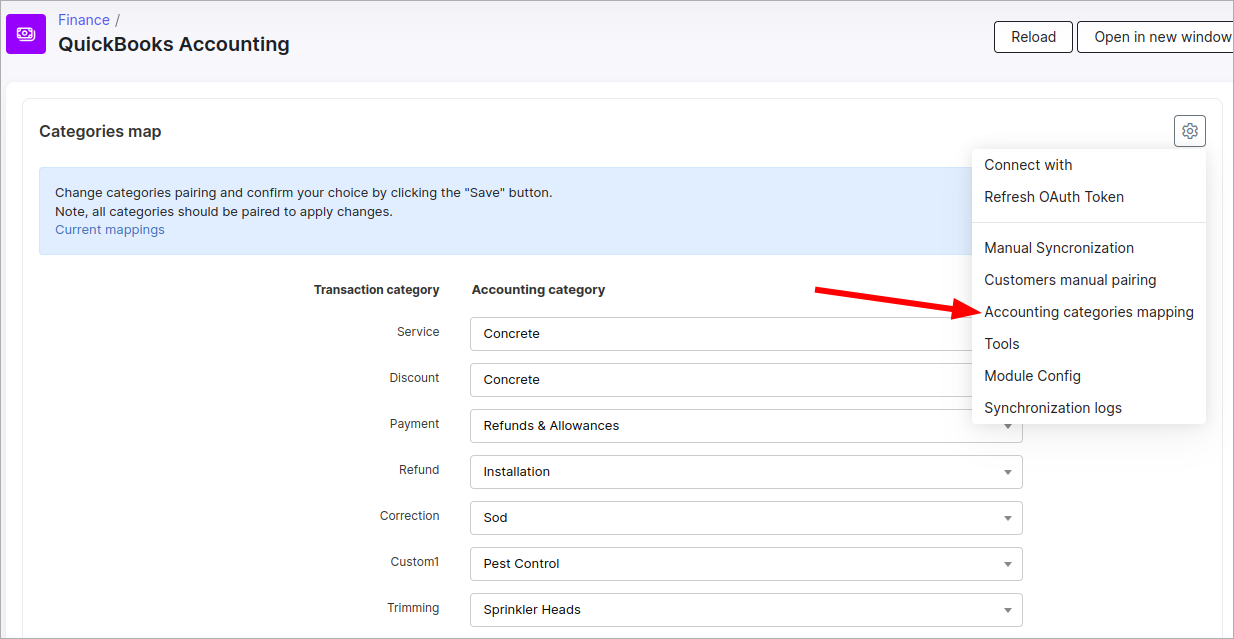
- Automatically, by clicking on the
Accounting categories mappingitem in the settings menu under Finance → QuickBooks Accounting. It will generate a preview of the transaction categories that will be paired with accounting categories. You can manually select another category to pair from the dropdown list. Afterward, click theSavebutton to initiate the pairing process.
- Manually, under
Config → Finance → Accounting categories.
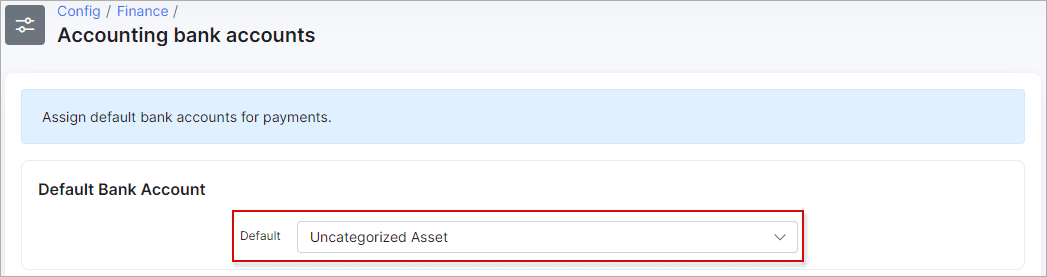
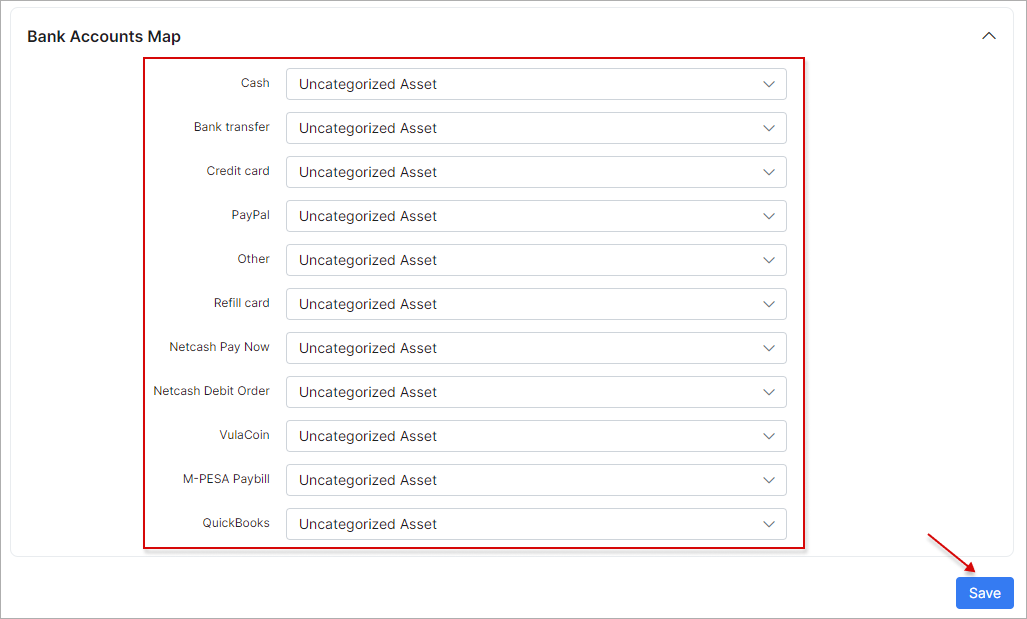
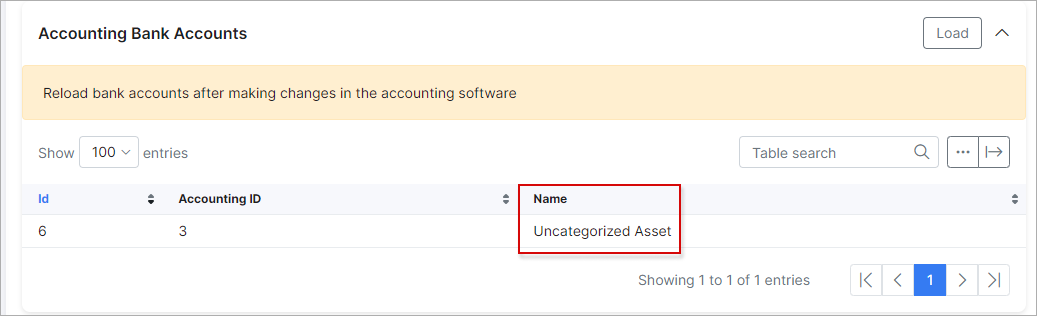
¶ Accounting bank accounts
As soon as the relevant categories are configured, we can proceed with bank accounts. Navigate to Config → Finance → Accounting bank accounts.
Assign the QuickBooks bank accounts (Accounting → Chart of Accounts types) to payment methods (Config → Finance → Payment methods) in Splynx, also the default bank account should be selected.
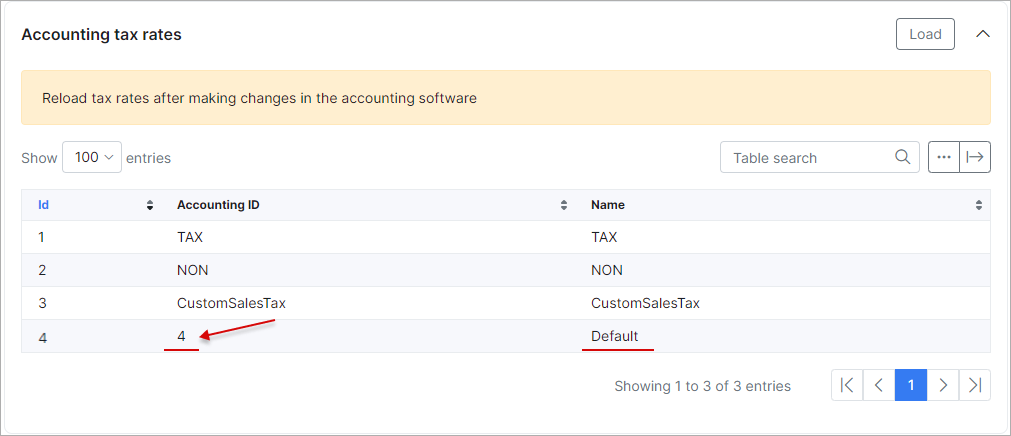
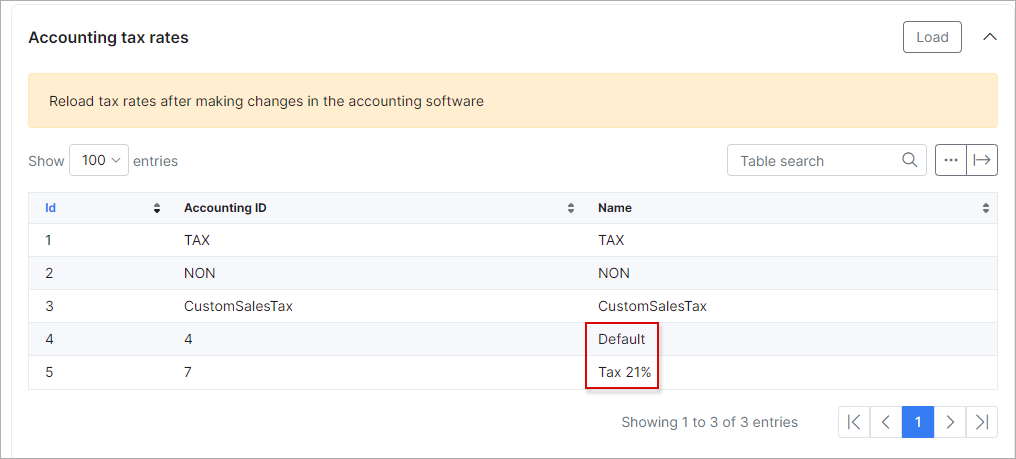
¶ Accounting tax rates
And the last one - Config → Finance → Accounting tax rates.
For US company select "NON" for zero values and "TAX" for other values.

In Config → Integration → Modules list → QuickBooks Accounting, set the tax rate accounting id and the currency:
For other countries, select the matching between taxes in Splynx and in Quickbooks:
Finance documents cannot be updated for France.
¶ Exporting customers
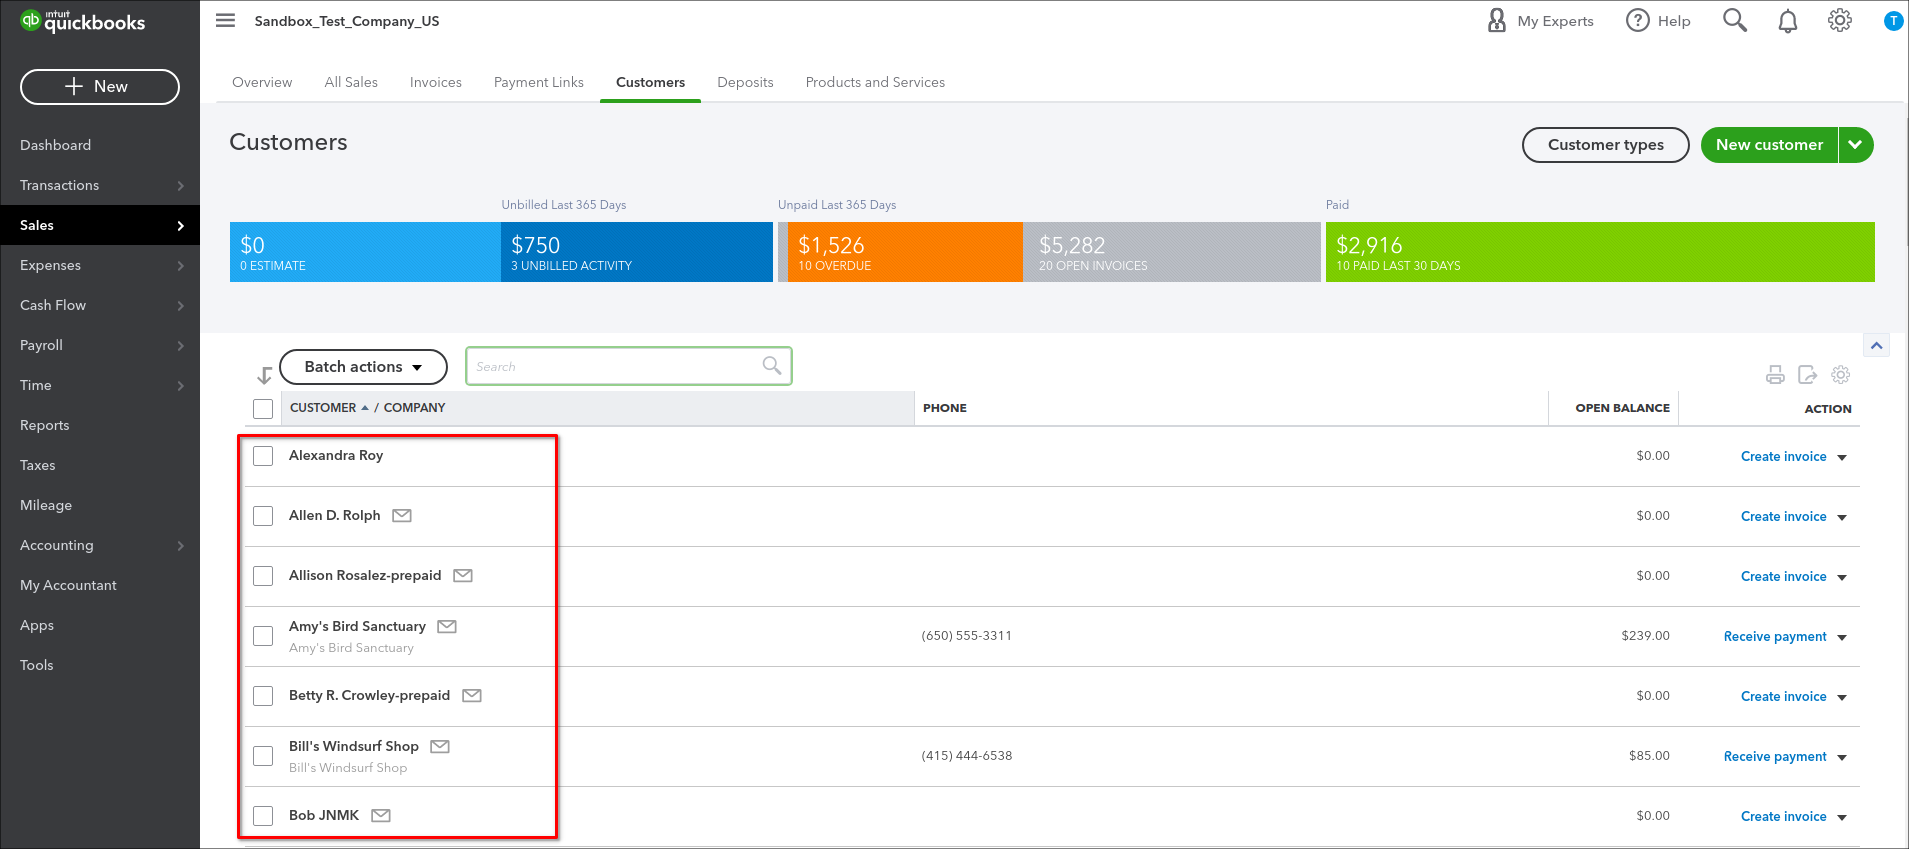
When the accounting settings are done, we can export our customers from Splynx to Quickbooks or match existing clients in the databases:

We can check if all clients were pushed to QuickBooks:
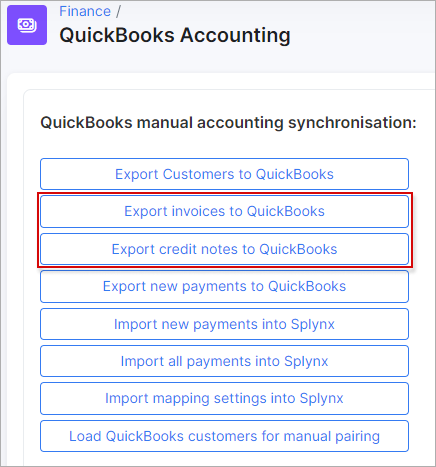
¶ Exporting invoices and credit notes
Once the customers' export is completed, we can export invoices/credit notes:
Invoices in Splynx without transactions/marked as Deleted/with negative total amount will not be synced to Quickbooks.
What Is A Credit Note?
The credit notes can be used in any situation that would require an invoice to be changed and re-issued. For example, the credit note should be issued when there is a need to cancel all or part of an invoice that has already been charged. This is done to keep accounting records straight since invoices cannot be deleted or edited once issued. Credit notes allow you to delete the amount of the invoice from your financial records without deleting the invoice itself in cases when the invoices deleting is unlawful.
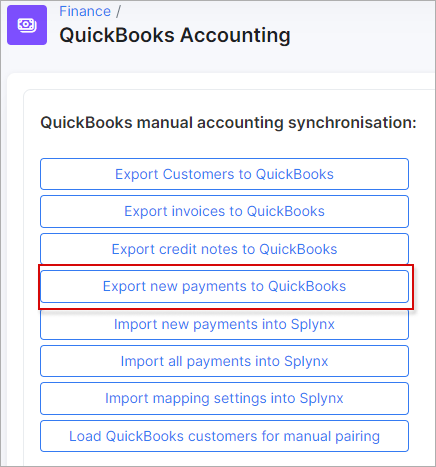
¶ Exporting payments
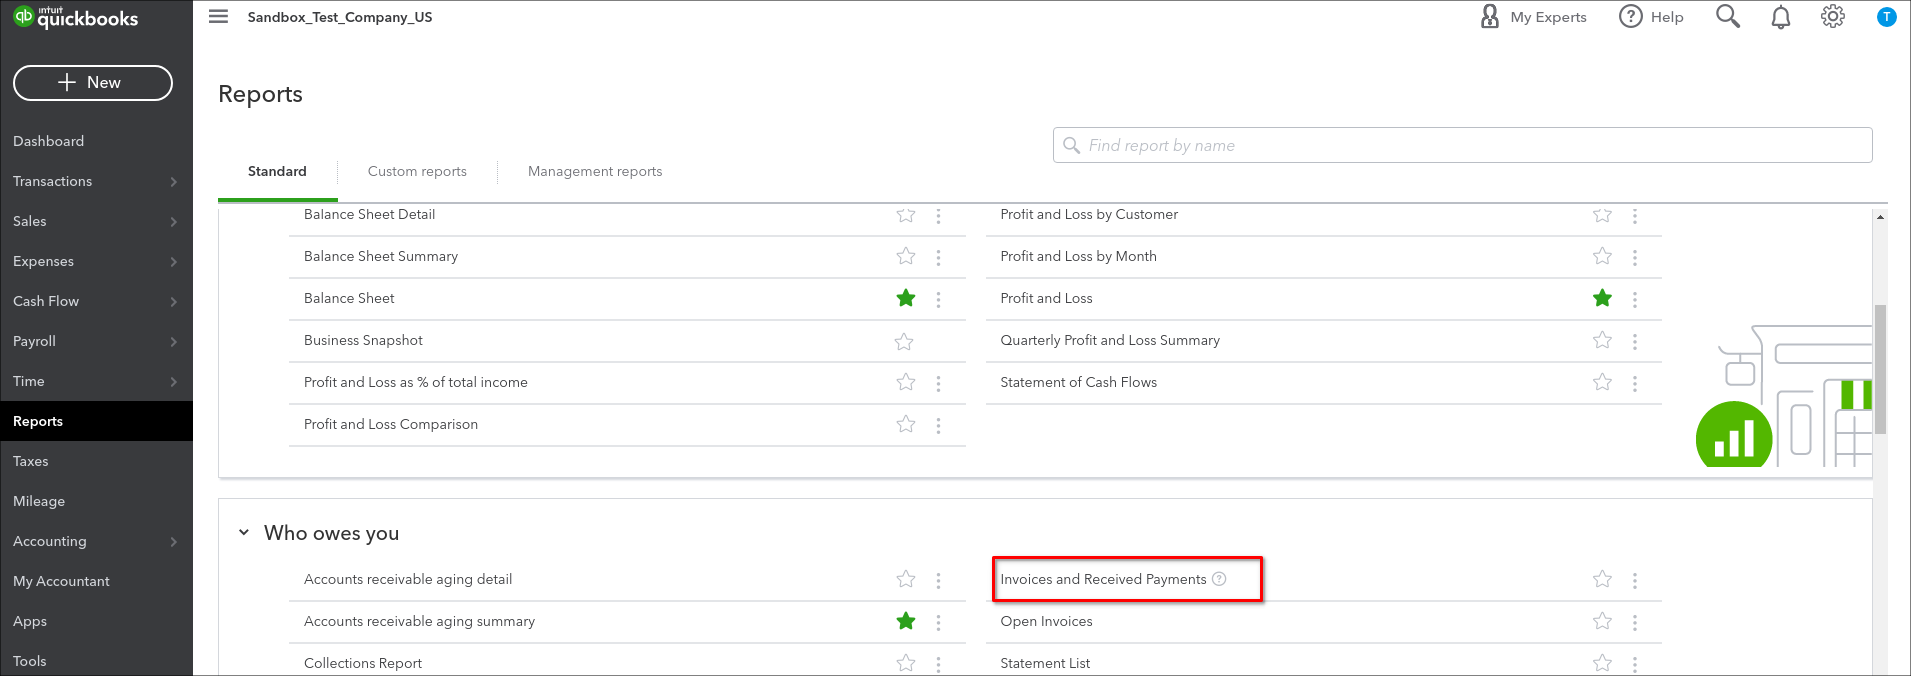
Then export payments from Splynx to Quickbooks (depends on Payments synchronization direction setting in add-on configuration). You can check received payments via report.
¶ Examples
Now you can issue Invoices/Credit notes in Splynx and process Payments. This information will be sent to Quickbooks online immediately. All changes are also synced immediately between the two systems.
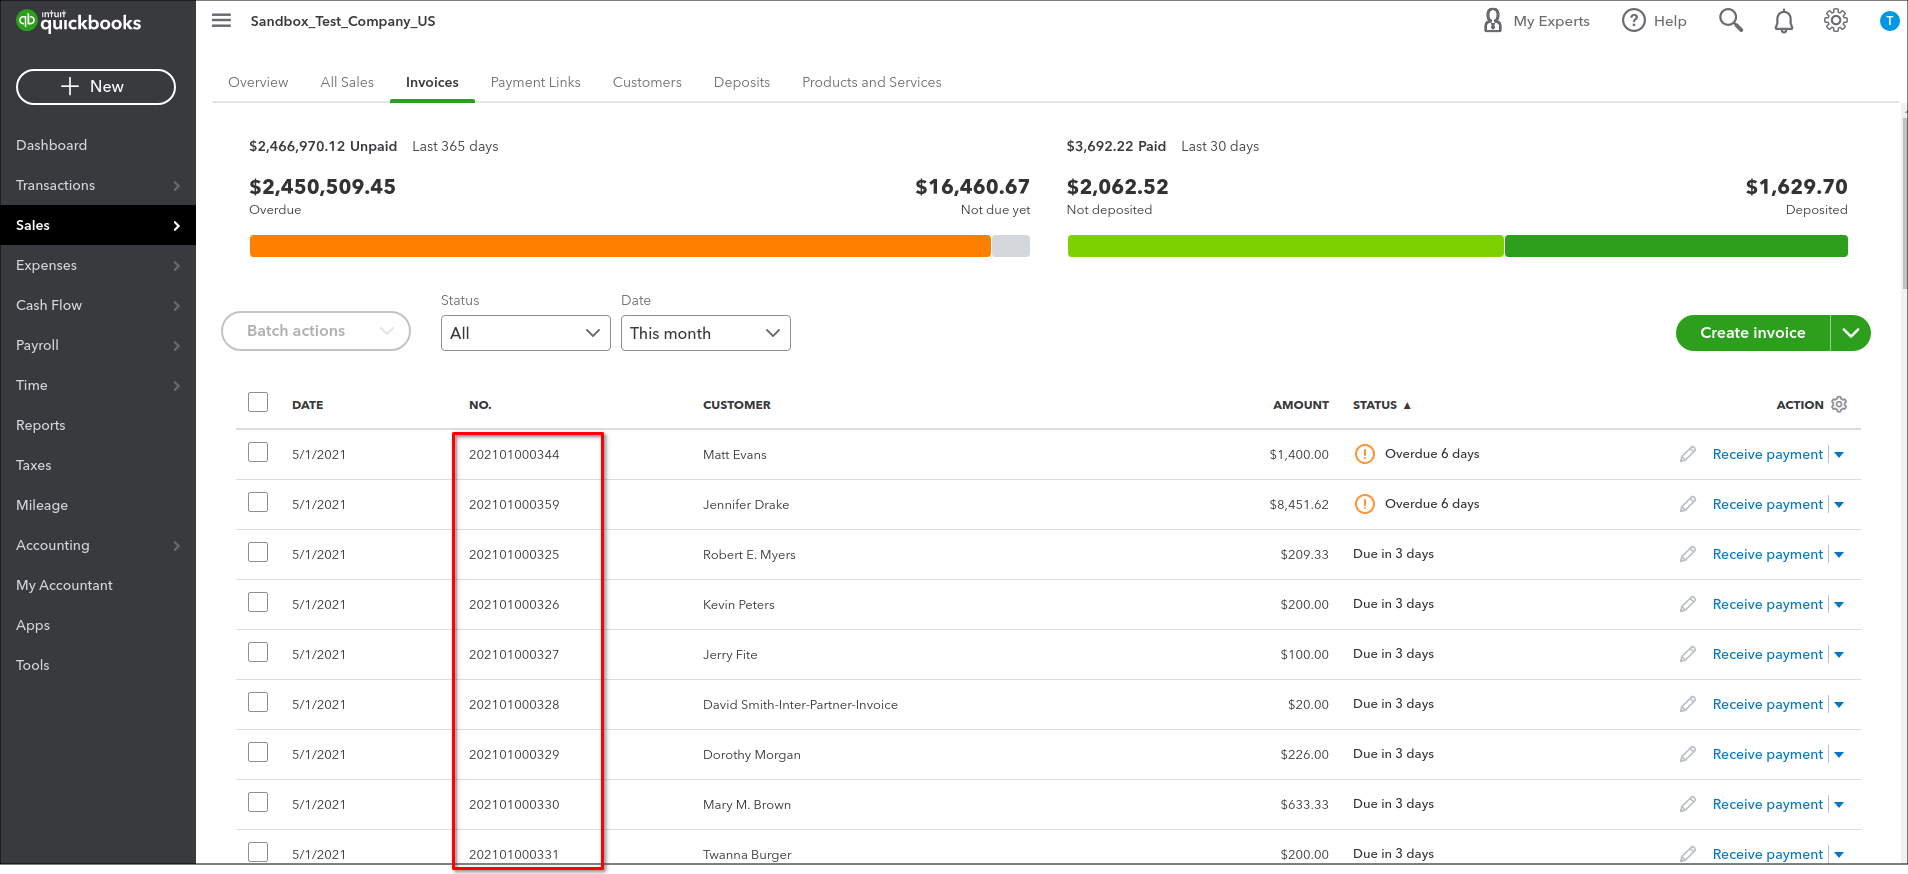
Let's issue 3 invoices in Splynx:
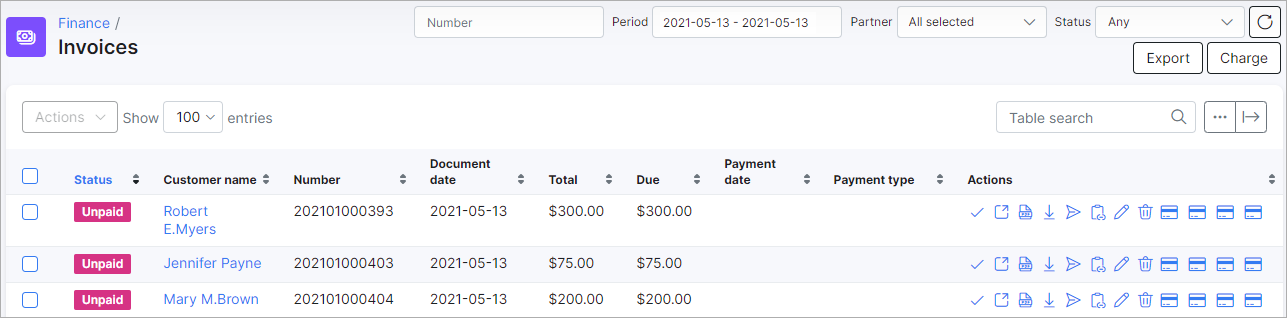
Done! they've been synced to Quickbooks as well!

After processing payments in Splynx, the information is also synced to Quickbooks.
Let's pay 2 invoices in Splynx:

Payments are sent to QuickBooks in few seconds:

In Splynx, when credit notes are deleted and synced with Quickbooks, they will remain in the accounting system, and you will need to manually delete them from there. For more information, please read this: Deletion of credit notes synced to accounting.
¶ Quickbooks logs
Sync logs are located in Administration → Logs → Accounting integrations

If a customer/invoice (credit note)/payment has an "Accounting ID", this indicates that it was synced. If not, it was not synced.
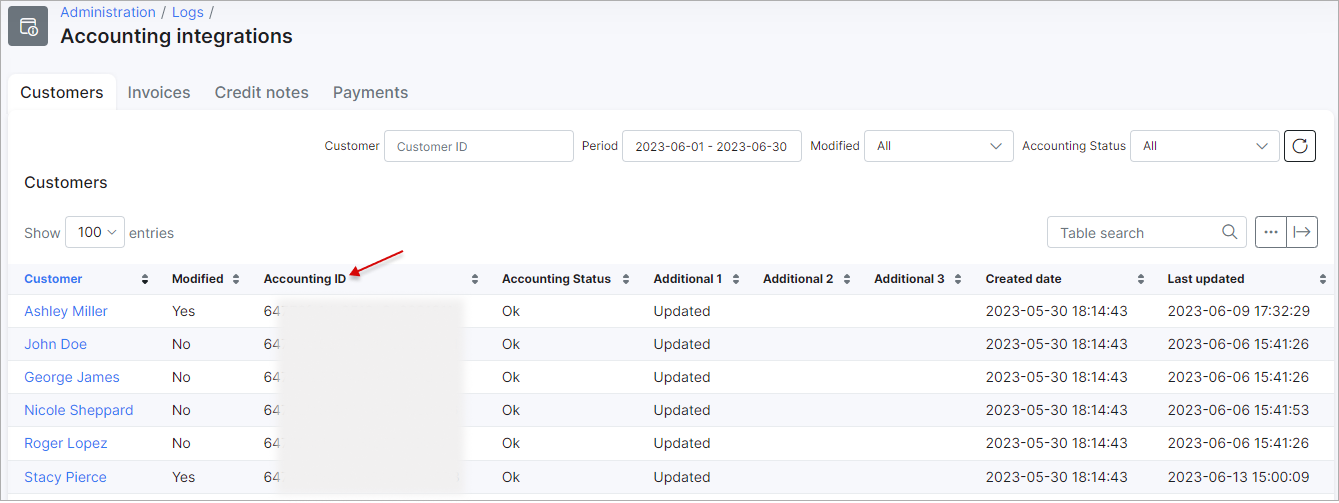
The same logic is for invoices/credit notes and payments: if accounting ID is present, it was synced.
¶ Quickbooks tweaks
In Config → Integration → Modules list → QuickBooks Accounting when clicking on the gear icon, you will see the dropdown menu with additional settings related to the QuickBooks add-on:
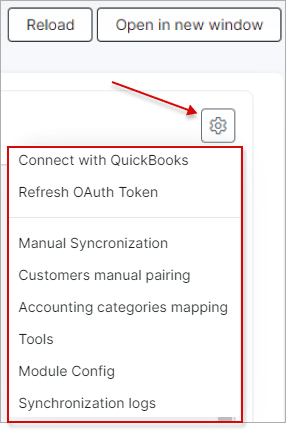
Connect with QuickBooks - if the QuickBooks Accounting addon was disconnected from the QuickBooks account, you can reconnect it here;
Refresh OAuth Token - setting to refresh the OAuth token;
Manual Synchronization - used to go back to manual synchronization window;
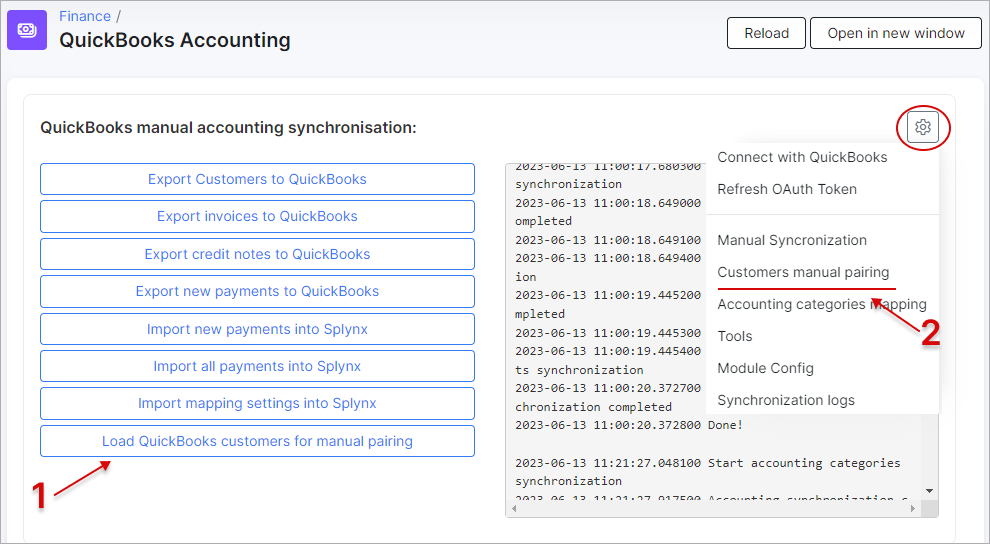
Customers manual pairing - the setting is used to open the pairing window when there are existing customers in both Splynx and QuickBooks. Please note the currency set in the QuickBooks add-on configuration. If the currency of QuickBooks customers is different, synchronization errors may occur for their related data;
In addition, there is a Load QuickBooks customers for manual pairing button. This feature pulls the customer list from QuickBooks into Splynx and allows the admin to manually pair the customers without having to create them in either platform again. Firstly, load the customers, and then perform manual pairing.
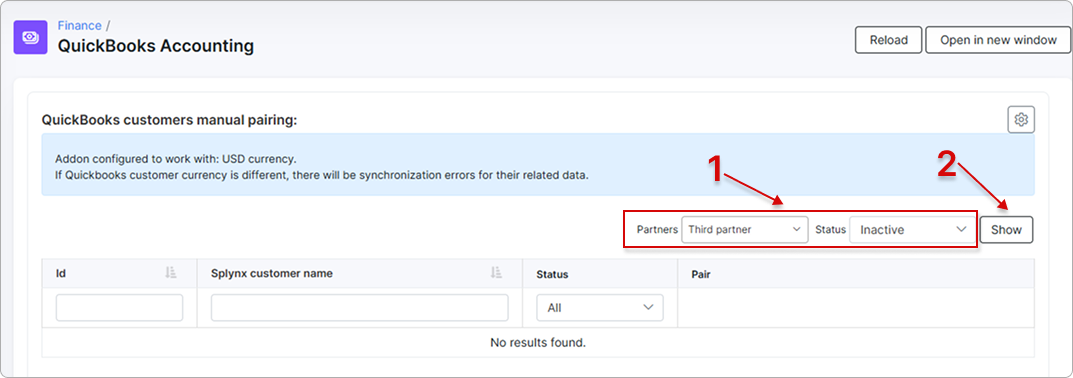
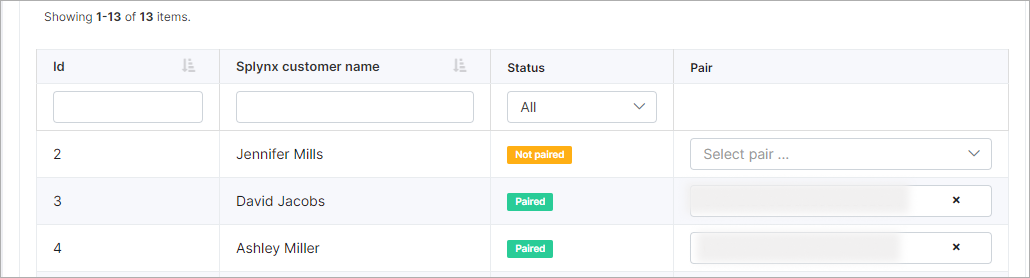
For manual customer pairing, first select Partners and Status, then click Show. The filtered customers will be available for pairing:
- Accounting categories mapping - the link automatically maps accounting and transaction categories instead of manual mapping.
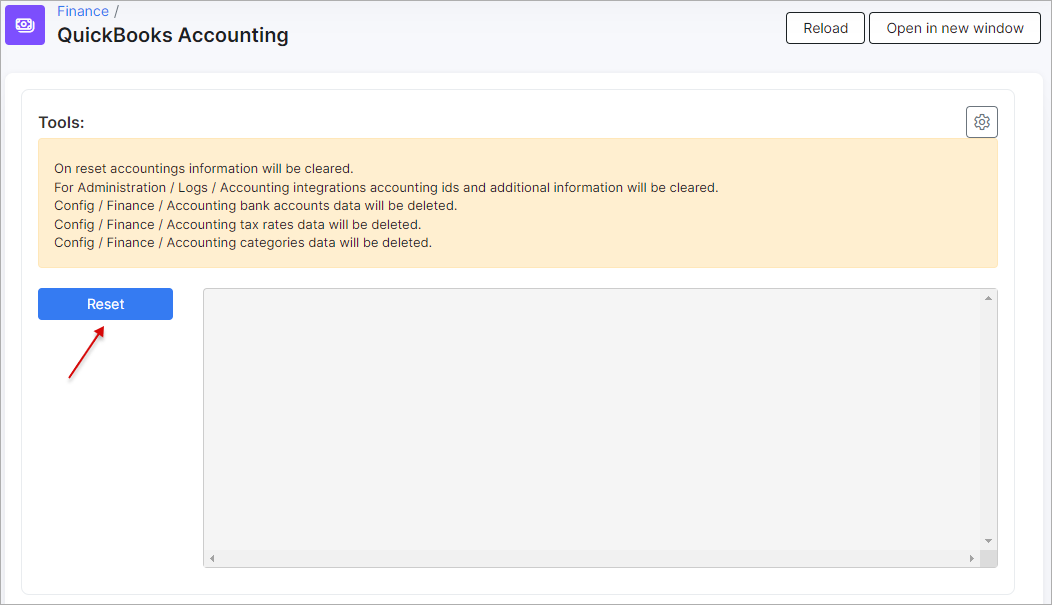
Tools - this menu is used for resetting the accounting database. All items that were selected previously in Accounting categories, Accounting bank accounts and Accounting tax rates will be erased. It is mainly used when the organization changes. Before changing the organization, the accounting database must be reset:
Module Config - the link is used to open the QuickBooks add-on configuration page (Config → Integration → Modules list → QuickBooks Accounting);
Synchronization logs - the link is used to open the QuickBooks logs page (Administration → Logs → Accounting integrations).