¶ Credit notes
- Overview
- Statuses and actions
- Creating a credit note
- Credit notes in Finance
- Deletion of credit notes synced to accounting
- Template of Credit note
- Notifications
- Logs
¶ Overview
The Credit note is a kind of negative invoice designed to give a refund on part or all of the invoice amount. To be precise, it is a document issued to indicate a return of funds in the event of a service cancellation, network equipment return, miscalculation of price/tax/discount in the invoice or other specified circumstances.
Sometimes we can send a customer an invoice and then realize that we have overcharged them for certain services or network stuff. Instead of canceling the original or recreating a new invoice, which can confuse the customer in accounting processes, we can issue a credit note to correct the total.
¶ Statuses and actions
Let's consider in details the Credit notes statuses and the actions that can be applied to:
| Status | Description |
|---|---|
 |
the initial status of a new credit note. It means that the money in the credit note has been refunded to the customer's balance, but the customer has not yet taken money out from the ISP. The Credit transaction will be created. On the other hand, this status is also set when the amount of credit note is more than the total amount of unpaid invoice, the rest of money will be added to the customer's account balance. |
 |
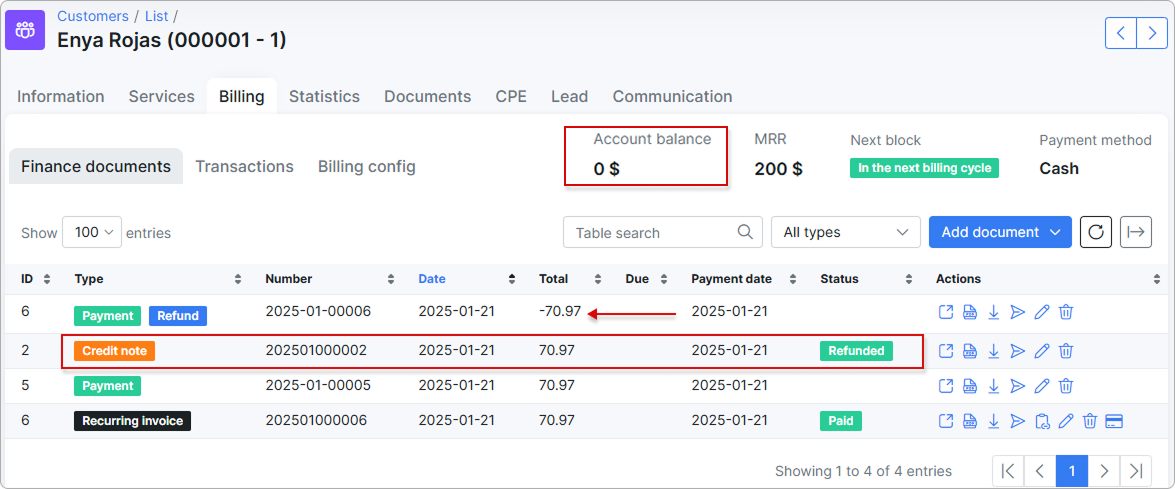
the administrator sets this status when the customer has withdrawn money from the account balance to the credit card or has taken money in cash. The specific amount of money will be withdrawn from the customer's balance. The new Debit transaction (the Refund payment with the negative sum) will be created. If the credit note is in the Refund due status (its amount was greater than the total amount of the unpaid invoice, it was partially used) and we are going to refund it, the payment will be created for the remaining amount. The refund payment can be removed, as a result, the credit note status will be changed back to Refund due, the Credit transaction will be re-created and the money will be returned to the customer's balance. |
 |
it means that the credit note was completely used to pay off the unpaid invoice. If the amount of the credit note is less than or equal to the total of the unpaid invoice, the credit note will be closed and the invoice will be partially paid or fully paid. |
 |
it means that the credit note was Marked as deleted. In this case the credit note item remains visible in the Finance documents but the Credit transaction will be removed. The amount of credit note money that has been added to the account balance will be deleted. Not to be confused with Delete completely action. |
 NOTE:
NOTE:
-
A created credit note can only be edited if it is in the
Refund duestatus and at the same time is not linked to an invoice; -
If a credit note is in the
closedorrefundedstatus, only the Note field can be edited; -
A credit note that has already been synced to any accounting system (e.g. Xero), cannot be deleted.
| Action | Description |
|---|---|
 View View |
to view the details of the credit note. |
 Refund Refund |
the administrator should choose this action when a customer withdrew money from the balance to the credit card or took the money out in cash from the SIP. |
 View PDF View PDF |
to view the credit note according to its template in Splynx. |
 Download PDF Download PDF |
to download the generated credit note PDF file. |
 Send Send |
send the credit note to customer's email or portal. The specific template can be loaded or saved as new one in a new window. |
 Edit Edit |
used to edit the details of the credit note: note, status, link/unlink to the invoice etc. |
 Delete Delete |
can be applied to the credit note in Refund due or Delete status. In case a credit note is in Refund due status, two options are available to choose from: Marked as deleted and Delete completely. If a credit note is in Deleted status, only Delete completely action can be applied to remove a credit note from the finance documents list. |
¶ Creating a credit note
Creating a credit note with the "Add document" button
Let's say we have a customer who uses the Internet service for $100. And an ISP should give the money back to the customer.
- The customer has been invoiced for 100$ for the service (the account balance =
-100). The invoice was paid successfully by the customer (the balance =0);


- For some reason, a provider should give the money back to the customer. So, the administrator should open the customer profile (
Customers → List), click on theBilling → Finance documentstabs, press theAdd documentbutton and choose theCredit noteitem in the drop-down list.
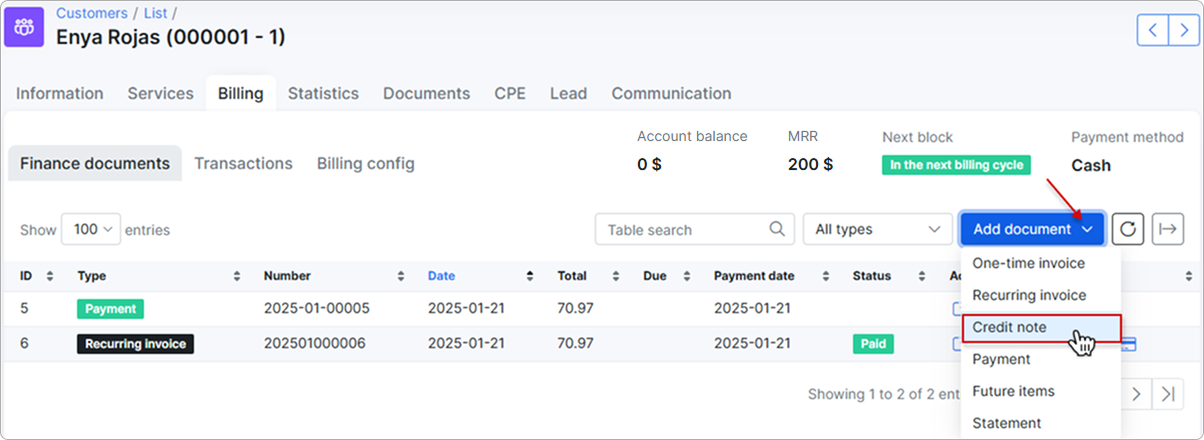
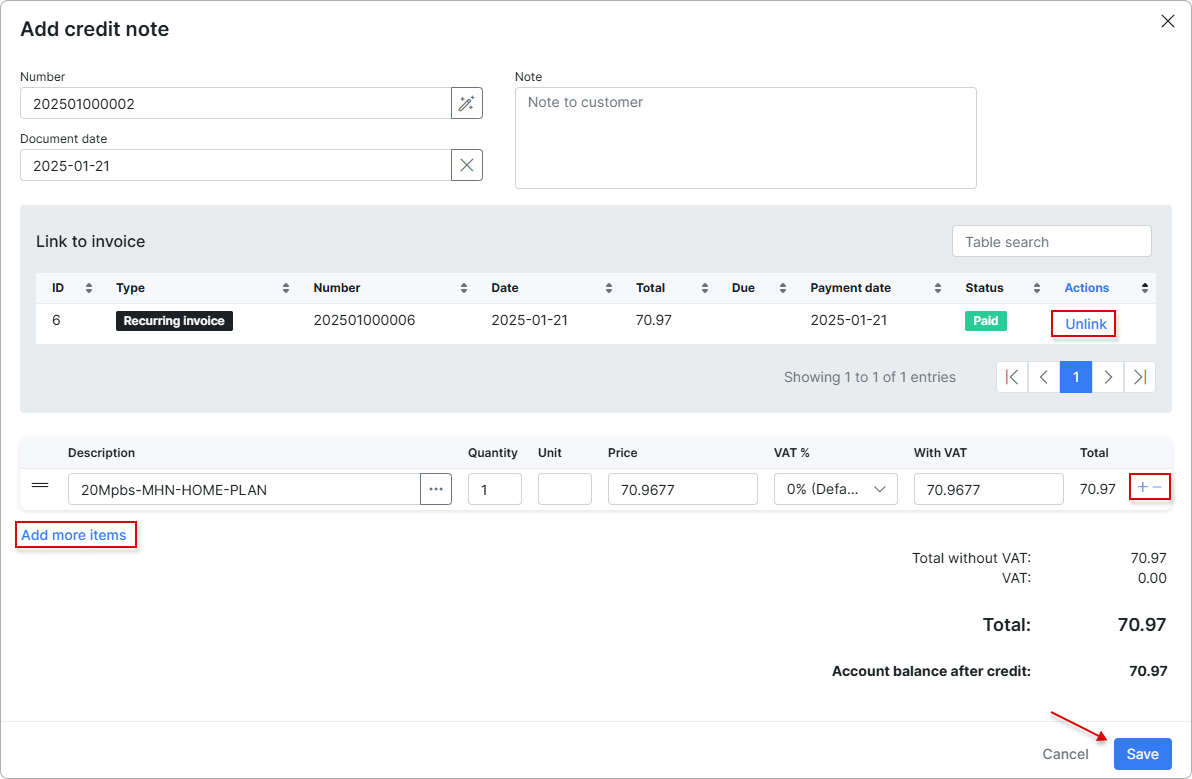
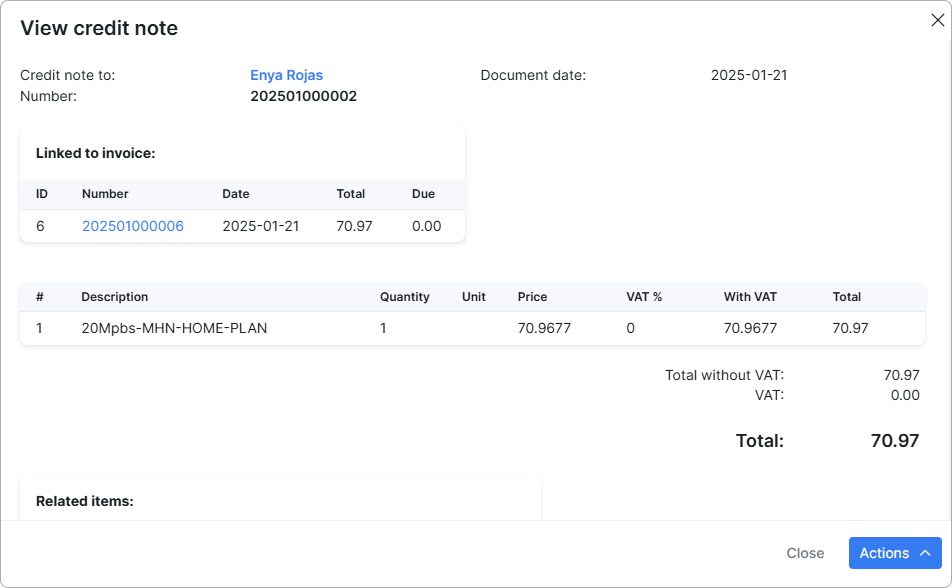
In the new window, you can link/unlink only one related paid/unpaid invoice to the current credit note. Moreover, it's possible to use the option Add more items to add the additional item (-s) and specify its Description, Price etc. Use - sign, which is to the right of the line, to remove the unnecessary items.
If the invoice is linked, all items (transactions) of such invoice will be added to the new credit note with all details. After that press the Add button, the new credit note with Refund due status will be created.

At this stage, the sequence of transactions will be the following:

- The customer has decided to withdraw money from the balance in cash. After the customer receives the money, the administrator will refund the credit note by pressing
 icon in the Actions column.
As a result, at this moment the customer's balance =0because the customer withdrew the money.

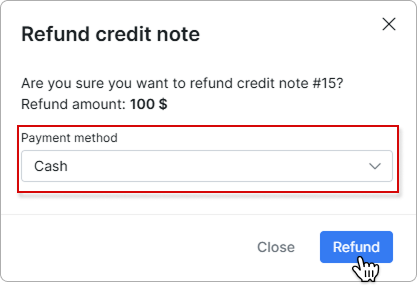
Choose the payment method to use for the refund:
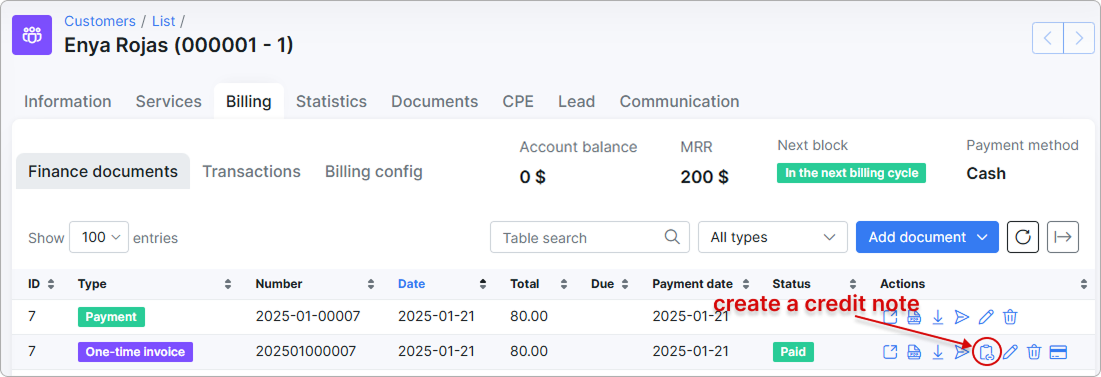
Creating a credit note with the "Create a credit note" icon (immediately create a credit note and link it to the existing invoice in customer profile)
Find the necessary invoice in customer's Finance documents and click on ![]() icon to create a credit note.
icon to create a credit note.
 NOTE: You cannot create a credit note to the invoice with
 Deleted (Mark as Deleted) status.
In such case, the related invoice (and its transaction) will be automatically linked to this credit note.
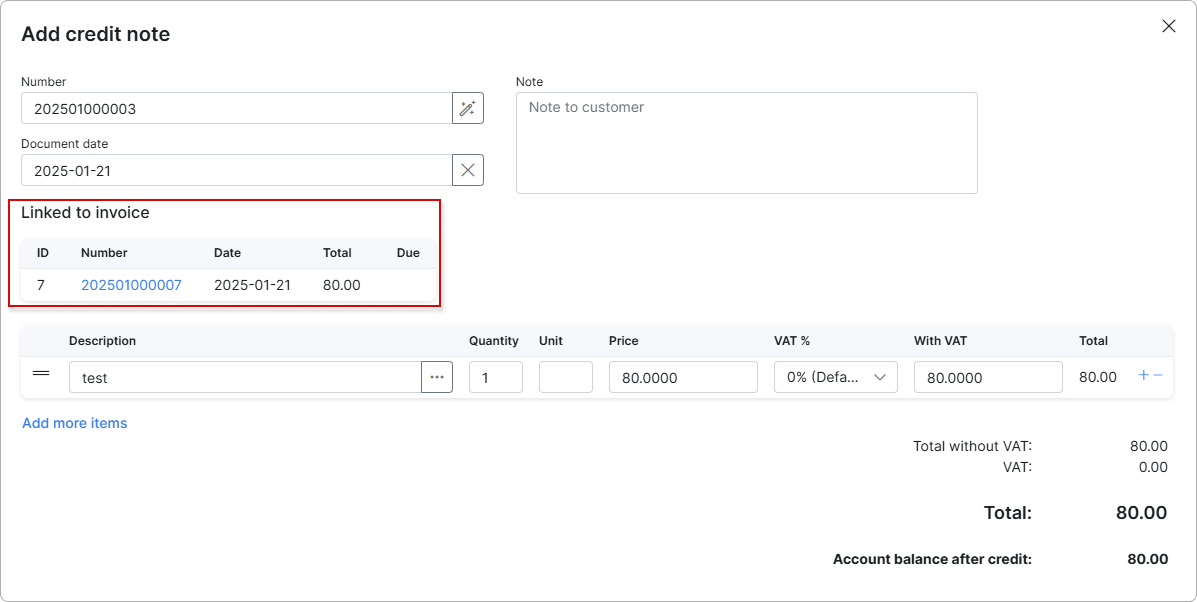
If necessary, you can change the price, description etc. of an included item or add a new one.
¶ Invoiced until period
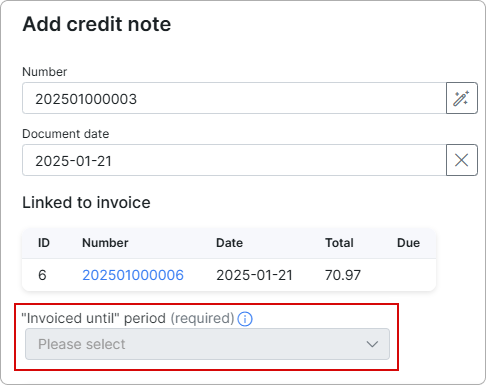
When creating a credit note for the latest recurring invoice, you should specify the 'Invoiced until' period. This field is mandatory in this scenario.
This option is essential for canceling recurring invoices one by one, starting with the most recent, to avoid gaps in the billing period.
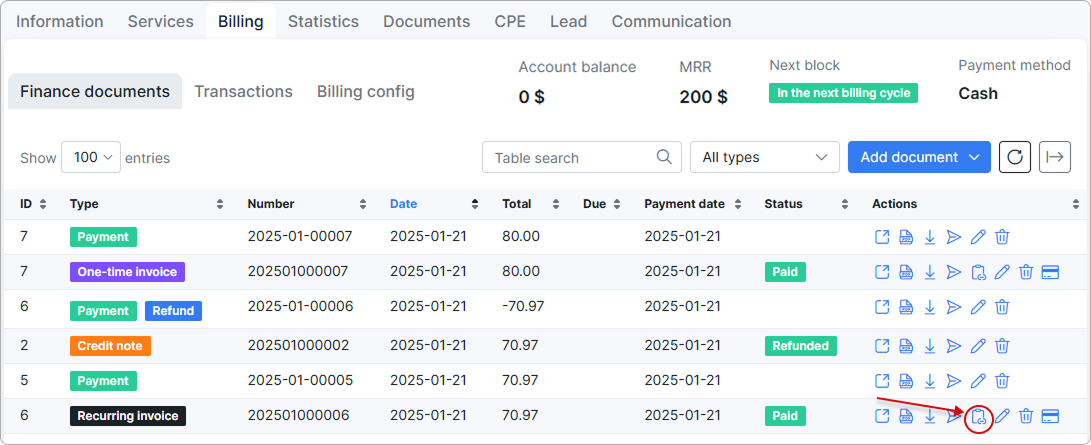
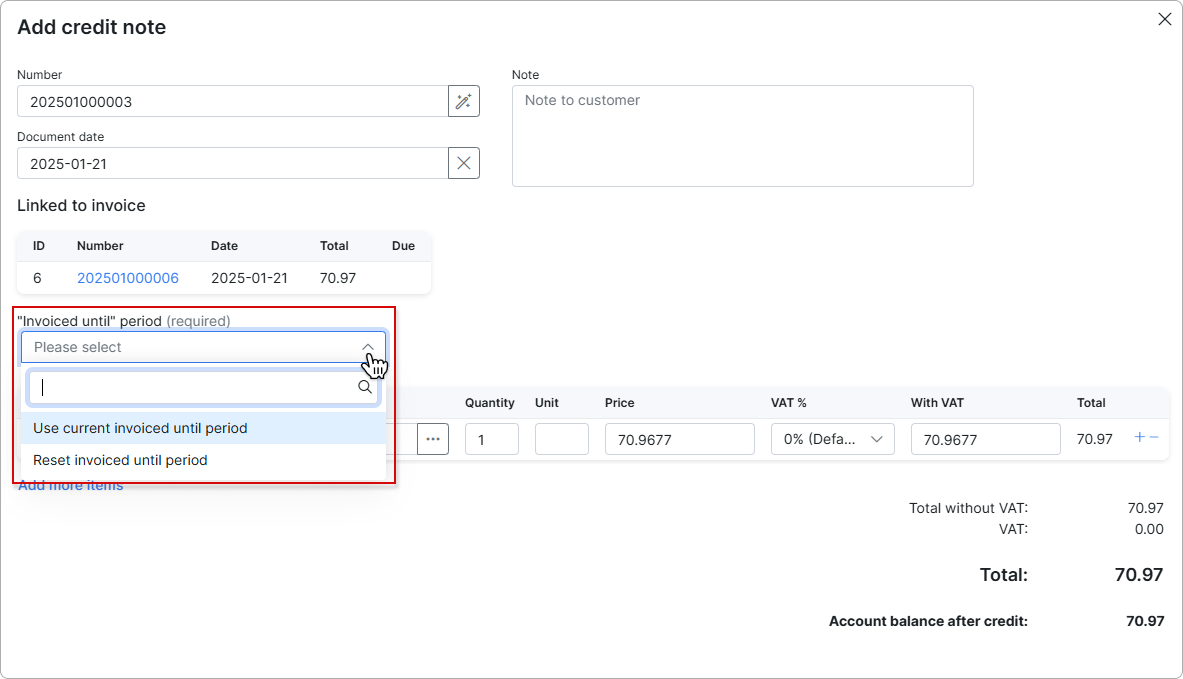
-
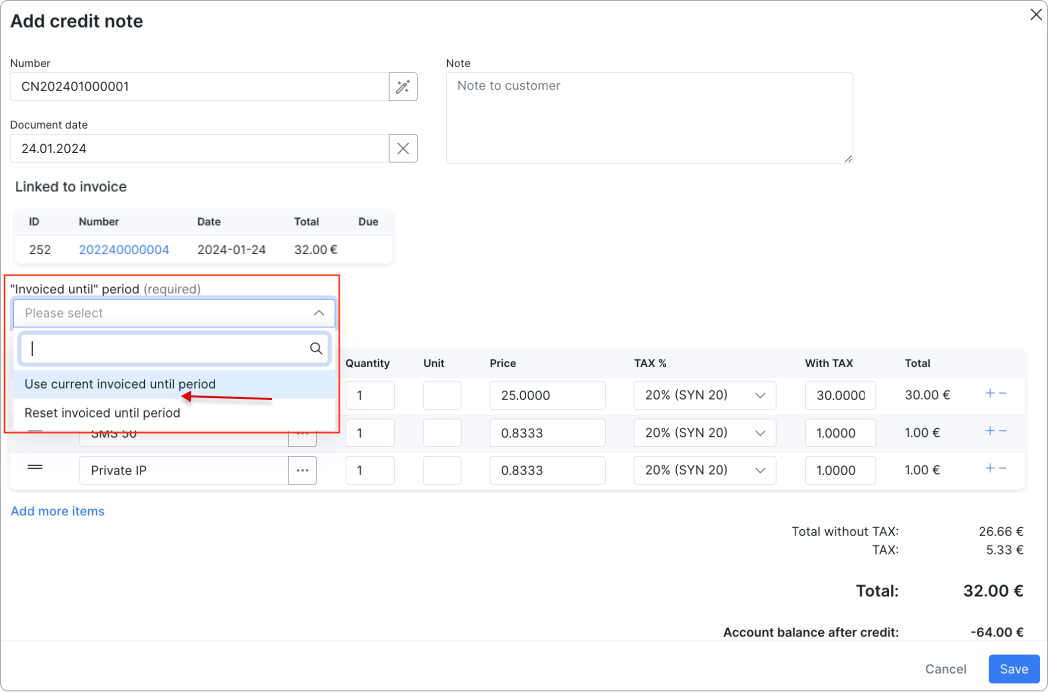
Use current invoiced until period - the Invoiced until date will remain unchanged for the service when selecting this option.
-
Reset invoiced until period - the ‘Invoice until’ date for the service will be reset to the previous one when selecting this option. This will allow the service to be billed for the same period as what was credited.
 The “Invoiced until’ date will only be reset for services that are fully covered by the credit amount.
In other cases, this field will be disabled.
After clicking on the information icon, the following message will be shown: The 'Invoiced Until' can only be reset for the invoice where the maximum date is specified for the invoiced until period.
 To create a credit note for the most recently issued invoice, ensure that the field is active. If it's inactive, it's likely due to a service period specified in one of the client's previous invoices that has a later date than the invoice you're trying to credit.
Example for the 'Reset invoiced until period' option
Here, we have an internet service invoiced until 31.01.2024:

Let's create a credit note for the unpaid recurring invoice:

We choose the reset option when adding the credit note:
The credit note has been automatically created and closed, and the recurring invoice for the service now has the Paid status:

When we return to the service in the list under the 'Services' tab, we can see that the invoiced until date has been reset to the previous one, which is 31.12.2023:

 IMPORTANT:
-
Items with a negative price value can be added to the credit note, but the total price of the credit note cannot be a negative amount; it can only be
0or greater than0. This rule also applies to the creation of an invoice. An invoice with negative item(s) can also be linked to a credit note. -
In case the customer with existing Credit notes is converted back to the lead, the credit note item (-s) can be found in
History → Billing → Credit Notesof the lead account. -
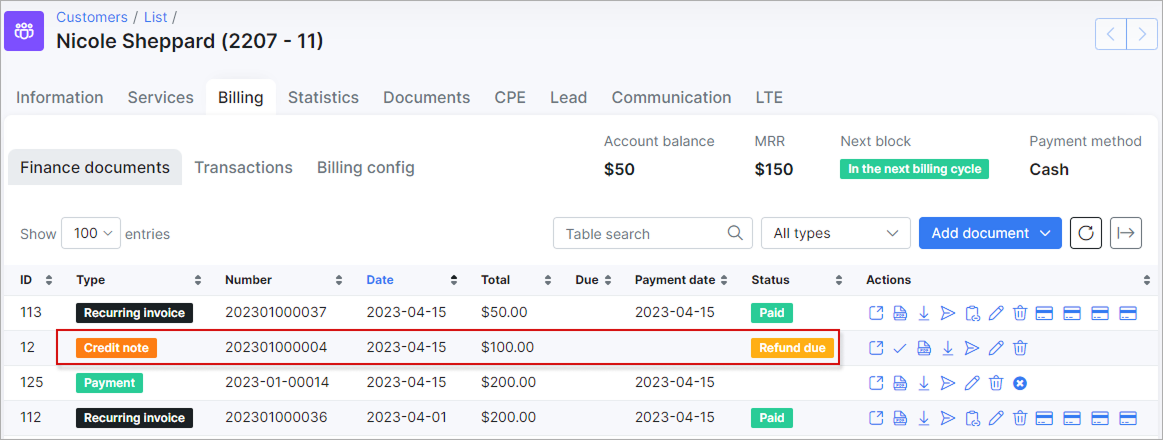
If the customer's service was charged (the recurring invoice was created and it was paid) and the administrator changed the service/plan to a new one in customer profile - a money for the unused period will be refunded to the customer's balance as Credit note (it's assumed that the
Refund unused moneyoption is enabled inConfig → Finance → Change plan).
For example, the initial Internet service price = 200$ and the new Internet service price = 100$, in such case we will have the next result:
Click to see the detailed explanation
April 2023 = 30 days.

200$/30 days = 6.6666$.

The service was changed on April 16 (New plan start date = April 16).

As a result, the initial Internet service start date - 2023-04-01 and End date - 2023-04-15 and the new Internet service start date - 2023-04-16.

30 days - 15 days = 15 days of initial paid Internet service left.

15 days * 6.66$ = 99.99$ ~ 100$ (for the Credit note, this amount will be added to the customer's account balance).

But we have other 15 days for the new Internet service.

The new Internet service price = 100$ / 30 days = 3.3333$.

3.33$ * 15 days = 49.99$ ~ 50$ (price of the new Internet service).

The new recurring invoice will be paid from the account balance and 50$ will remain on the balance.
- Pay attention, if the service is planed to be changed (the new service is in
Pendingstatus), the Credit note will be created immediately. In case the customer changed their mind, do not forget to correct the customer's finance documents manually, e.g. to remove newly created Credit note, Recurring invoice.
¶ Credit notes in Finance
All issued Credit notes can be found in Finance → Credit Notes. In case the module is not visible on the left sidebar of Splynx, you can enable it in Config → Integration → Main modules.
With the use of a filter, it is possible to display credit notes by its Number, Period of time, Partner or Status (Any, Refunded, Refund due, Deleted, Closed). Below the table of Credit notes you'll find the Totals table that displays a total of all credit notes by their status and the amount of credit notes in each status.
To export the list of Credit notes, click on Export button, in a new window specify the Period of time, Export type (CSV, PDF files in archive, One PDF file, Template, External handler) etc.

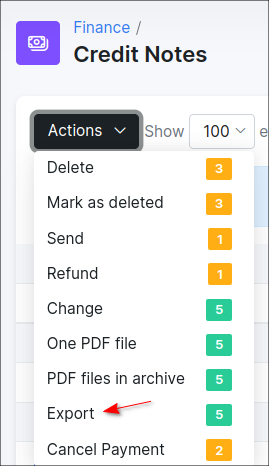
Alternatively, once you have selected the required Credit note (-s) in the table, click the Actions button and select the required option in the drop-down menu.
¶ Deletion of credit notes synced to accounting
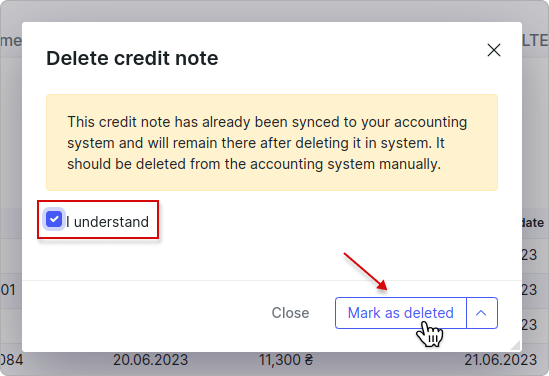
If you have credit notes synced with accounting systems like Xero, SageOne, or QuickBooks and wish to delete them, you will see the following window:
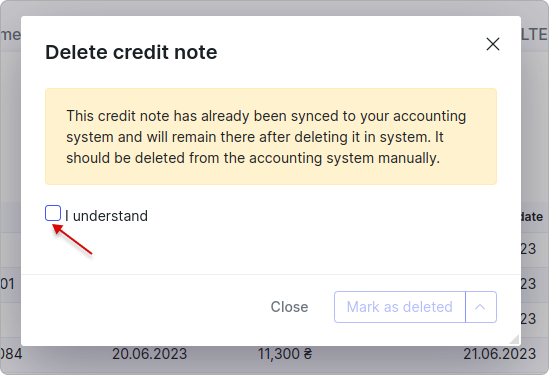
Your confirmation is needed to ensure that you do indeed wish to delete the credit note within Splynx, even if you are aware that it will still be retained within the accounting system, and you will have to delete it manually from there:
¶ Template of Credit note
Credit notes in PDF format are fully customizable with templates. You can create a new template using the different variables or edit the build-in templates in Config → Templates (Type: Credit Note PDF). Then, open Config → System → Company Information, find the field Credit Note PDF Template and in drop down list choose the template that will be used by default in Splynx.
¶ Notifications
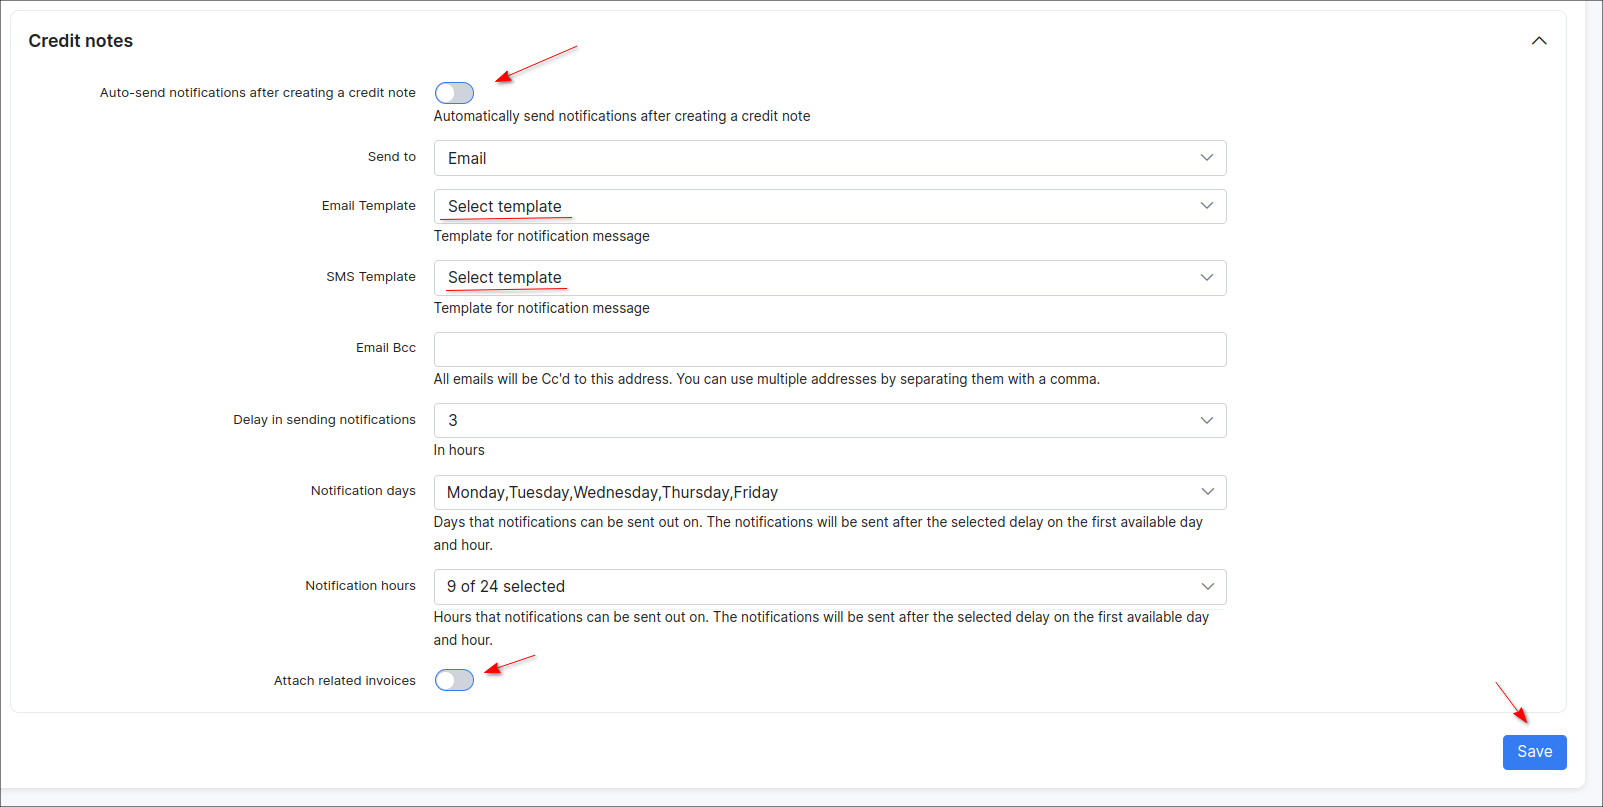
To configure the notifications after credit note is created, navigate to Config → Finance → Notifications → Global (tab) → Credit notes and set the required settings.
¶ Logs
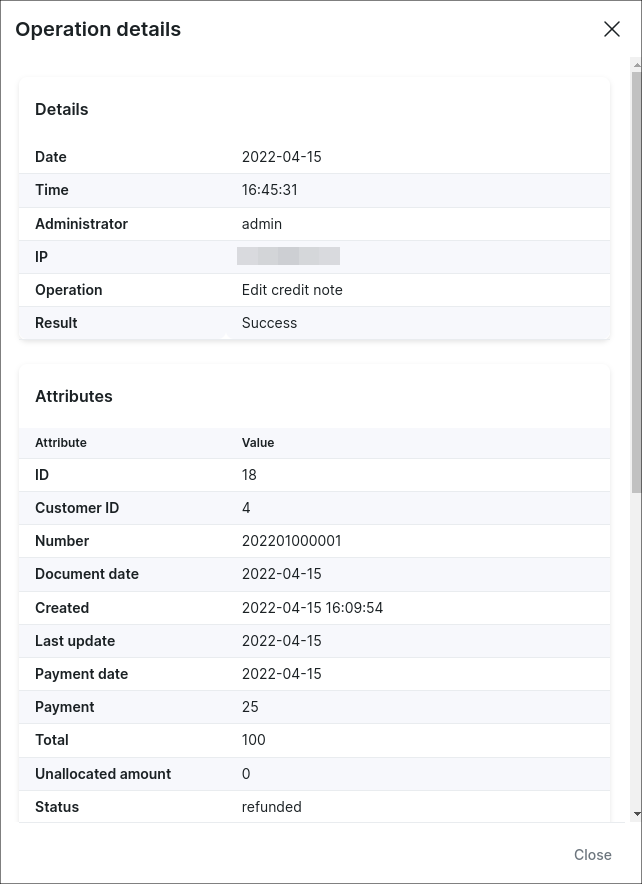
The log with all Credit notes operations can be found in Administration → Logs → Operations. Click on  icon to view more details.


