¶ Stripe
- Overview
- Installation
- Configuration
- Add credentials
- Pay for invoices
- Top up balance
- Charge invoices and balances
- Payment refund
- Logs
- Direct payments
¶ Overview
Stripe is a Splynx add-on used to synchronize customers, invoices and payments with the Stripe payment gateway - https://stripe.com
Stripe works only via HTTPS connection; domain + SSL need to be set and configured.
¶ Installation
The add-on can be installed in two methods, via the CLI or the Web UI of your Splynx server.
To install the Stripe add-on via CLI, the following commands can be used:
apt-get update
apt-get install splynx-stripe
To install it via the Web UI:
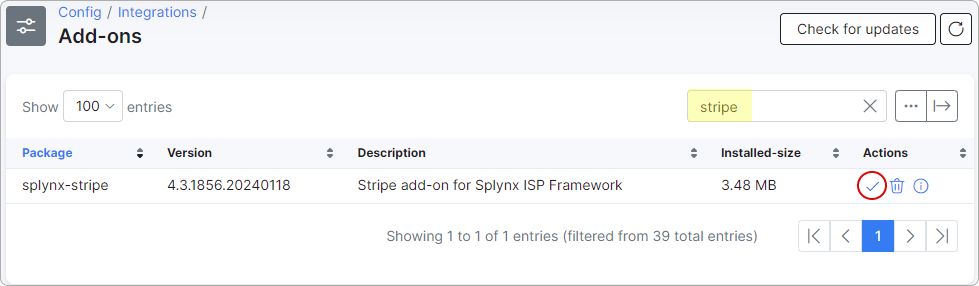
Navigate to Config → Integrations → Add-ons:

Locate or search for the splynx-stripe add-on and click on the install icon in the Actions column, you will be presented with a window to confirm or cancel the installation. Click on Confirm to begin the installation process:
¶ Configuration
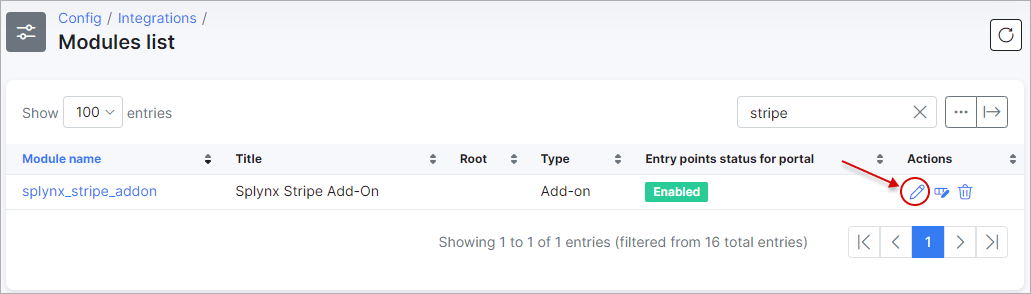
After the installation process has completed, you have to configure the parameters in Config → Modules List:

Locate or search for the "splynx_stripe_add-on" and click on the Edit icon in the Actions column:
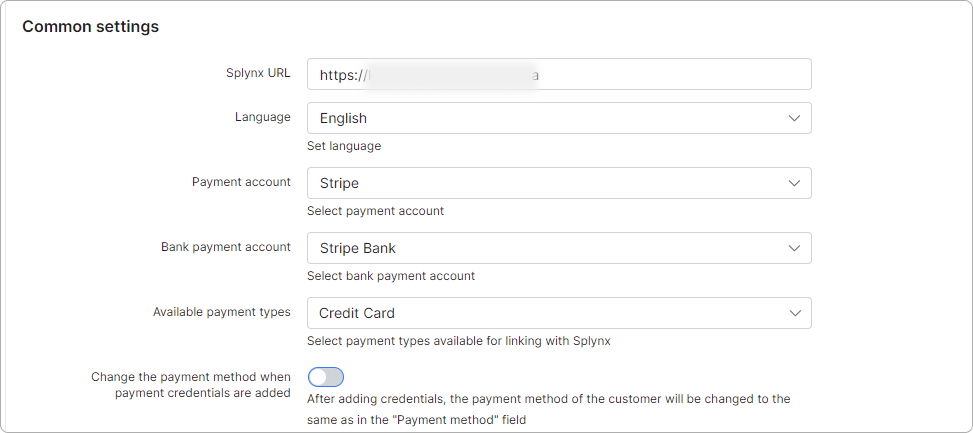
You have to Set your Splynx URL, Public Key and Secret Key:
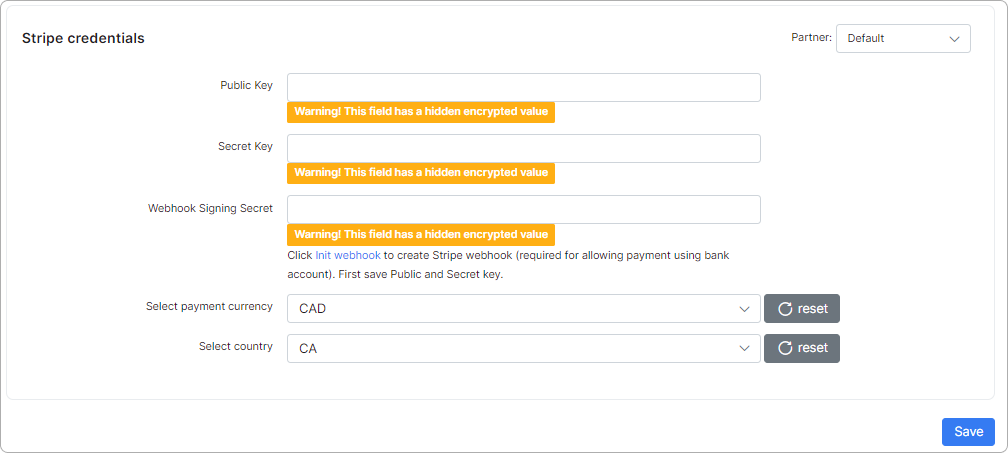
 You can notify customers of failed automatic payments by enabling the
 Failed Payment Notifications toggle.
See also
Failed payments notifications

How to create a webhook
Follow the steps below to create a webhook:
- After adding the Public Key and Secret Key, click on
Init webhook. This action will automatically generate a webhook in Stripe.

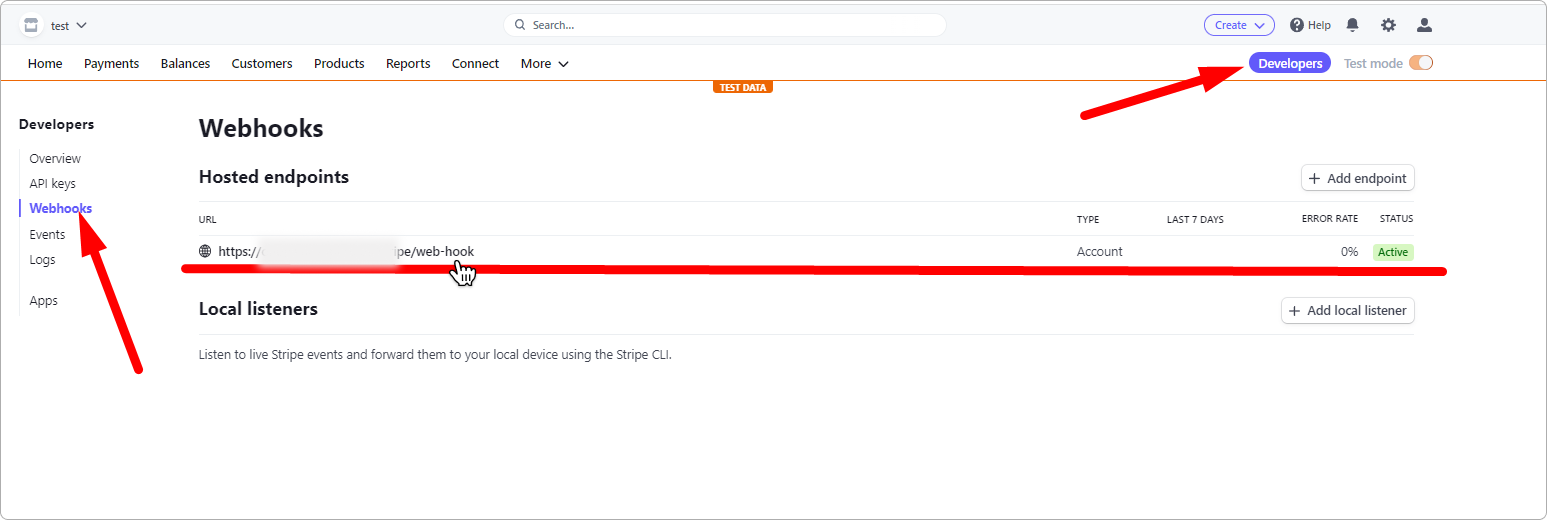
- Go to
Stripe account → Developers →Webhooks.
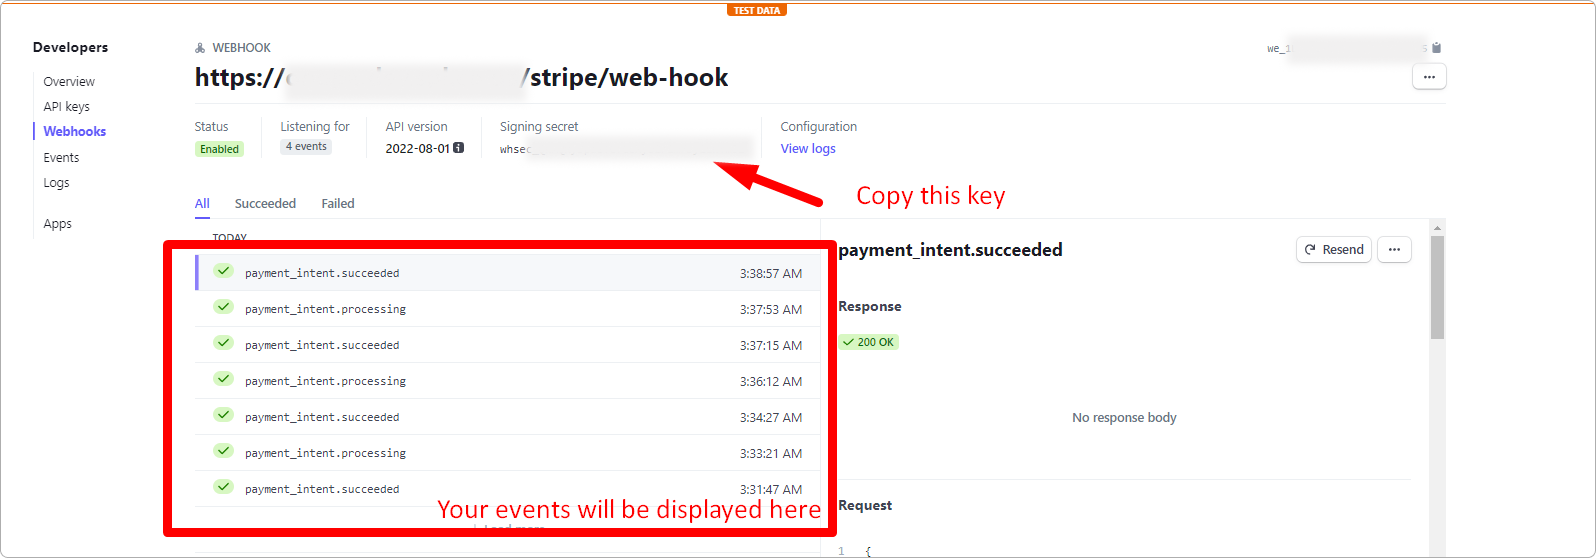
- Copy the Signing secret. Paste it in the Webhook Signing Secret Field in the add-on config in Splynx. In this section, you will find a list of events exchanged between your server and Stripe. Here, you can monitor the statuses and responses associated with each event.
The Stripe add-on now supports:
BECS Direct Debit for Australia
Pre-authorized Debit payments for Canada
ACH Direct Debit for the USA
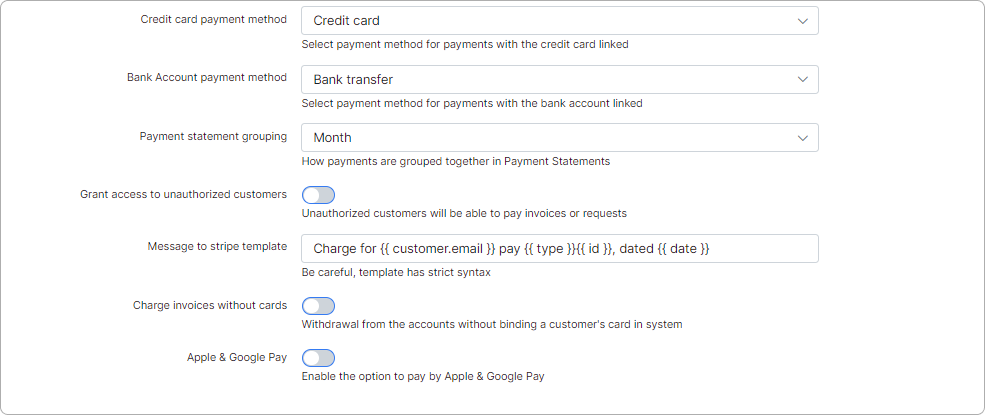
To enable support for bank accounts, select the appropriate payment method for your country under 'Available payment types.' Please note that you should only select one bank account option that corresponds to your country:

¶ Add credentials
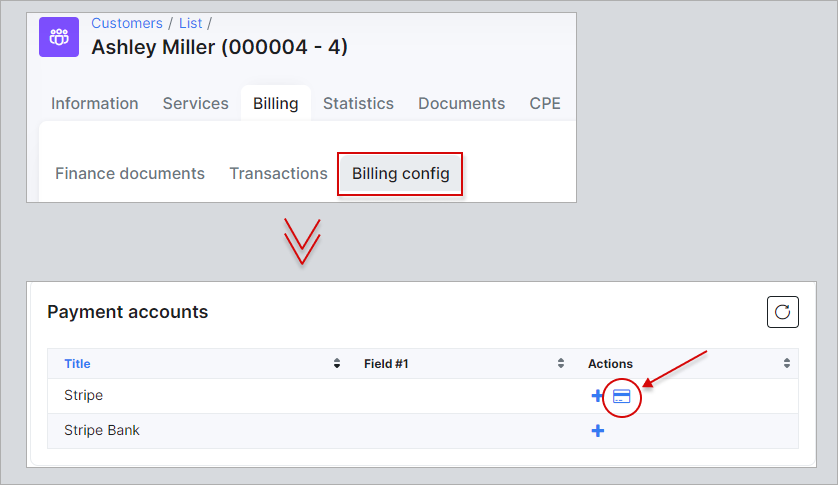
Admin can add customers' payment credentials on the Admin portal in their profiles:
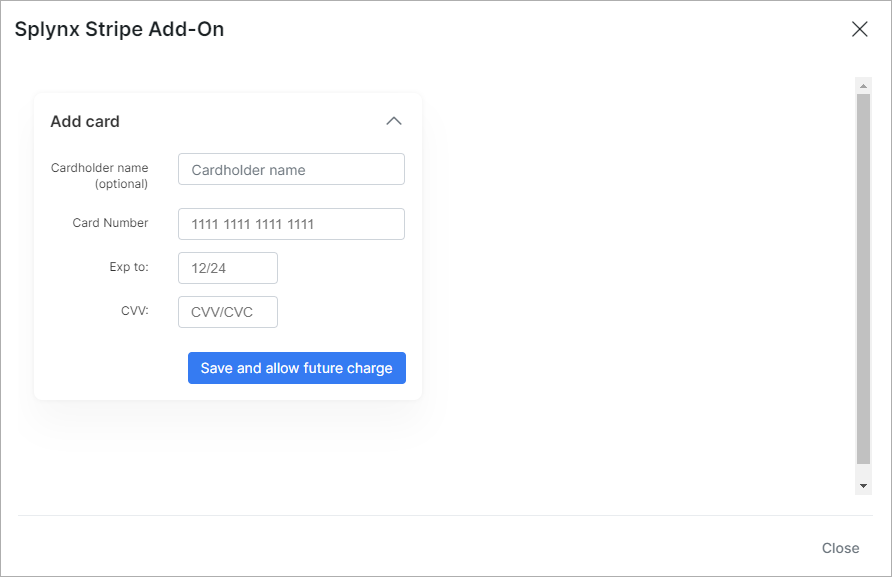
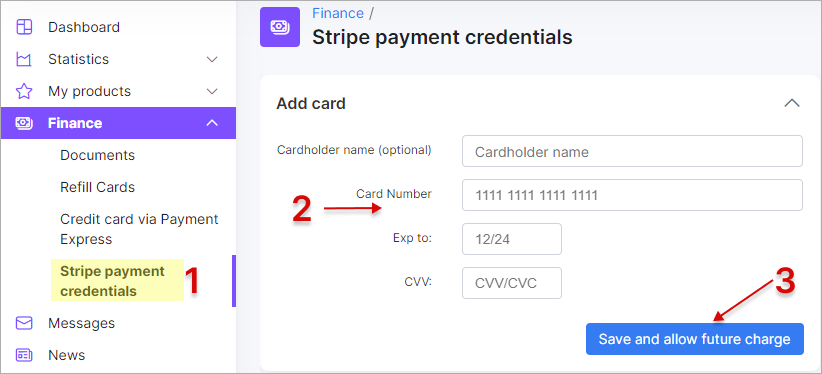
Customers have to add a credit card in the Customer portal:
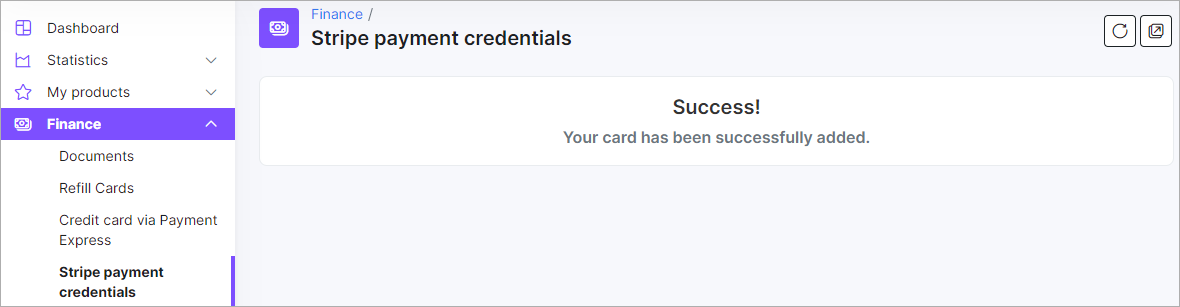
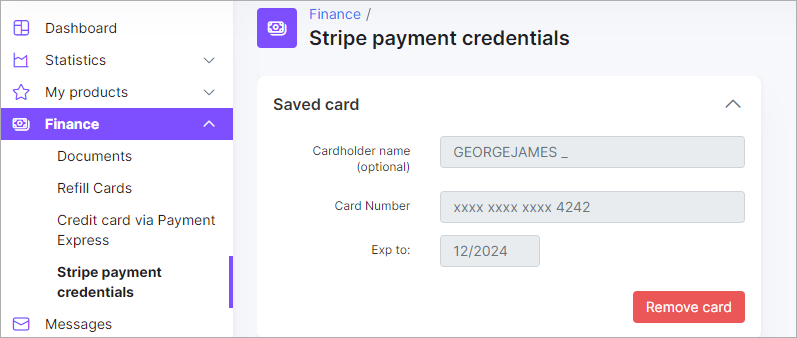
All customer personal information related to their bank account is stored encrypted in the database.
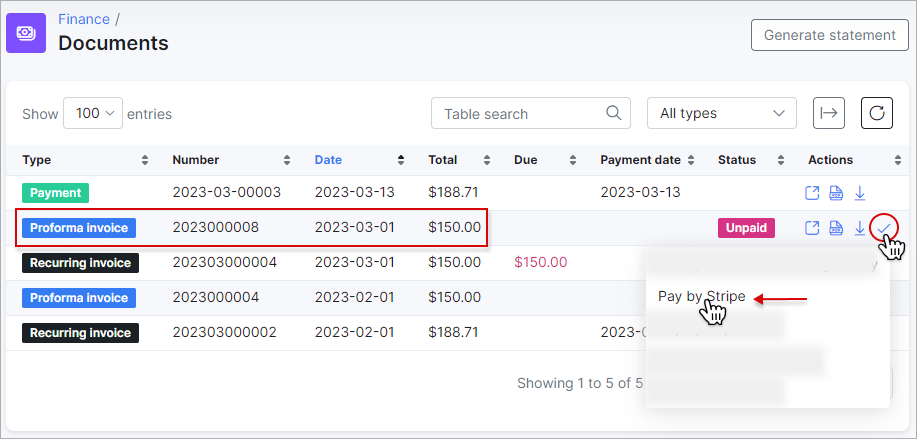
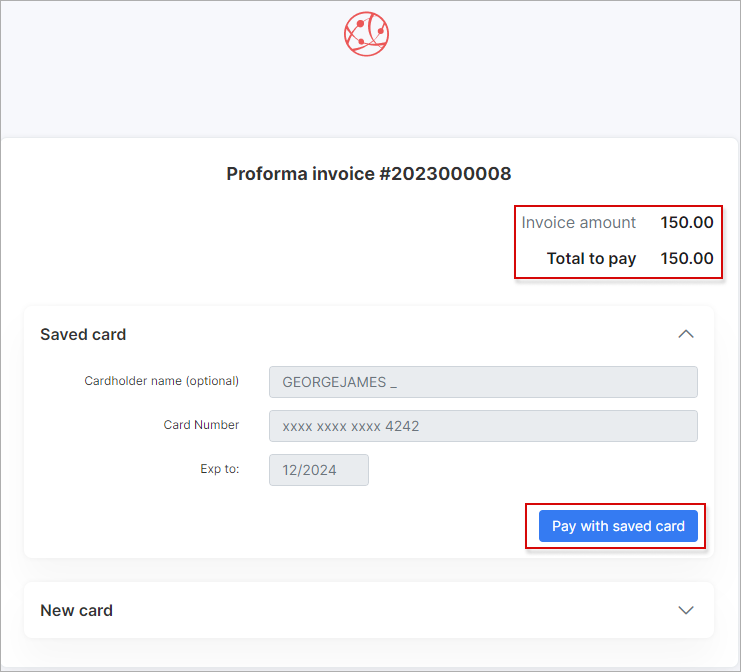
¶ Pay for invoices
Once the configuration is completed, customers can pay for their invoices using the stripe.com system in Finance / Invoices:

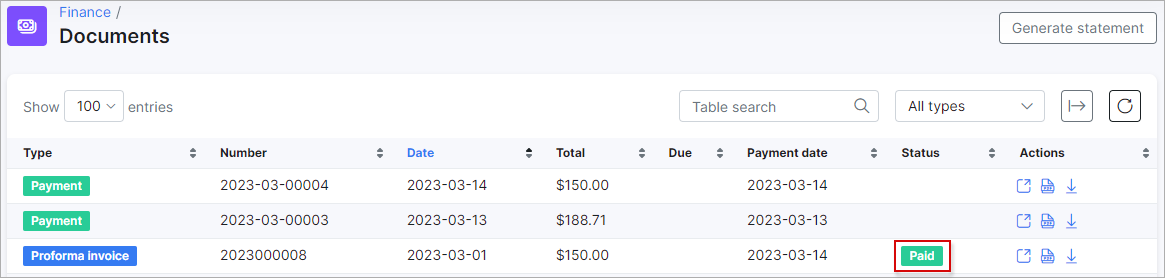
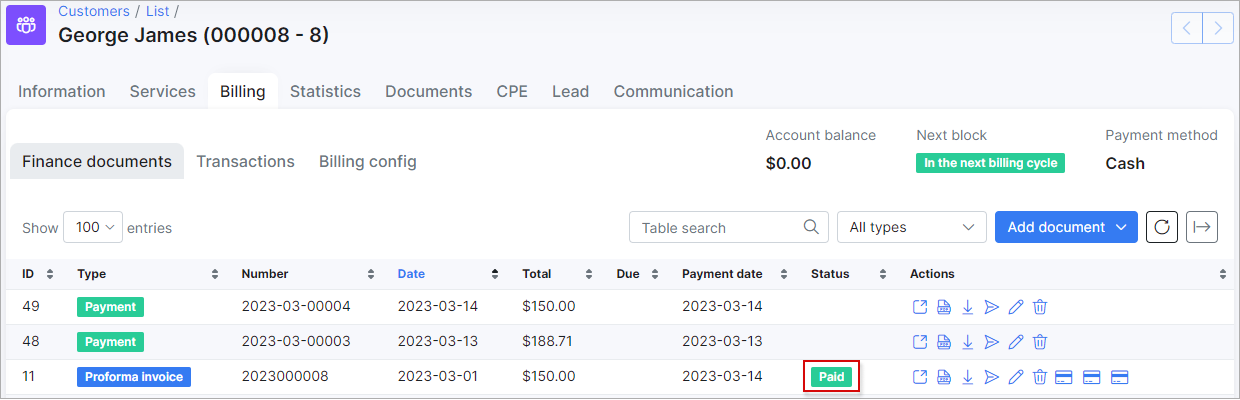
If everything went well, you will see the status of the invoice marked as "Paid" (in the customer and admin portal):
¶ Top up balance
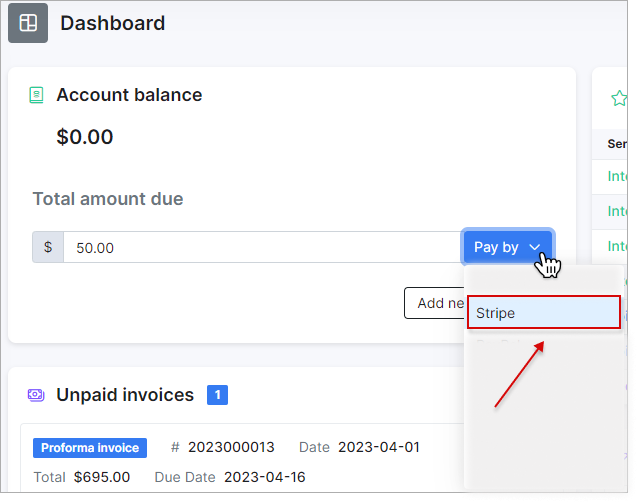
Customers can top up their balances from the Dashboard in the Customer Portal:
¶ Charge invoices and balances
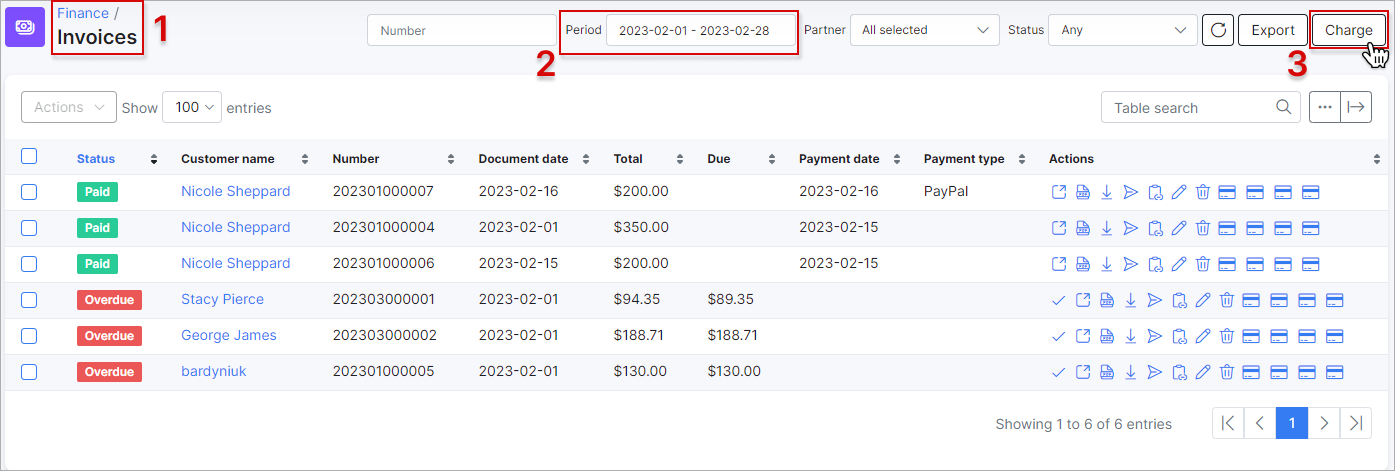
You can charge all customers' invoices and balances using one button. Navigate to Finance → Invoices, set the period and click on Charge as depicted below:
¶ Charge invoices
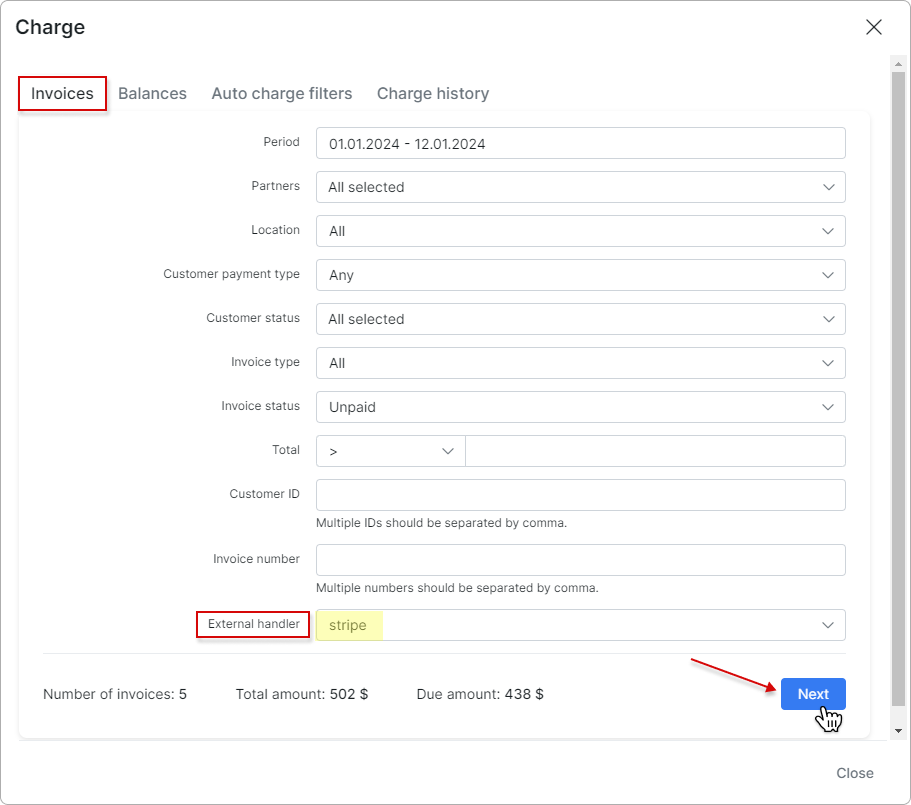
To charge invoices, select stripe as the External handler in the Invoices tab, and then click the Next button:
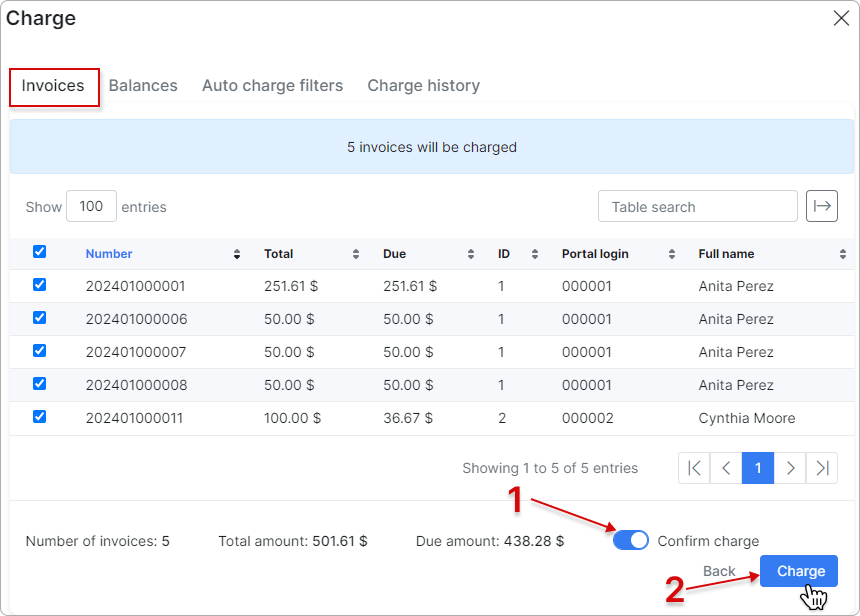
In the new window, toggle the Confirm charge switch to enable it, and then click the Charge button to complete the charging process:
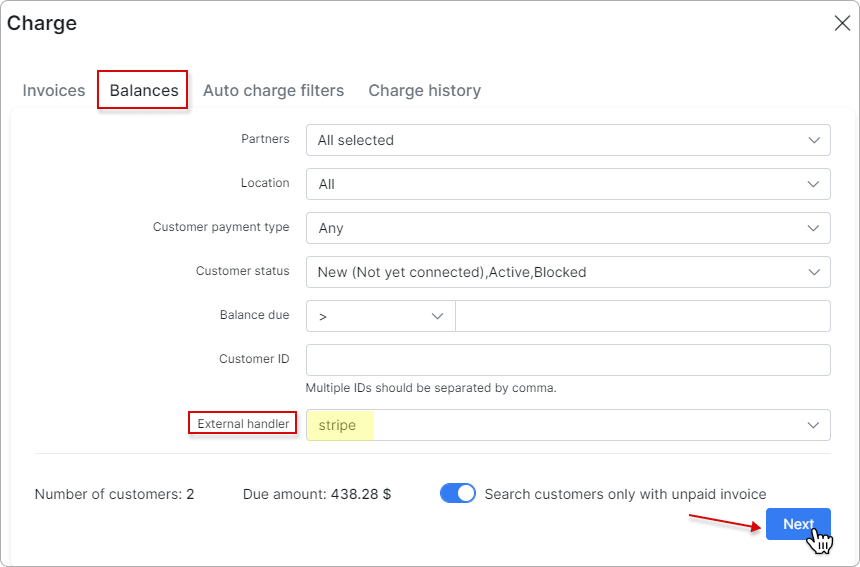
¶ Charge balances
To charge balances, select stripe as the External handler in the Balances tab, and then click the Next button:
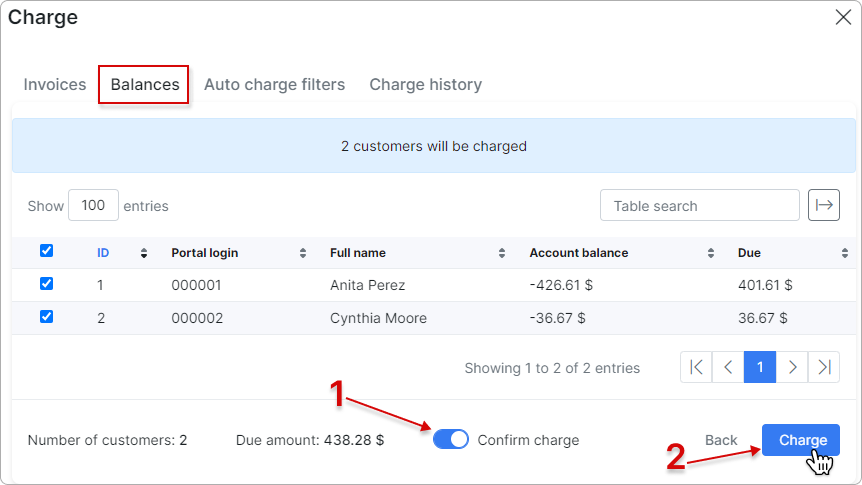
In the new window, toggle the Confirm charge switch to enable it, and then click the Charge button to complete the charging process:
To learn more details about how to charge invoices and balances, please read Invoices
¶ Payment refund
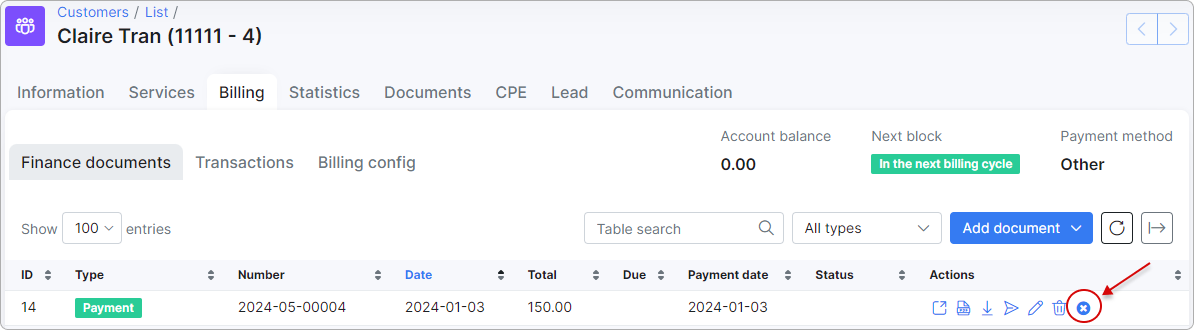
Payments made with Stripe can be refunded to the customer with the Refund button:
Enter the refund amount. You can enter the full amount or make a partial refund. Refund amount can only be equal to or less than the invoice amount.

Then, a credit note will be generated for the refunded amount, and the refund will be processed immediately.
If the payment has already been refunded, you will receive a warning message:

¶ Logs
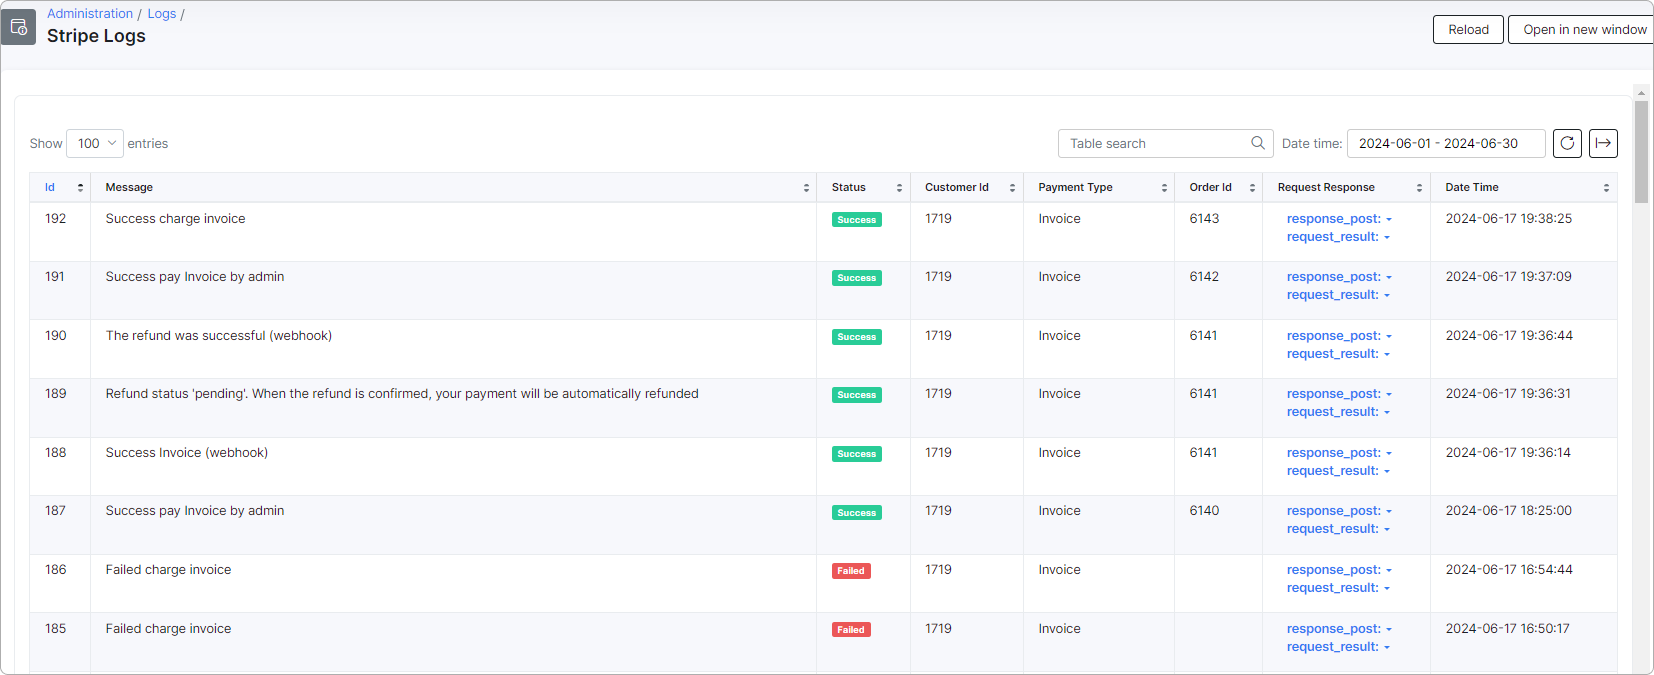
The Stripe logs can be found in Administration → Logs:

Here, you can view different records based on the payment type. The records can also be filtered by date:
¶ Direct payments
You have the option to include a direct payment link in your invoice or proforma invoice template, as well as in your email notification template for invoices and proforma invoices.
By doing so, your customers will be able to pay their invoices without requiring any authorization:
http://YOUR_DOMAIN/stripe/direct-pay-invoice?item_id={{ invoice.number }}

http://YOUR_DOMAIN/stripe/direct-pay-invoice-by-id?item_id={{ invoice.id }}

http://YOUR_DOMAIN/stripe/direct-pay-request?item_id={{ request.number }}

http://YOUR_DOMAIN/stripe/direct-pay-request-by-id?item_id={{ request.id }}