¶ Braintree payments
¶ Overview
Braintree is a Splynx add-on that enables the recharging of customer credit cards through the Braintree payment gateway - https://www.braintreepayments.com.
The add-on can work with different credit cards if the cards are saved on customer profiles. The addon allows charging all customers using Direct debit orders.
¶ Installation
The add-on can be installed in two methods: via the CLI or Web UI of your Splynx server.
To install the splynx-braintree-rb add-onv via CLI, the following commands can be used:
apt-get update
apt-get install splynx-braintree-rb
To install it via the Web UI:
Navigate to Config → Integrations → Add-ons:

Locate or search for the "splynx-braintree-rb" add-on and click on the install icon in the Actions column. A window will appear for you to confirm the installation:

¶ Configuration
After the installation process has completed, you have to configure the add-on.
Navigate to Config → Integrations → Modules list:

Locate or search for the "splynx-braintree-rb" add-on and click the Edit icon in the Actions column:


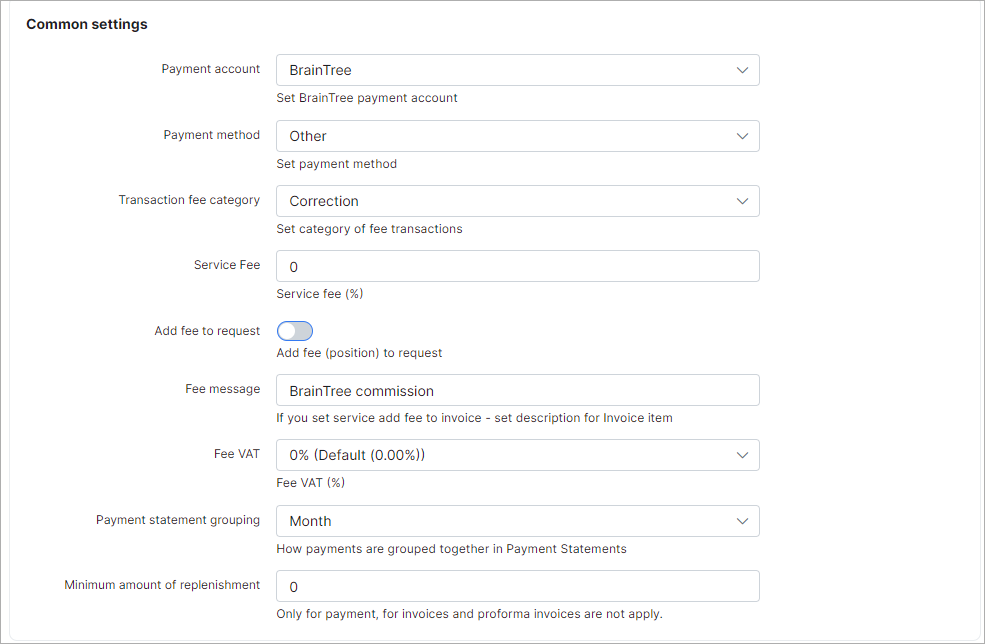
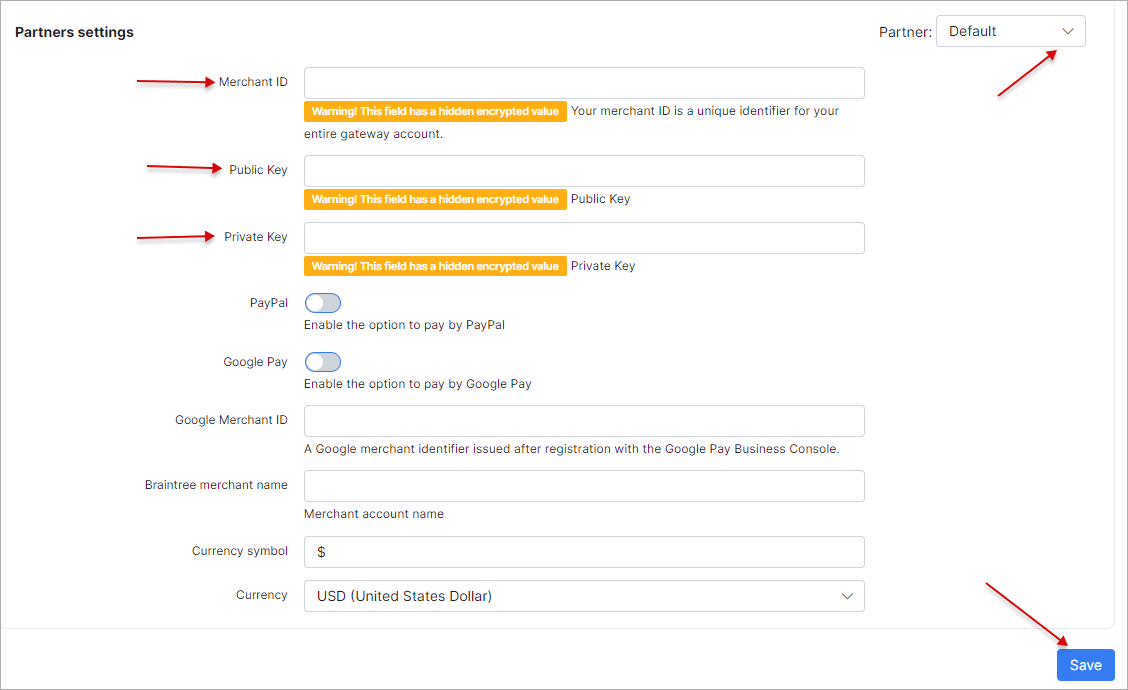
Partners settings:
-
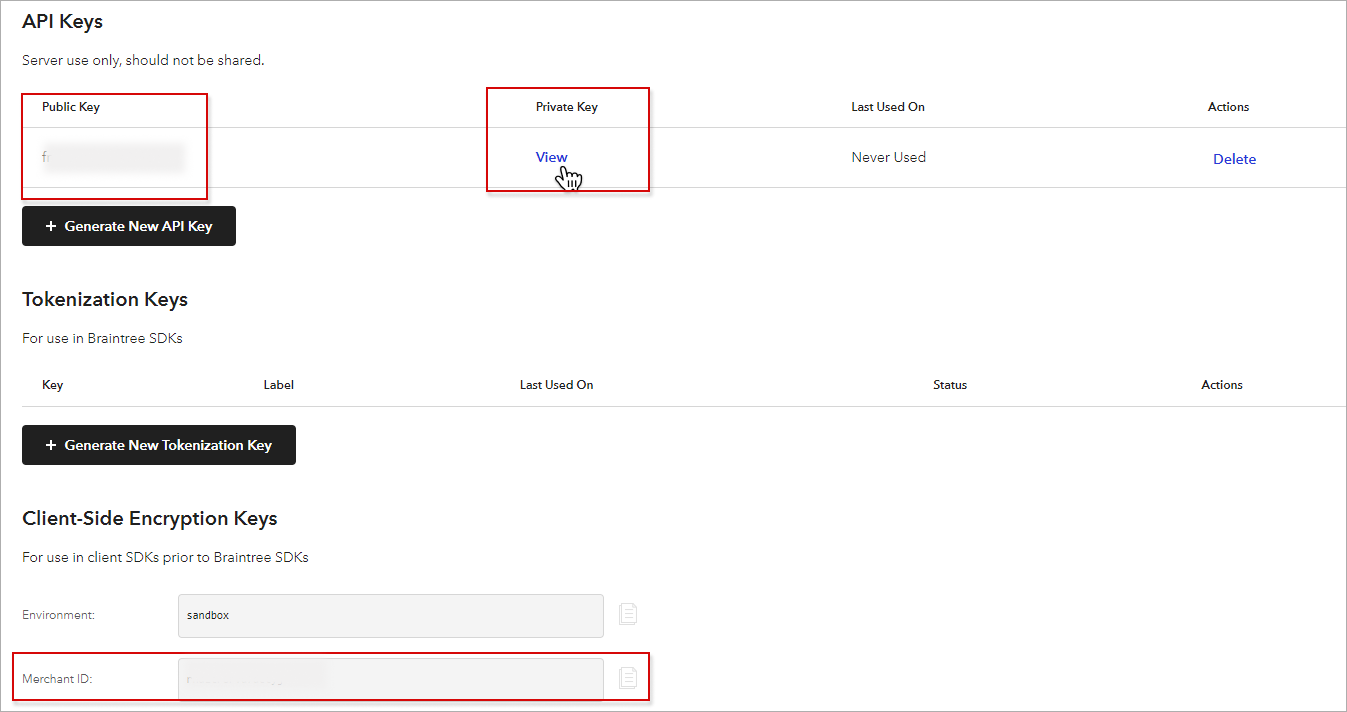
Merchant ID - a unique identifier for your gateway account, which is different than your merchant account ID.
-
Public key - a user-specific public identifier;
-
Private key - a user-specific secure identifier that should not be shared – even with us!
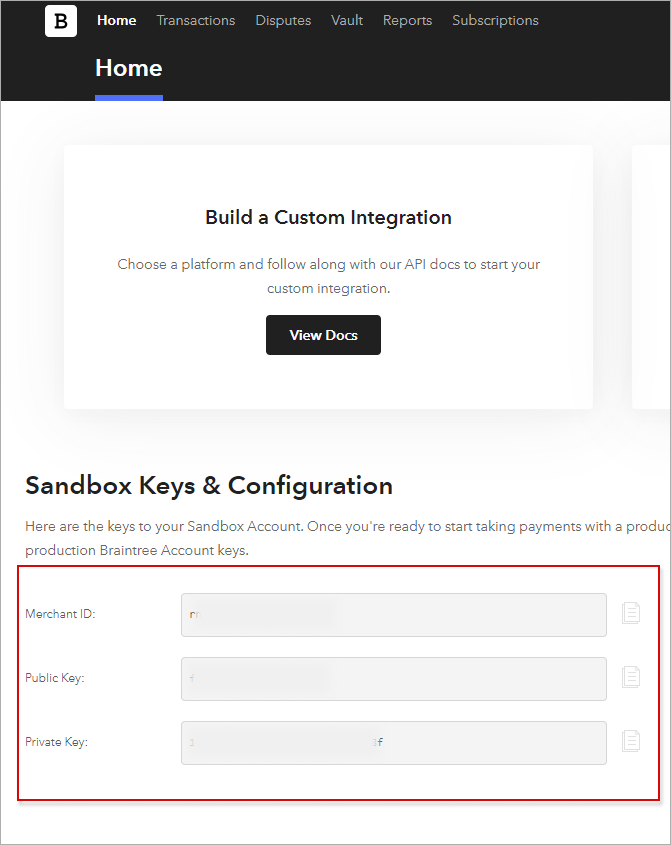
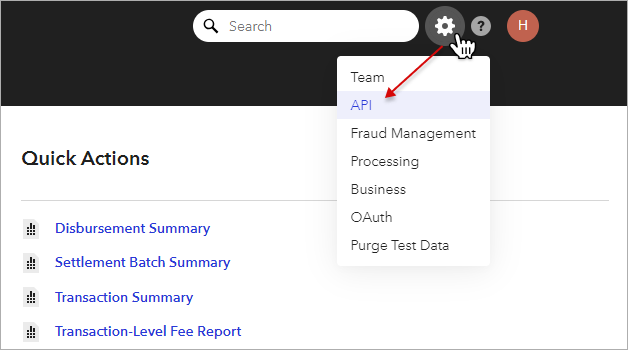
To obtain these credentials, log in to your Braintree account at https://www.braintreegateway.com:
You can find the necessary credentials either at the Home page or in API section of your Braintree account:
Customers can then pay their invoices and top up balances using the Braintree system.
They can add their card for Braintree payments on the Customer Portal under the Finance section:
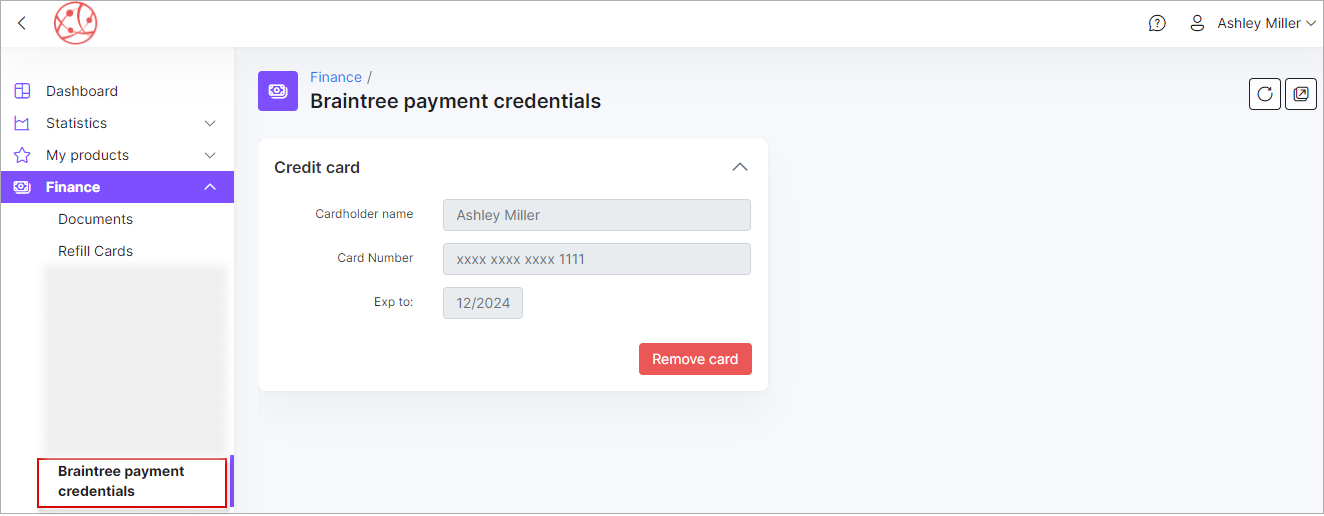
 All customer personal information related to their bank account is stored encrypted in the database.
¶ Pay for invoices
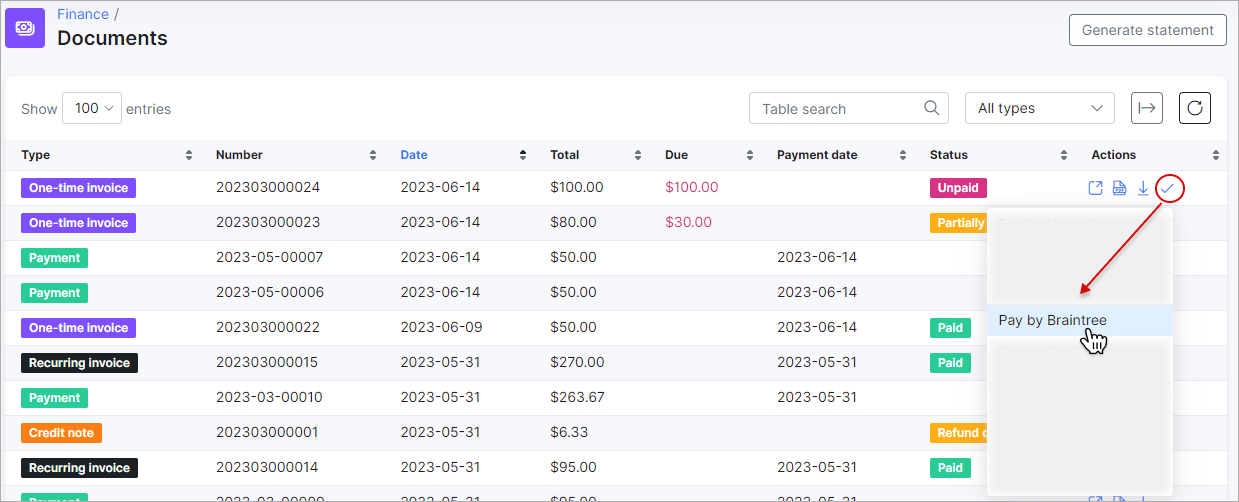
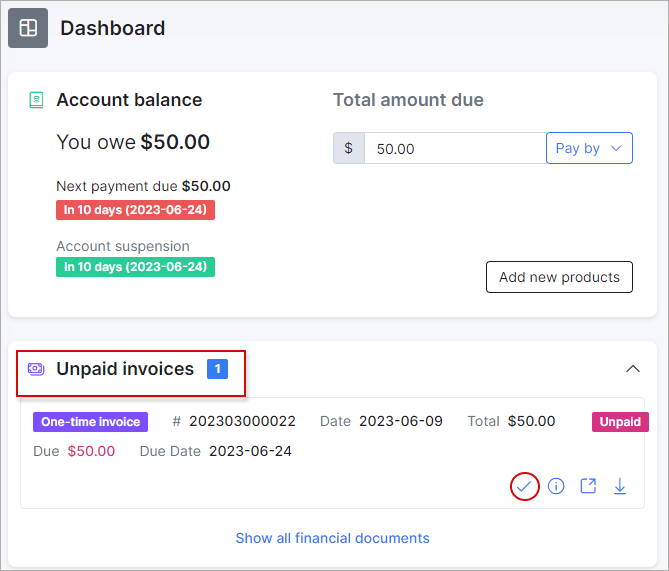
Customers can pay for their invoices either under Finance → Documents or from the Dahsboard on the Customer Portal:

Lastly, you can charge all customers with a single click.
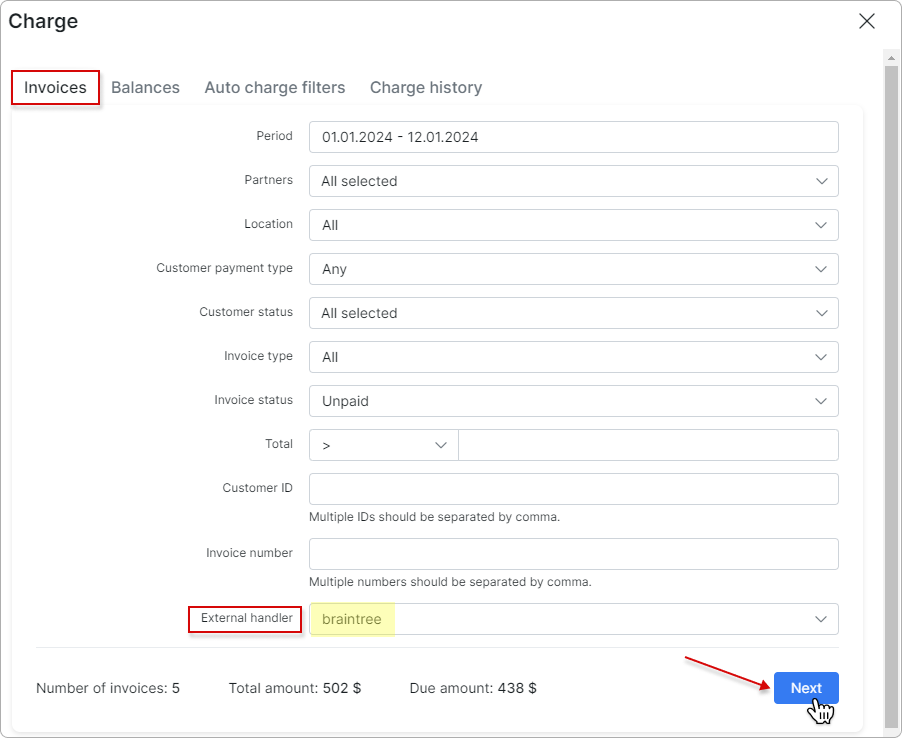
To do this, navigate to Finance → Invoices, set the desired period, and click the Charge button, as shown below:

Select braintree as the External handler in the Invoices tab, and then click the Next button:
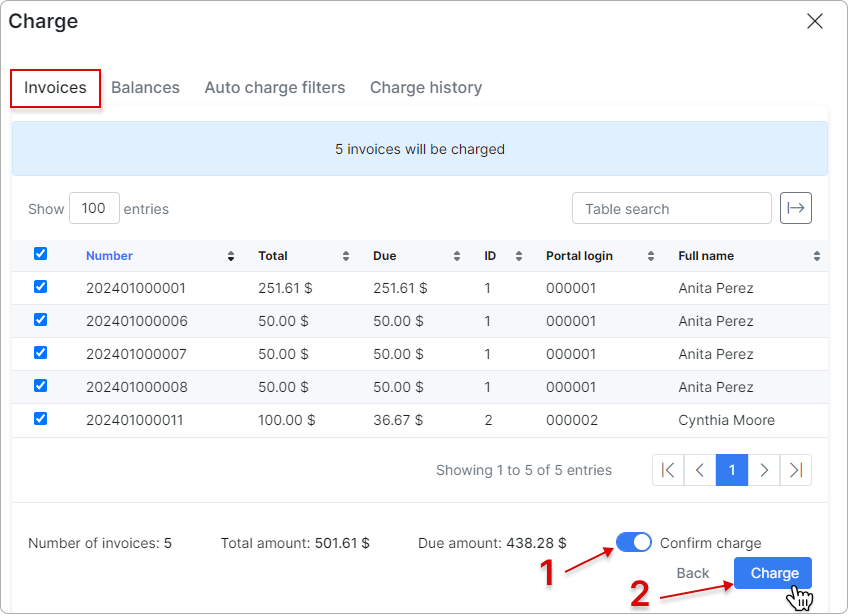
In the new window, toggle the Confirm charge switch to enable it, and then click the Charge button to complete the charging process:
To learn more details about how to charge invoices, please read Invoices
¶ Top up balance
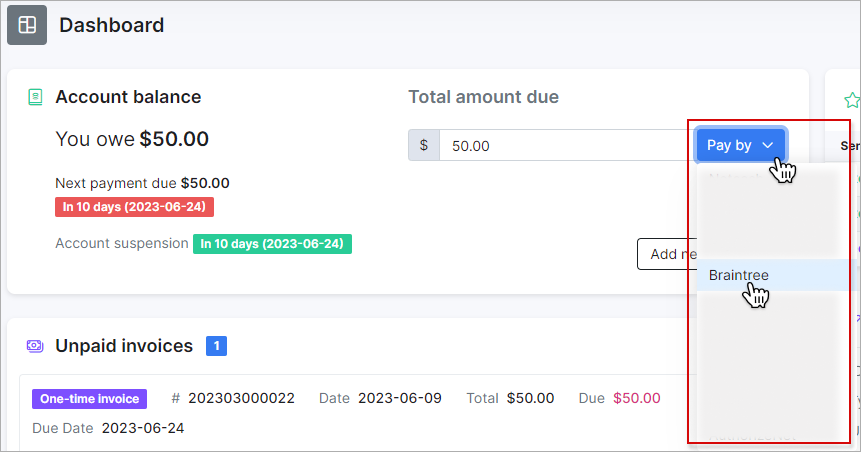
Customers can top up their balances from the Dashboard on the Customer Portal by clicking the Pay by button:
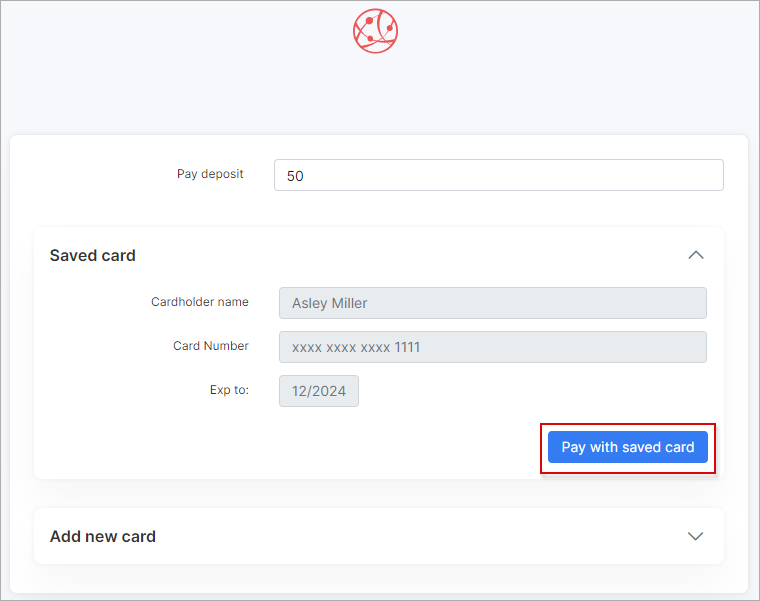
¶ Direct payments
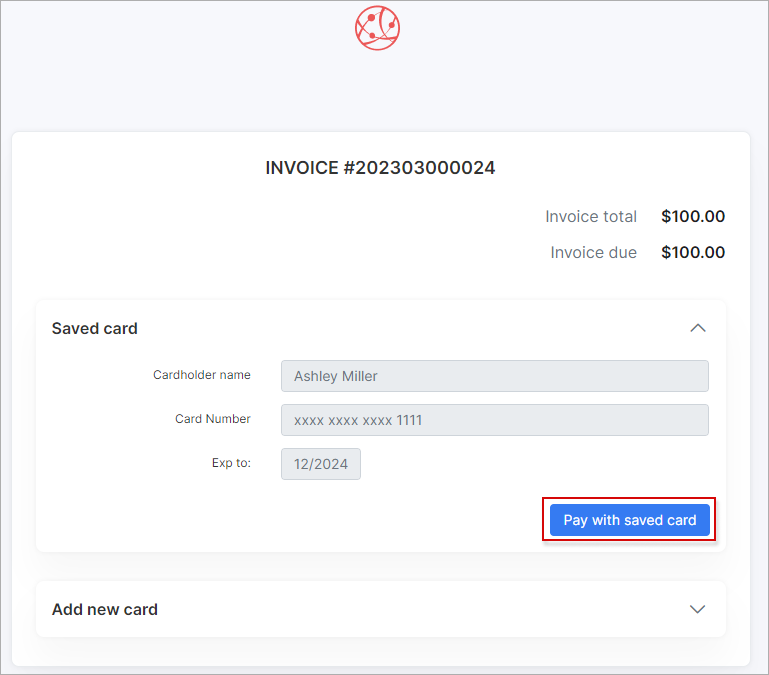
You can add a direct payment link to your invoice (proforma invoice) template or include it in your invoice/proforma invoice email notification template, allowing your customers to pay an invoice without authorization.
Invoices:
http://yoursplynx.domain/braintree-rb/direct/direct-pay-invoice-by-id?item_id={{ invoice_id }}
http://yoursplynx.domain/braintree-rb/direct/direct-pay-invoice?item_id={{ invoice_number }}
Proforma:
http://yoursplynx.domain/braintree-rb/direct/direct-pay-request-by-id?item_id={{ invoice_id }}
http://yoursplynx.domain/braintree-rb/direct/direct-pay-request?item_id={{ invoice_number }}
