¶ MailXstream
¶ Overview
The add-on syncs PDF copies of invoices to the MailXstream platform, where they are printed and sent to the specified customer’s physical address.
The MailXstream add-on and its services are available for clients located in the United States of America.
¶ Installation
The add-on can be installed in two methods: via the CLI or the Web UI of your Splynx server.
To install the add-on via CLI, the following commands can be used:
apt-get update
apt-get install splynx-mailxstream
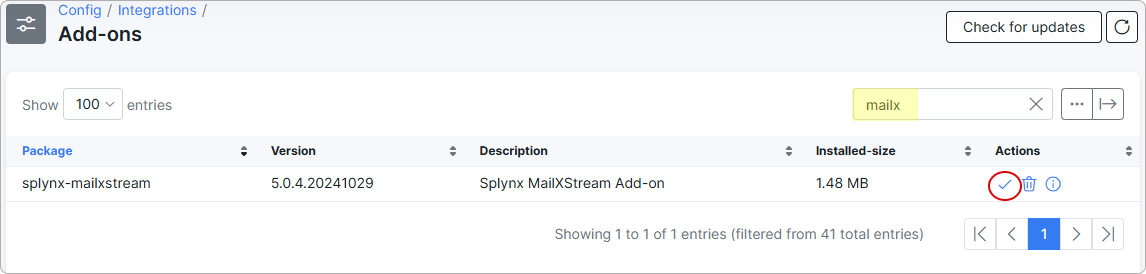
To install the add-on from the Web UI, navigate to Config → Integrations → Add-ons:

Locate or search for the splynx-mailxstream add-on and click the Install icon in the Actions column:
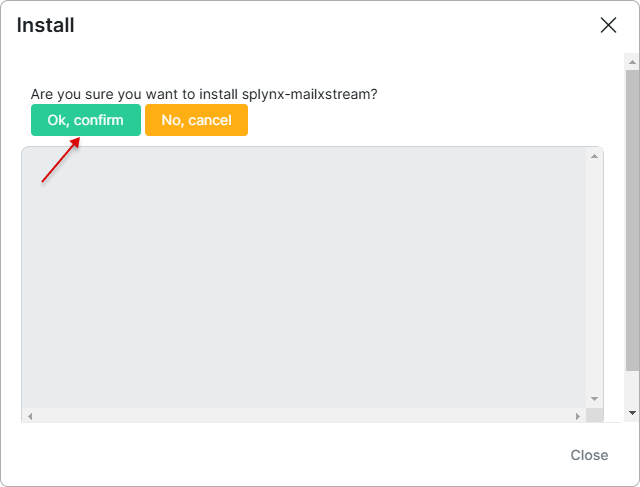
Click the OK, confirm button to begin the installation process:
¶ Configuration
After the installation process has completed, you have to configure the add-on. But first, you'll need to create an account on the MailXstream platform.
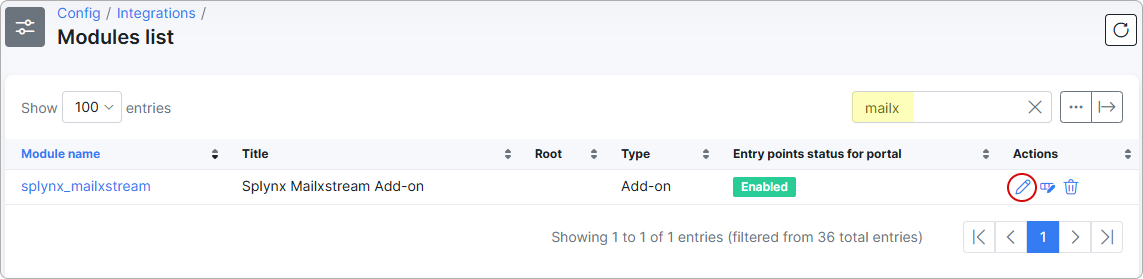
Navigate to Config → Integrations → Modules list:

Locate or search for the splynx-mailxstream module, then click the Edit icon:
Next, verify your credentials (you can change them if necessary):
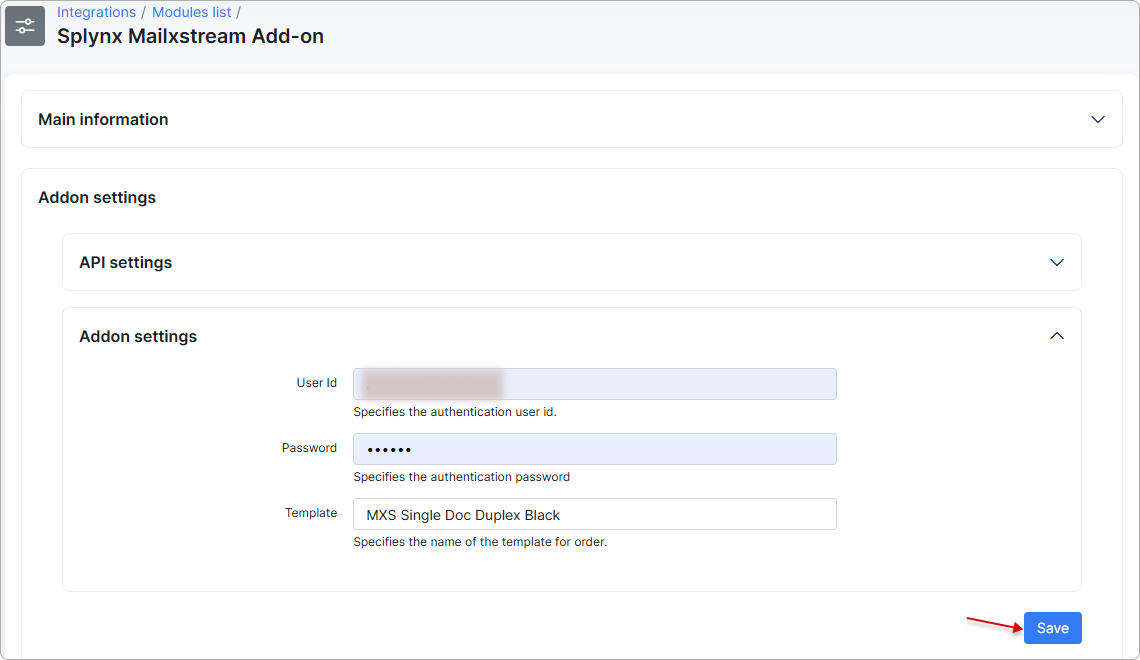
- User ID - your User ID for authentication;
- Password - your Password for authentication;
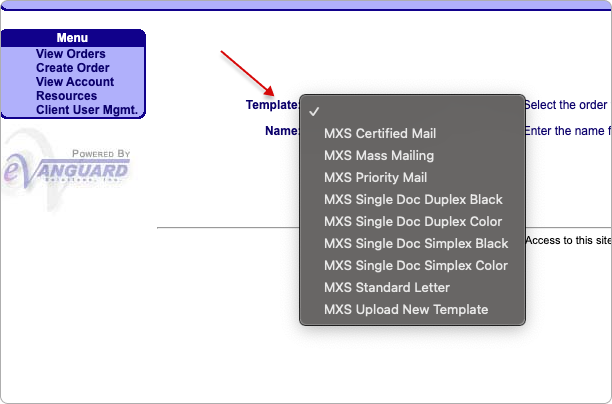
- Template - the default name of the template for ordering.
 On the MailXstream platform, you can choose an alternative template from the list below:
¶ How it works
After completing the configuration, enable the MailXstream toggle for customers whose invoices you want sent to MailXstream for printing and mailing to their address:
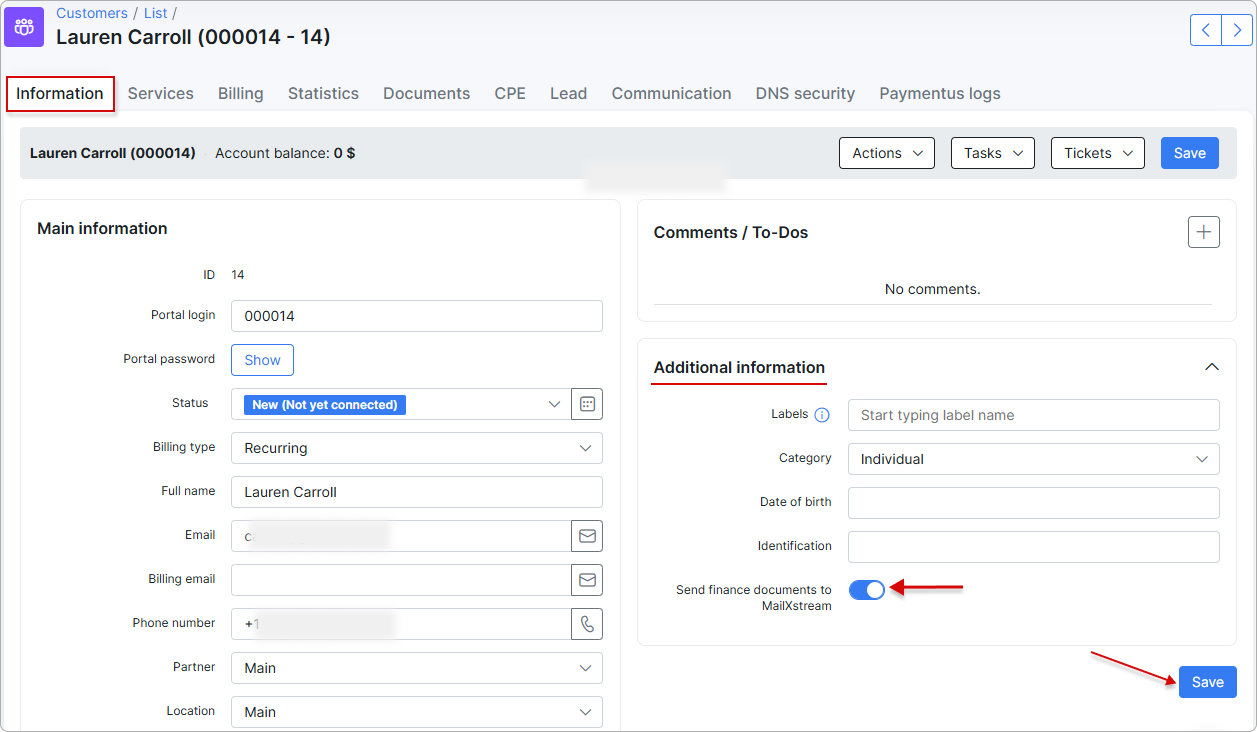
If a billing address is available, it will be used first. Otherwise, the primary customer address will be applied.
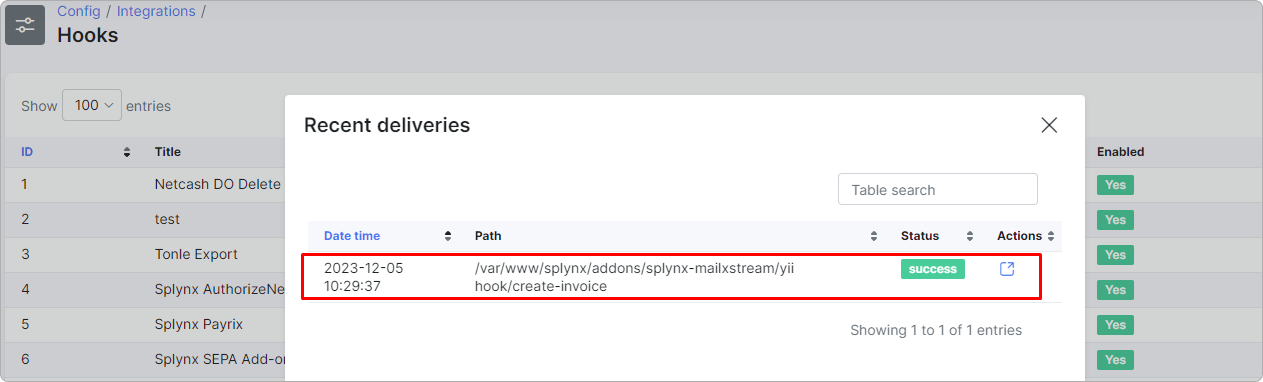
Verify that the status is marked as successful in Config → Integrations → Hooks:
Your order will appear on the MailXstream platform:

Click on the order to view its details and open the invoice PDF:
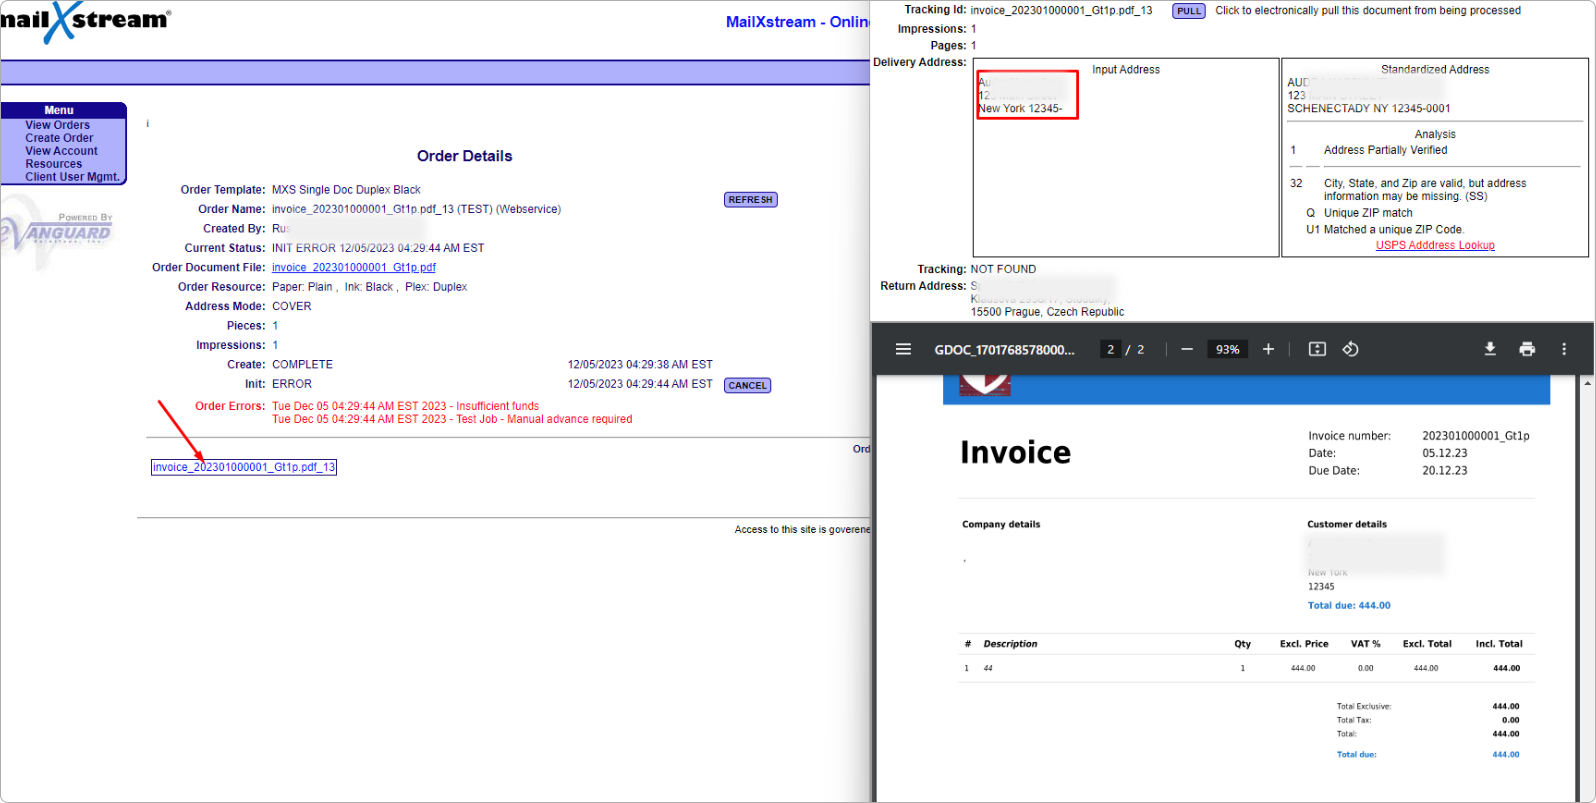
If the address is valid, the customer will receive a physical copy of the invoice sent to their address.