¶ Multiple PSK
¶ Overview
Multiple PSK (Pre-Shared Key) is a feature that allows network administrators to define multiple Wi-Fi passwords (pre-shared keys) for a single SSID (Wi-Fi network name). This enables differentiated access control and policy enforcement based on which key a user or device uses to connect.
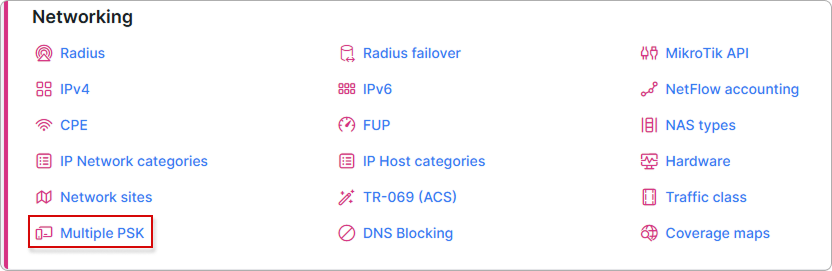
In Splynx, Multiple PSK functionality is managed through the Config → Networking → Multiple PSK. It is designed specifically to work with internet services.
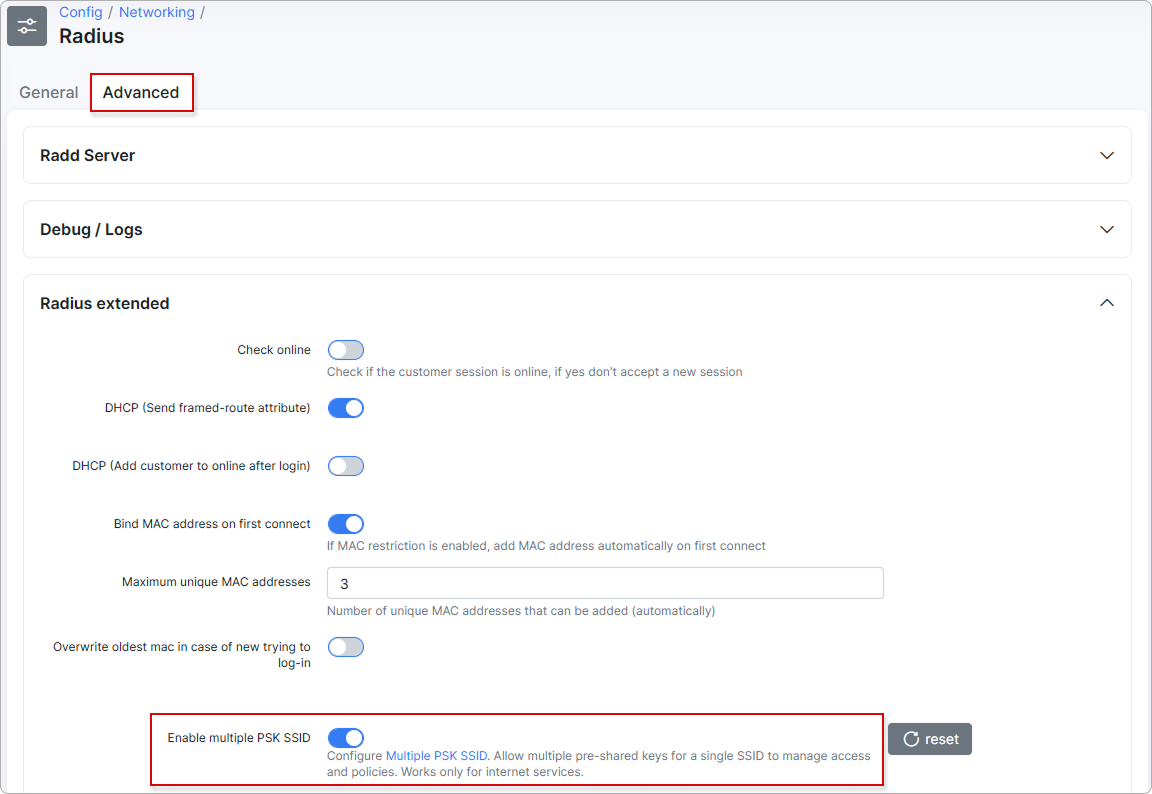
To start using this feature, you need to enable it in the RADIUS advanced configuration:
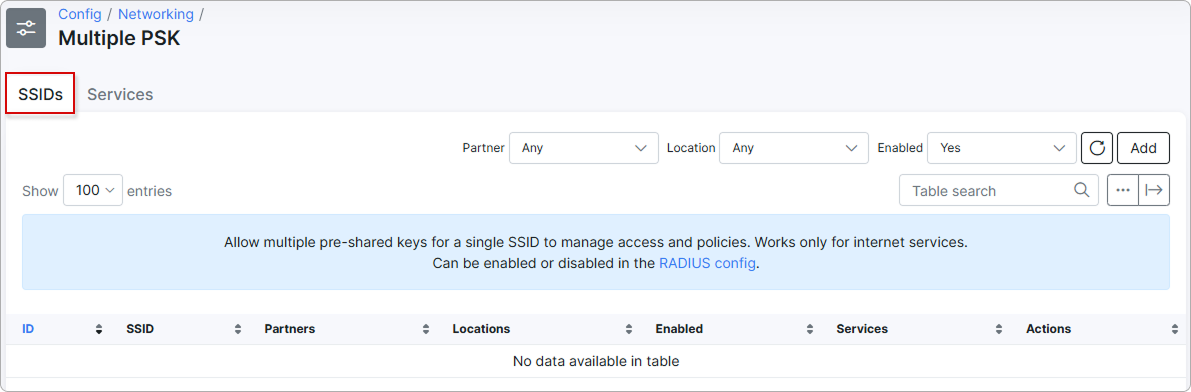
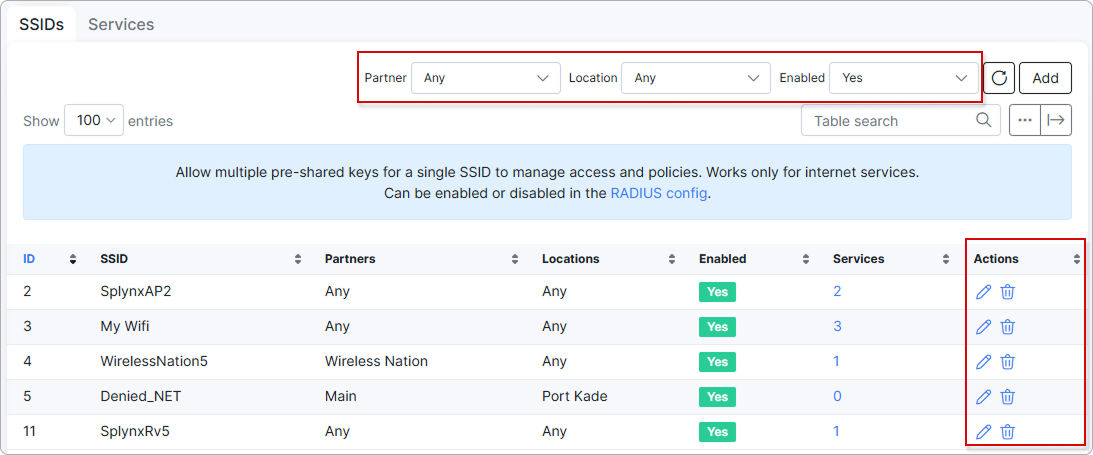
¶ SSIDs
Here, you can create and manage your list of SSIDs:
To add a new SSID, click the Add button and enter the required details:
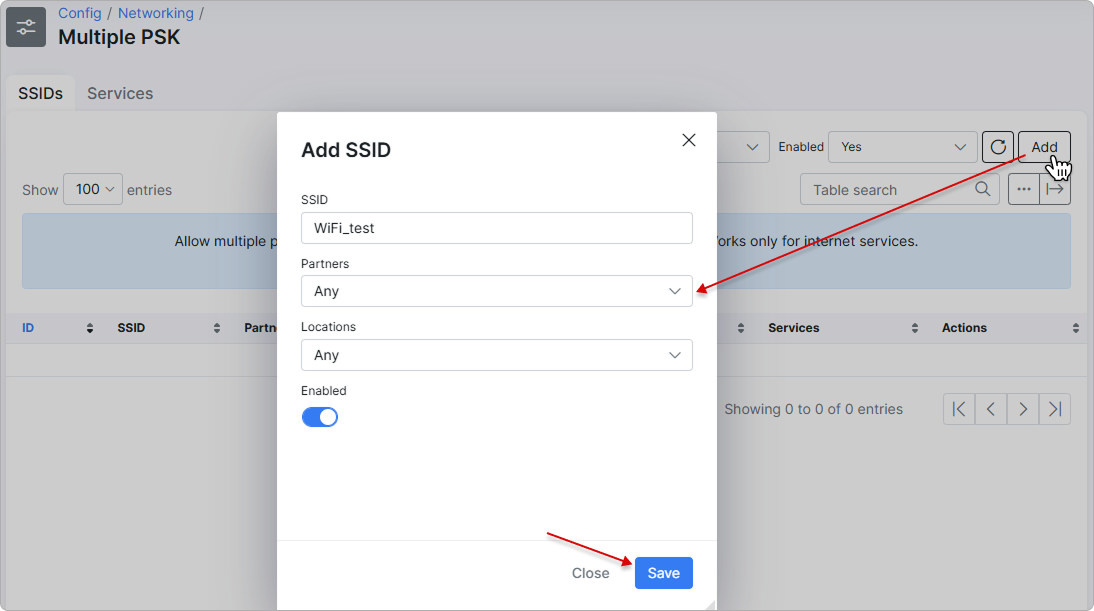
- SSID – enter a name for the new SSID (Wi-Fi network name);
- Partners – select a specific partner or leave it as "Any" (default);
- Locations – assign the SSID to a particular location or keep it applicable to "Any" location;
- Enabled – controls whether the SSID is active or not.
You can filter the list of SSIDs by Partner, Location, and availability status (enabled, disabled, or both). You can also manage an individual SSID by editing or deleting it:
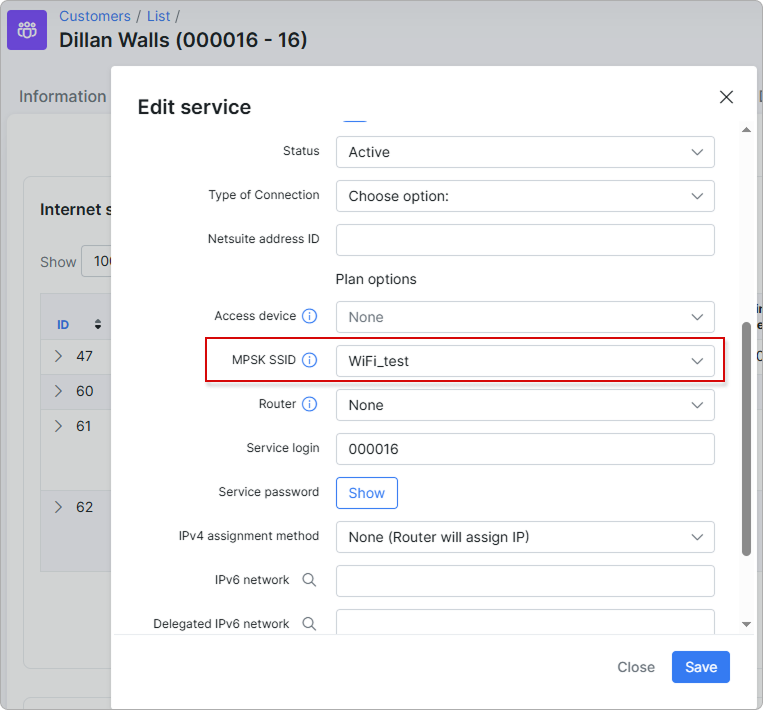
Then, you can add an SSID for the customer's service from their profile:
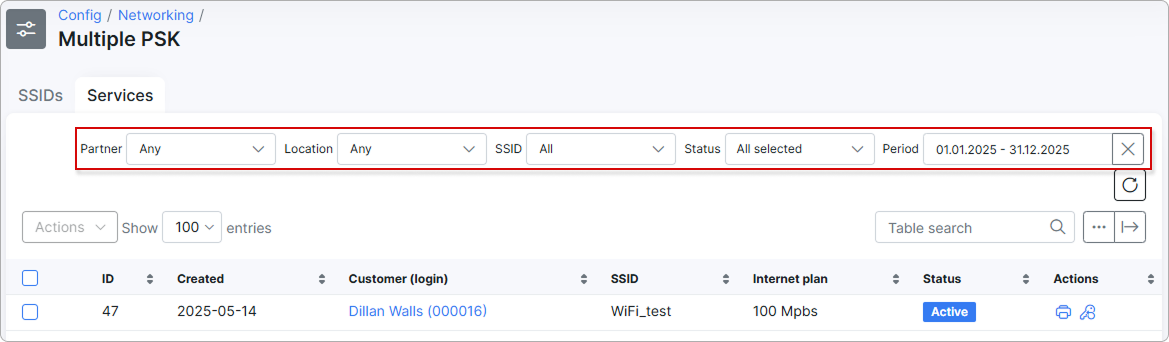
¶ Services
Services with an SSID will appear under the Services tab, where you can view the creation date, associated user, SSID, name, and status.
You can also filter services by Partner, Location, SSID, Status, and Period:
You can download a printable PDF with the service information by clicking the print icon next to the service:
![]()
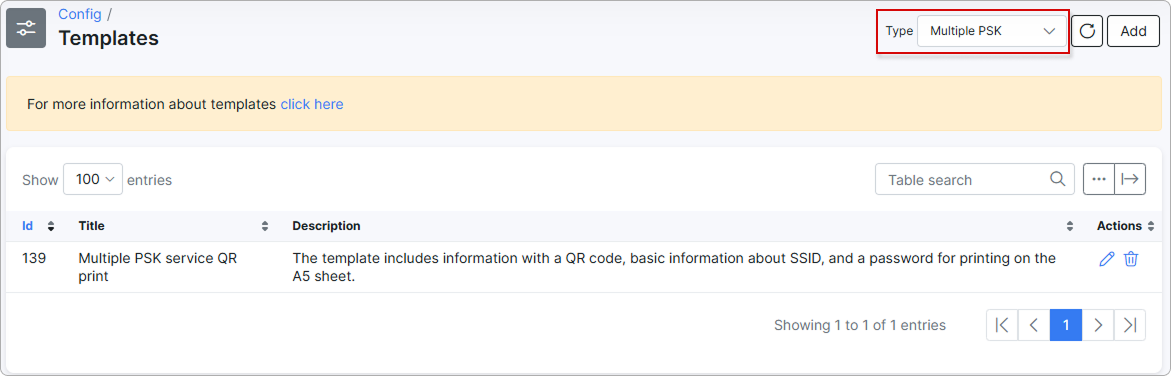
The template can be configured under
Templatesconfiguration for the Multiple PSK type:
To change the automatically generated password for the service, click the key icon next to it:
![]()
To deactivate an entry, you have to confirm the action. Once confirmed, the service will be archived and the customer deactivated:
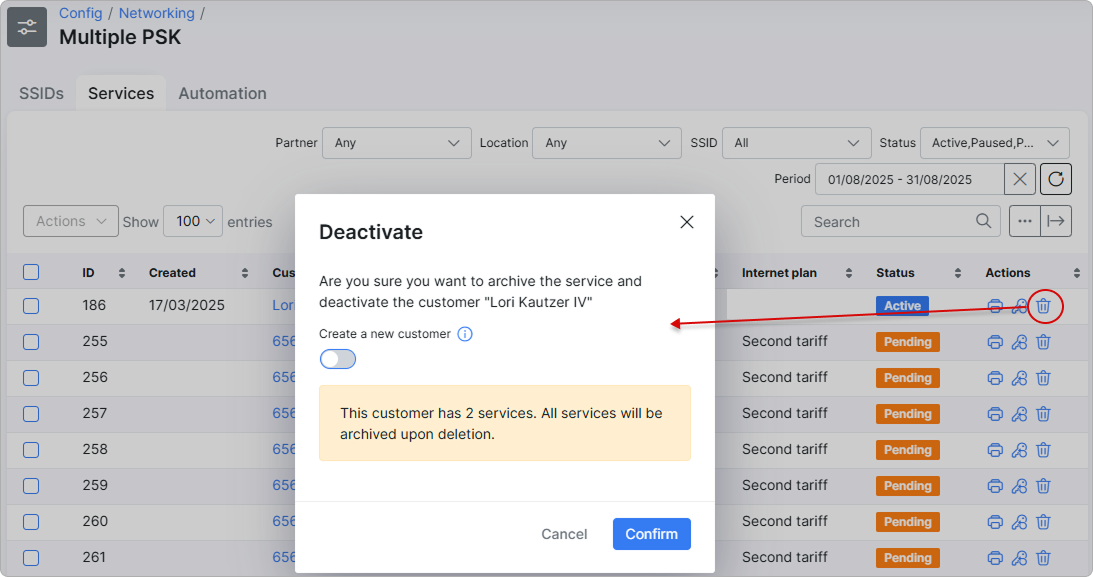
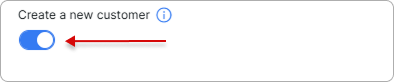
However, you can choose to create a new customer (with the same parameters and in Pending status) after deactivation by enabling the corresponding toggle:
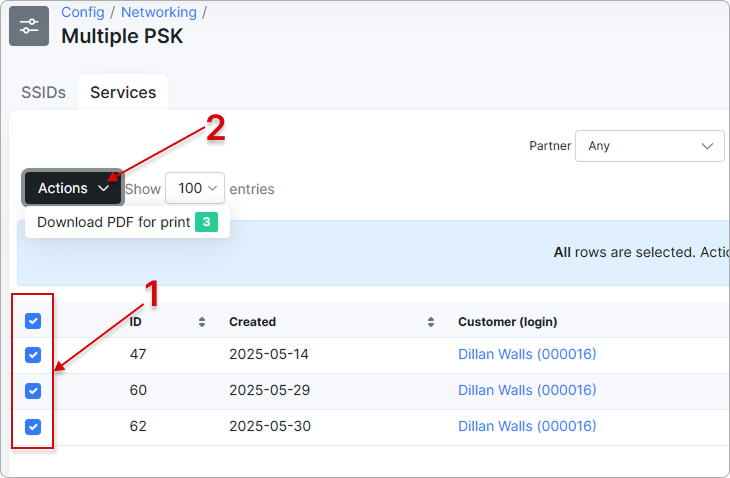
You can also Reset password or download PDFs in bulk for printing by selecting the desired services and choosing the corresponding option from the Actions menu:
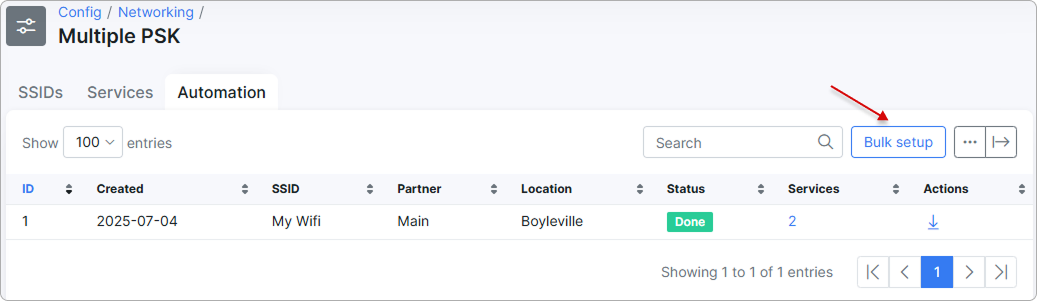
¶ Automation
The Automation feature is used for managing and auditing the bulk creation of Wi-Fi access credentials (Multiple PSKs), making it ideal for efficiently onboarding large numbers of users.
It enables template-driven customer naming, ensures partner- and location-specific setup, and supports scalable provisioning based on predefined rules.
Only customers with the status New and their linked services in the status Pending can be included in a bulk operation.
Click the Bulk setup button to create a new batch of Wi-Fi access credentials for customers:
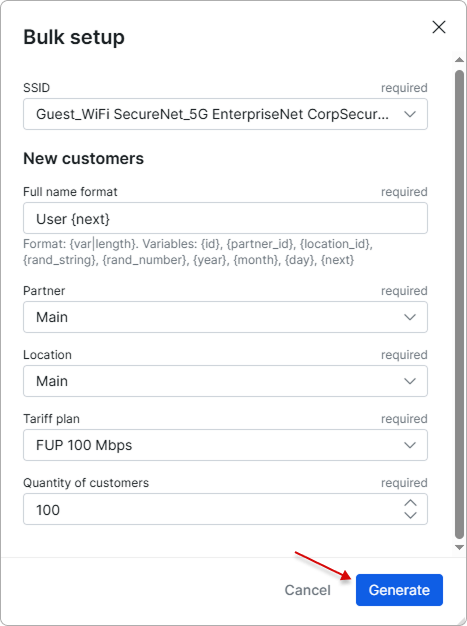
A new window will appear where you’ll need to enter the following details:
You need to complete all fields before proceeding.
-
SSID - select an existing Wi-Fi network (SSID) to which the generated customers will be linked.
-
Full name format - define a naming pattern for each customer. For example, User {next} will generate usernames like User 1, User 2, etc.
Supported variables (learn more)
When generating multiple PSKs in bulk, you can include dynamic variables to automate the naming and identification process. These variables allow you to create unique and meaningful values for each generated entry without manual input.
Supported variables:
{id} – Unique identifier for each record.
{partner_id} – ID of the selected partner.
{location_id} – ID of the customer’s location.
{rand_string} – Random alphanumeric string (e.g., for passwords).
{rand_number} – Random numeric value (e.g., for tags or IDs).
{year} – Current year (e.g., 2025).
{month} – Current month (e.g., 08).
{day} – Current day of the month (e.g., 01).
{next} – Auto-incrementing number (e.g., User 1, User 2).
Example:
If you use User_{partner_id}_{next} as the full name format, and the partner ID is 5, your generated names might look like:
User_5_1

User_5_2

User_5_3
-
Partner - select the partner.
-
Location - select the location.
-
Tariff plan - choose the internet plan that will be assigned to each generated customer.
 Only plans associated with the selected partner will be available.
- Quantity of customers - enter the number of customer records and corresponding services to create. Only numeric values are accepted.
Then click Generate to start the bulk generation process.
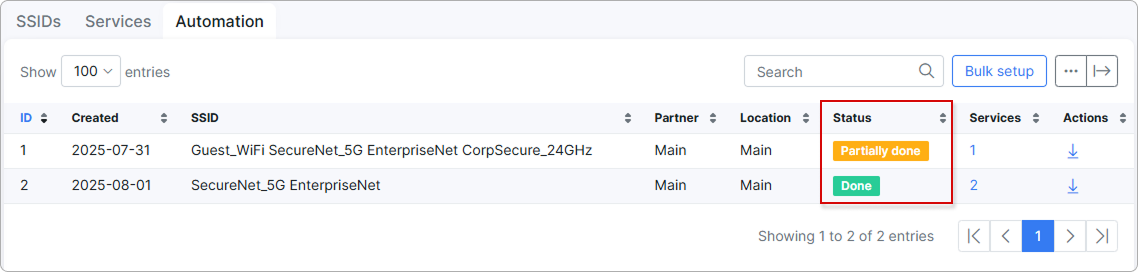
The generated entries will appear in the Automation table, displaying the creation date, SSID name, associated partner and location, status, and the number of services created.
The status column indicates whether the generation process was successful.
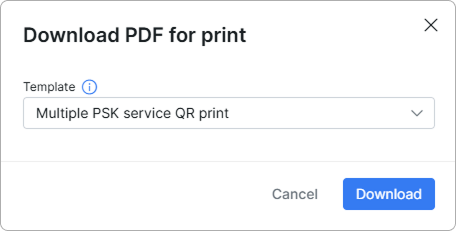
Click the ![]() icon to download the bulk details as a PDF.
icon to download the bulk details as a PDF.
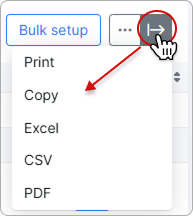
The arrow button allows you to download the table data in a convenient format of your choice:
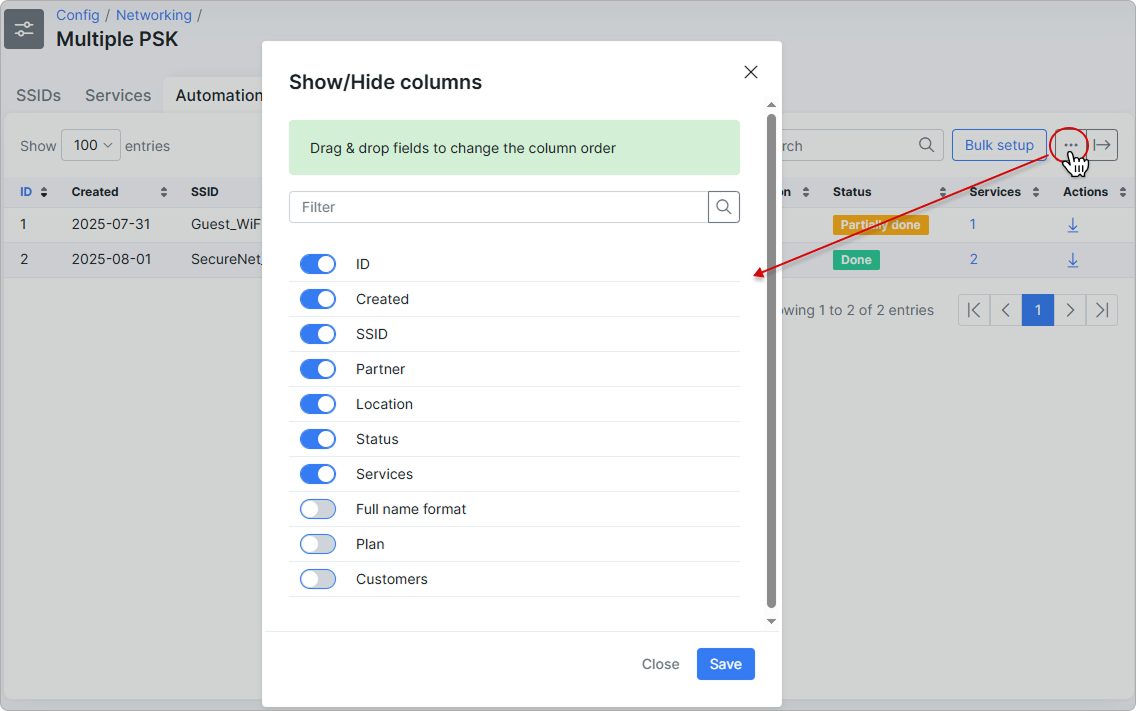
To rearrange the column order and manage which columns are visible in the table, click the breadcrumbs button: