¶ Adding a new lead
The first step is to add a new lead.
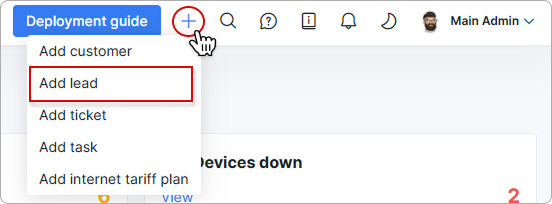
You can do this either through the Quick add option in the header of Splynx or by clicking Add lead at the top right of the lead list:

A modal window opens, where you specify the following details:
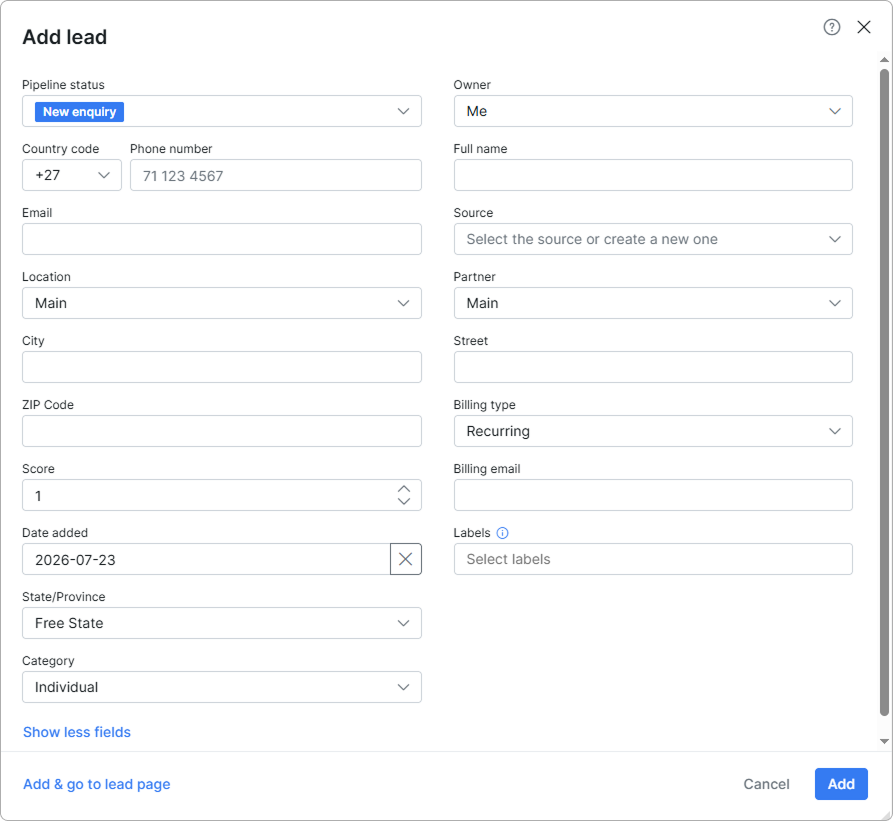
The field layout of this modal is personal: the order of the fields and the number of rows shown come from your own administrator profile, so the same lead may look different to your colleagues. Click the options icon next to the fields, then 'Configure', to open My Profile → Leads fields and arrange the form — see Leads fields.
- Pipeline status - status of the lead (stage in the process);
- Owner - administrator that will be responsible for the lead;
- Country code and Phone number - contact number(s) of the lead, multiple numbers supported and separated by comma
,sign; - Full name - name and surname of the lead;
- Email - email address(es) of the lead, multiple addresses supported and separated by comma
,sign; - Source - where/what/how the lead obtained/received/gained interest or information about your company;
- Location - location the lead will belong to in the list of locations;
- Partner - partner the lead will belong to in the list of partners;
- City, Street, ZIP Code - physical address fields of the lead;
- Billing type – select the lead's billing type (Recurring or Prepaid);
- Score – score the lead based on popularity;
- Billing email – specify the lead's billing email;
- Date added – the date when the lead was added to Splynx;
- Labels - select one or more labels that are created in Config → System → Labels under the Leads/Customers module.
- State/Province - select a state or province preconfigured under Config → Main → Localization (State/Province);
- Category - choose the lead's category (Individual or Business);
Leads interested in signing up for a subscription can also be directed to the Customer portal, where they can register using a form that collects the necessary contact details.