¶ Tickets
On the Tickets page, the customer can create, submit, view and manage their tickets sent to the technical support team.
¶ Creating and submitting a ticket
A ticket can be created by clicking on the question mark sign at the top of the Customer Portal or, from the Tickets page, by clicking on the Create ticket button:
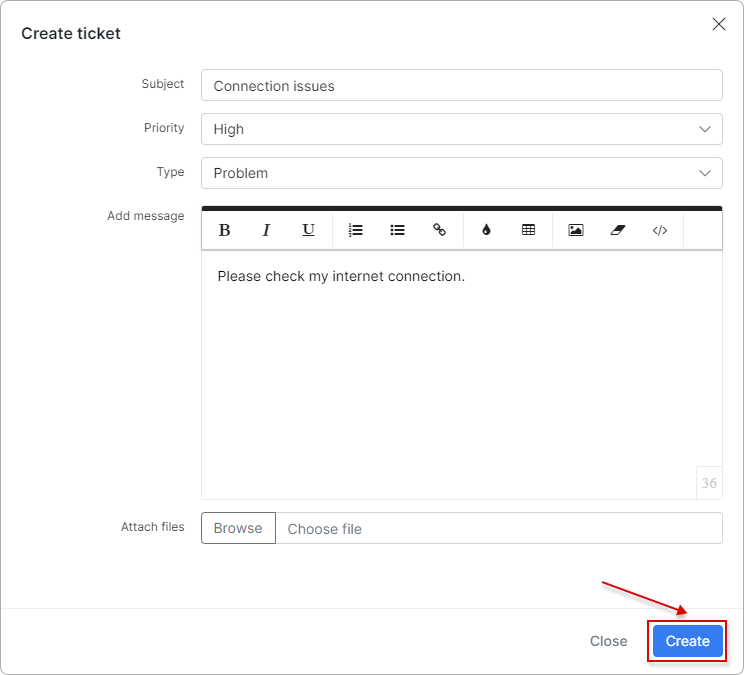
The following window pops up:
- Subject - the subject of the ticket briefly naming the issue;
- Priority - urgency of the issue (Low, Medium, High, Urgent);
- Type - the reason for creating the ticket can be set to
Question,Incident,Problem,Feature requestorLead; - Add message - for writing a message describing the issue in more detail;
- Attach files - the customer can attach a file(-s) related to the issue in the following formats: jpg, jpeg, png, heic, doc, docx, txt, pdf, rtf, odt, ods, odp, odf, eml, csv, xls, xlsx, gif, mov, mp4, avi, wmv. File size up to 50 MB.
Once all relevant fields have been completed the Create button should be clicked which will submit the ticket.
The newly created ticket will appear in the customer's tickets list and that of the admin as well.
¶ Managing tickets
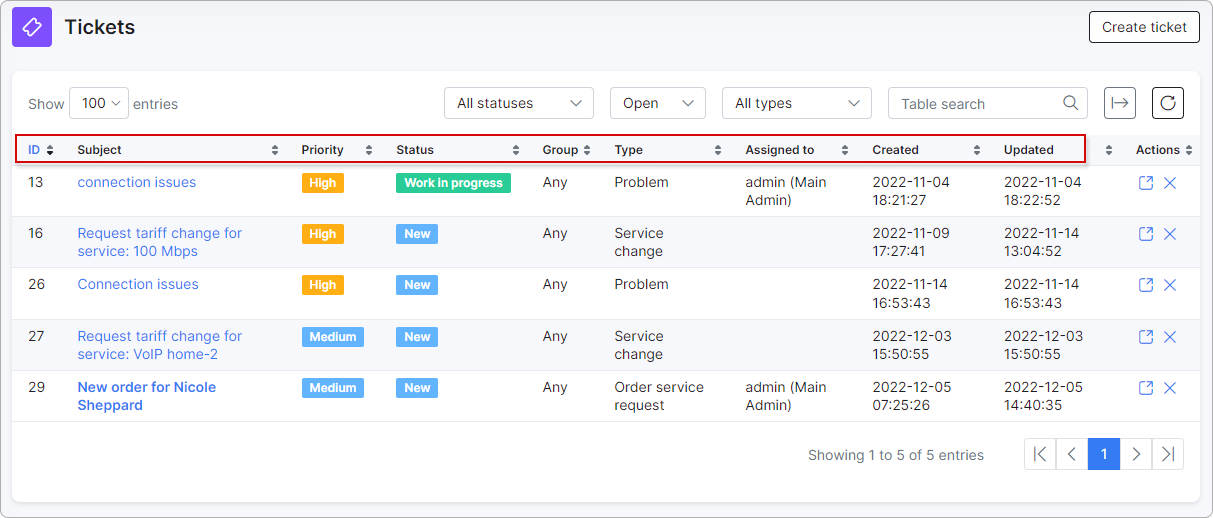
All the customer's Opened and Closed tickets are presented in the form of a table where the customer can see certain sections of information about the ticket under each column. The visibility of this information is regulated by the admin from Config → Main → Portal → (Per partner settings → Tickets).
The customer easily switch between the two tables (Opened and Closed tickets) - Opened tickets being the default:
For all tables, the number of rows shown in the table can be regulated (Show...entries); tickets can be filtered by status and type; tickets can also be searched by word or number with the Table search field:
With the help of the following buttons, the customer can export the tickets table: copy, print, download (as Excel, CSV, PDF files); refresh the table:
¶ Action buttons
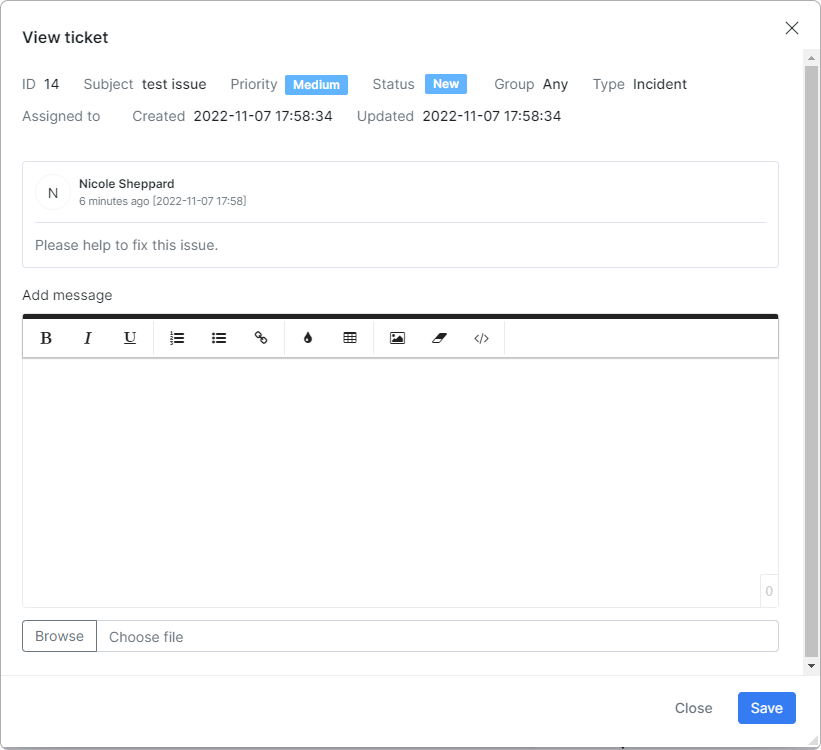
By clicking on View ticket  , the customer can see the history of messages with the support team on this issue. Tickets can also be answered in the same window:
By clicking on Close ticket  , the customer can close the ticket and it will be moved to the Closed tickets table.
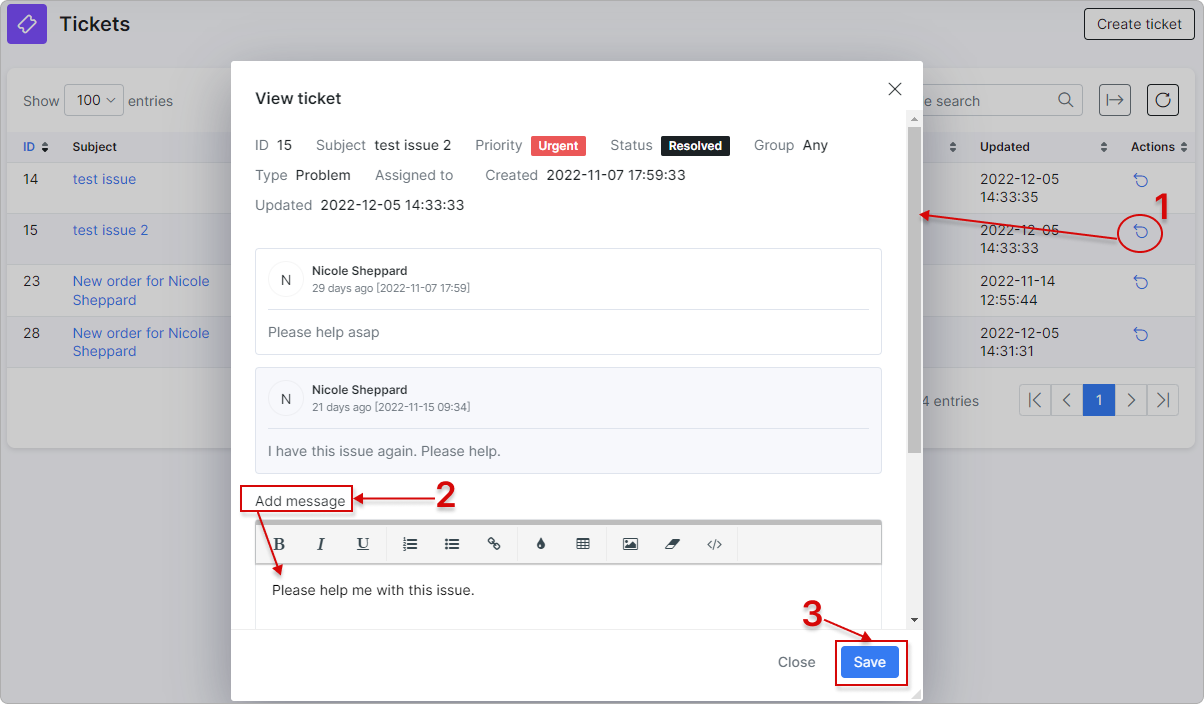
To re-open a ticket, the customer should switch to the Closed tickets table and click on Re-open ticket  . In the new window, the customer should type a message required for re-opening and click on
 Save. The ticket will be moved to the Opened tickets table, and the support team will receive the customer's message.


