¶ Payments
- Overview
- Manual Payments
- Mass Payments
- Payments with negative value
- Refunding and voiding gateway payments
- Table data management
¶ Overview
This section contains all payment records in your Splynx system. Any payments made by or for the customer, across all available payment methods, are recorded and displayed here.
Splynx supports a wide variety of payment methods, including cash payments, generating SEPA payment orders, bank statement processing, and integration with numerous payment gateways (e.g., SagePay).
The Splynx Cashdesk module allows for the administrative processing of payments in a restricted and monitored environment.
For more information on the Cashdesk module please click here: Cashdesk.
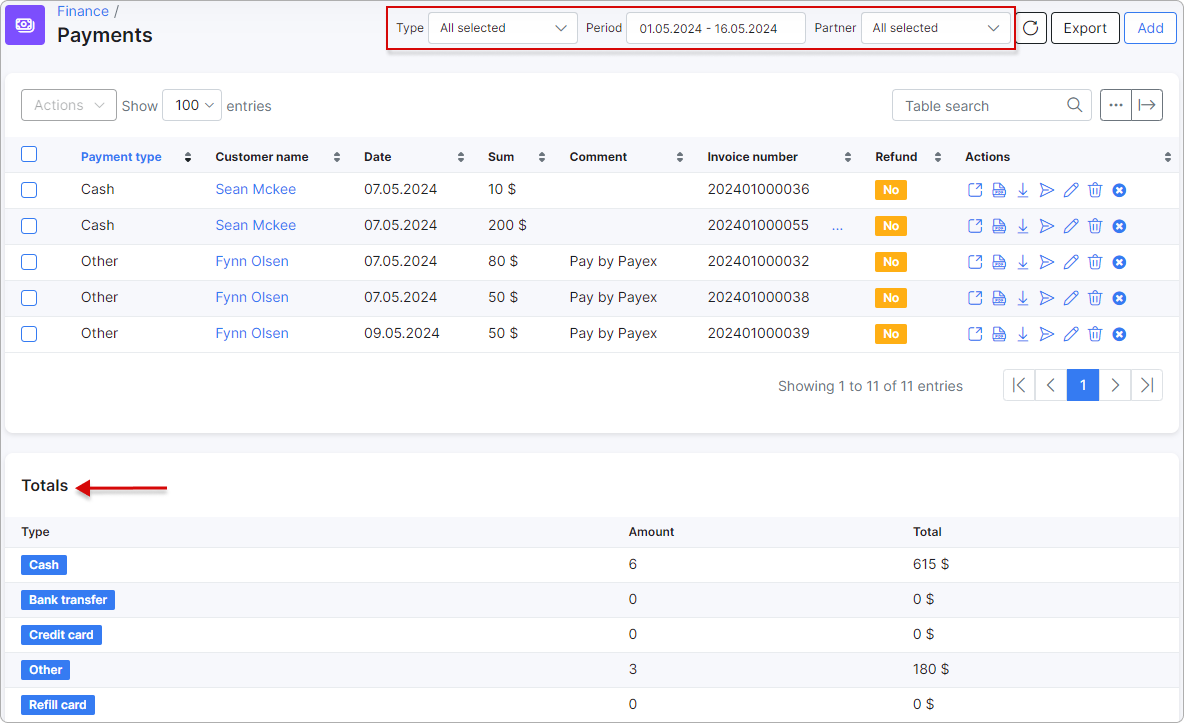
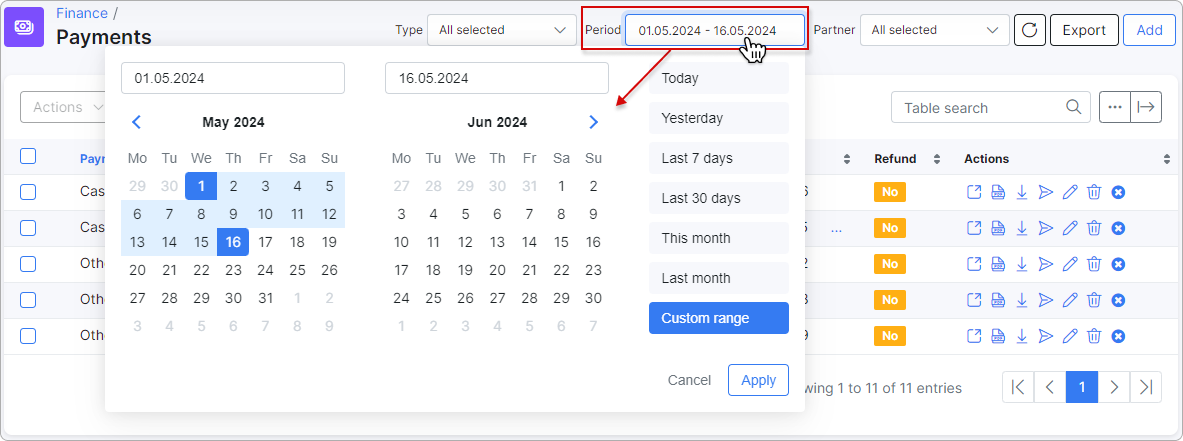
The Payments table in the Finance module shows various types of payments for a selected period. You can also filter payments by partner. Below the list of payments, there is a "Totals" table that summarizes the number and amount of payments per type for the selected period.
Since Splynx v5.0, mass payments are also supported.
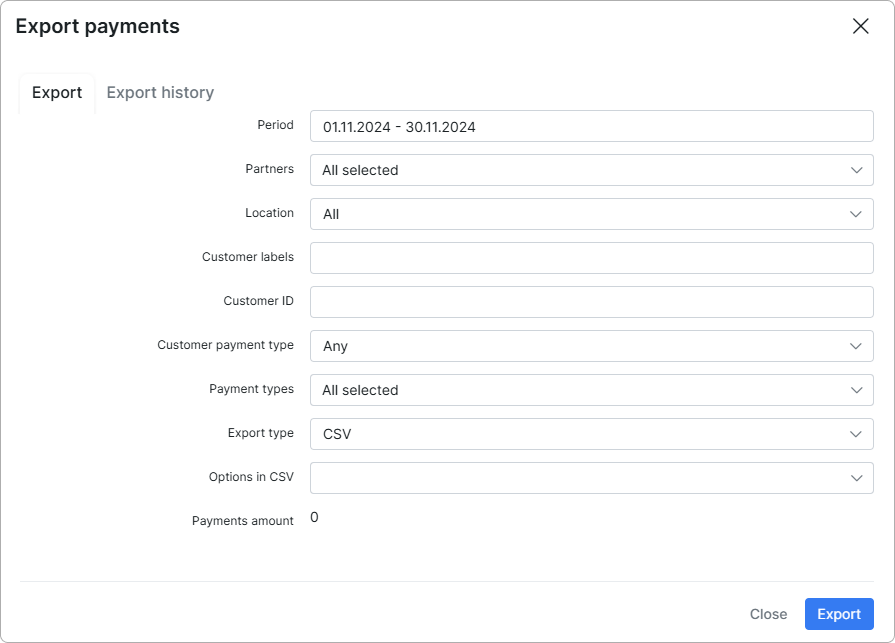
You can export selected payments into a single PDF or CSV file. Click the Export button, and a window with export options will appear, allowing you to create an export based on partner, location, customer payment type, and more. You can also choose the export format here.
¶ Manual Payments
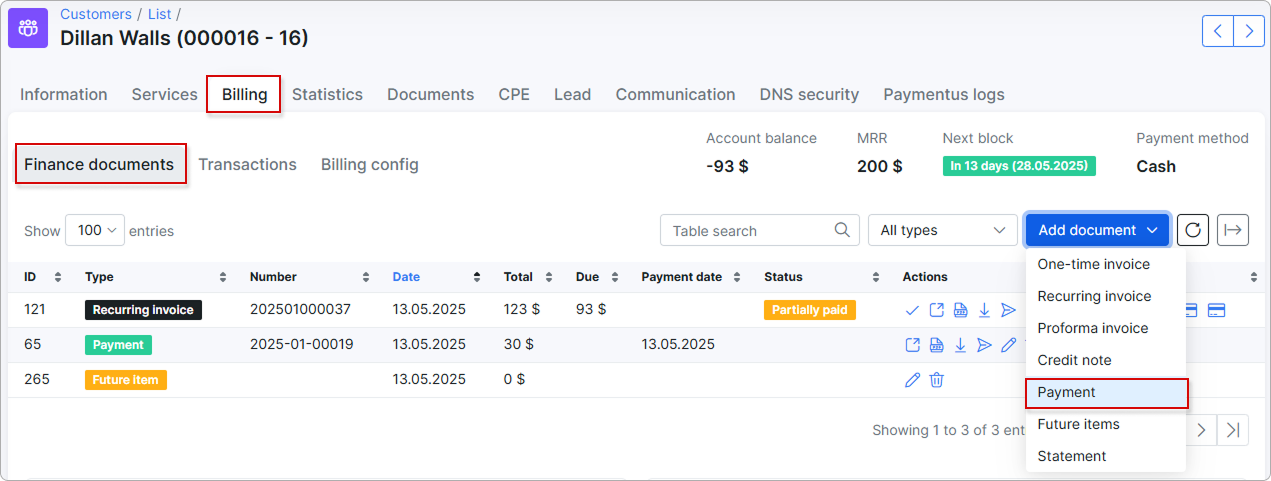
Manual payments can be added in Splynx without the use or need of an invoice. This is done in the customer profile in Billing → Finance documents. Click on Add document and select Payment from the drop-down list.
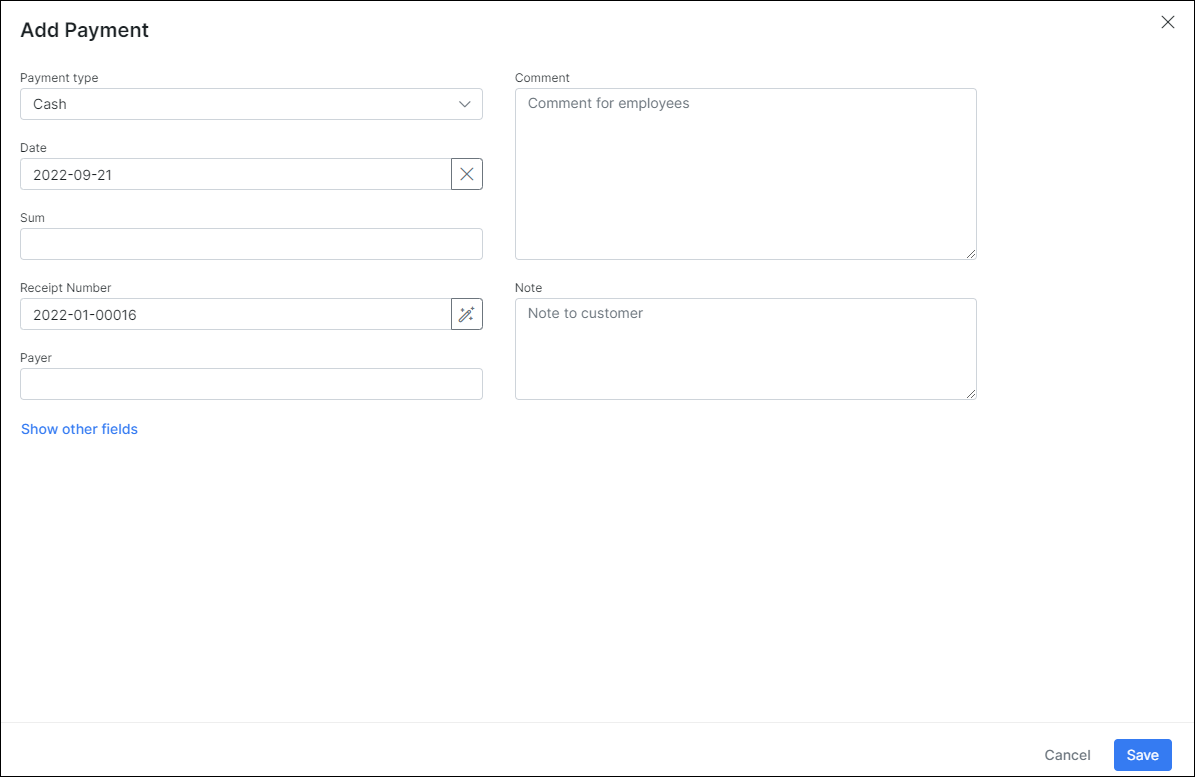
A window will appear, where you can select Payment type (Cash, Bank transfer, PayPal, Credit card, Other), add Date of payment, Sum, Receipt Number, Payer, Comment, Note, enter any necessary information in other additional fields:
Once a payment is created, a new credit transaction will be visible in the list of transactions.
In the list of payments, you will find a number of icons in the actions column to execute different actions to the payment.
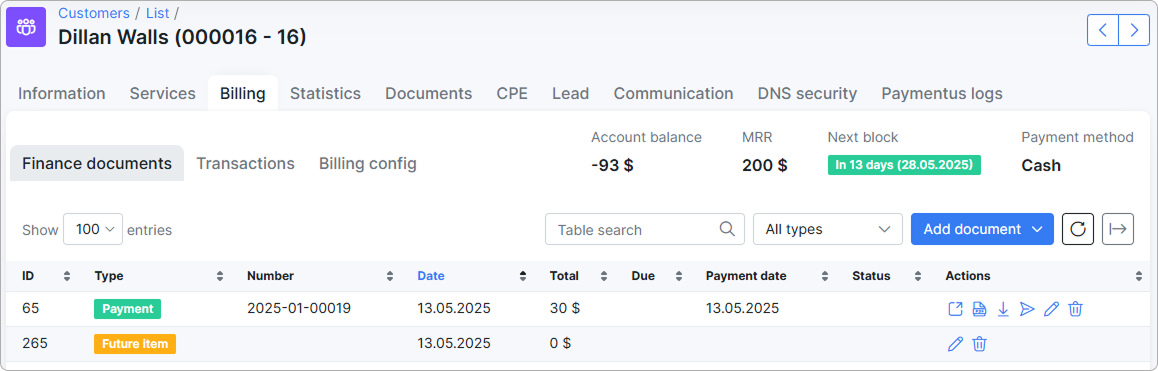
¶ Actions with Payment:
 View payment
 Open payment in PDF format
 Download payment in PDF format
 Send payment via email
 Edit payment information
 Delete payment
Payments received through an integrated payment gateway can no longer be deleted. To reverse such a payment, use the 'Void' or 'Void by [payment system]' action instead (see Refunding and voiding gateway payments).
¶ Mass payments
This feature allows you to add payments for multiple customers at once without visiting each customer's profile individually. It is especially useful when creating numerous payments simultaneously.
To initiate mass payments, click the Add button in the top-right corner of the Payments page:
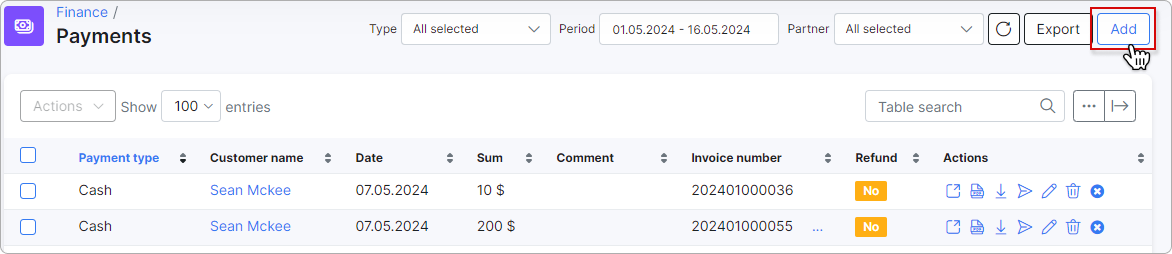
A new window will appear where you need to choose the payment method, select customers, specify the sum for each payment, and optionally add a comment. It is possible to select the same customer more than once for different payments within the same bulk.
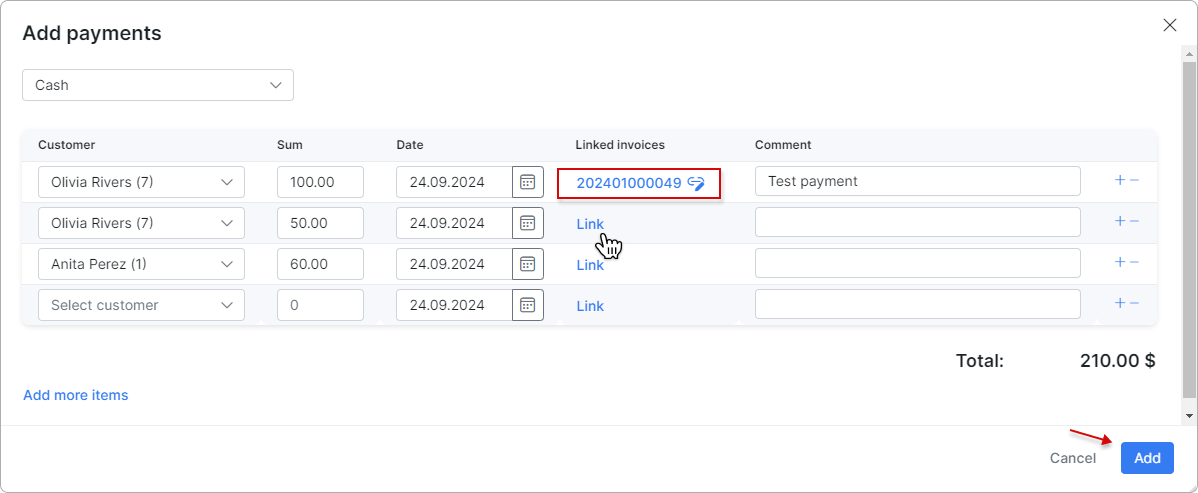
You can add more rows to include additional payments or remove rows as needed. The total sum will be displayed at the bottom. Finally, click Add.
By clicking Link, you can associate a customer's invoice with the payment (one invoice per payment).
Click Confirm to finalize the invoice linking:
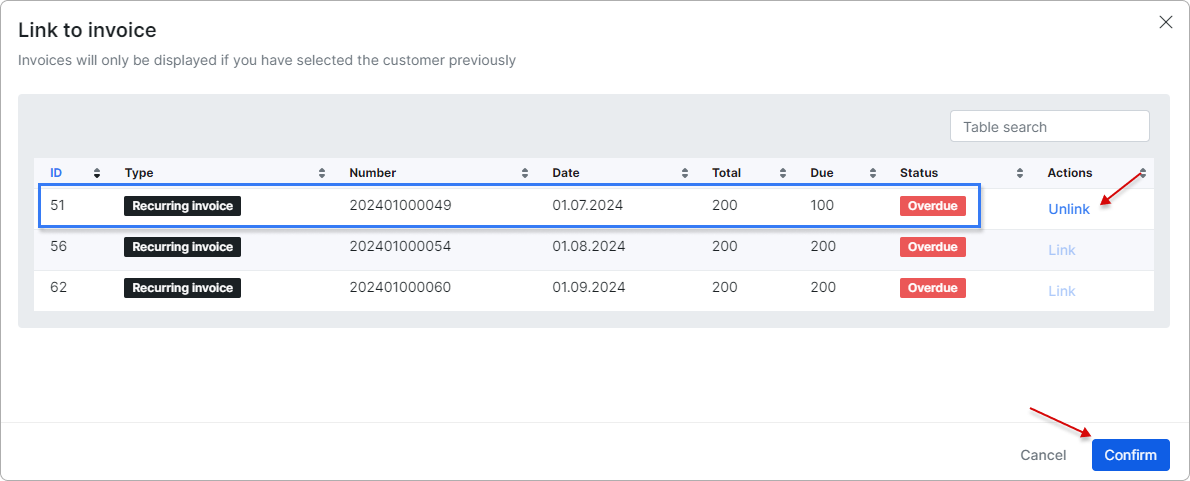
 If the payment amount exceeds the invoice's due amount, the excess will be added to the customer's balance.
If no invoice is linked, the entire payment amount will be added to the customer's balance. However, if there are unpaid invoices, the payment will automatically be applied to the oldest unpaid invoice.
Since Splynx v5.2, when a payment is made directly against a specific invoice and the amounts match, this payment-to-invoice link is permanently preserved during billing recalculation. Only automatically allocated payments (e.g., balance payments or partial amounts) may be reassigned when recalculation runs.
¶ Payments with negative value
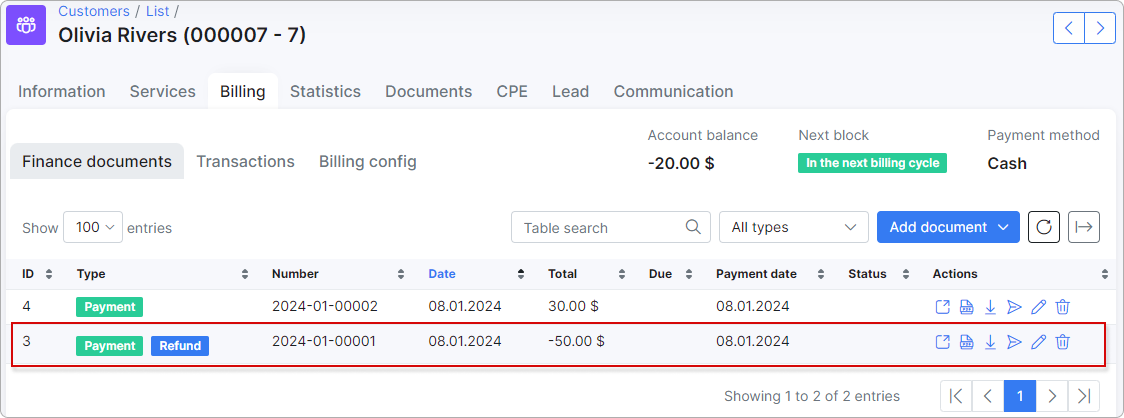
If you need to refund a payment to the customer's account, you can generate a negative payment with the corresponding amount to be returned.
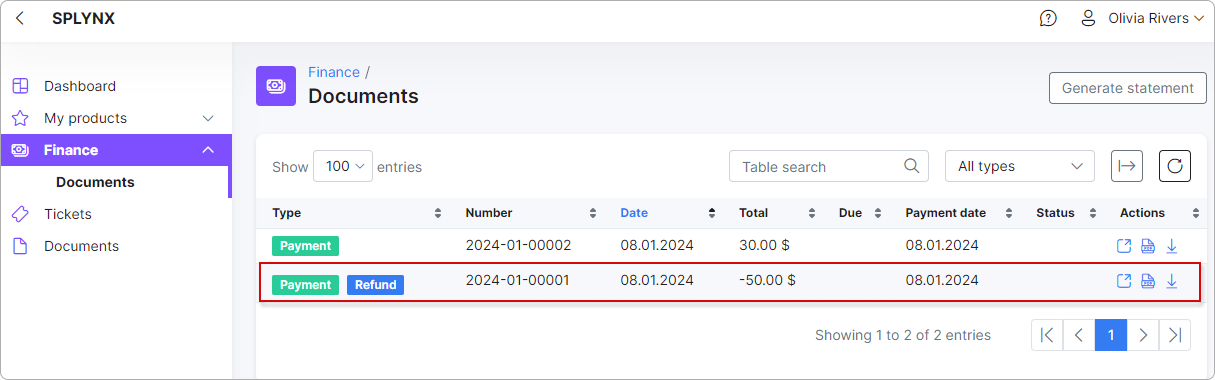
Once the negative payment is created, the Refund label, highlighted in a blue background, will be visible next to it in both the Admin portal and the Customer portal:
Admin portal
Customer portal
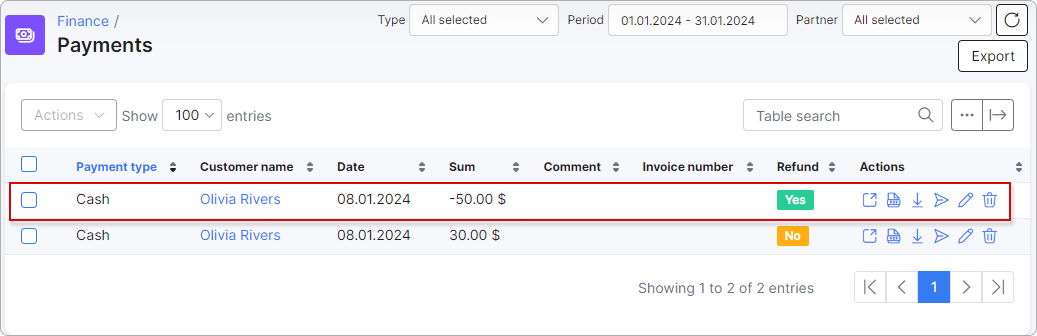
In the Finance → Payments section of the Admin portal, payments with a negative value are displayed with the status Yes under the Refund column:
¶ Refunding and voiding gateway payments
For payments received through an integrated payment gateway, Splynx can reverse the transaction directly from the payment record. Gateway payments can no longer be deleted — you void or refund them instead.
Void and refund are supported only for payment gateways that implement the operation. In v6.0 the reversal buttons appear on payments made through Paymentus, AuthorizeNet, and GoCardless. Payments made through gateways that do not support voiding are unaffected.
Two reversal actions exist, each shown as a circular  icon. Which ones you see depends on where you open the payment:
- In Finance → Payments, only the Void by [payment system] action is available.
- In the customer profile, under Billing → Finance documents, both the Void and Void by [payment system] actions appear in the row next to the payment.
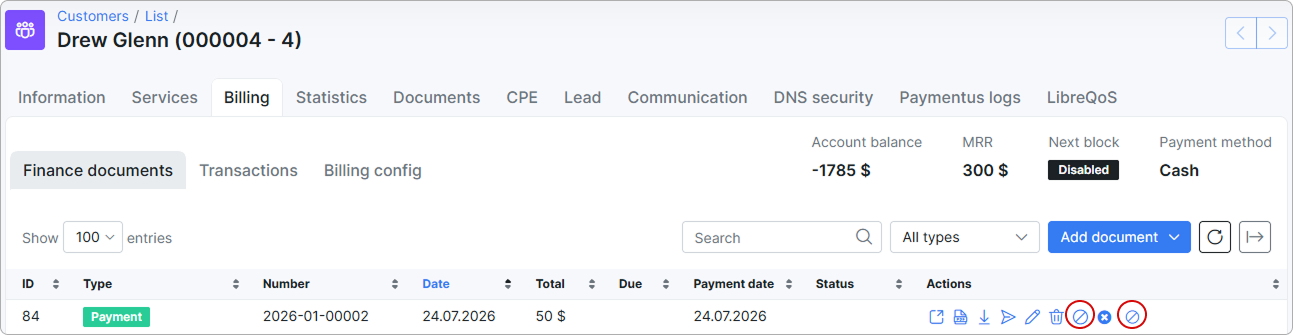
Void by [payment system] — the label carries the name of the connected payment system (for example, Void by Paymentus). This action reverses the payment through the gateway and covers both refund and void: if the payment has already settled at the gateway it is refunded, and if it has not settled yet it is voided. Splynx sends the request to the payment system, which performs whichever operation applies.
Void — sends a void request from the Splynx side, cancelling the payment directly in Splynx. This action is available in the customer's Billing → Finance documents list.
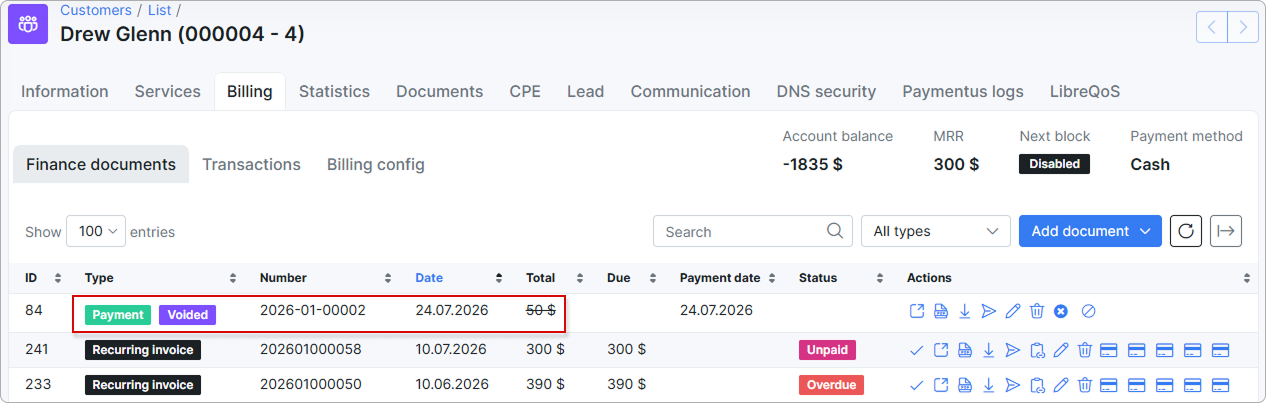
Once a payment has been voided, its Status changes to Voided (shown as a purple label) and its amount is displayed struck through in the payments list:
¶ Automatic re-allocation of funds
When funds are automatically re-allocated (for example, during billing recalculation after a void or refund), Splynx sets the invoice payment date to the later of the invoice date and the payment date. This keeps the payment date from falling before the invoice it is applied to.
These reversal actions and the re-allocation behavior are controlled by hidden configuration options that are enabled per client on request. Contact our support team (support@splynx.com) to enable them for your instance.
Void operations performed in Splynx are also reflected in connected accounting integrations — see Xero, SageOne, QuickBooks, and Zoho Books.
¶ Table data management
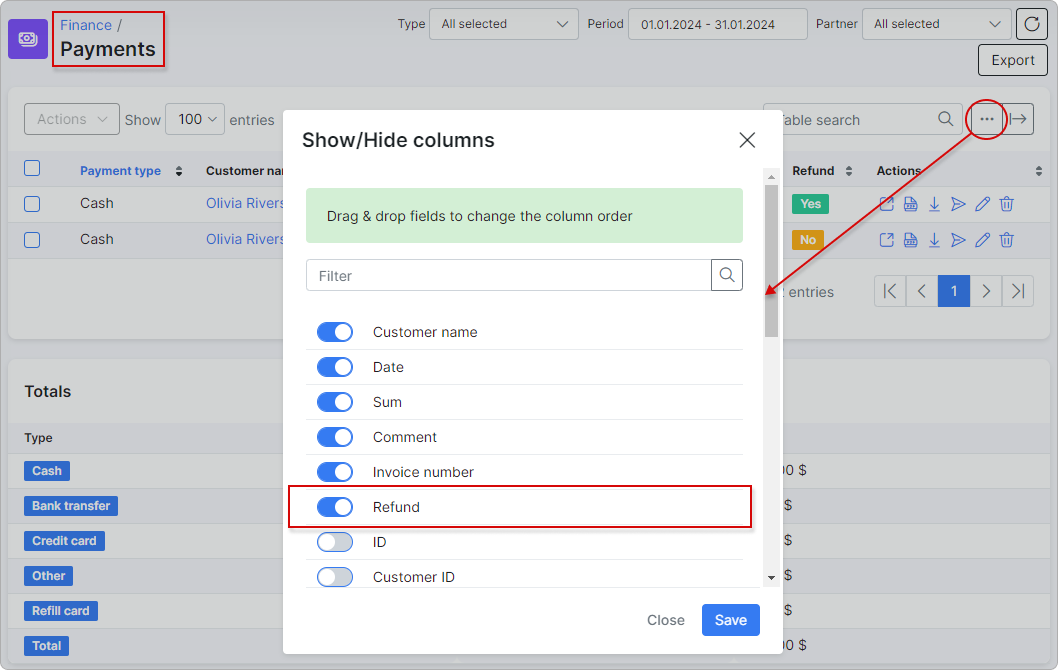
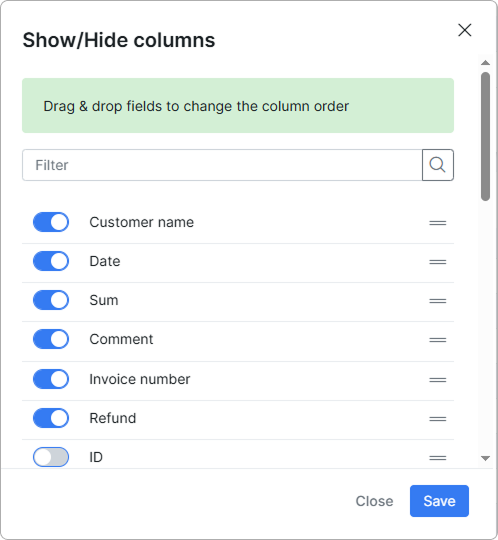
In the Finance → Payments table, you can customize the view by rearranging columns or enabling/disabling available ones. To do this, click the breadcrumbs button  .
.
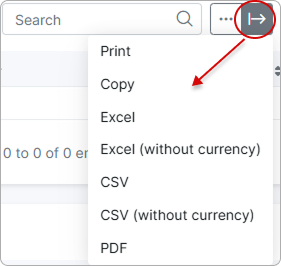
Click the Export button to choose an export option for the content of the Payments table. You can print, copy, save it as a PDF file, or export it as Excel/CSV (with or without currency):