¶ ACS services and server configuration
¶ Enable ACS services
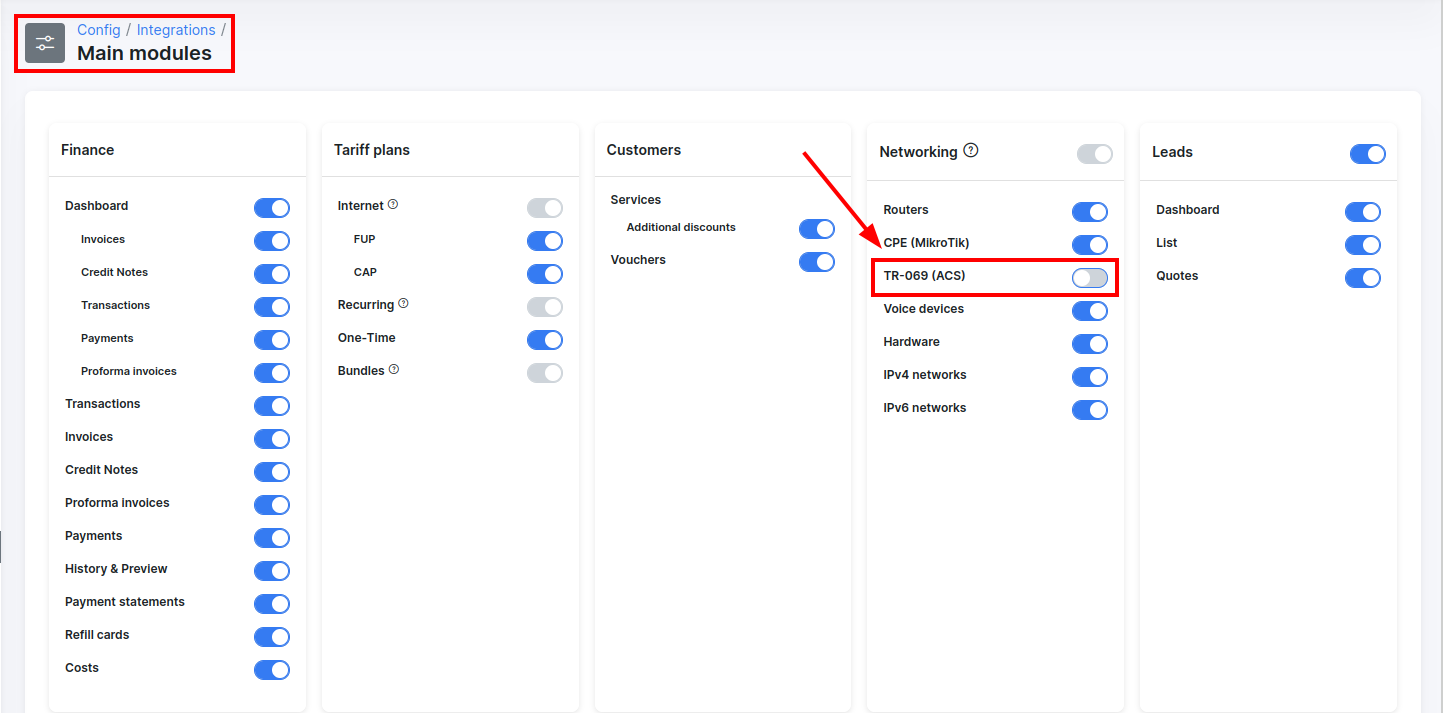
To enable ACS in Splynx, navigate to Config → Integrations → Main modules:

Enable a toggle for TR-069 (ACS) under Networking :

Once TR-069 (ACS) is enabled, you will see a new item under Networkingsection at your left:

¶ ACS server configuration
Let's start configuring the ACS server:
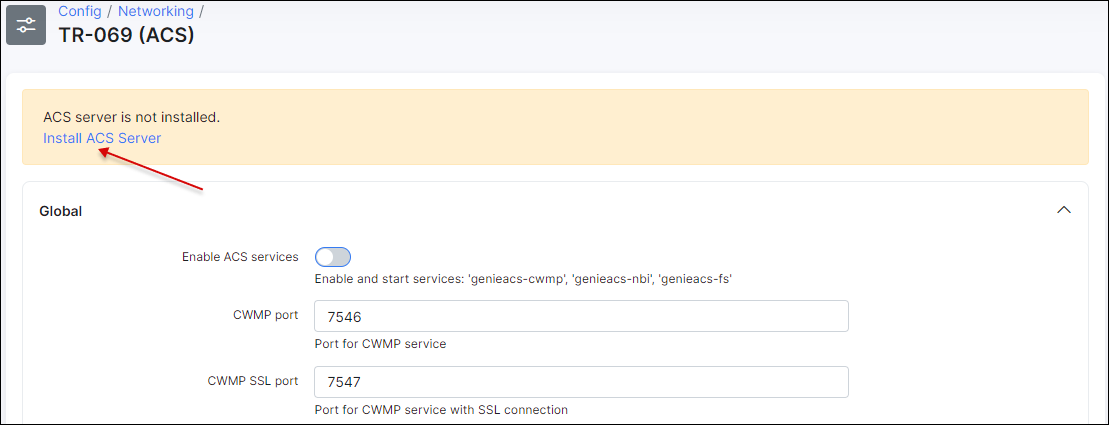
¶ Step 1
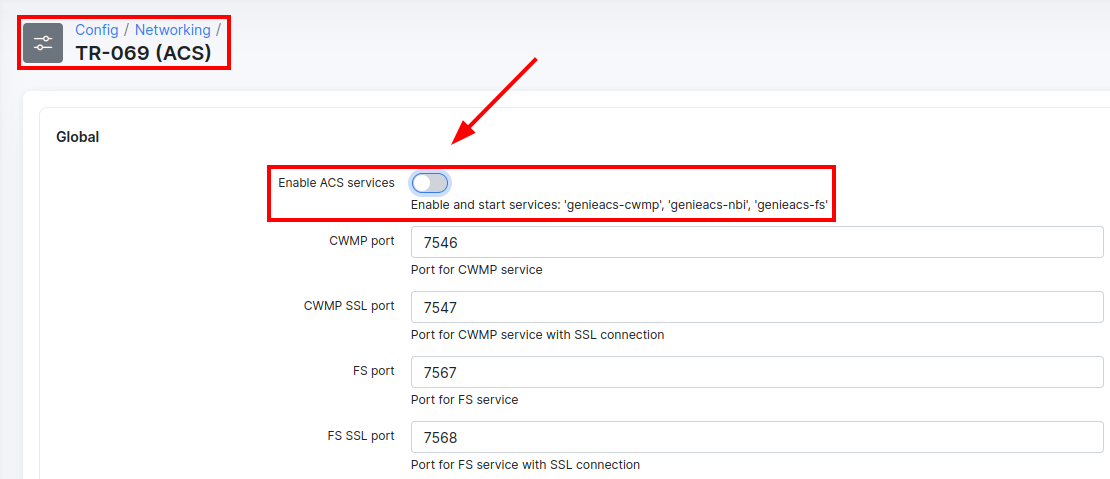
Navigate to Config → Networking → TR-069 (ACS), and click on install ACS server:
Once the server was installed, specify its global parameters:
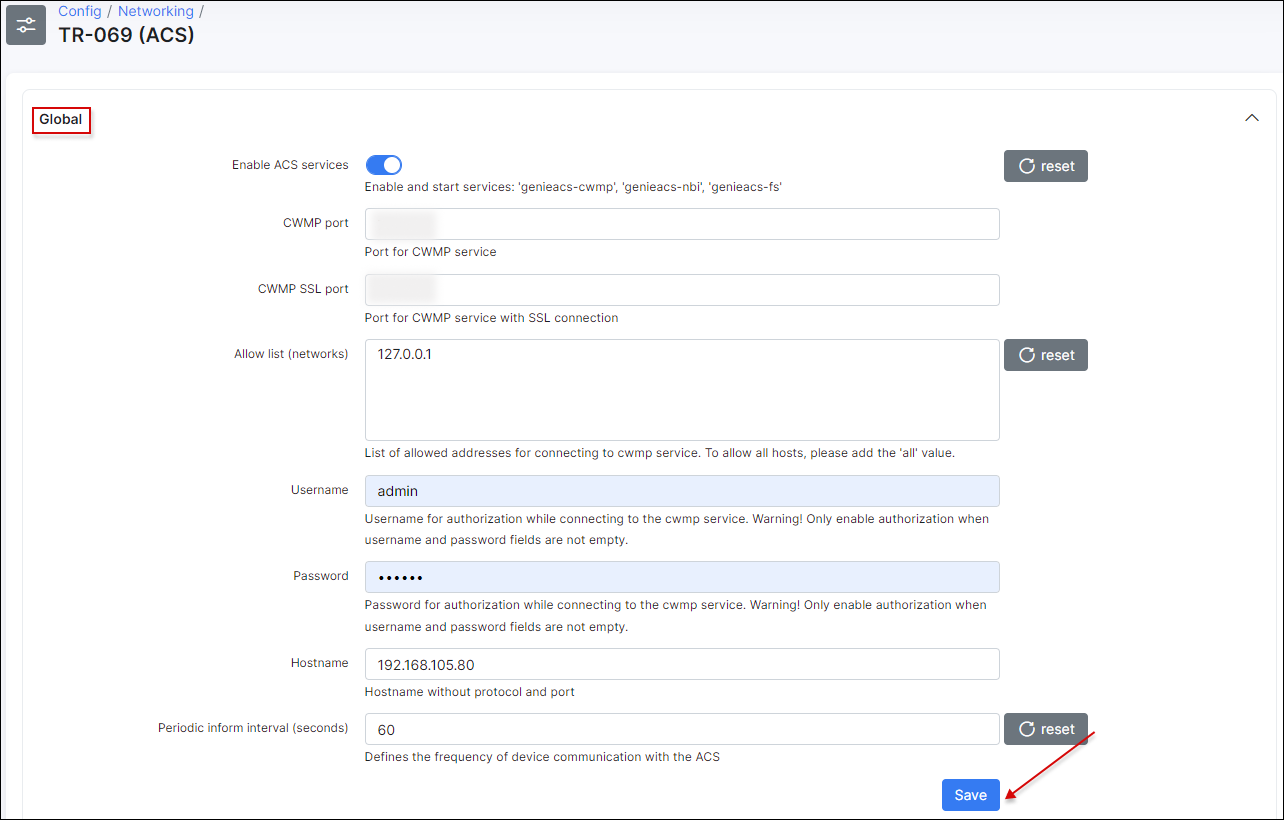
Here we have the next options:
-
Enable ACS services - enable/disable ACS services such as genieacs-cwmp, genieacs-nbi, genieacs-fs. Can be used to reboot the ACS server;
-
CWMP port - port for CWMP service;
-
CWMP SSL port - port for CWMP service with SSL connection;
-
Allow list (networks) - list of allowed networks for connecting to CWMP service. To allow all host, use
allvalue; -
Username - using for authorization to connect to CWMP service.
Authorization is possible only if username and password fields are not empty.
- Password - using for authorization to connect to CWMP service.
Authorization is possible only if username and password fields are not empty.
-
Hostname - hostname without protocol and port (192.168.105.80 or mysplynx.com depending on your configuration);
-
Periodic inform inverval (seconds) - interval on how often Splynx will sync with the ACS.
Click on Save button when configuration is completed.
¶ Step 2
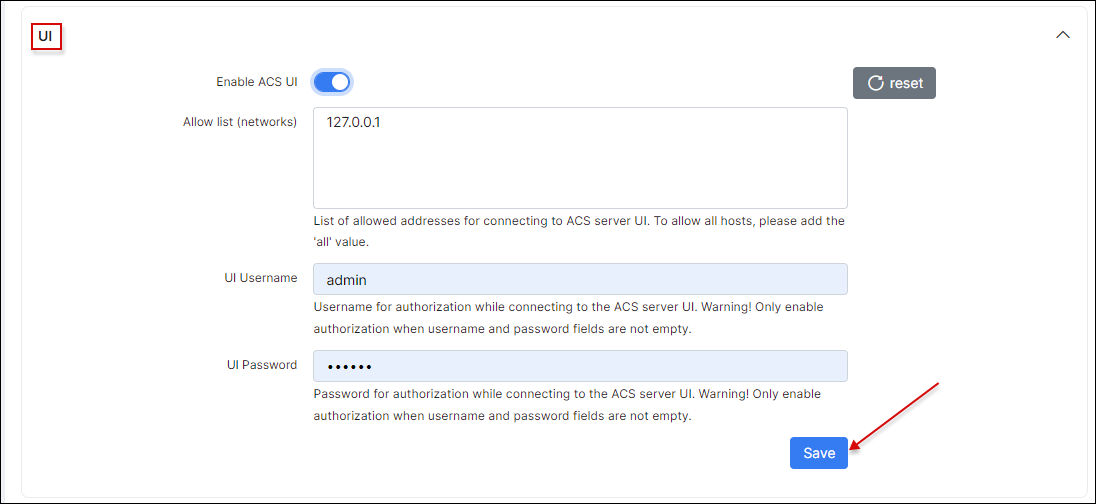
On the same menu, Config → Networking → TR-069 (ACS), let's configure ACS User Interface (UI) parameters:
-
Enable ACS UI - enable/disable an access via web interface;
-
Allow list (networks) - specify allowed networks from which you can access to the ACS UI. To allow all hosts, please add the
allvalue; -
UI username - username for UI access.
Authorization is possible only if username and password fields are not empty.
- UI password - password for UI access.
Authorization is possible only if username and password fields are not empty.
Click on Save button when configuration is completed.
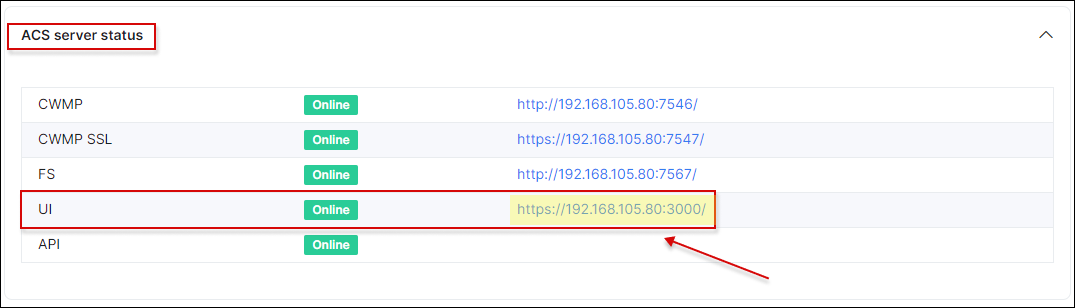
¶ Step 3
Click on a link for UI here:
You should be redirected to the Genie ACS page. If you prompted for login/password, use the credentials from a step 2.
After successful login, you will see a window as in the screenshot below, you should click on ABRACADABRA button.
All check-boxes should be selected except Presets and Provisions.
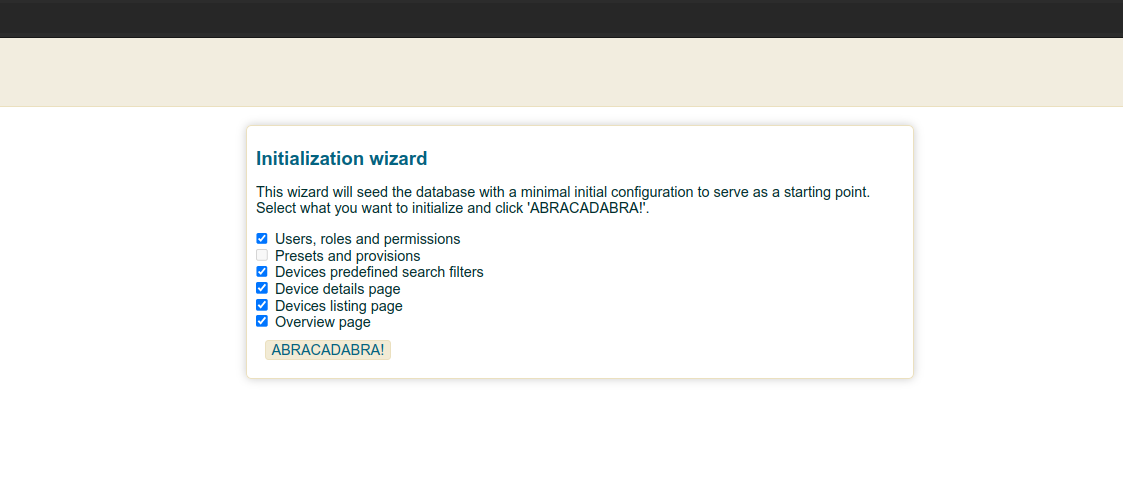
The default username and password for GenieACS are: admin / admin
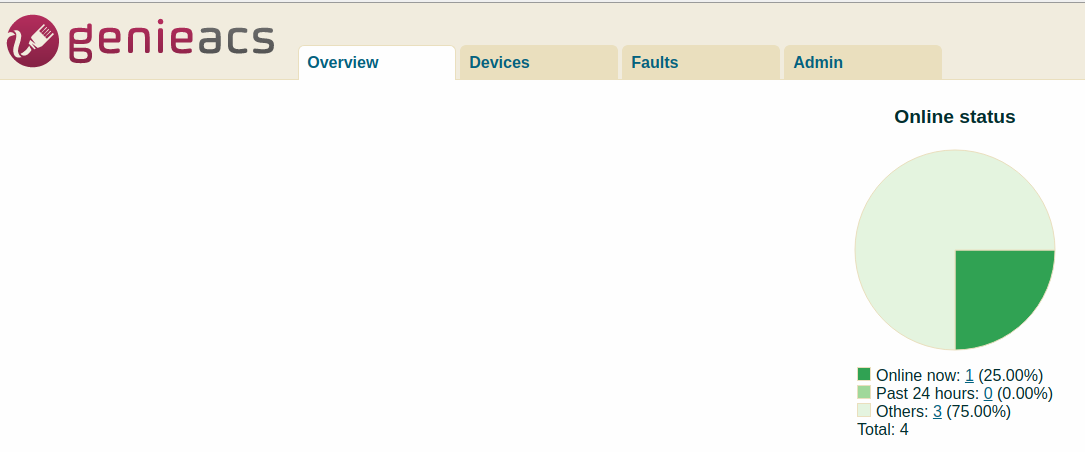
Once this done, you will see GenieACS dashboard:
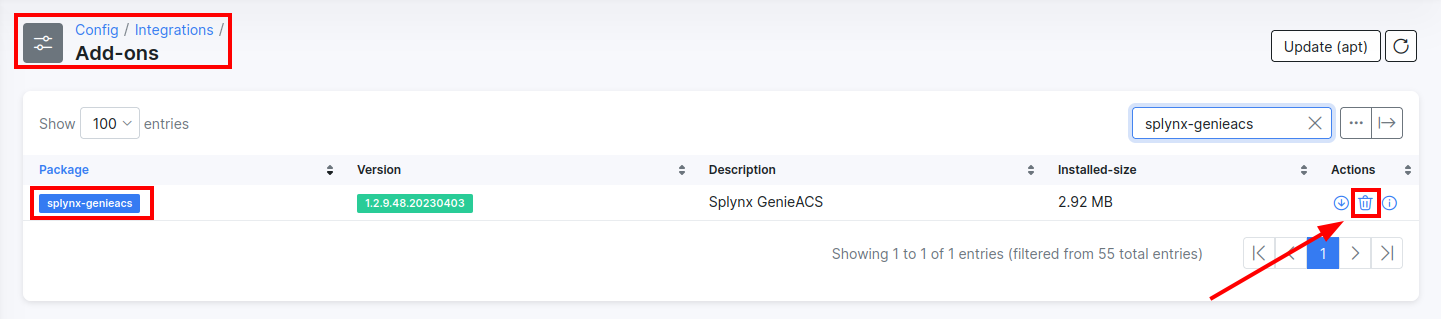
¶ Remove and disable ACS services
If you wish to remove and disable ACS services from your instance, please follow next steps in the given order:
- Disable ACS services in the
Config → Networking → TR-069 (ACS):
- Go to
Config → Integrations → Main modulesand disableTR-069 (ACS)module:
- Remove
splynx-genieacspackage fromConfig → Integrations → Add-onsmenu:
- Or you can remove it manually from CLI by executing the following command:
sudo apt remove splynx_genieacs