¶ Ticket feedback add-on
¶ Overview
The Ticket Feedback add-on is a powerful tool within Splynx designed to enhance your ticketing system by enabling you to gather and analyze feedback from your customers. This add-on allows you to send automated surveys to customers once their support tickets are resolved, providing them with an opportunity to express their satisfaction or dissatisfaction with the support they received.
Alongside the Splynx AI add-on, developed with AI technologies, this will provide you with a robust instrument to analyze and enhance the quality of your customer support service through a single report.
 To start using the Ticket feedback add-on, you should first configure email sending from Splynx.
¶ Installation
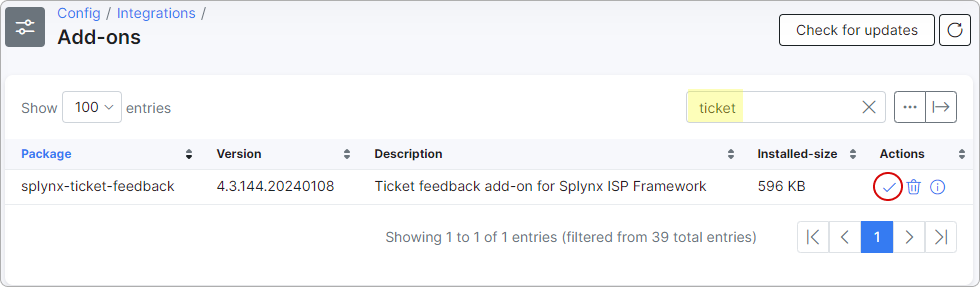
Navigate to Config → Integrations → Add-ons, search for splynx-ticket-feedback and click on the install button:
Once the installation is completed, a new template will automatically be created in Config → System → Templates under the template type Ticket Automation:
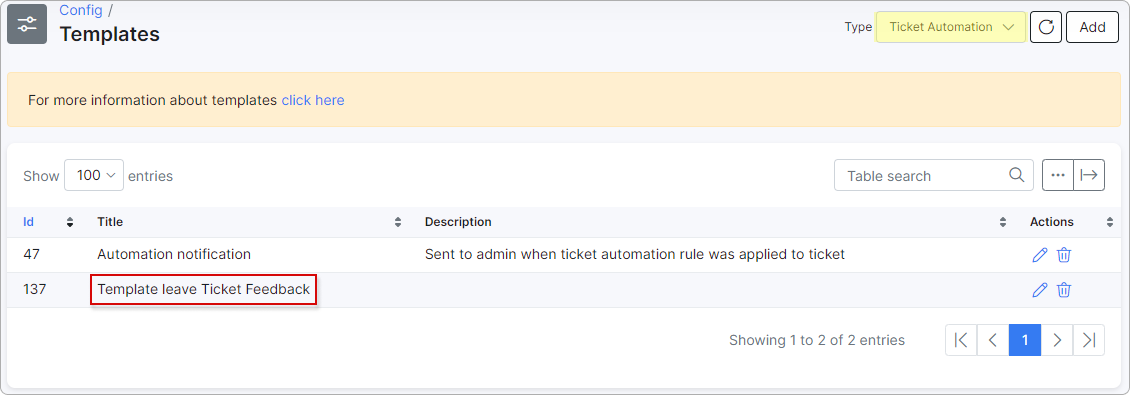
You can edit this template according to your needs.
¶ Configuration
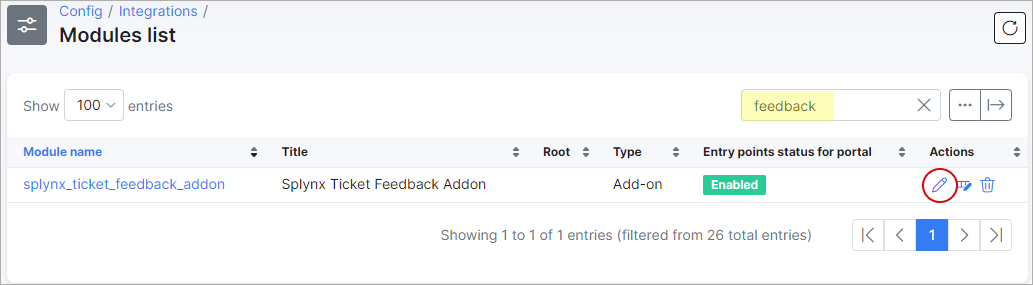
You can change the add-on settings under Config → Integrations → Modules list:
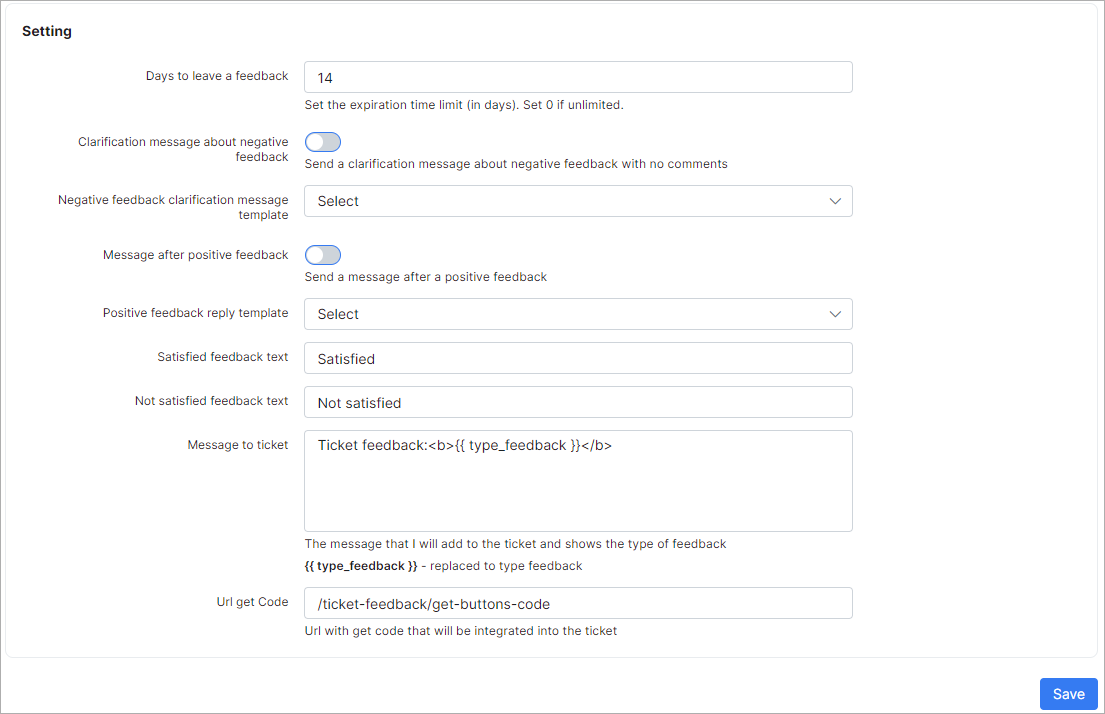
- Days to leave a feedback - set the expiration time limit for a feedback (in days). After the expiration time, the feedback cannot be sent. Set 0 if unlimited;
- Clarification message about negative feedback - enable the toggle to send a clarification message about negative feedback with no comments;
- Negative feedback clarification message template - select a template for the negative feedback clarification message;
- Message after positive feedback - enable the toggle to send a message after a positive feedback;
- Positive feedback reply template - select a template for a positive feedback reply;
- Satisfied feedback text - you can change the text for satisfied feedback in this field;
- Not satisfied feedback text - you can change the text for not satisfied feedback in this field;
- Message to ticket - here you can set the message that will be added to the ticket;
- Url get Code - Url with the get code that will be integrated into the ticket.
¶ Creating a new ticket rule
Once this is done, navigate to Config → Helpdesk → Ticket Automation and create a new rule with the following parameters:
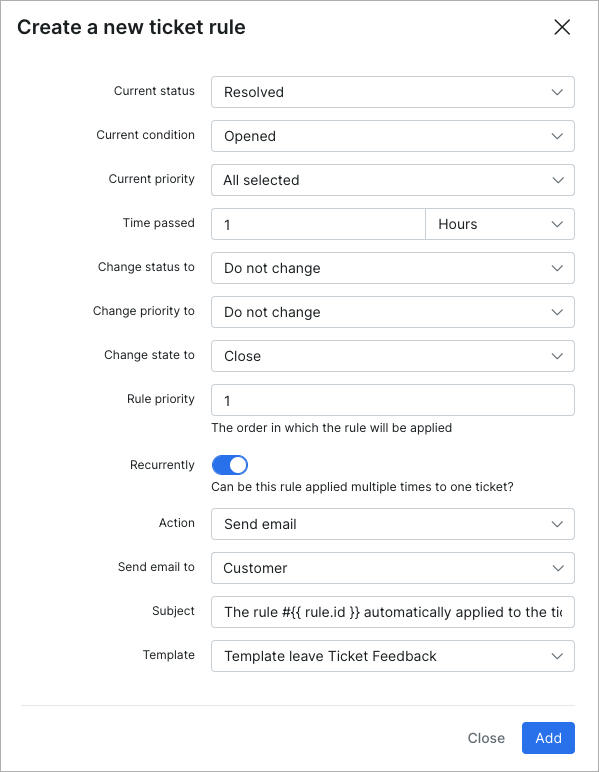
In this example - All tickets with the Resolved status will be closed in 1 hour (being in the resolved status for 1 hour), and the customer will receive an email with the survey buttons:
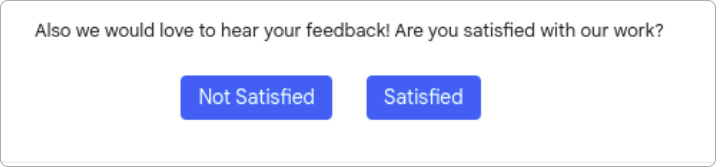
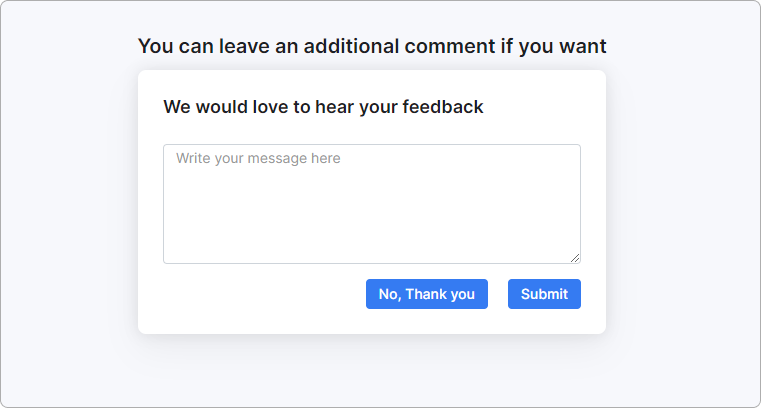
The customer can then leave an optional comment about this ticket after selecting either survey button.
The admin will then receive a new ticket message with the reaction and comment in the closed ticket:

Lastly, you can view the customer's feedback under Administration → Other reports → Support ticket reports:
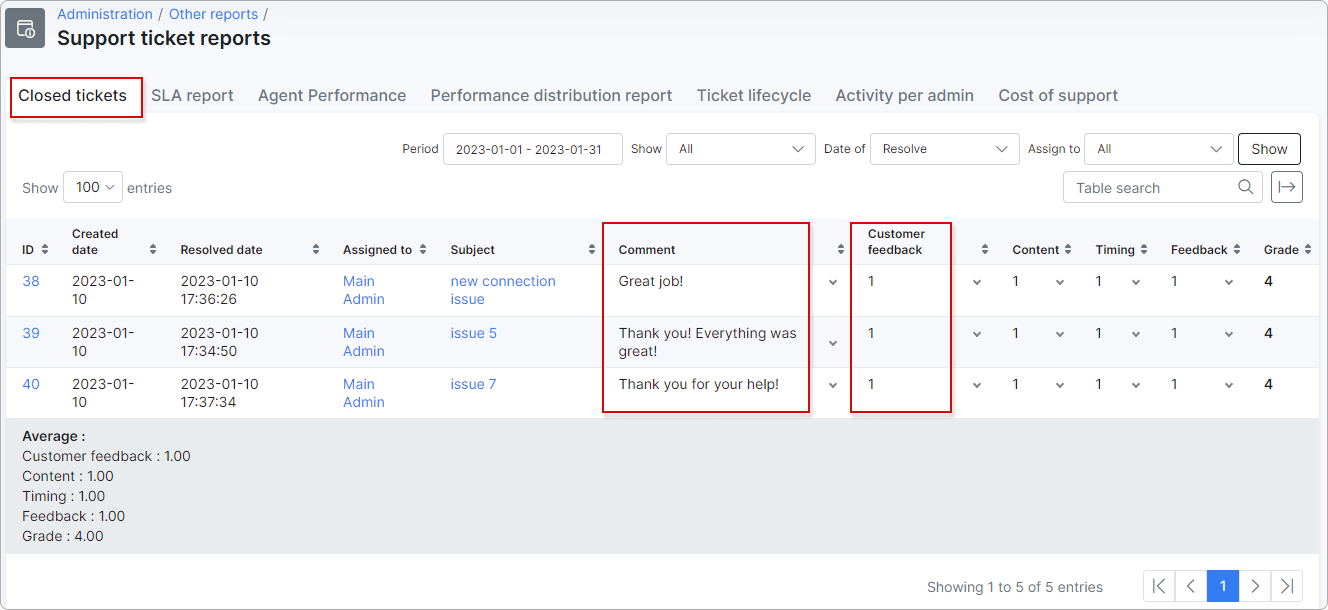
In the Customer feedback column:
1 - satisfied;
0 - not satisfied.
 To learn more about how to automate the evaluation of Content, Timing and Feedback columns, please read Splynx AI.
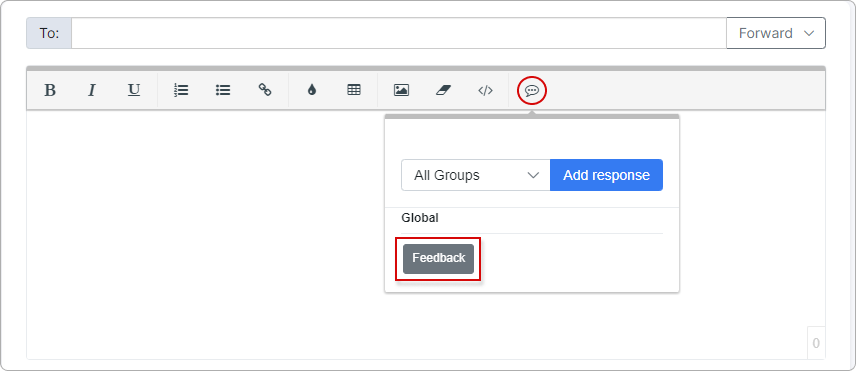
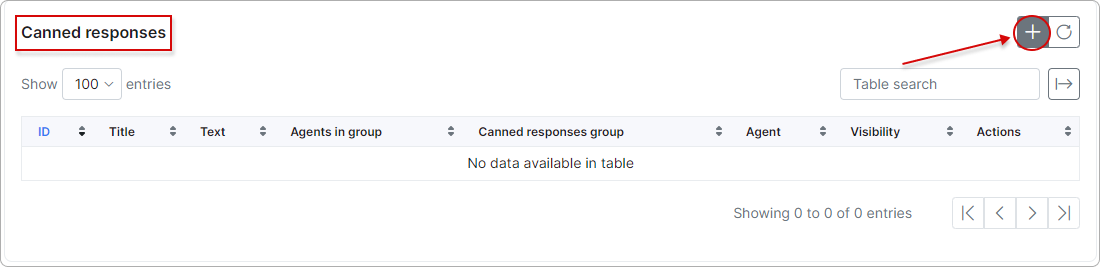
¶ Creating a new canned response
You can also create a new canned response under Config → Helpdesk → Canned responses with the feedback buttons.
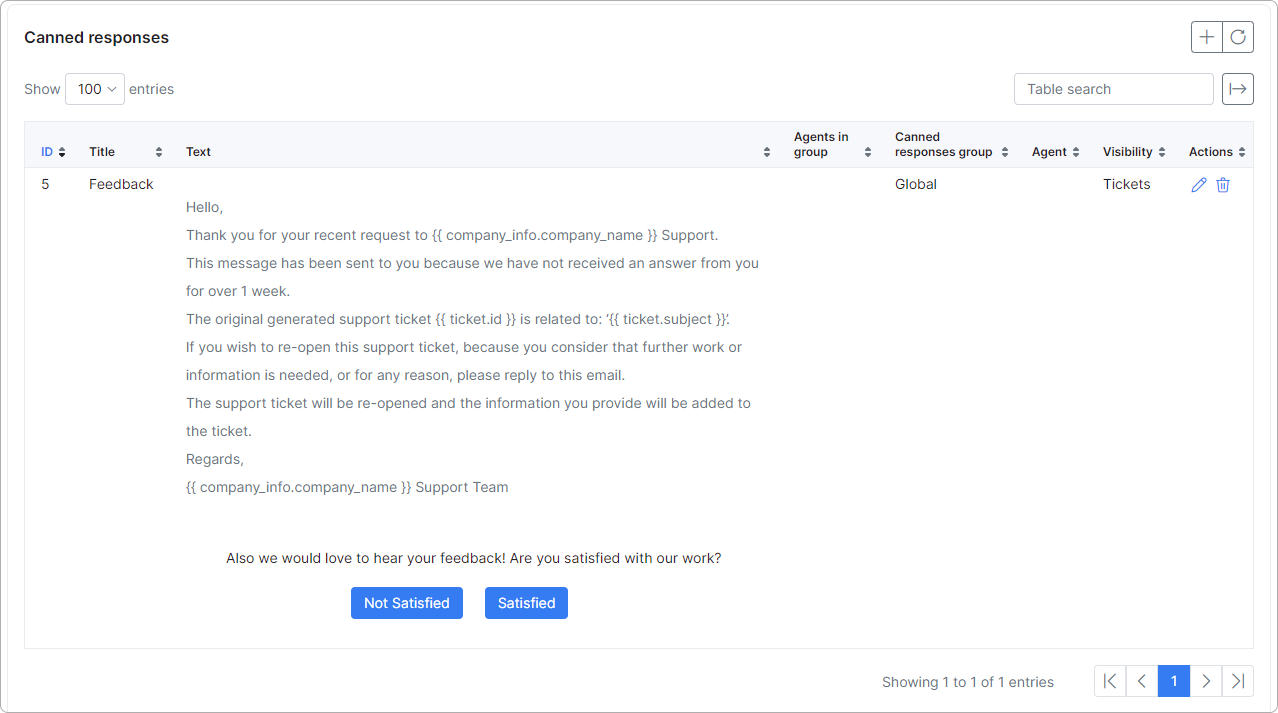
Add the relevant title, click on Add feedback buttons - the template will be inserted automatically. Then click the Add button.

The new canned response will appear in the Canned responses list:
Now you can use this canned response when replying to tickets: