¶ AuthorizeNet
- Overview
- Installation
- Configuration
- Synchronizing customer address with AuthorizeNet
- Charge invoices
- Payment accounts
- Payment refund
- Direct payments
¶ Overview
Authorize.net is a Splynx add-on used to synchronize customers, invoices and payments with the Authorize.net payment gateway - https://www.authorize.net.
 Some filters within the Authorize.net gateway can either delay the updating of payments or prevent charges from being confirmed:

¶ Installation
The add-on can be installed in two methods, via the CLI or via the Web UI of your Splynx server.
To install the Authorize.net add-on via CLI, the following commands can be used:
apt-get update
apt-get install splynx-authorizenet
To install it via the Web UI:
Navigate to Config → Integrations → Addons:

Locate or search for the "splynx-authorize.net" addon and click on the install button in the Actions column:

Click the OK, confirm button to begin the installation process:

¶ Configuration
After the installation process has completed, you have to configure the add-on under Config → Integrations → Modules list. Locate or search for the "Splynx AuthorizeNet Recurring Billing Add-On", and click on the edit  icon the Actions column, as depicted in the images below:


Main information:

Add-on settings:

-
API domain - your Splynx URL.
-
API key, API secret - default values. Don't change this if it is not completely necessary.
Options:

-
Payment account - select AuthorizeNet.
-
eCheck Payment account – select the account used for processing electronic checks.
-
Payment method - when a customer pays using this add-on, the payment will be allocated as this payment type.
-
Change the payment method when adding payment credentials – toggle to automatically update the payment method when new credentials are entered.
-
Payment type – define the payment type (e.g., Credit Card, Bank Account, or All).
-
Payment statement grouping - group bank statements (
Finance → Payment Statements → History) monthly or daily. -
Language - language of the addon.
-
Format expiration date – set the date format used for card expiration (e.g., YYYY-MM).
Email settings:
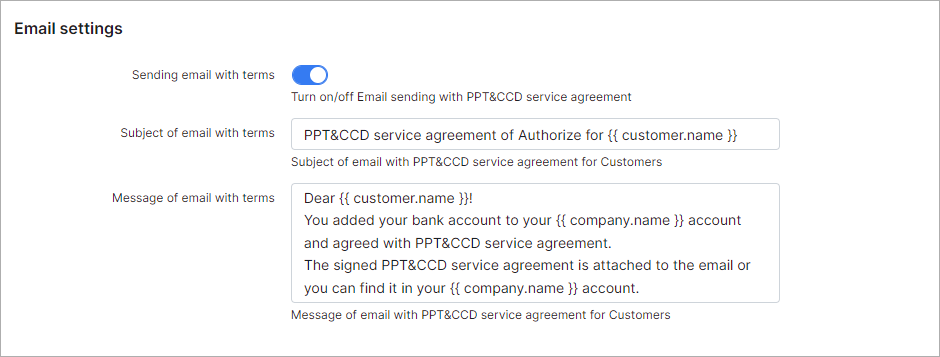
- Sending email with terms - enable this toggle to send emails to customers with the PPT&CCD service agreement (as per NACHA standards).
- Subject of email with terms - subject of the email with the PPT&CCD service agreement for customers.
- Message of email with terms - message of the email with the PPT&CCD service agreement for customers.
Partners settings:
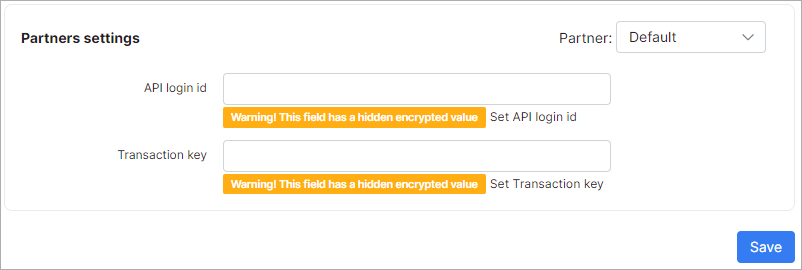
- API login id, Transaction key - described on the following page - https://support.authorize.net/s/article/How-do-I-obtain-my-API-Login-ID-and-Transaction-Key
¶ Synchronizing customer address with AuthorizeNet
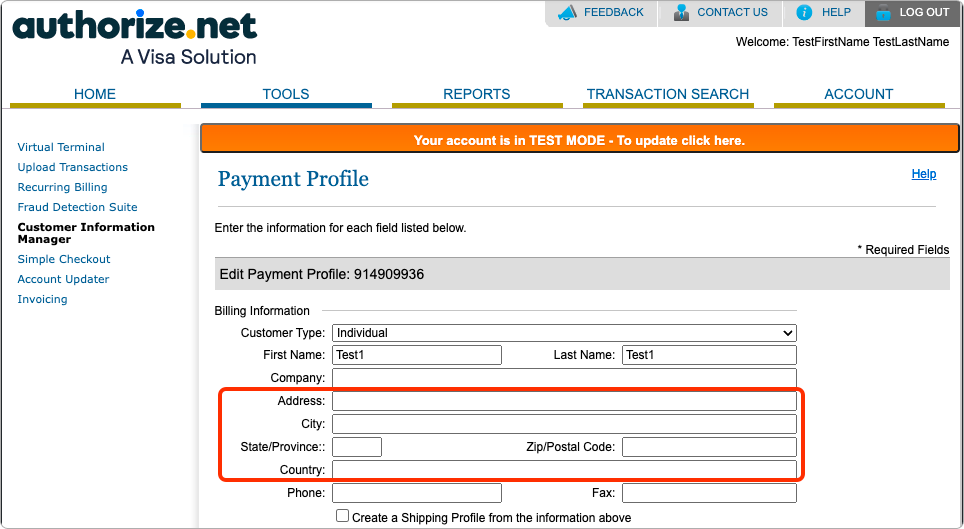
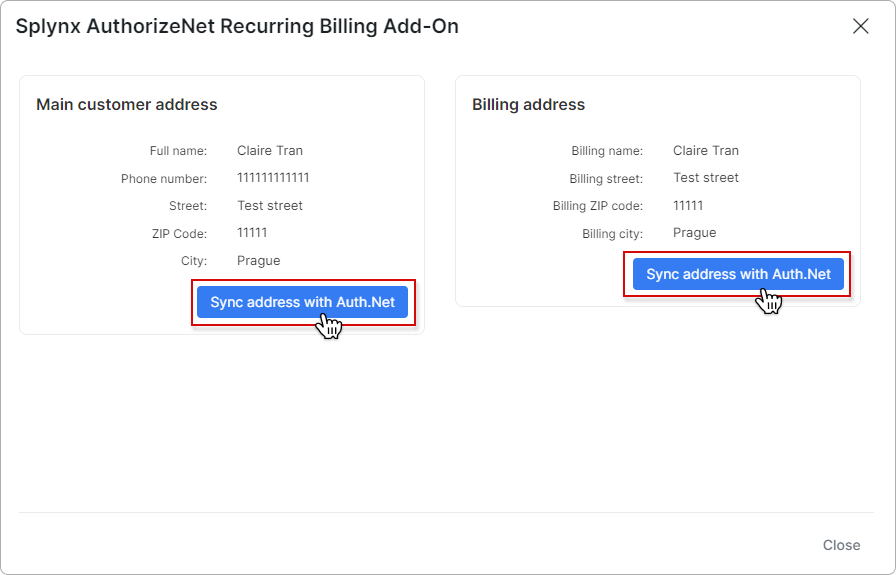
You can synchronize the customer's address from either the Information tab or the Billing address to the Authorize.net payment profile:
To initiate the process, navigate to the Payment accounts section within the Billing config tab in the customer's profile. Click on the tool icon in the AuthorizeNet row, and proceed to synchronize either the 'Main customer address' or 'Billing address':
![]()
If the synchronization process is successful, you will see the following message:

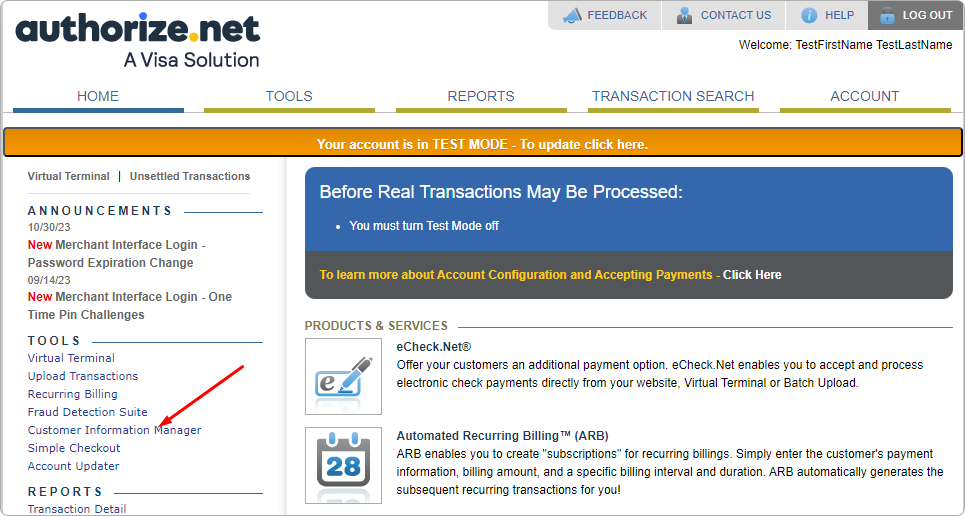
You will find the synchronized customer information in the Customer Information Manager section of your Authorize.net profile:
¶ Charge invoices
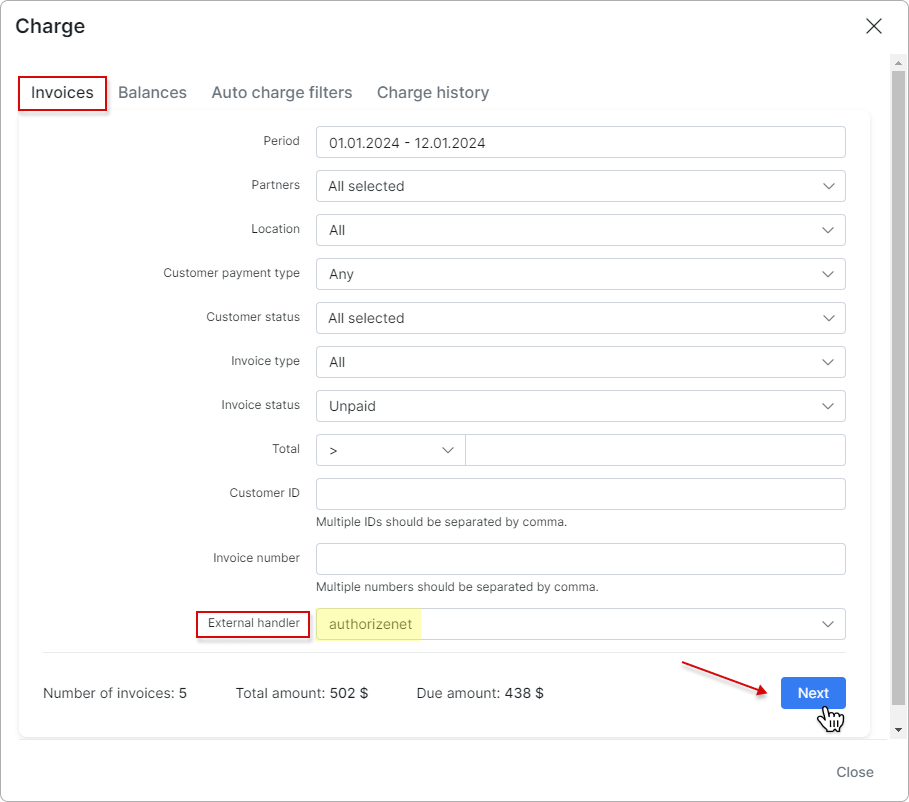
To charge invoices with Authorize.net, go to Finance → Invoices and click the Charge button located at the top-right corner of the page.
Select authorizenet as the External handler in the Invoices tab, and then click the Next button:
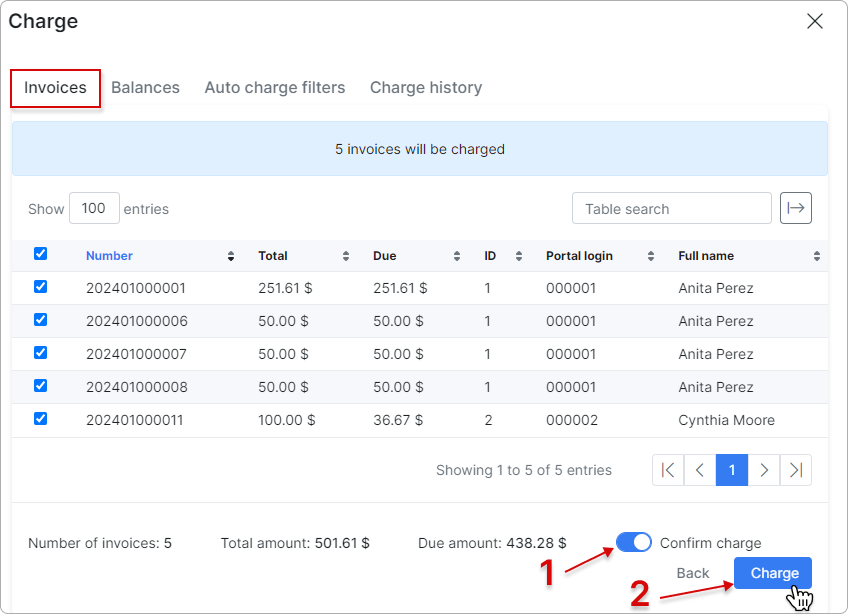
In the new window, toggle the Confirm charge switch to enable it, and then click the Charge button to complete the charging process:
To learn more details about how to charge invoices, please read Invoices
Thereafter, customers can pay their invoices and refill balances using the Authorize.net system.
- The customer can pay the invoices in Finance → Documents of the Customer Portal:

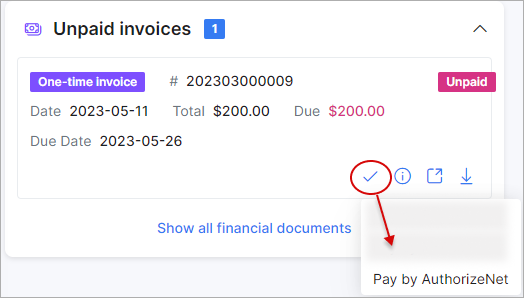
- Or from the Dashboard under the list of unpaid invoices:
¶ Paying invoices from the Admin portal
First, enable this option in the entry point configuration (it is disabled by default):

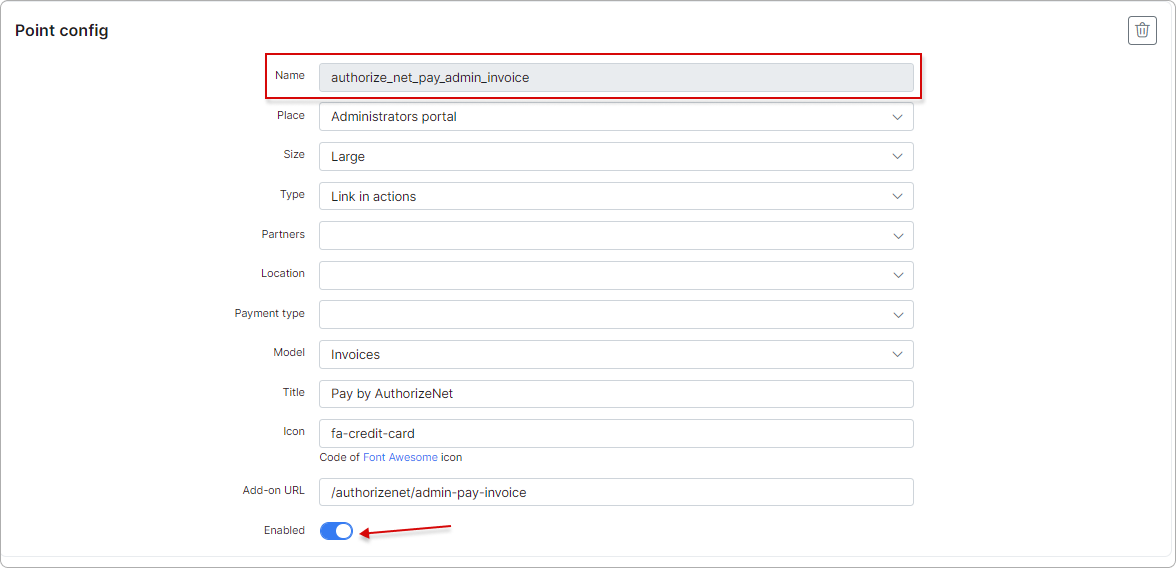
Then, the AuthorizeNet icon will be visible next to each invoice under Finance → Invoices and in the customer's profile.
![]()
¶ Payment accounts
There can be two payment accounts for Authorize.net: AuthorizeNet and AuthorizeNet eCheck. Their display can be configured under the add-on configuration in Modules list:
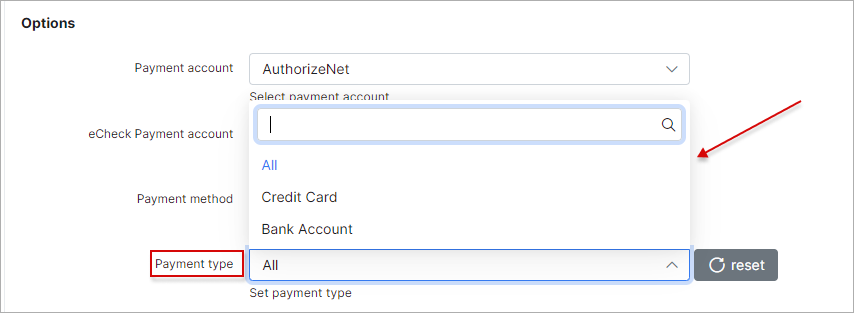
The customer can enter the payment credentials under AuthorizeNet payment credentials on the Customer Portal for both Credit card and Bank account if Payment type is set to All in the add-on configuration:

 All customer personal information related to their bank account is stored encrypted in the database.
When filling in the bank account details, you need to accept the PPT&CCD service agreement to save them. After saving the details, the agreement will be stored in the customer's profile under the Documents tab.
An email from the template indicated in the settings will be sent to the customer's email address if sending is enabled in the config
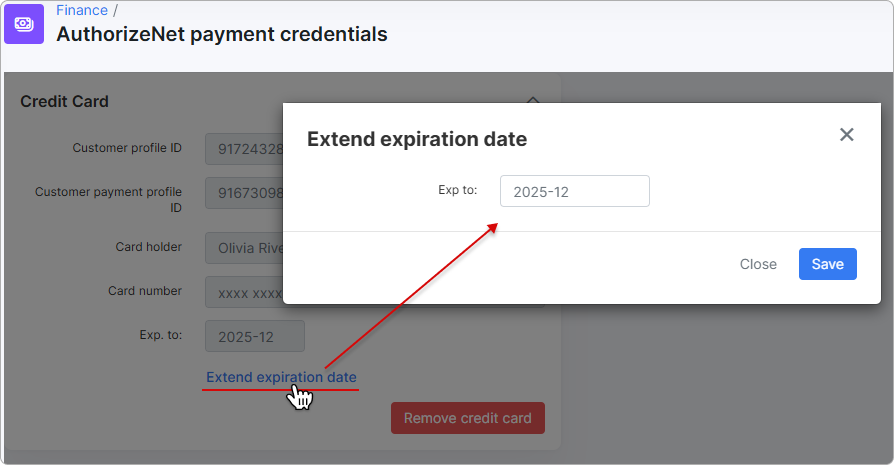
Once the card is added, you can edit the expiration date from the Customer portal:
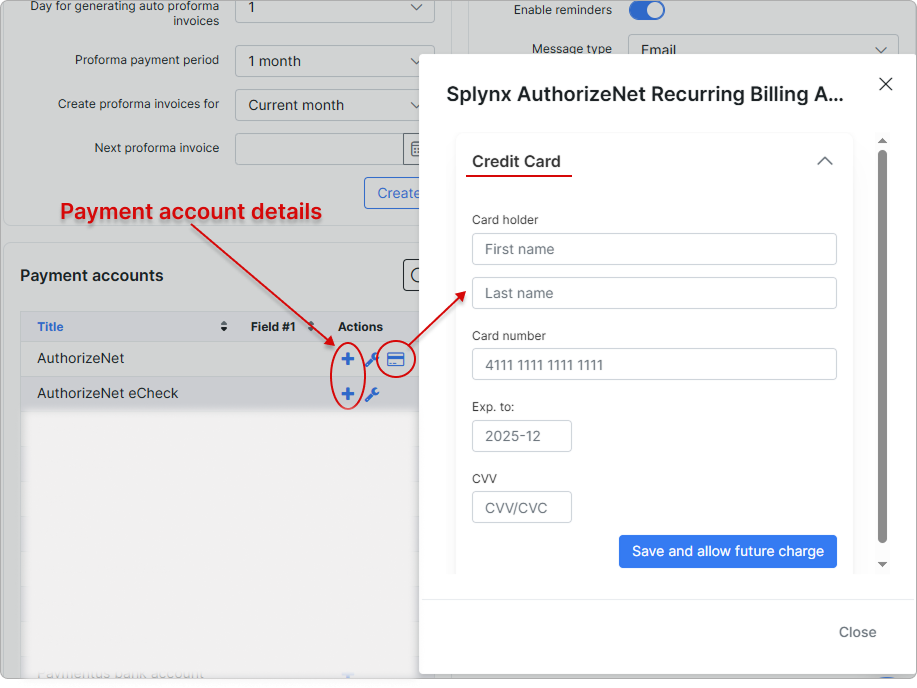
You can likewise set the customer's payment account and credit card credentials from the Admin portal in the customer's Billing config under the Payment accounts section:
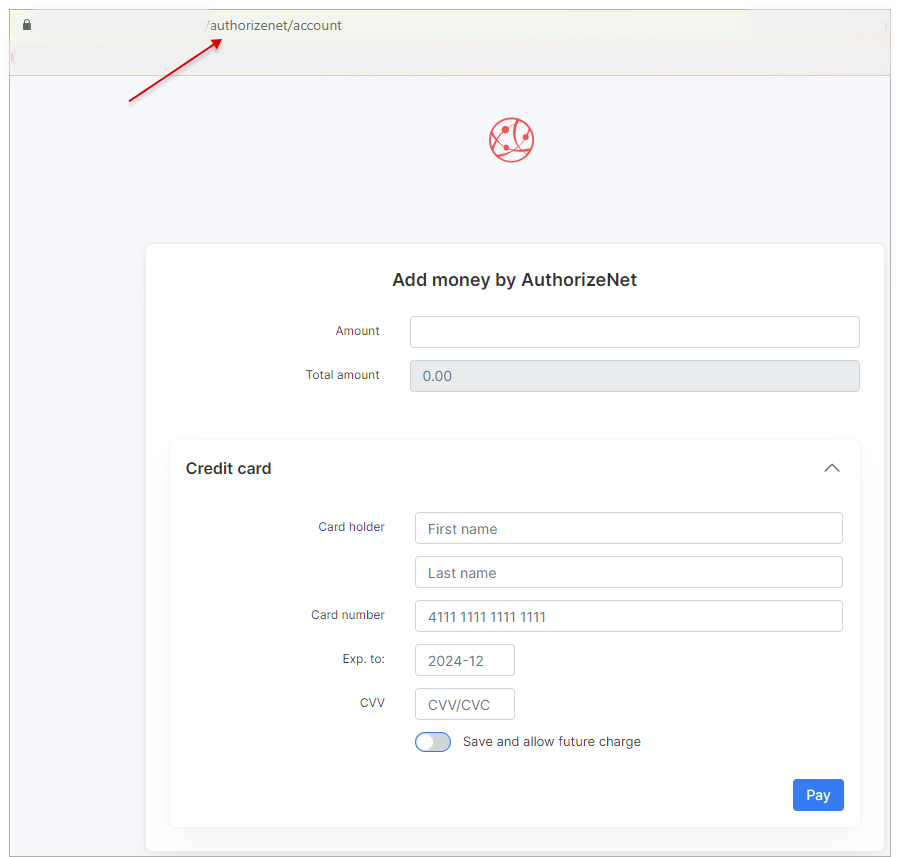
To refill customers' balances, the following link can be used - http://yoursplynxurl/authorizenet/account, where they will have to enter registration details for the first time:
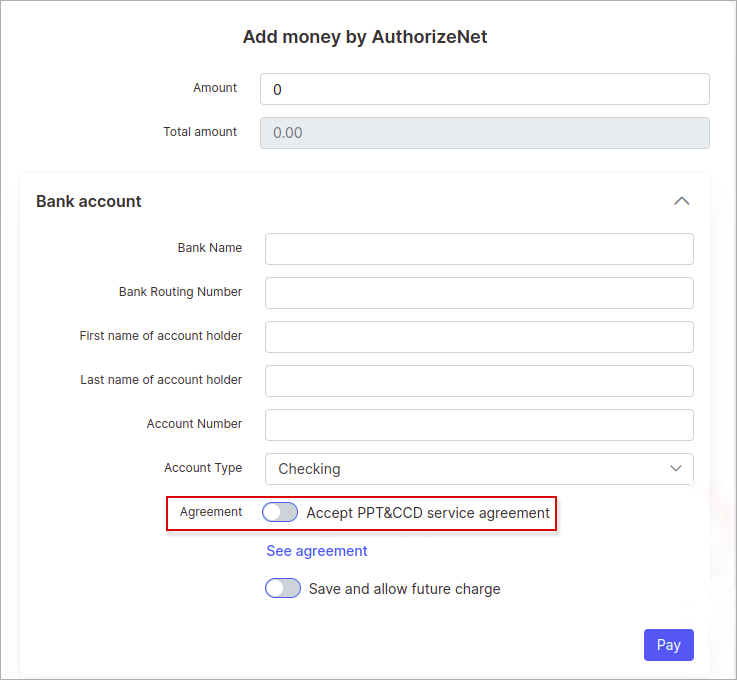
When a customer adds money from their bank account via AuthorizeNet, they first need to accept the PPT&CCD service agreement:
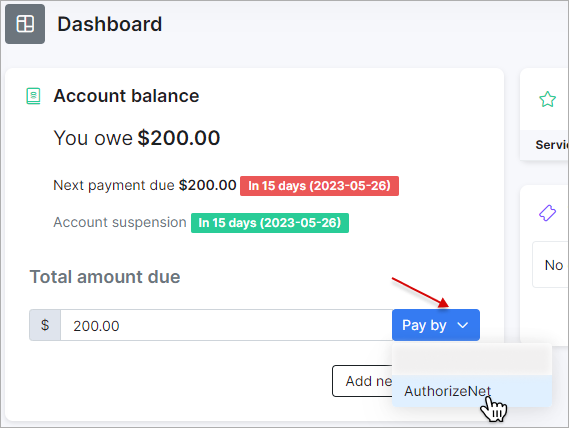
The customer can also refill their balance from the Dashboard with the Pay by button:
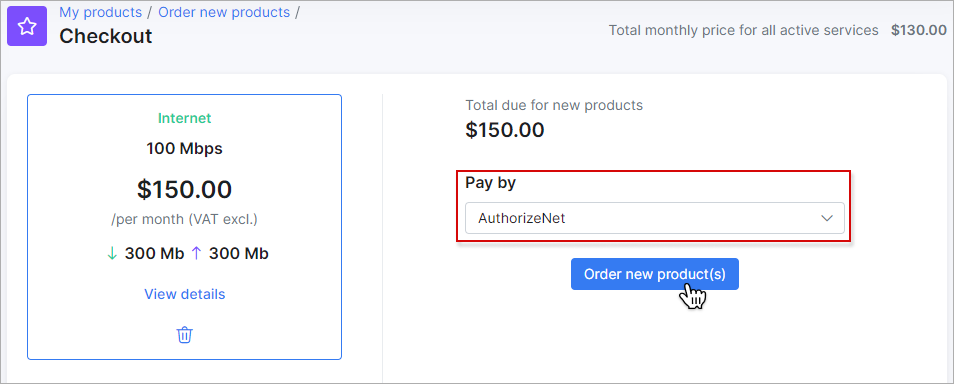
To order new products with Authorize.net on the Customer portal, go to My products → Order new products. In the Checkout, choose AuthorizeNet in the Pay by list and click the Order new product(s) button:
To learn more about how to order products on the Customer Portal, read the Order new products article.
¶ Payment refund
Payments made with Authorize.net can be refunded to the customer with the Refund button:

Enter the refund amount. You can enter the full amount or make a partial refund. Refund amount can only be equal to or less than the invoice amount.
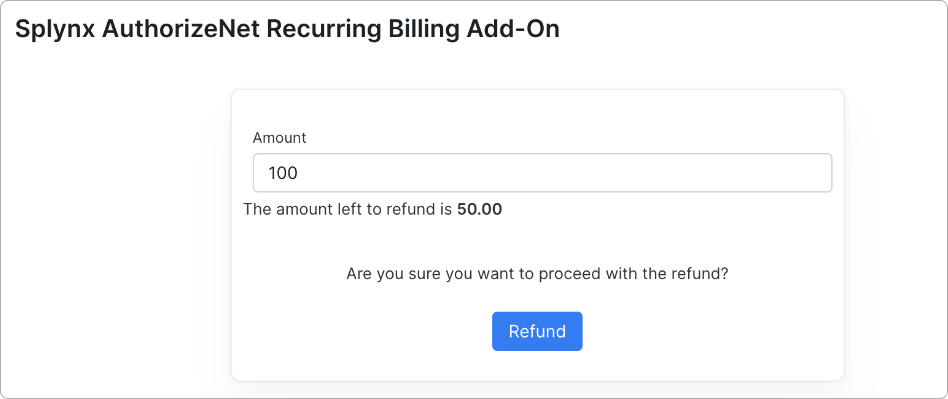
Then, a credit note will be generated for the refunded amount, and the refund will be processed immediately.
 If the payment has already been refunded, you will receive a warning message:

¶ Direct payments
You have the option to include a direct payment link in your invoice or proforma invoice template, as well as in your email notification template for invoices and proforma invoices.
By doing so, your customers will be able to pay their invoices without requiring any authorization:
-
pay invoice by number - https://YOUR_DOMAIN/authorizenet/direct-pay-invoice?item_id={{ invoice.number }}
-
pay invoice by ID - https://YOUR_DOMAIN/authorizenet/direct-pay-invoice-by-id?item_id={{ invoice.id }}
-
pay proforma by number - https://YOUR_DOMAIN/authorizenet/direct-pay-request?item_id={{ request.number }}
-
pay proforma by ID - https://YOUR_DOMAIN/authorizenet/direct-pay-request-by-id?item_id={{ request.id }}


