¶ Splynx Field Service app
¶ Overview
The Splynx Field Service app streamlines task management in the field, providing a fast and efficient way to oversee operations. All tasks are centralized on a single platform, enabling technicians to complete their work with ease while keeping you informed in real time.
Say goodbye to printed work orders — task details, checklists, time tracking, and customer information are all readily accessible.
For optimal, error-free use of the Splynx Field Service app, ensure that the technicians who will be using the application have the following permissions in Splynx:
¶ Download app links
To download the Splynx Field Service app use the next links:
¶ Dashboard
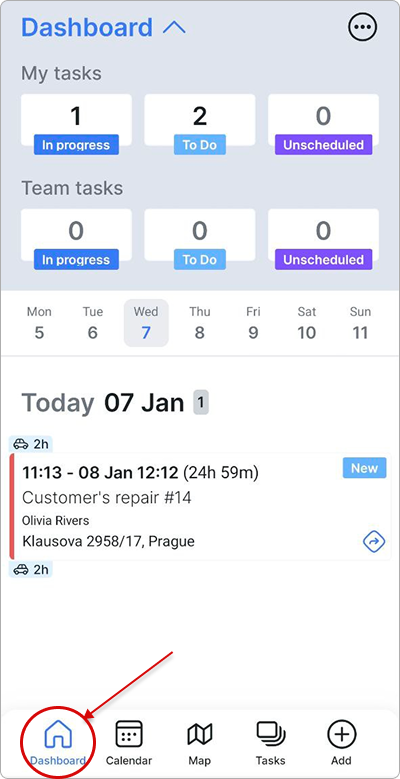
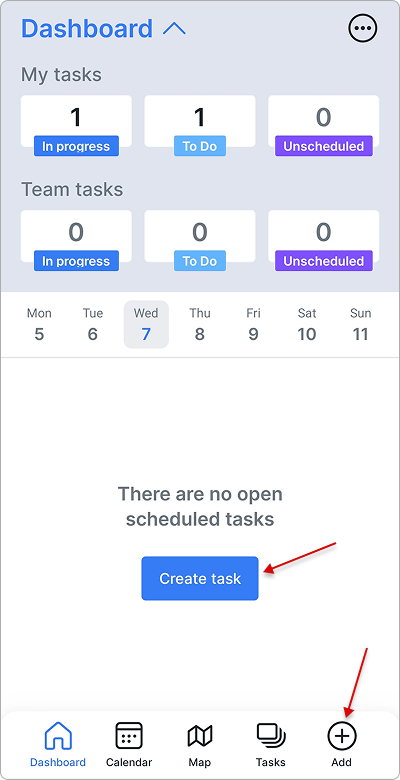
On the app dashboard, you can view the number of tasks assigned to you, as well as those assigned to your team. These tasks are further categorized into scheduled and unscheduled tasks.
A user-friendly calendar allows you to see which tasks are scheduled for each day:
¶ Account settings
The breadcrumbs button in the top-right corner of the Dashboard opens the Clear cache option and settings:
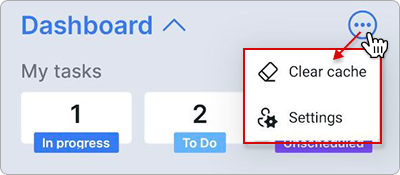
By clicking Settings, a list of account options opens, allowing you to configure notifications, change your password, enable two-factor authentication, read the app’s privacy policy, or log out:

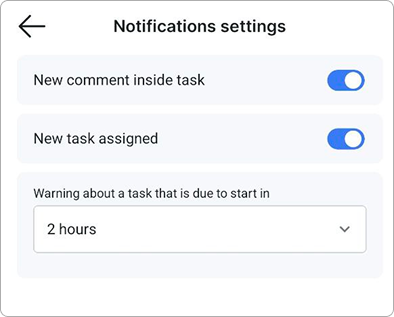
In Notification settings, you can choose which notifications to receive, including:
-
When a new comment is added to a task
-
When a new task is assigned to you
-
How many hours in advance you want to be notified about a scheduled task.
¶ Calendar
The integrated calendar simplifies the management of scheduled tasks, helping you navigate them efficiently and stay organized.

By using the filter in the top-right corner of the page, you can choose to display both tasks assigned to you and team tasks (My+team tasks), or display only tasks assigned specifically to you or only team tasks. You can also filter calendar entries by customer or by project:

¶ Map
Map integration streamlines task location tracking, improving visibility and supporting more efficient, reliable field operations.
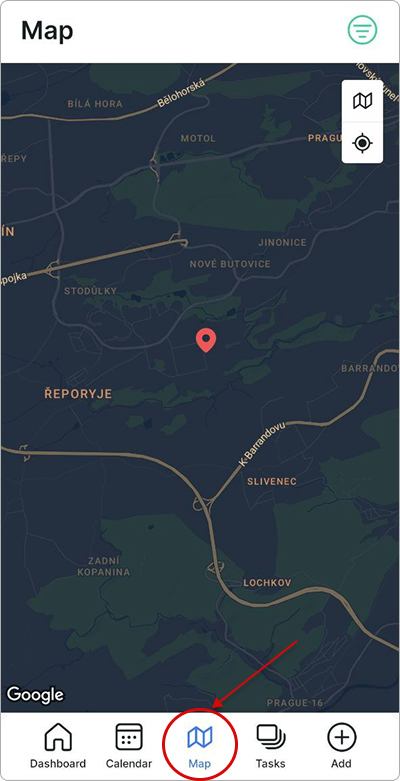
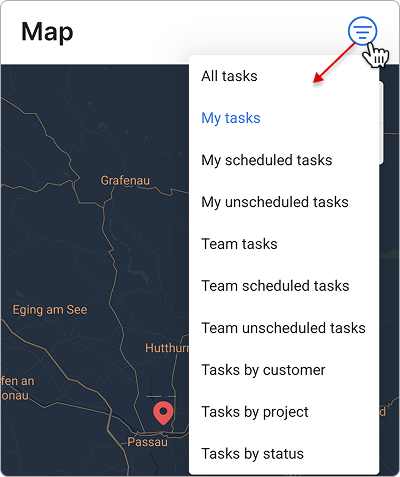
Use the menu in the top-right corner to filter which tasks are displayed on the map, allowing you to view tasks by assignment, schedule, team, customer, project, or status:
By clicking the map icon, you can choose the map type: Standard, Satellite, or Topographic:

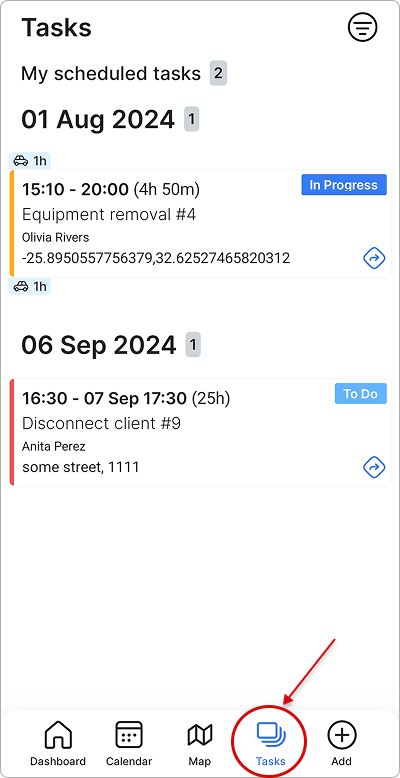
¶ Tasks
The Tasks section synchronizes all tasks and their details from the server to the app, allowing you to create new tasks, update existing ones, link customers and inventory items, and capture customer signatures on documents directly within the app.
¶ Adding new tasks
Tasks can be added from the Dashboard by clicking the Create task button if no task is scheduled for the week, or directly from the menu bar below by clicking the Add button:
The task form will appear, allowing you to enter all necessary details. The Title, Project, and Partner fields are required. Then click on Save.
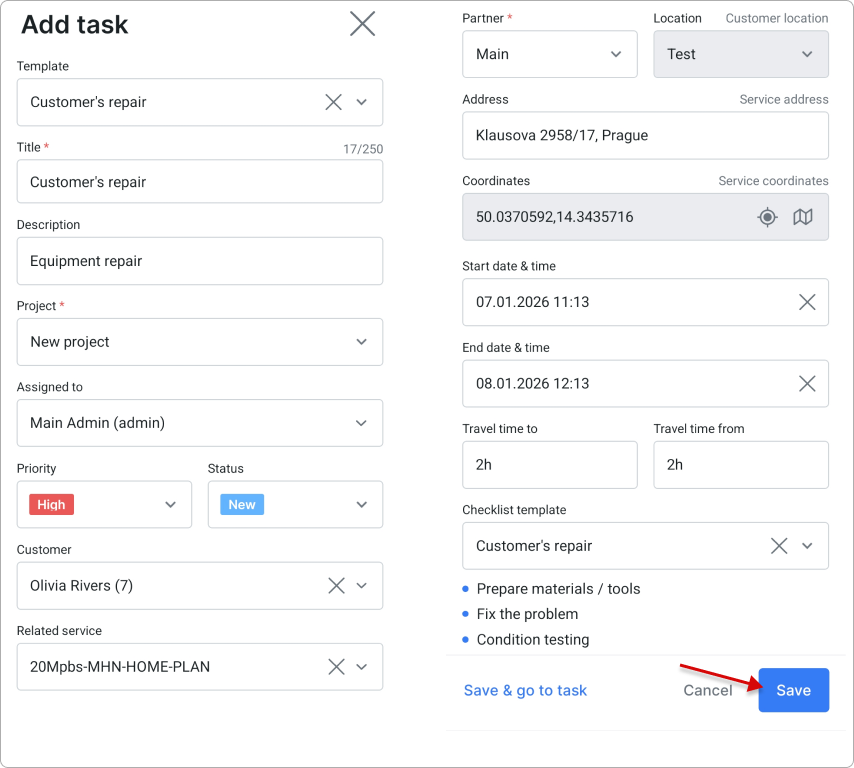
Within the task, the menu bar below allows you to view the customer’s details, attachments, comments, related items, etc.:

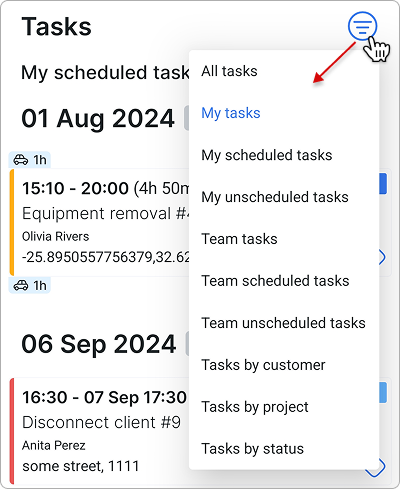
¶ Filter
Tasks can be filtered by assignment, schedule, team, customer, project, or status:
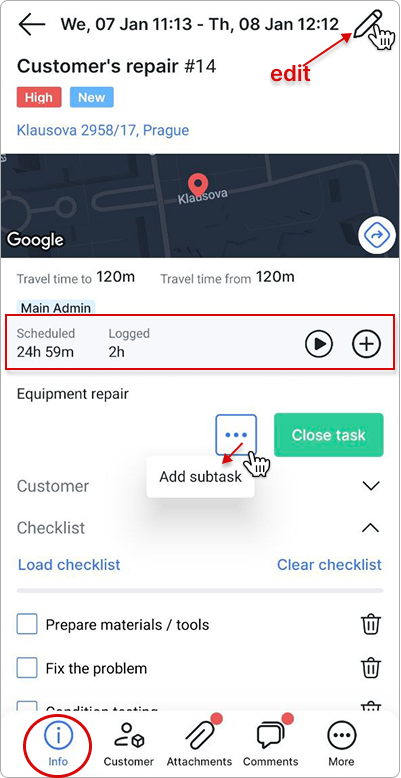
¶ Info
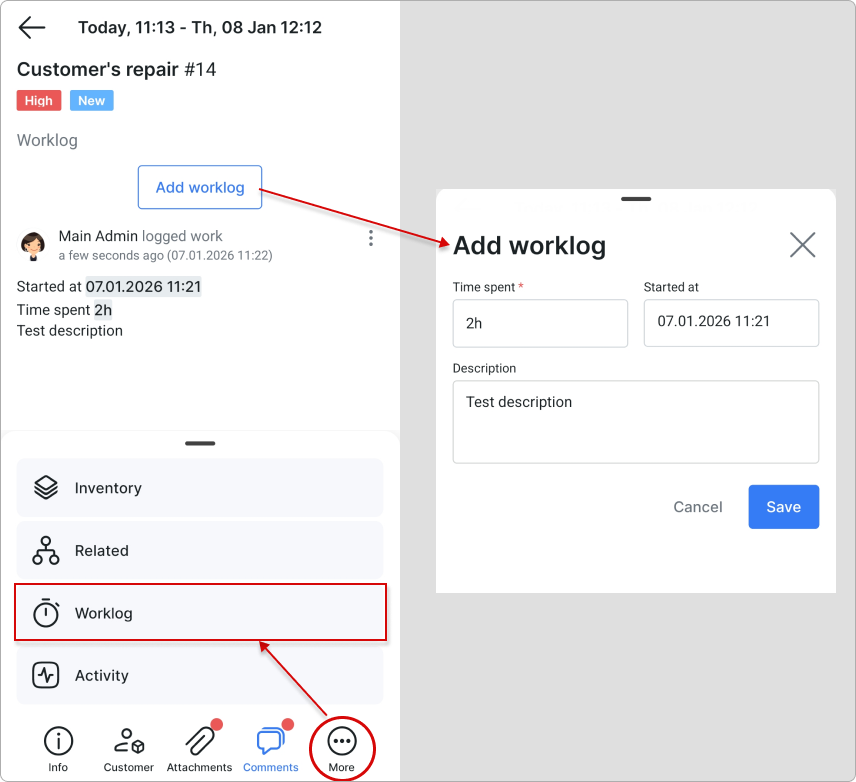
In the Info section, you can view all task details: location, status, and scheduled time; as well as add or remove checklist items, close the task, add sub-tasks, manage the worklog, and edit task details.
¶ Customer
In this task section, you can view all details and options related to the linked customer. You can add inventory items and manage the customer’s documents, including downloading, signing, sending to the customer, or deleting them.
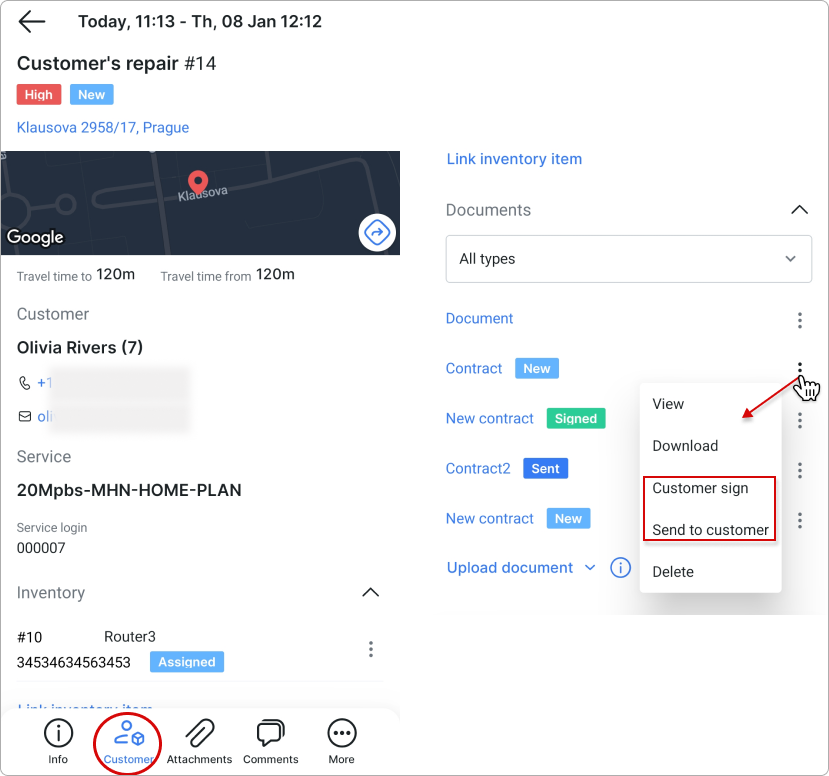
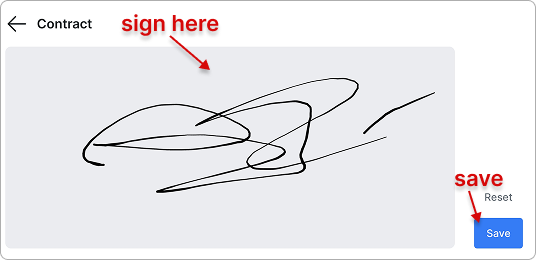
By selecting the Customer sign option next to the customer’s contract, you can initiate the signing process directly within the app. Click Save afterward.
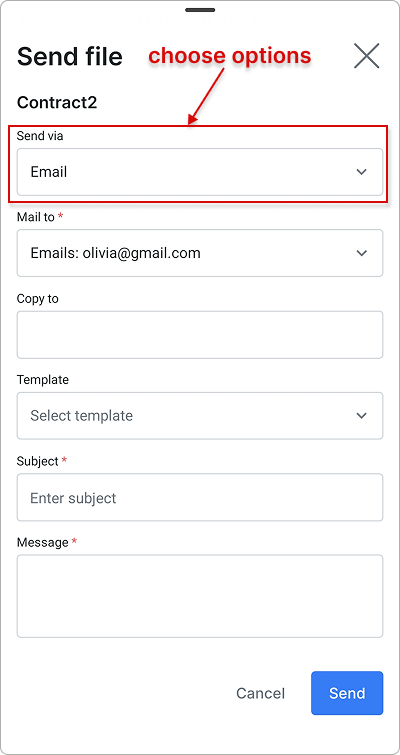
By selecting the Send to customer option, you can send the document to the customer via email, SMS, the Portal, or both the Portal and email:
 For more detailed information and limitations, see the Document signing section below.
¶ Document signing
Document signing in the Field Service app is not ad-hoc and not created by technicians.
All signable documents must be prepared in advance from the Splynx admin interface.
How document signing works
1. Create a signable contract in the admin interface
Before a technician can request a signature in the Field Service app, an administrator must:
-
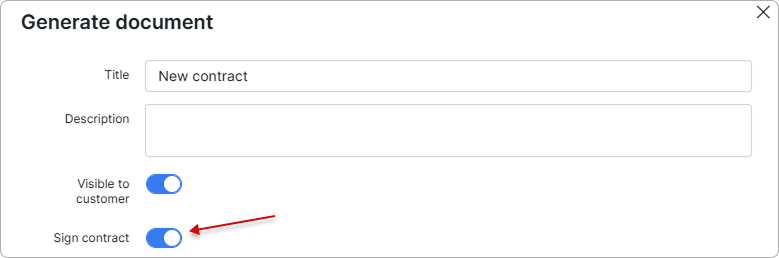
Create a contract in the Splynx admin interface on the relevant customer.
-
Ensure the contract is marked as signable:
Only contracts created this way are available for signing in the mobile app.
2. Technician requests the signature in the Field Service app
Once a task is opened in the Field Service app and a customer is linked:
-
The technician navigates to Customer → Documents within the task.
-
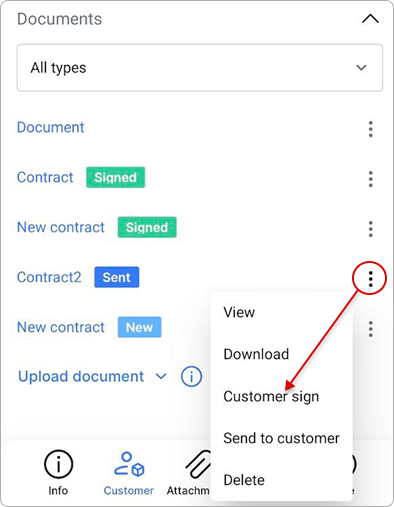
Existing customer contracts are displayed.
-
From the document options menu, the technician selects
Customer sign:
-
The customer signs directly on the technician’s mobile device.
-
The signed document is saved back to the customer record automatically.
Technicians cannot create contracts, modify templates, or upload unsigned contracts for signing from the app. Their role is strictly to request and capture signatures on pre-configured documents.
3. Optional: Send documents to the customer
From the same document menu, technicians can also:
-
Send documents to the customer via email, SMS, the Customer portal, or a combination of these.
-
Download or view existing documents if permissions allow.
Key limitations to be aware of
Document signing only works for contracts created in the admin interface.
The Field Service app does not generate contracts.
If a contract is not marked as signable, it will not appear as a signing option in the app.
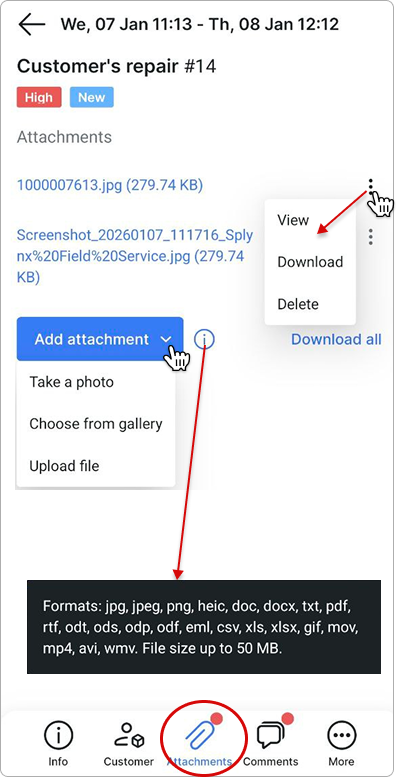
¶ Attachments
Here, you can add and manage attachments related to the task.
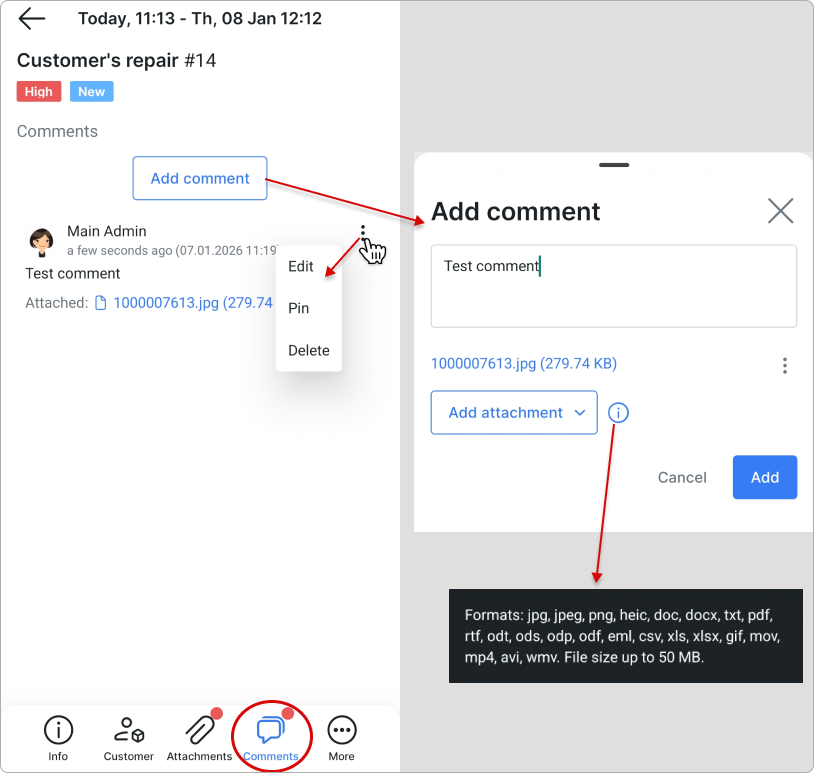
Formats: jpg, jpeg, png, heic, doc, docx, txt, pdf, rtf, odt, ods, odp, odf, eml, csv, xls, xlsx, gif, mov, mp4, avi, wmv.
File size: up to 50 MB.
¶ Comments
Click the Add comment button in the Comments section to create a new comment and attach files if needed. You can then edit, pin, or delete comments.
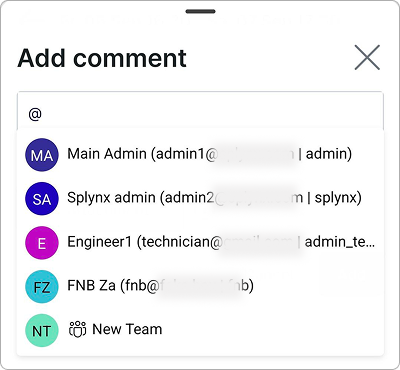
Start typing the @ sign to mention admins or teams in the comment:
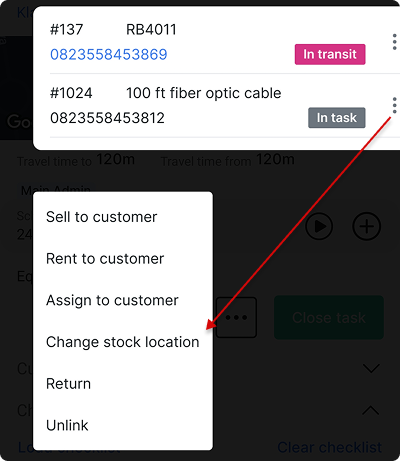
¶ Inventory
In this section, you can link available inventory items to the task.
Inventory searches are limited to the currently selected stock location. If an item does not appear in the search results, verify that the correct stock location is selected.
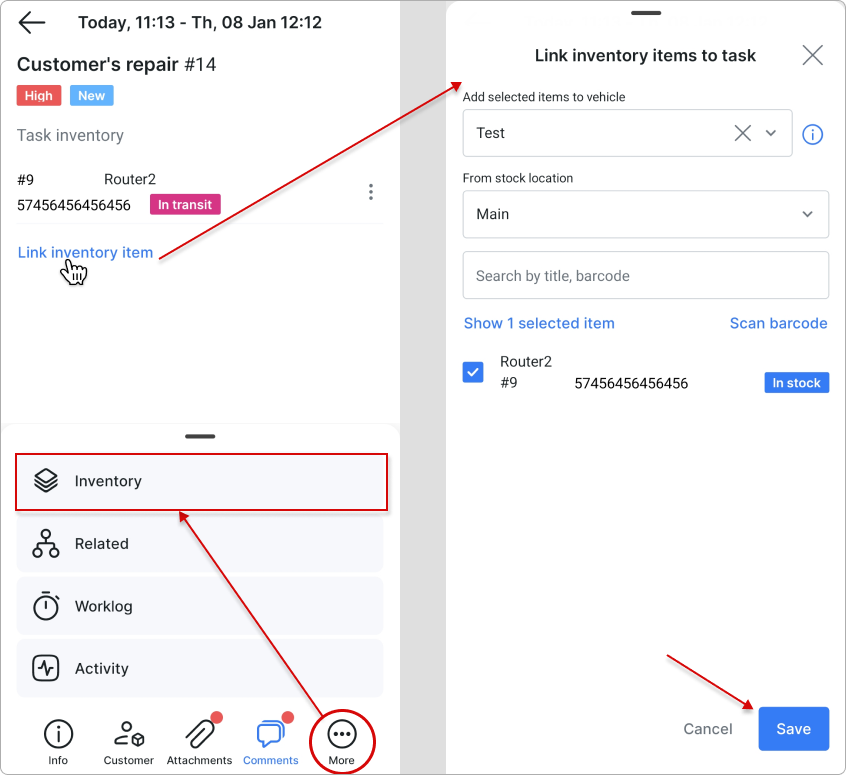
You can then manage the linked items in the same way as in the Inventory section of your server: for example, selling, renting, assigning items to a customer, returning them, or unlinking them from the task:
¶ Related
In the Related section, you can add sub-tasks, link related or parent tasks, and link a ticket:

¶ Worklog
The Worklog helps track all time spent on a task. All worklog entries can be edited or deleted.
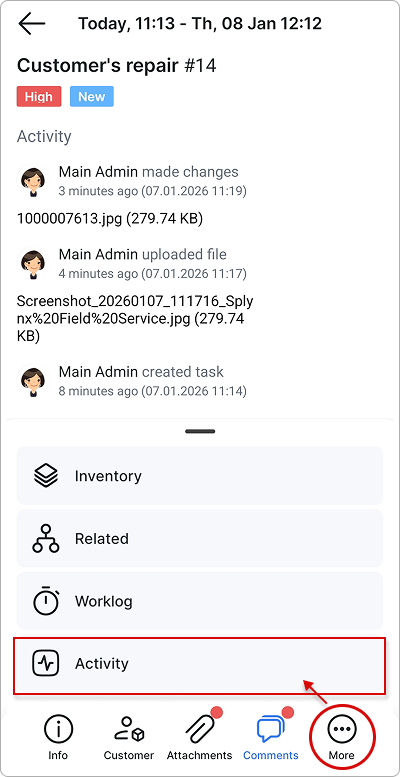
¶ Activity
All actions performed on the task can be viewed in the Activity section: