¶ Customer documents
- Overview
- Documents on the Customer portal
- How to upload a document
- File management
- How to generate a document
- Statuses
- Templates
- Contract and its signing by the customer
- Sharing contracts outside of Splynx
¶ Overview
In Splynx, it is possible to keep all contracts and agreements for each customer in a digitalized form.
In the Documents section, you can upload documents in any format, offering a secure, organized, and easily manageable way to store customer documents. Additionally, you can generate documents based on predefined templates.

¶ Documents on the Customer portal
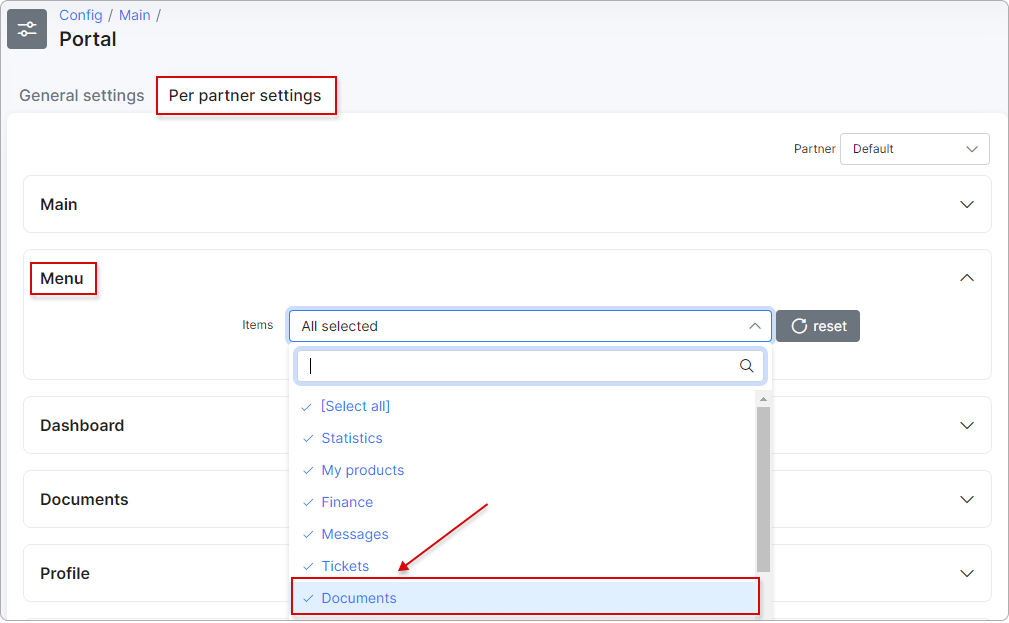
To enable the Documents section on the Customer portal, please navigate to Config → Main → Portal (Per partner settings/Menu), and select Documents from the drop-down list:
To learn more about the documents available on the Customer Portal, please read Documents (Customer portal)
¶ How to upload a document
To upload a document to Splynx, follow these steps:
-
Click the
Uploadbutton located at the top right corner of the table. A pop-up window titled Upload file will appear. -
In this window, you can specify a Title for the document and provide a short Description (optional).
-
Choose whether this document will be Visible to customer on their Portal or if it should be available only for the administrator.
-
Click on
Browseto select the document you wish to upload.
As soon as the file is uploaded, it will immediately appear in the Documents list.

¶ File management
In the Actions column of the table, you will find various actions related to the file, including Edit, View, Download, Send (to a customer), and Delete ![]() .
.
If you upload the file with the Visible to customer option enabled, it will be available for the customer to download the document and view it on their Portal under the Documents section.

 When you use the
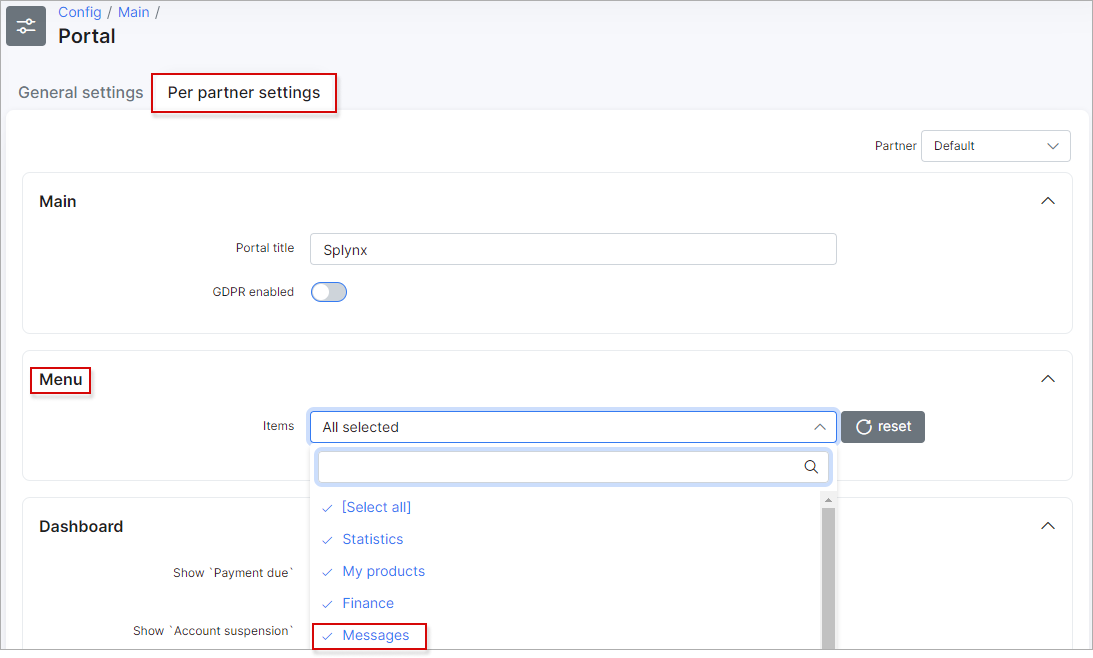
 Send button to send a message to the Customer Portal, the message will appear in the Messages section, which should be enabled under Config → Main → Portal → (Menu):
¶ How to generate a document
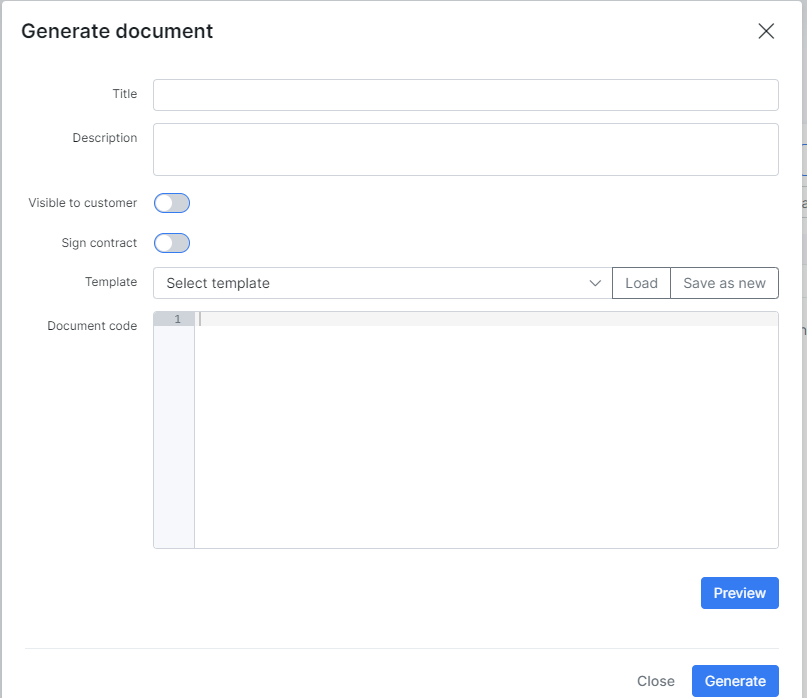
To generate a document in the customer's profile click on Generate/Contract button at the top right corner of the table:
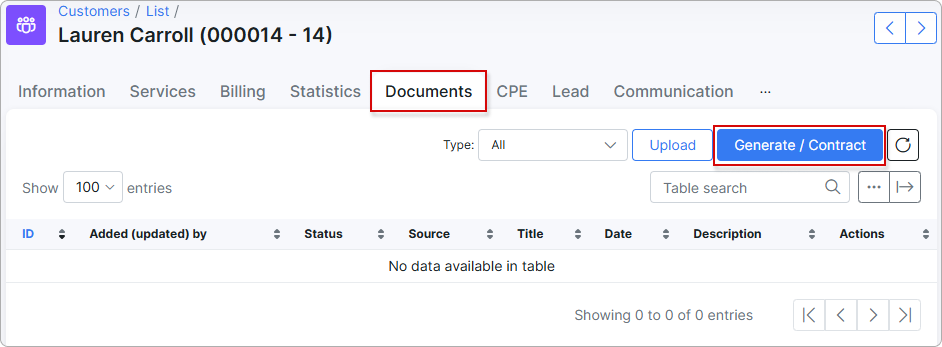
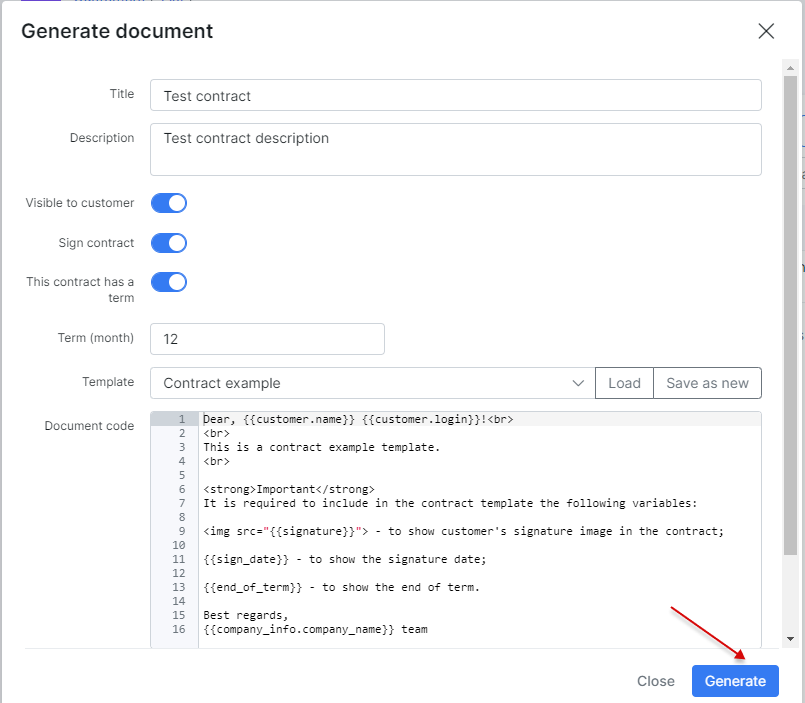
In a new Generate Document pop-up window, please specify the document's Title, provide a brief Description (optional), and select whether this document should be made Visible to customer on the Portal.
The Sign contract option will be described in the next section of this article.
There are two options to generate the Document code (the message body) of the document:
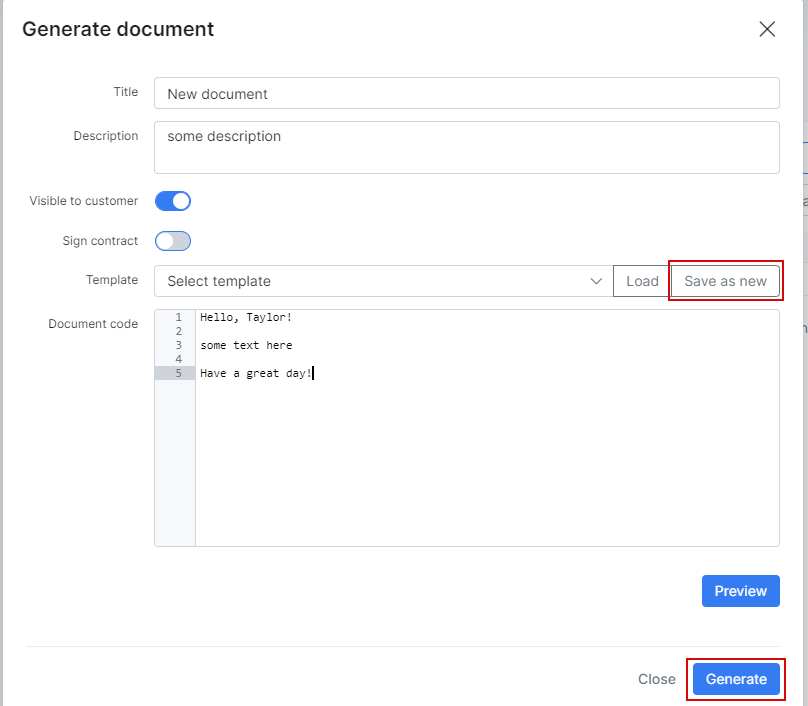
- Option 1 - simply type the desired content in the text window manually, use
Save as newbutton to save the typed text as a new document template in Splynx, and then click onGenerate:
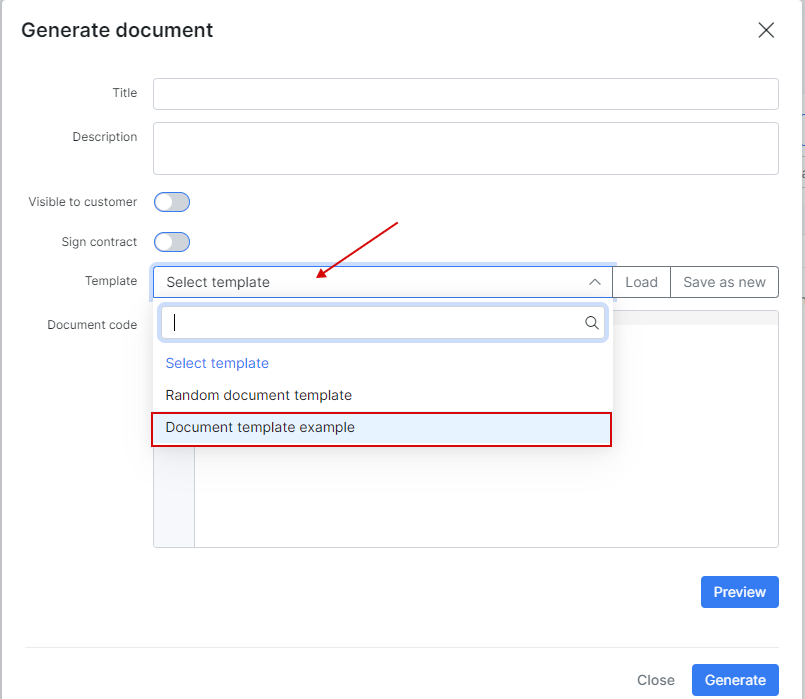
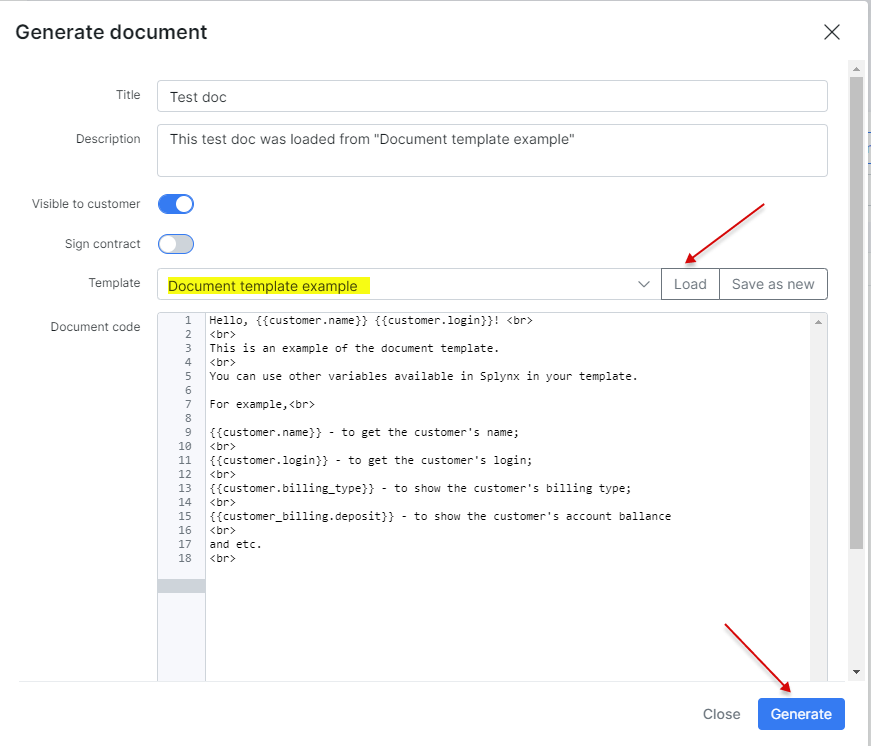
- Option 2 - you can use one of the saved Templates to create/generate a document. Click on the Template drop-down list, select the necessary template, and then press the
Loadbutton.
This action will populate the text area with pre-configured content from the selected template. Next, you should provide a Title for the document, a brief Description (optional), and decide whether to make this document Visible to customer on the Portal.
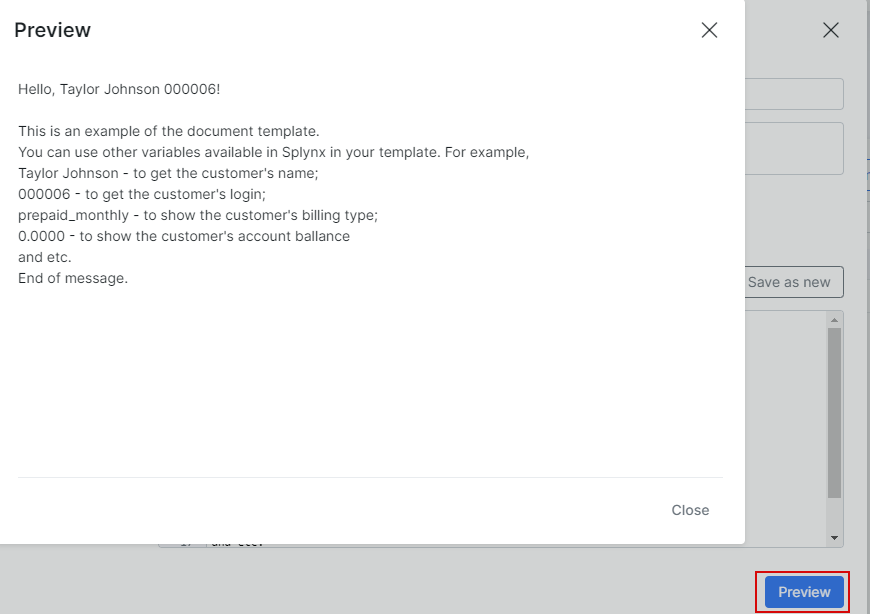
Click on Preview to view the document overall.
¶ Statuses
Each generated document requiring a signature (i.e., a contract) is assigned a status based on its processing stage:
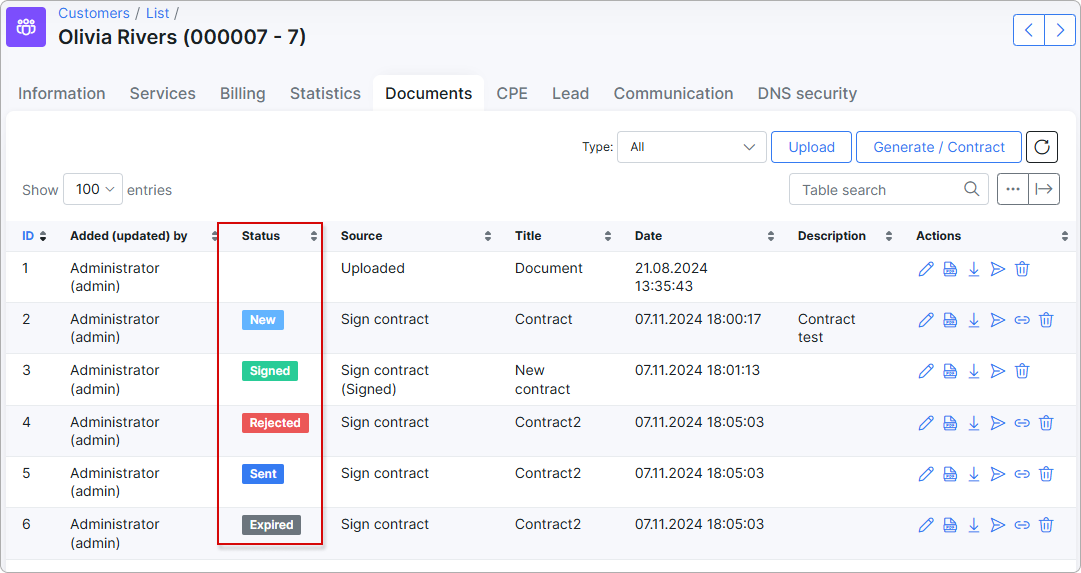
-
New: a contract is initially created and has not yet been processed or sent.
-
Sent: the contract has been sent to the customer by the administrator.
-
Signed: the contract is signed, either via a link or directly on the Customer portal.
-
Rejected: the customer rejects the contract, either by clicking
Rejecton the Customer portal or via a link. -
Expired: the contract has a specified expiration date, set by selecting 'This contract has a term', and this date has passed.
¶ Templates
 Before utilizing your own templates, it is essential to configure them first in Config → System → Templates. In Splynx, templates are organized by document type. You can add your own templates, customize existing ones, preview them, or remove templates.
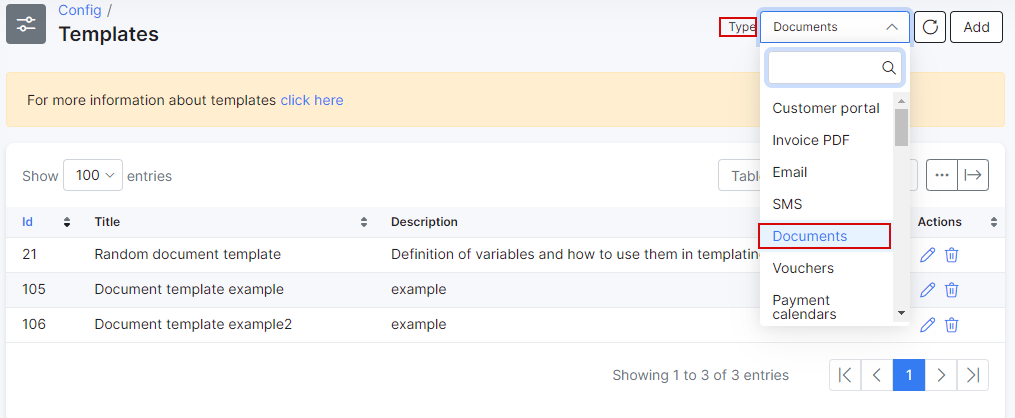
When the Config → Templates page is opened, select the Documents type from the drop-down list at the top right corner of the page.
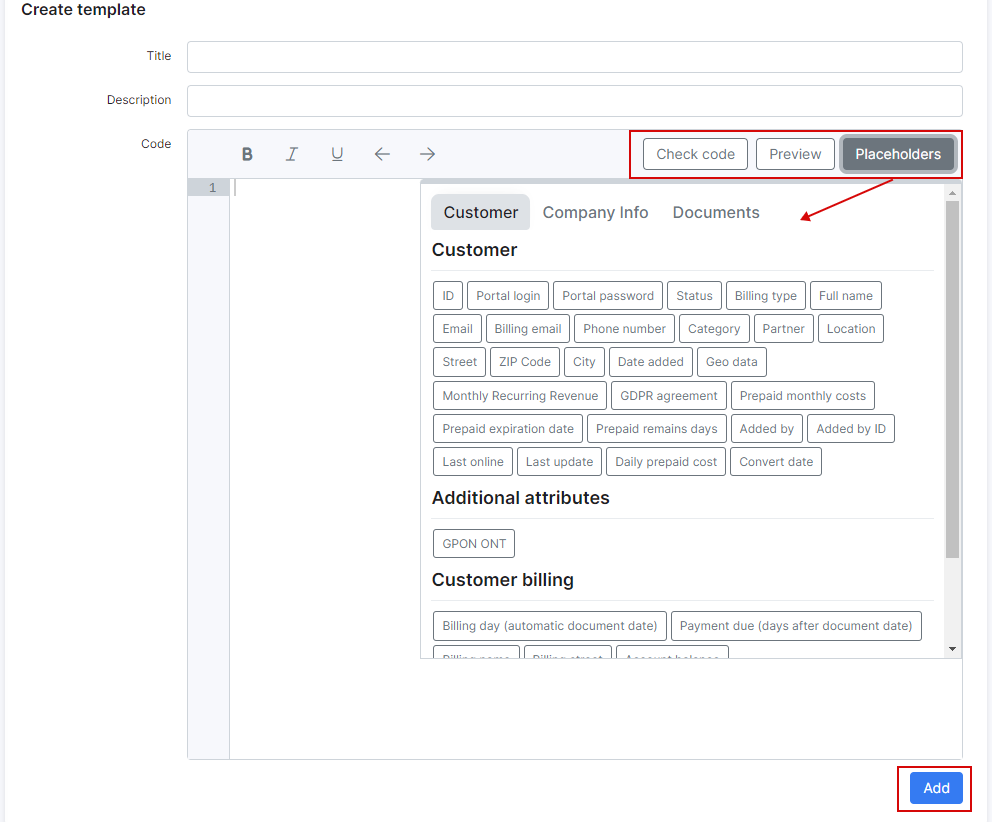
To create a new template, click theAdd button. In the new window, specify the Title and, optionally, the Description, then insert or type the HTML code for your template.
Use the Check Code and Preview buttons to verify the code's validity and preview the output result. The Placeholders button can be used to quickly insert the necessary variables into the code.
More information about templates, placeholders, and variables can be found in these articles:
¶ Contract and its signing by the customer
A customer contract is a legally binding agreement between you and the customer concerning the sale of goods or digital content or the supply of services (with or without goods).
You use the traditional post service or email (attachment) to send a contract to the customer and wait for it to return signed.
As a result, you are not sure whether the customer has received the contract, read it, or perhaps have already sent it back. Such situation is very common for people in sales and may feel annoying. But there is a solution.
You can create your own contract using the functionality of template and customer can add their 'electronic' signature withing Splynx. Such approach eliminates the costs and hassle of printing, scanning and delivery.
Create a contract template:
-
Navigate to
Config → System → Templates, at the top right corner, selectDocumentstype in drop-down list; -
Click
Addbutton in order to add a new template; -
Fill out the fields
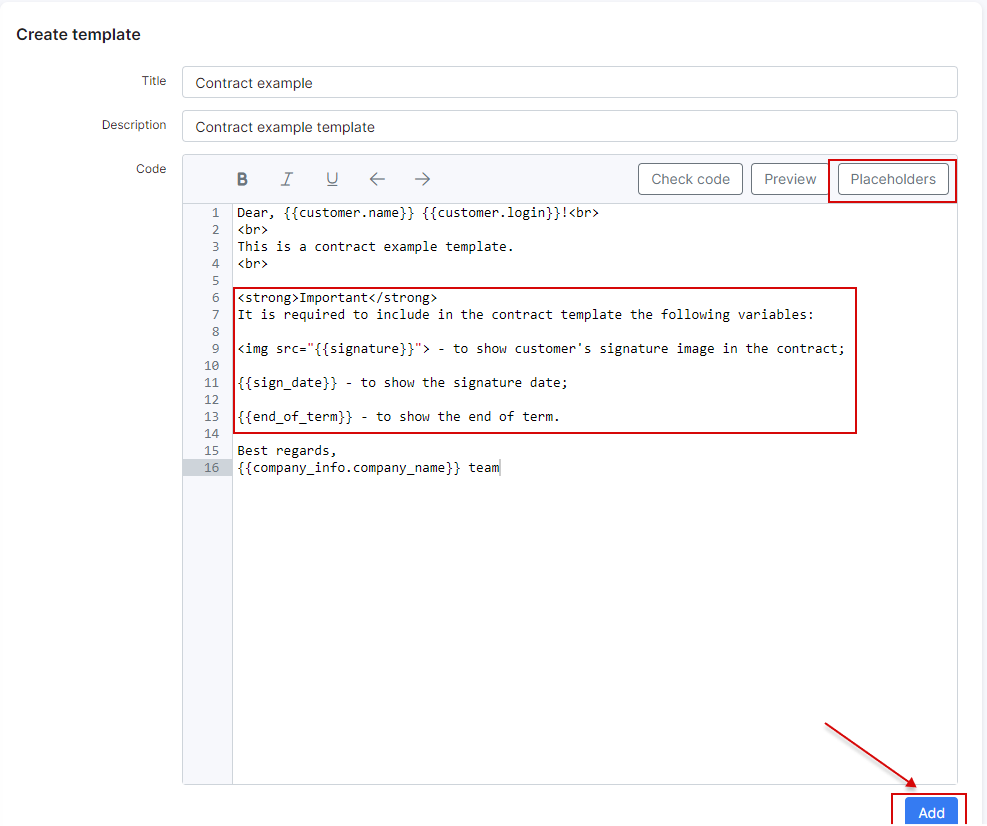
Title,Description(optional) andCode. Pay attention that in the contract template code should be included the next variables:
 To show customer's signature image in contract (required):
<img src="{{signature}}">
To show the signature date (optional):
{{sign_date}}
To show the end of term (optional):
{{end_of_term}}
To show the document id (optional):
{{id}}
To show who added the document (optional):
{{added_by}}
or
{{added_by_id}}
Use Placeholders button to quickly insert the necessary variable into the code and customize your template.
The code example of the Contract you can find here.
After the template code is ready press Save button.
- In
Customers → List, find the customer to whom the contract should be sent to, open customer's profile, navigate toDocumentstab and pressGenerate/Contractbutton at the top right corner of the table.

- In the new window, click on Template drop-down list to choose the template created on previous step and press
Load, the content will be loaded to Document code text area.
Enable the next toggles:
-
Visible to customer - the document will be available on Portal to download by customer;
-
Sign contract - it enables the option to sign contract by customer on Portal;
-
This contract has a term - use this toggle if you contract has any term;
-
Term (month) - in this field you can specify the contract term in month (depends on the service you provide).
Click the Generate button to create a contract for the selected customer.

- The generated contract will be available for the customer on their Portal:

Let's simulate the signing of the contract by customer.
In customer profile, navigate to Information tab and click on Actions drop-down menu, choose Login as customer option to open customer Portal in a new tab of your web browser.
Click on Documents items on the sidebar and click on Contract tab. Then, press  (Sign contract) button.
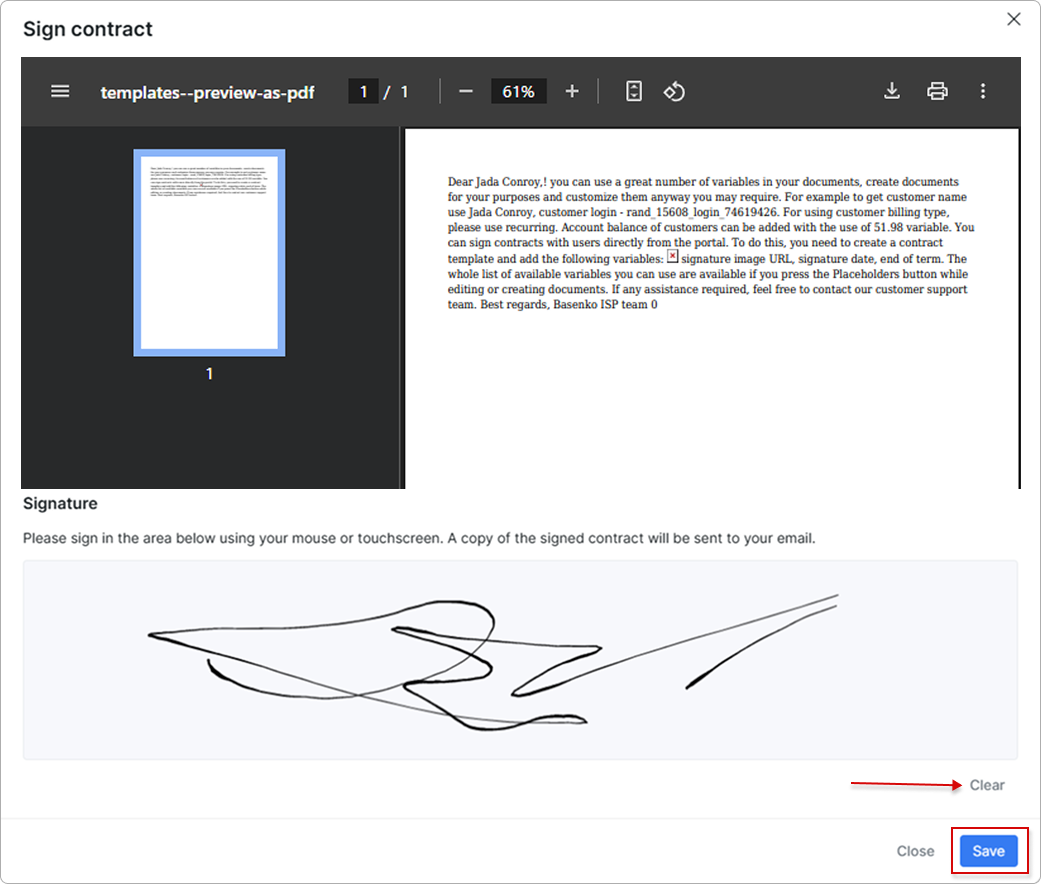
In new window, use your mouse or touch screen to put your signature and press Submit contract button.
If you make a mistake, press the Clear button and start from the beginning.
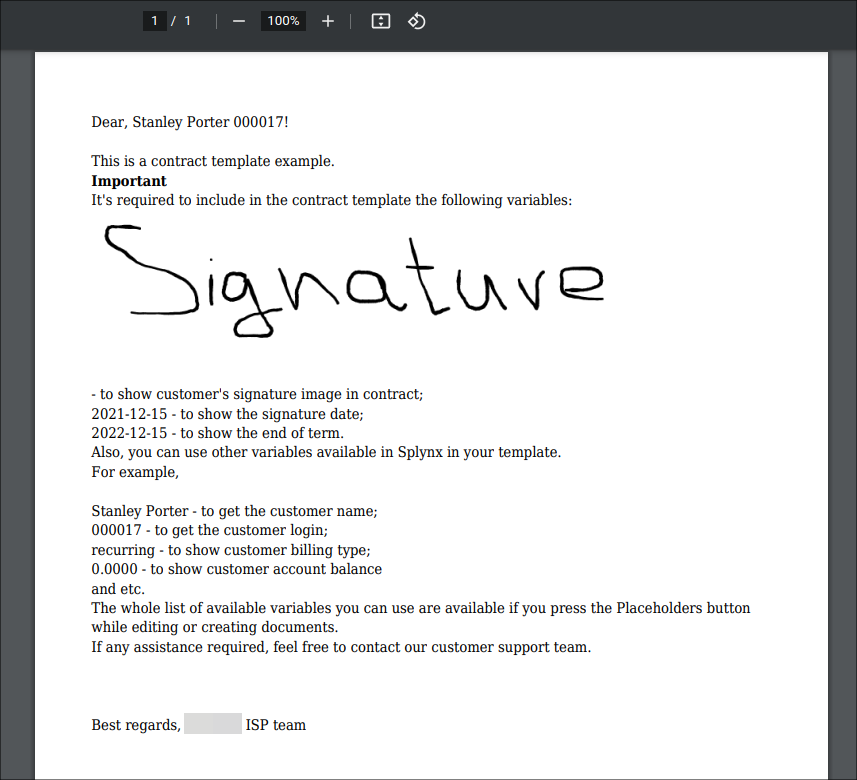
After the contract is signed, the Signed status and label (contract title) will be added to it, and the date/time values will be set automatically in the Signature date and End of term fields (if applicable):
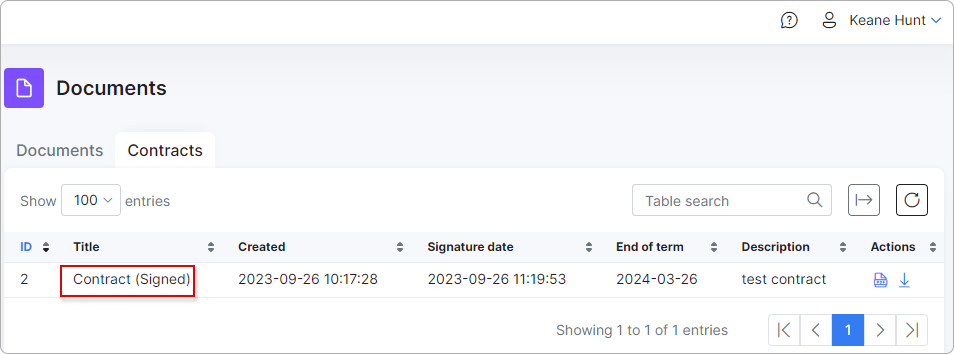
The customer can download the signed contract to their local storage:
The results of the document signing are logged under Administration → Logs → Operations.
You may also like: Contract template example
¶ Sharing contracts outside of Splynx
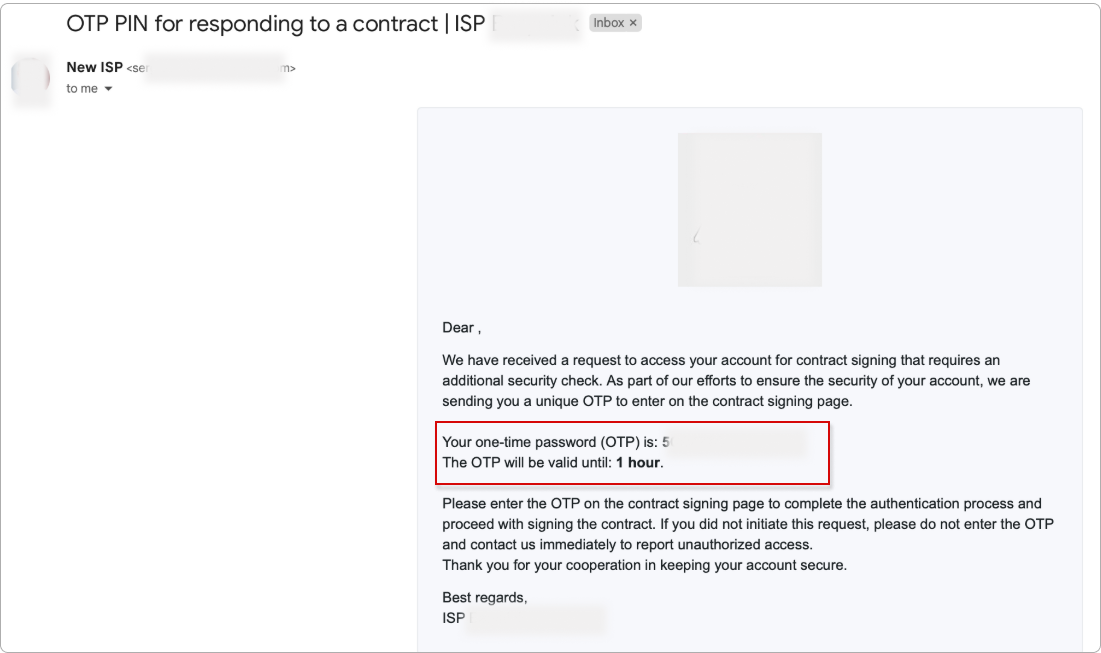
For customer convenience, contracts can be shared outside of Splynx. To do this, you can copy the link by clicking the link icon  next to the contract and paste it directly into the customer’s message. Alternatively, for enhanced security, you can share the contract using a template that includes the link and an OTP, which will be sent to the customer via email or SMS.
- In the
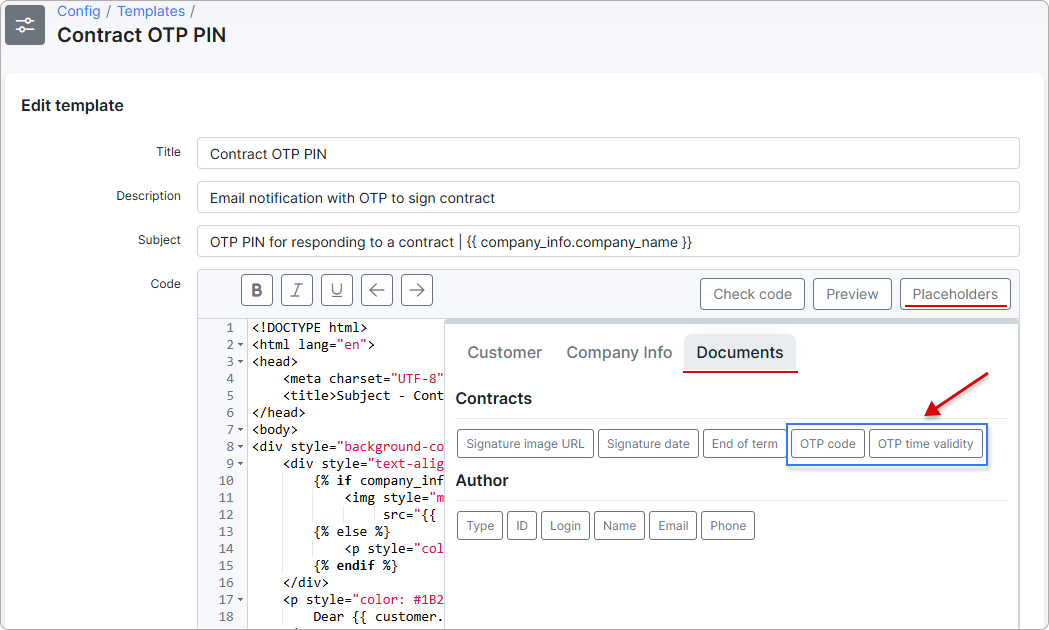
Config → System → Templates, you can edit the default template or create a new one for sharing contracts via email. Make sure to select the 'Contracts accepting templates' type.

Each template of this type now includes new OTP placeholders under the Documents tab, allowing you to customize the template to suit your needs.
-
Next, go to
Config → Finance → Notificationsto adjust the Contracts accept settings. -
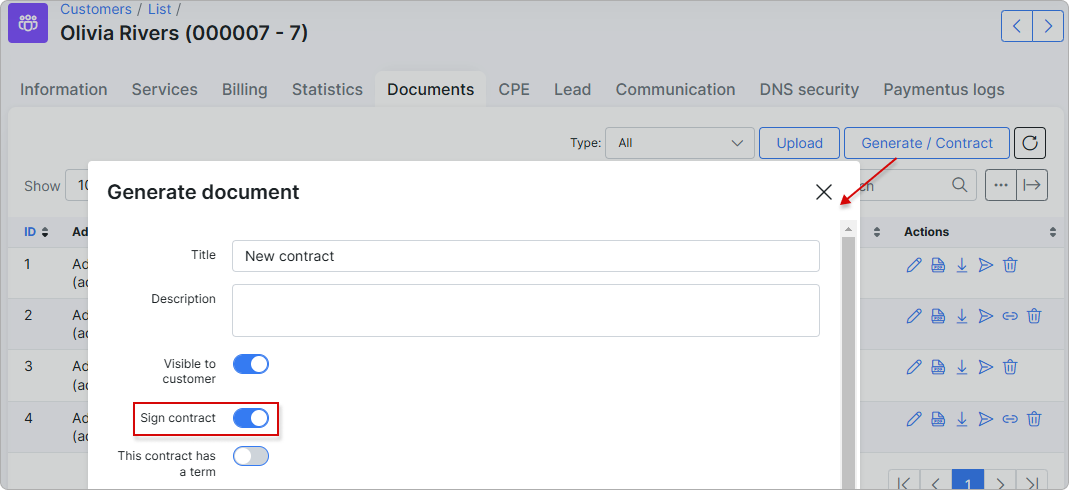
After completing all configurations, generate a new contract with the
Sign contractoption enabled:
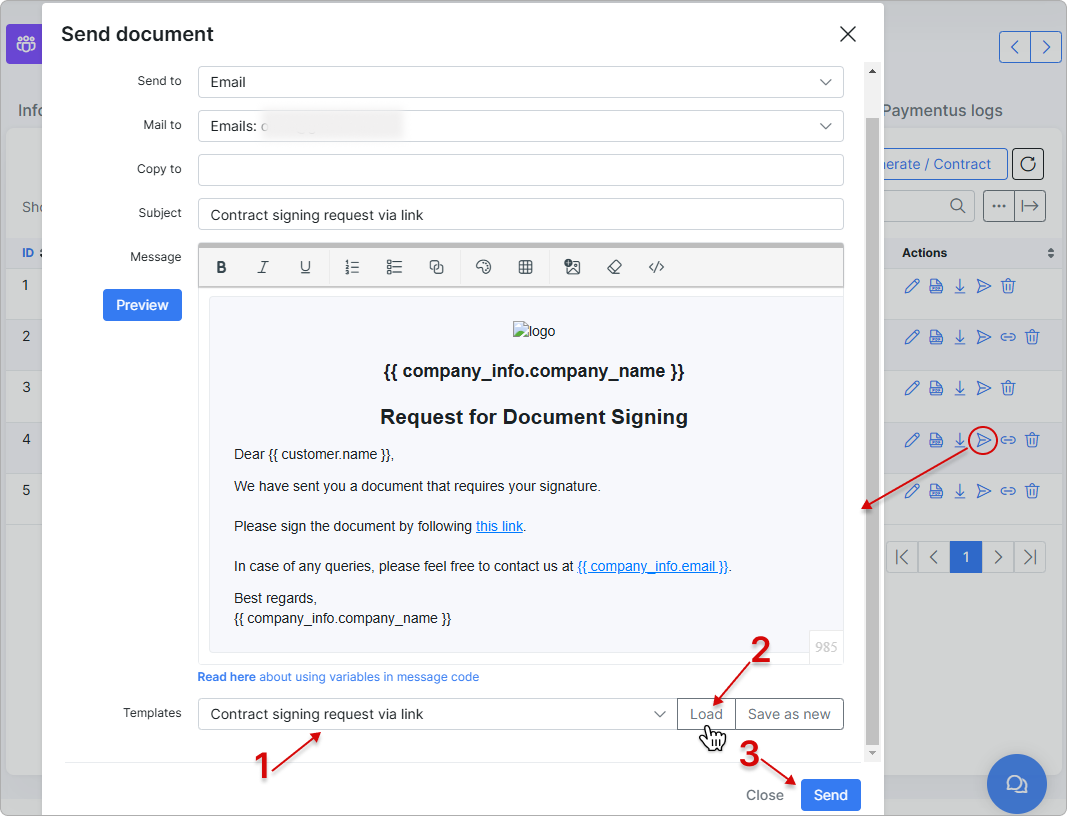
- Send the contract to the customer via email using the template titled 'Contract signing request via link':
- Then the customer will receive an email containing a link to the contract:
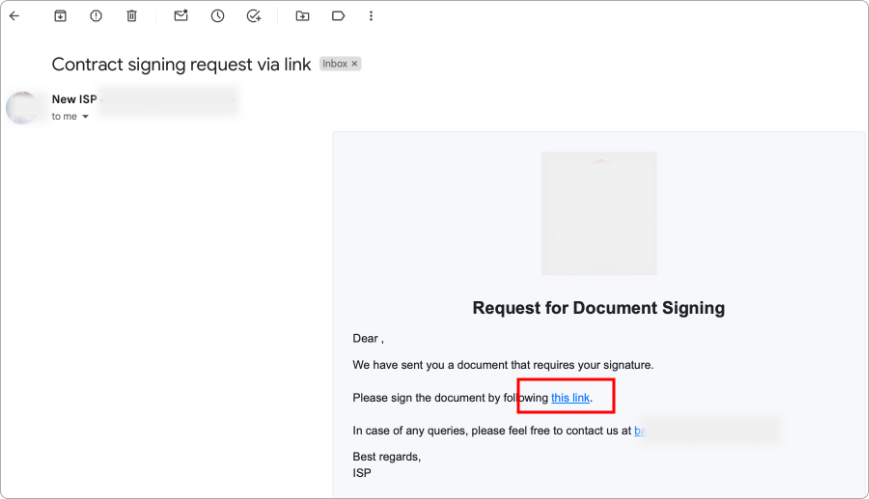
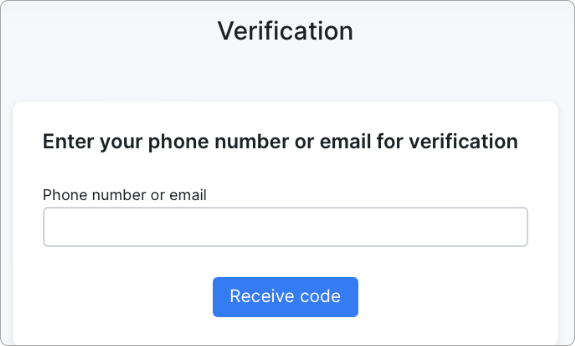
When the customer opens the link, they will be prompted to enter their phone number or email address for verification:
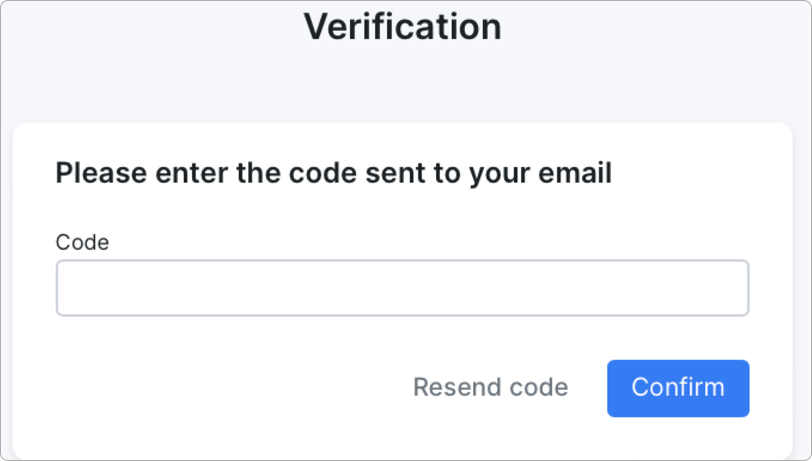
In the second stage of verification, the customer will need to enter the code:
In the new window, the customer can either sign and accept the contract or reject it:
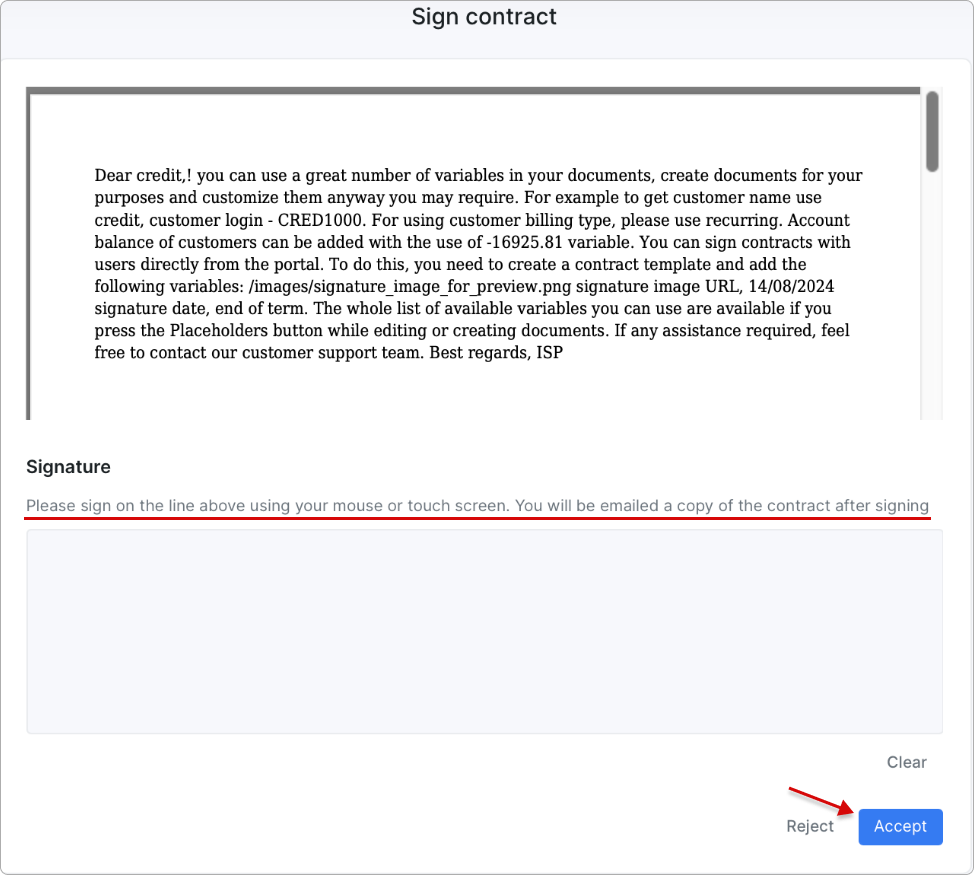
If the contract is rejected, it will be assigned the corresponding status. The accepted contract will be marked as 'Signed'.

 If the contract had a term and it expired before being signed, the customer will see the following message upon opening the link:


