¶ Items
¶ Overview
This is where you can view information about the items of your products, manage them and add new ones.
You can filter the data in the table by Supplier invoice ID, Barcode, Status, Product, or Stock location.
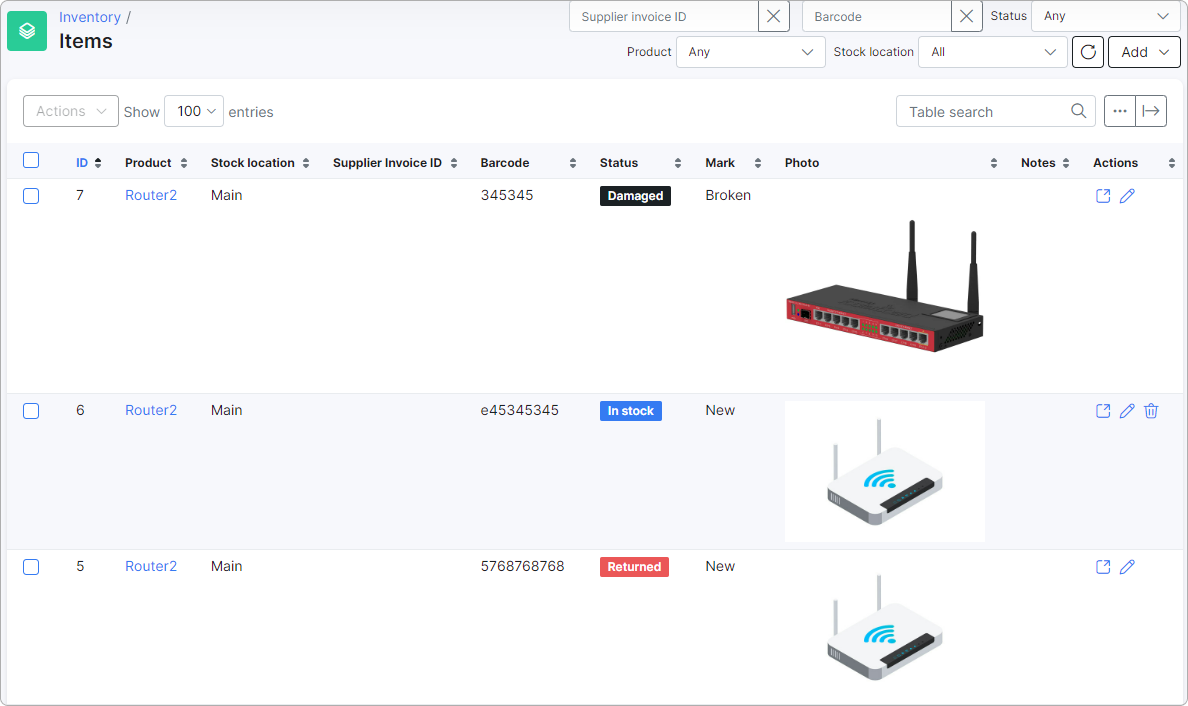
The items table also includes a Hardware column showing the monitoring device each item is linked to (if any). Click the device to open it in the Hardware (Monitoring) module.
¶ Editing items
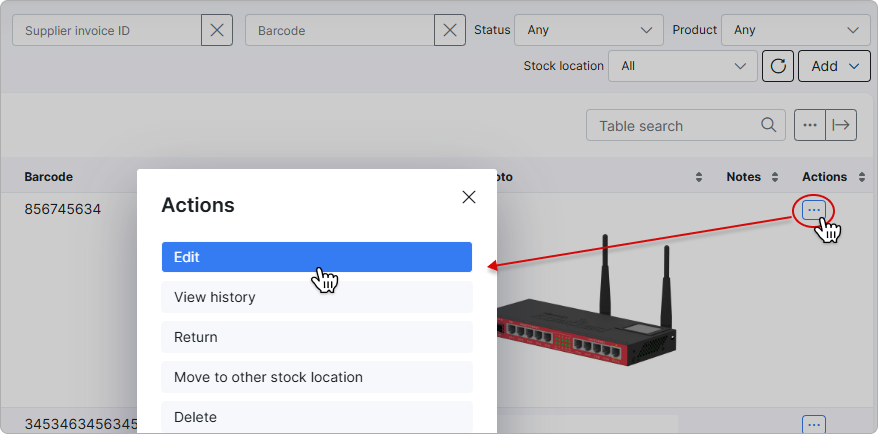
You can add or modify item information by clicking the Actions button and selecting Edit from the pop-up menu:
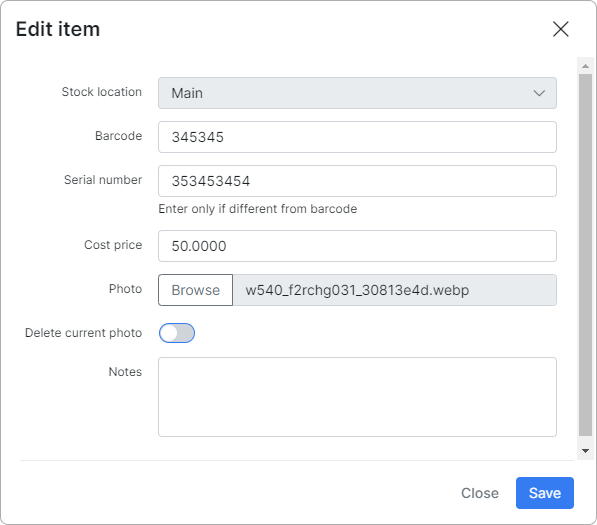
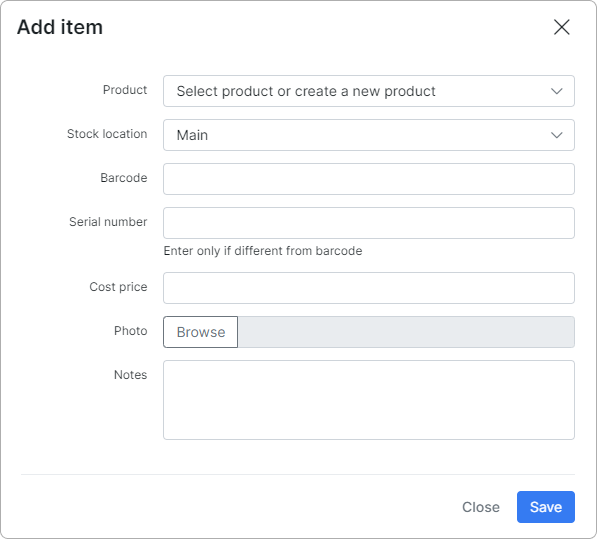
Here, you can change the Stock location, add, or edit the Barcode. If you add a photo for the item, it will override the 'global' photo of the product (if the product has one). You can add/edit Notes.
¶ Adding items
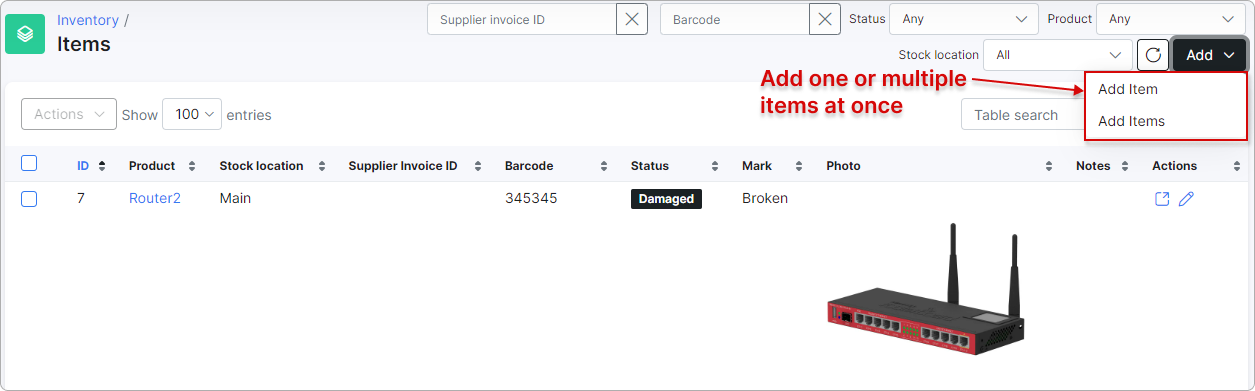
To add a new item, simply click the Add button and select the desired option for one or multiple items.
¶ Actions with items
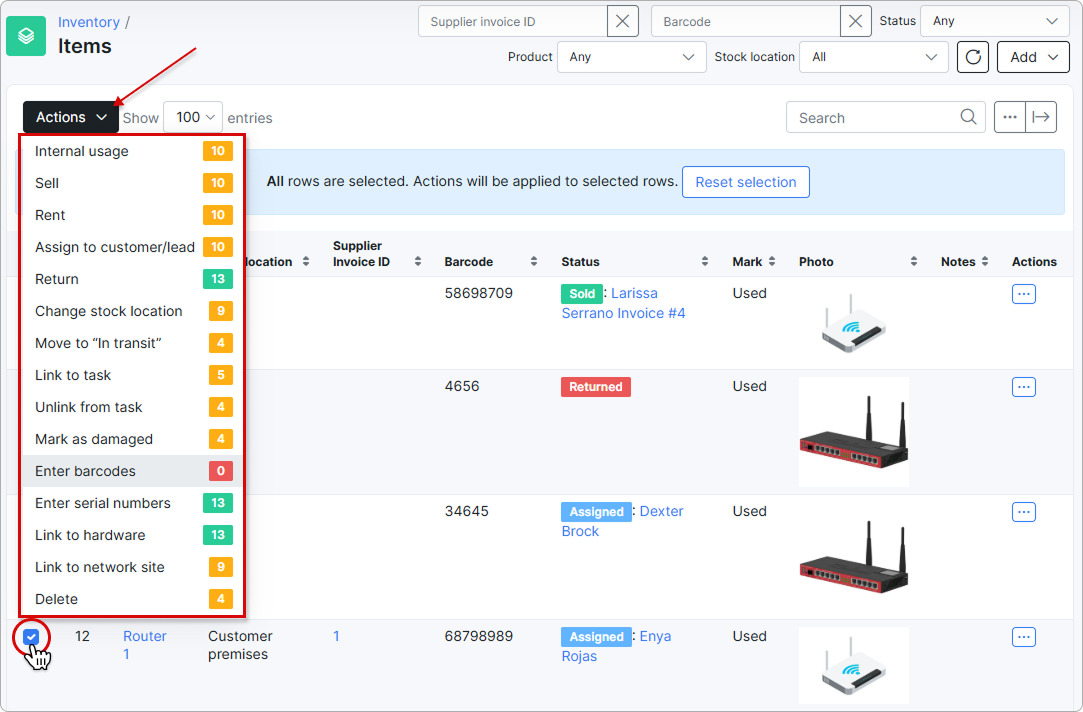
If you want to manage several items at once, you need to check them and open the Actions menu to select one of the desired options.
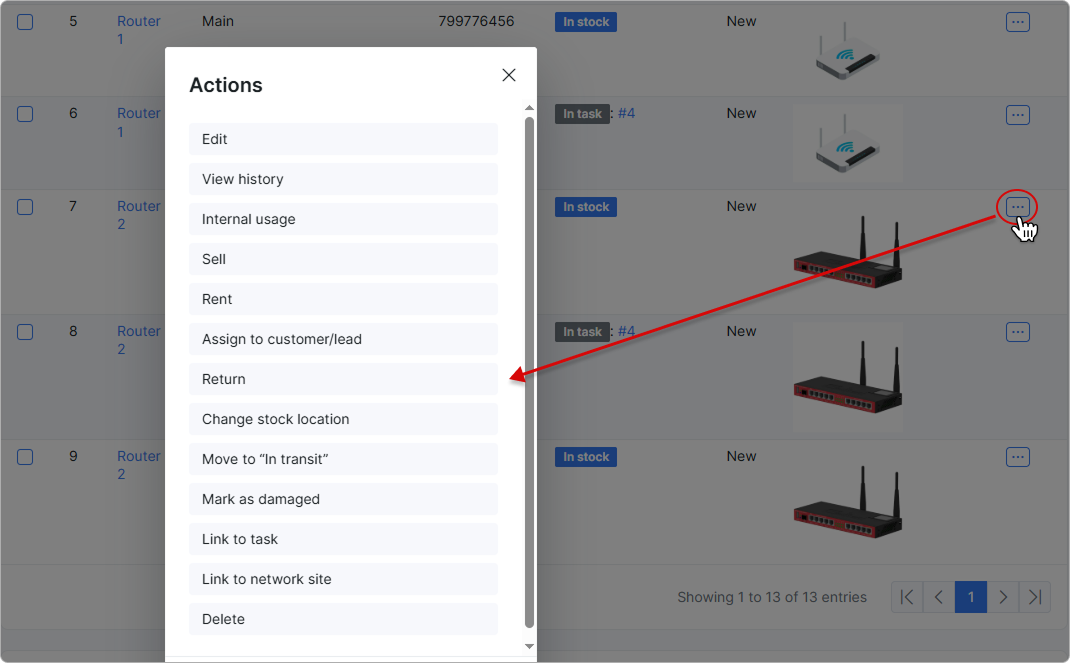
To manage a specific item, click the Actions button next to it and select the required action:
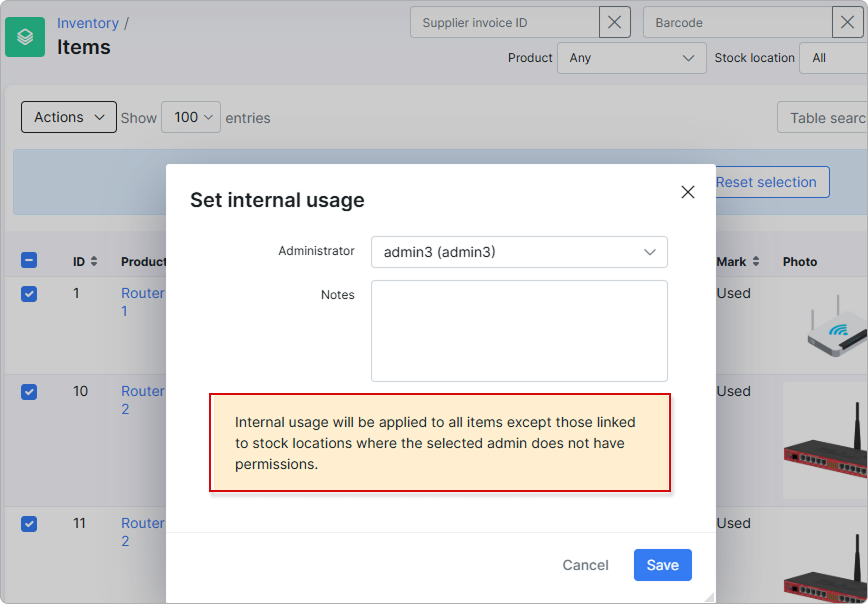
- Internal usage – the item is used by your organization.
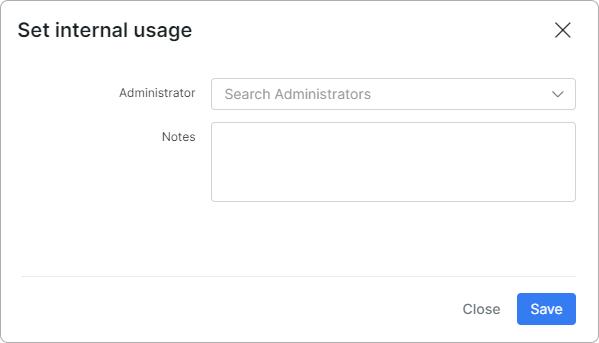
Internal usage applies to all items except those linked to stock locations where the selected admin lacks permissions.
- Sell – sell the item to the customer.
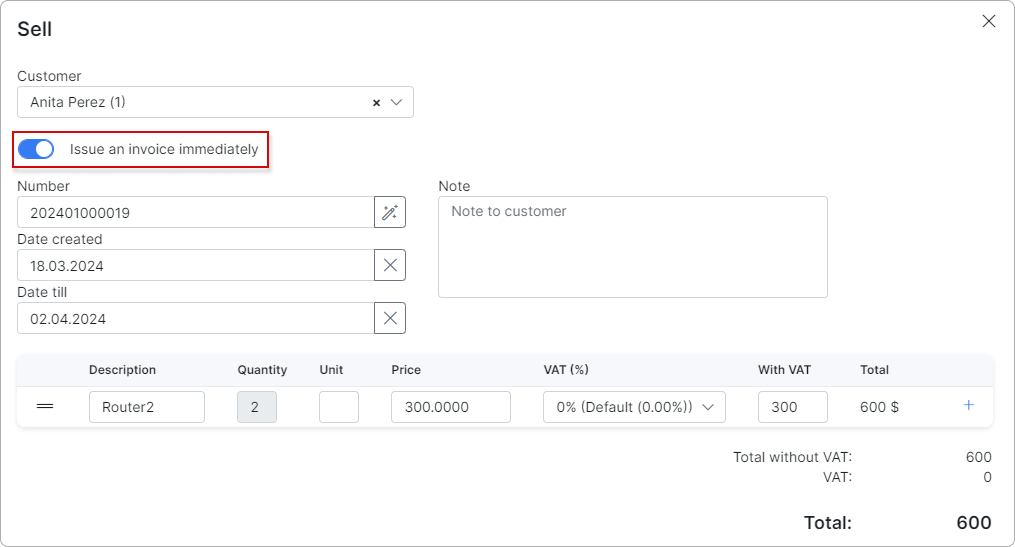
Choose the customer, edit the necessary information, and click on Save.
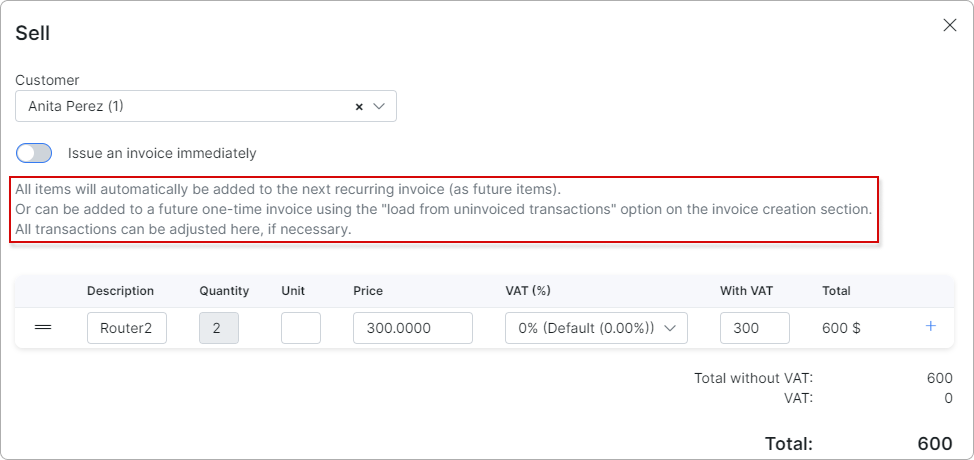
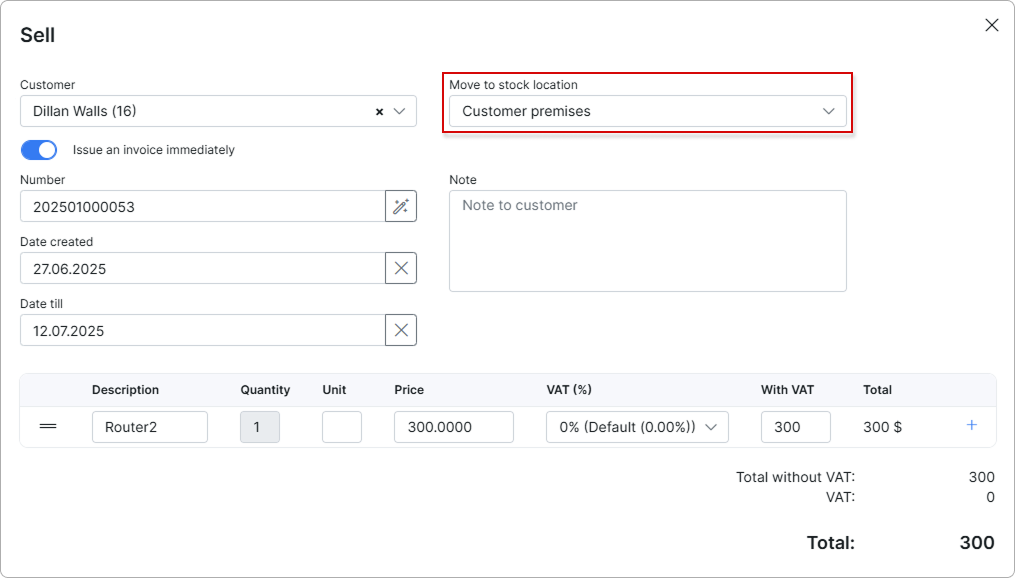
The Issue an invoice immediately toggle is enabled by default. With it, you can issue an invoice immediately for the chosen customer. Additionally, you can add or remove items from the selling list by clicking the + or - buttons.
If the toggle is disabled, all items will be automatically added to the next recurring invoice as future items:
- Rent – rent the item to the customer.
Before you can rent an item to the customer, you need to create a recurring plan for it: Tariff plans → Recurring → Add plan:
Then go to the item(s), check it, and press Rent in the Actions drop-down menu:
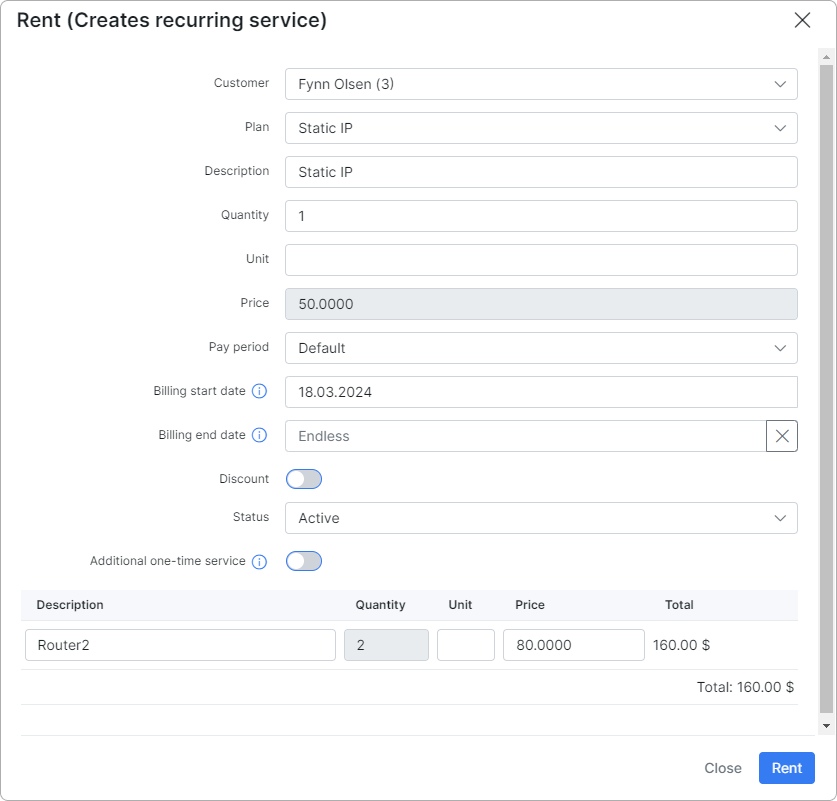
- Choose the customer.
- Select a rental plan.
- Edit the remaining fields as needed, then press
Rent.
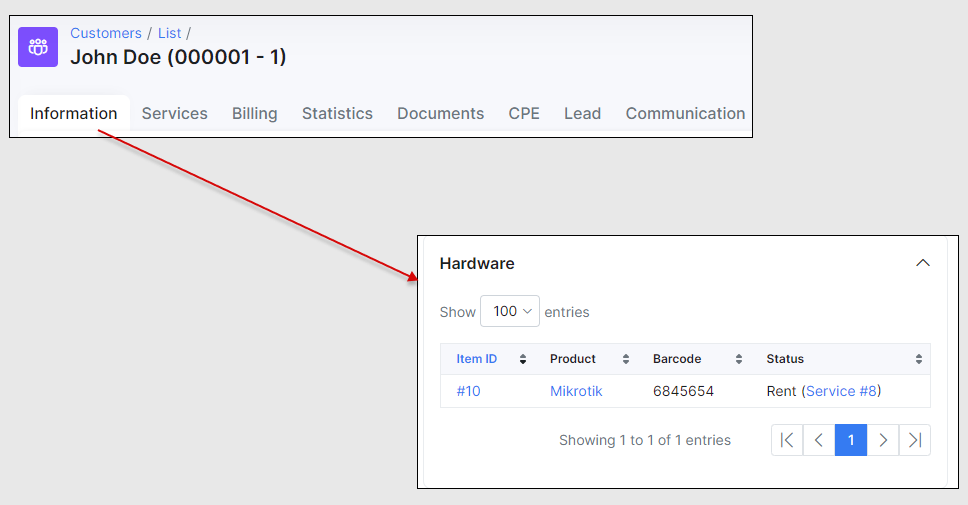
The rental service will be added for the selected customer (Customer's Information tab → Hardware section).
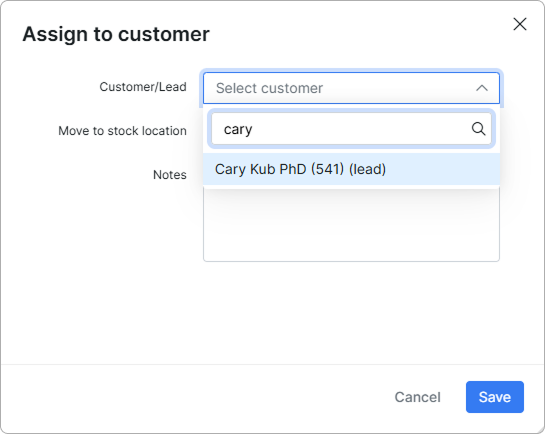
- Assign to customer/lead – you can link the item to a customer or lead:
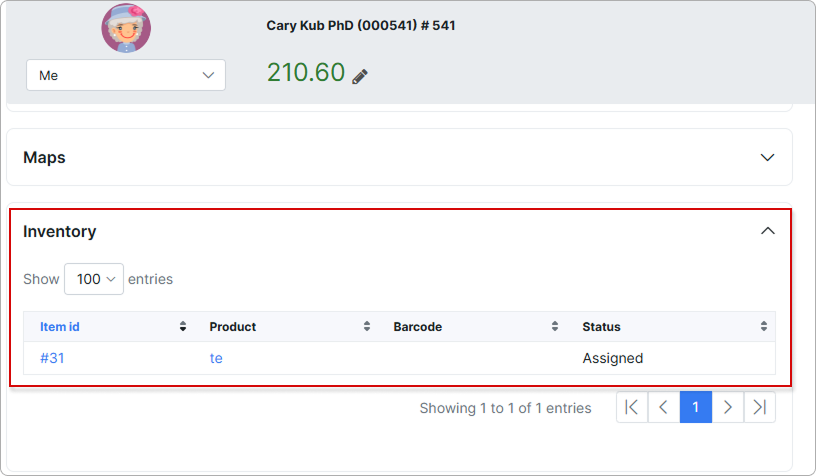
It will then appear on their profile and be associated with the specific customer/lead:
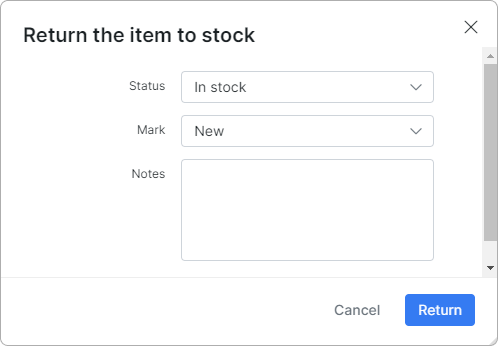
- Return – return the item to the stock.
- Link to task - link the item to a task. It will then be visible within the Inventory tab of that task and receive the status 'In Task'.
All possible statuses of the item are: In stock, Internal usage, Sold, Rent, Assigned, Returned, Damaged, In task, In transit, and Deployed.
Additionally, you can view the history of each item by clicking the following icon:  .
.
 The default status of the inventory item depends on the type of stock location assigned to it.
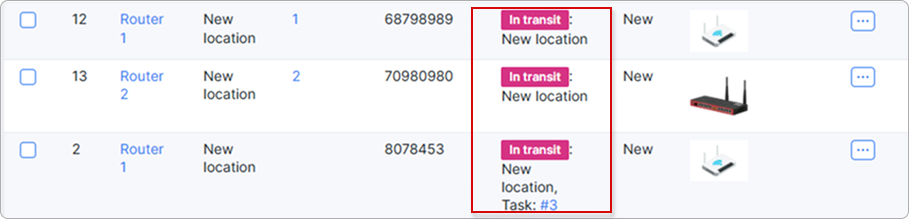
For example, if the stock location type is Vehicle, its status will be In transit.
- Link to hardware - associate the item with a hardware device. Once linked, the item and the hardware move together between network sites: linking either one to a network site automatically links the other.
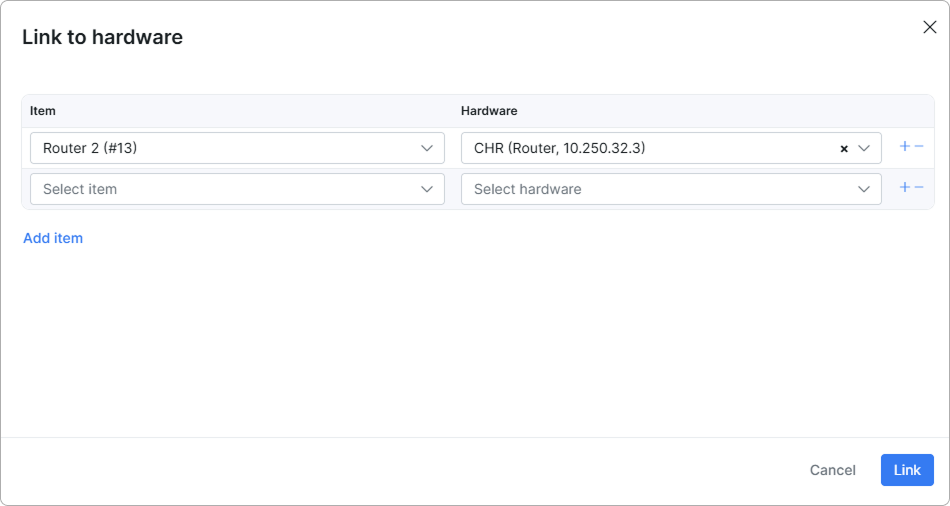
An inventory item can be linked to only one hardware device, and a hardware device to only one inventory item.
When a hardware device is linked to an inventory item and you change or remove its network site, the Unlink inventory from network site modal appears on 'Save':
"Unlinking this hardware will also unlink the associated inventory item {Product} ({ID}). Please select a new stock location and status."
Choose a Stock location, Status (a Vehicle location allows only 'In transit'), and Mark, then confirm.
When you delete a hardware device that is linked to an inventory item and your admin role has no permission for Inventory → Inventory, the delete confirmation shows a yellow warning:
"This hardware device is linked to an inventory item. When deleted, the link between hardware and inventory will be broken. The inventory item will need to be deleted manually."
If you have the Inventory permission, the warning is not shown.
- Link to network site - it will then appear in the Inventory tab of that network site.
This action is available for items with the status In stock, In task, In transit, or Internal usage.
When you run this action from a task page for an item linked to a task that already has a network site, the Network site field is preselected with that site. You can change it before confirming.
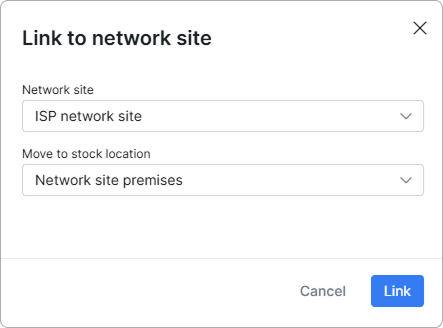
The item's status changes to Deployed (orange label), and its stock location becomes 'Network site premises':

If the item is already linked to a hardware device, that hardware is automatically linked to the same network site.
To learn more, please read this article:
Stock locations

¶ Item history
Each inventory item keeps a log of every status change. To open it, click the View history button:
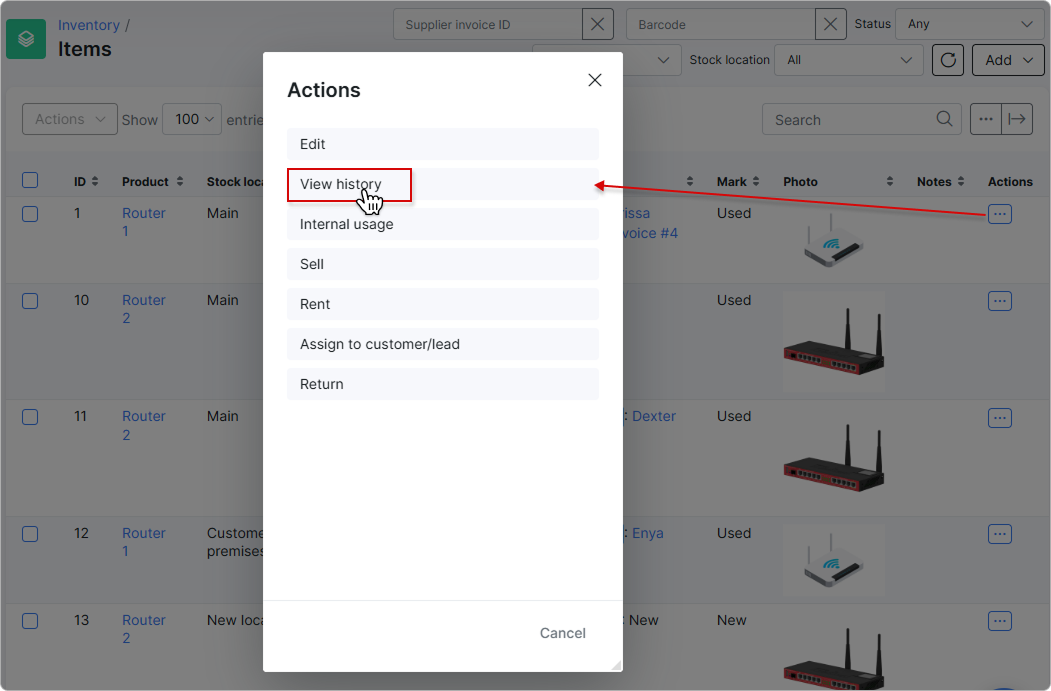
The History - Item ID #id page lists every status the item has been through, from the moment it was added to stock up to its current state:
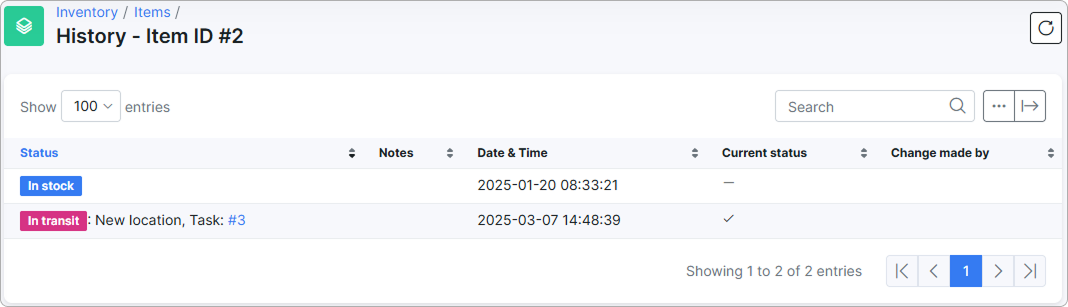
The table includes the following columns:
- Status — the status assigned at that point in time (e.g.
In stock,In transit,Sold,Assigned,Returned). - Notes — extra context for the change, such as the new stock location or a linked task number.
- Date & Time — when the change was recorded.
- Current status — a checkmark on the row matching the item's current state.
- Change made by — the admin or system process that triggered the change.
¶ Customers
When you rent or sell your products to customers, you can view them in the customer's Information tab under the Hardware section.
If you rent an item, the customer can view it on the Customer portal (under My Products → Hardware):

When you rent, sell, or assign an item to a customer, Customer Premises becomes the default stock location:
To learn how to configure taxes for inventory items, see Inventory taxes.
You can also view the video description of the Inventory feature in use: