¶ Tasks
- Overview
- How to create a task
- Editing a task
- Filter
- Mass actions
- Task information
- Top bar
- Task section
- Customer section
- Action buttons
- How to close and reopen tasks
- Table and Workflow view
- Templates
- Subtasks
¶ Overview
With tasks, you can easily manage and organize work related to various projects or customer service operations. Tasks can be created, assigned, tracked, and managed within the system to ensure that all necessary actions and operations are completed efficiently.
Tasks can be associated with specific customers, services, or projects.
Completed tasks can be archived to maintain a history of actions taken and can be restored if needed. This helps preserve a clear record of work done and allows for easy retrieval of information when necessary.
Tasks are a crucial part of workflow management in Splynx, helping teams stay organized and ensuring that no important actions are overlooked.
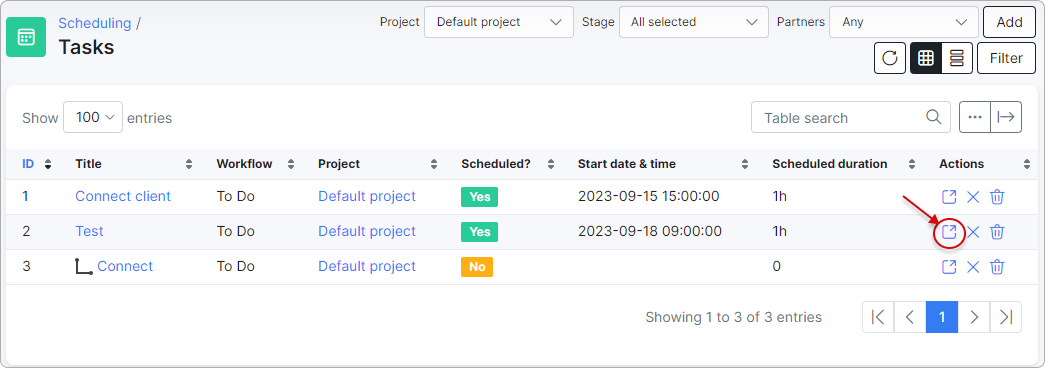
The existing tasks can be searched by Project, Stage or Partners in Scheduling → Tasks:

¶ How to create a task
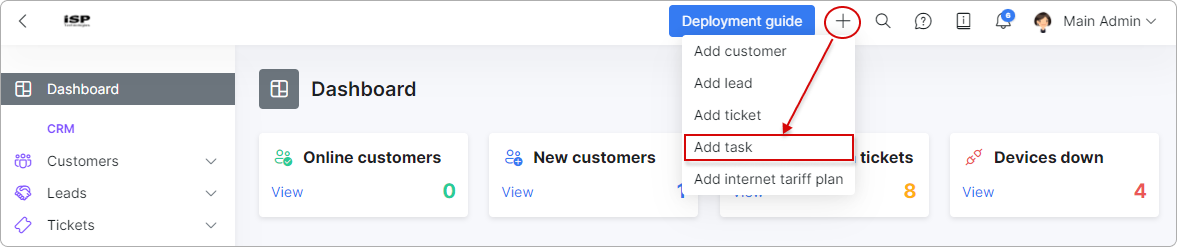
The quickest way to create a task is by clicking the + button in the header of your Splynx account. You can do this anywhere within the system:
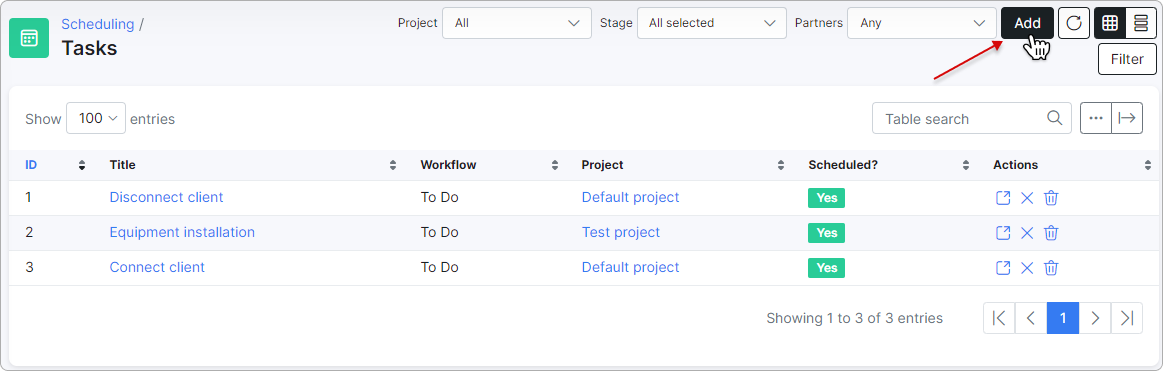
Under Scheduling → Tasks, you can create a task by clicking the Add button in the top-right corner of the page:
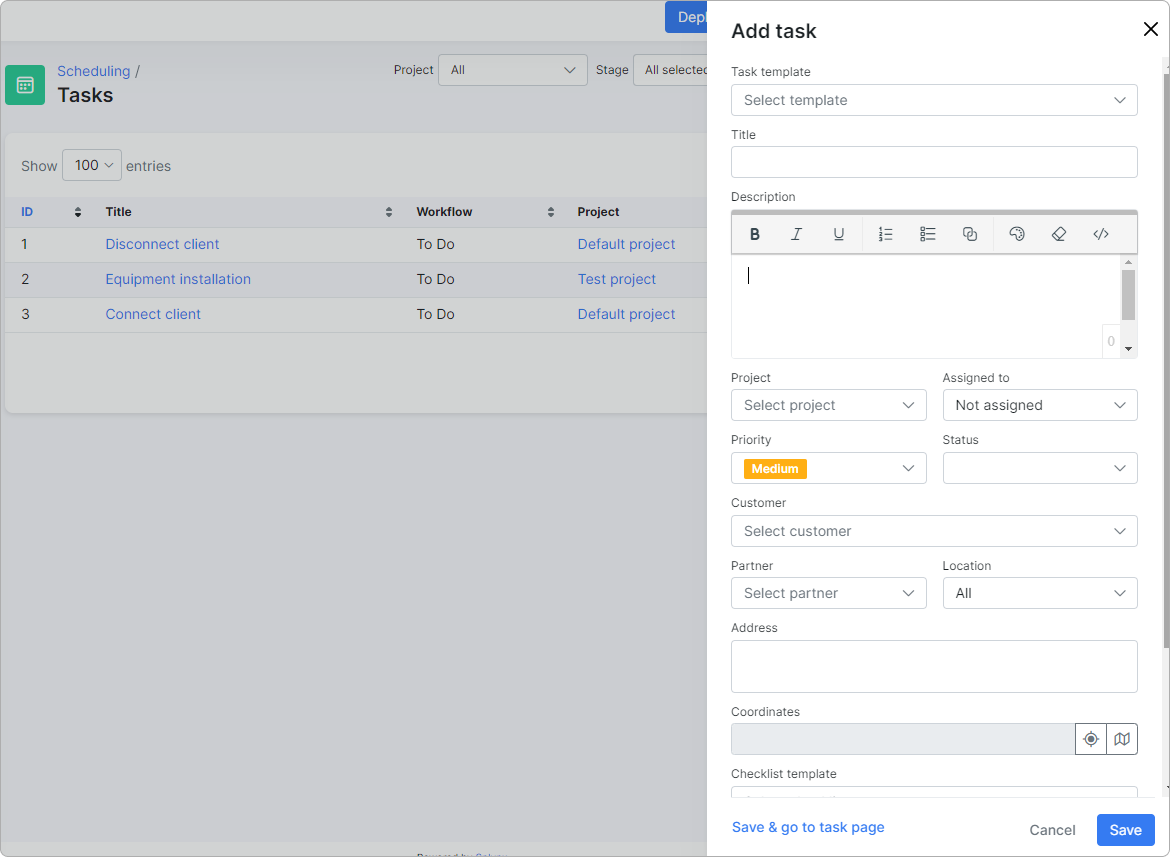
When you click it, a sidebar will appear where you can enter the information for the task. Then click on Save:
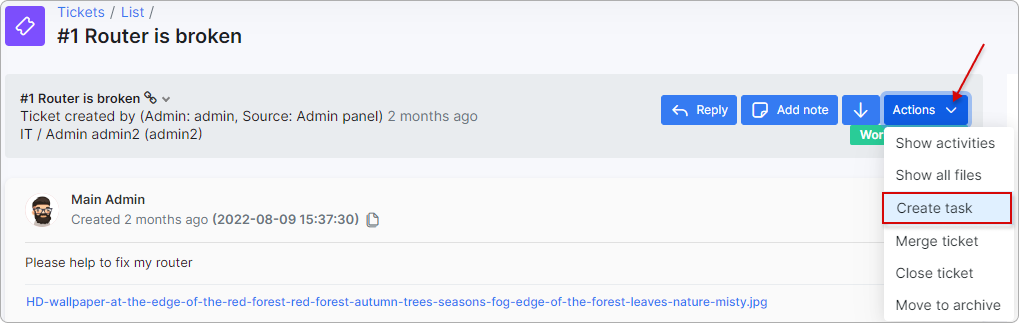
It is also possible to create tasks directly from the ticket you are working with by clicking on Actions button at the top right corner of the page, and then on Create task:
¶ Editing a task
After creating the task, you can edit it by clicking either the task name or the View icon ![]() .
.
You can perform many actions with the task, including editing the task overview, marking checklist steps, logging time spent, editing the task description, adding related tasks, rescheduling the task, assigning responsible individuals, or simply checking the activity log.
¶ Filter
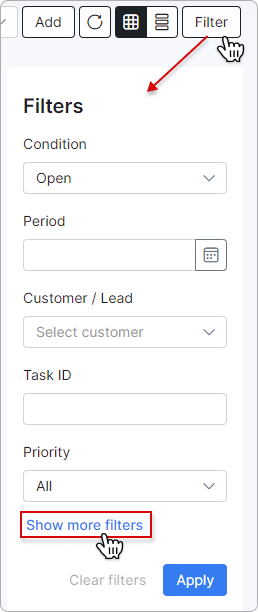
You can also apply an advanced search with the Filter button located at the top right corner of the Tasks window. With this feature, tasks can be filtered by Condition (All, Open, Closed), Period, Customer/Lead, Task ID, Priority, Assigned to, Location or any Text in tasks.
¶ Mass actions
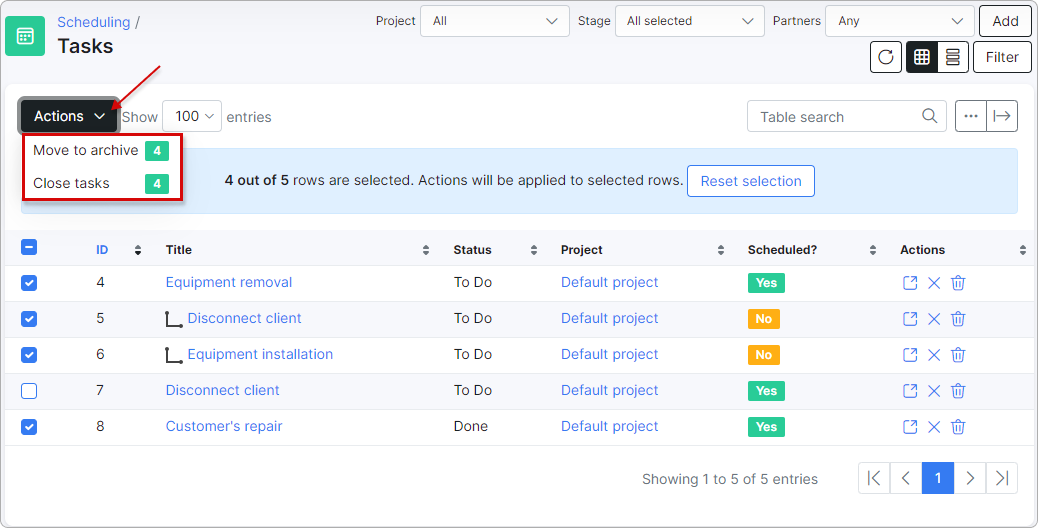
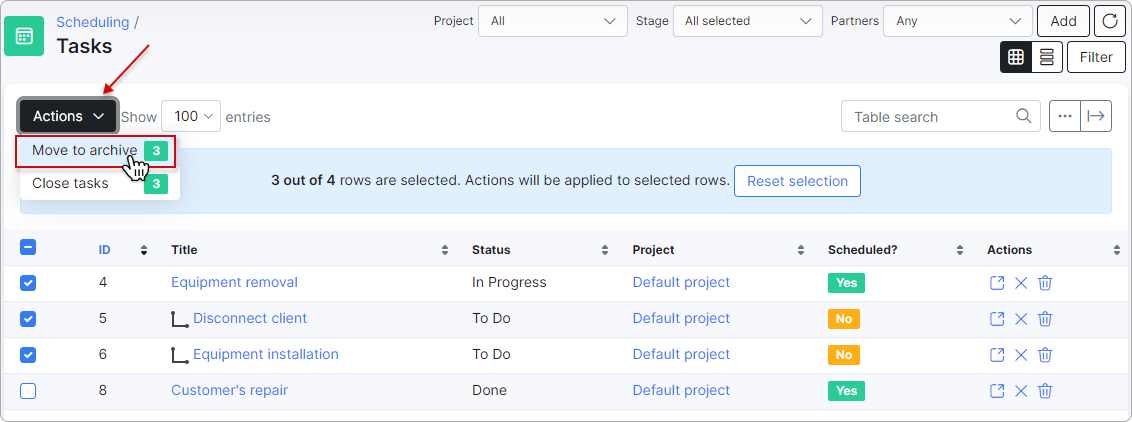
You can archive and close tasks in bulk using the mass actions menu located in the top-left corner of the tasks table:
¶ Task information
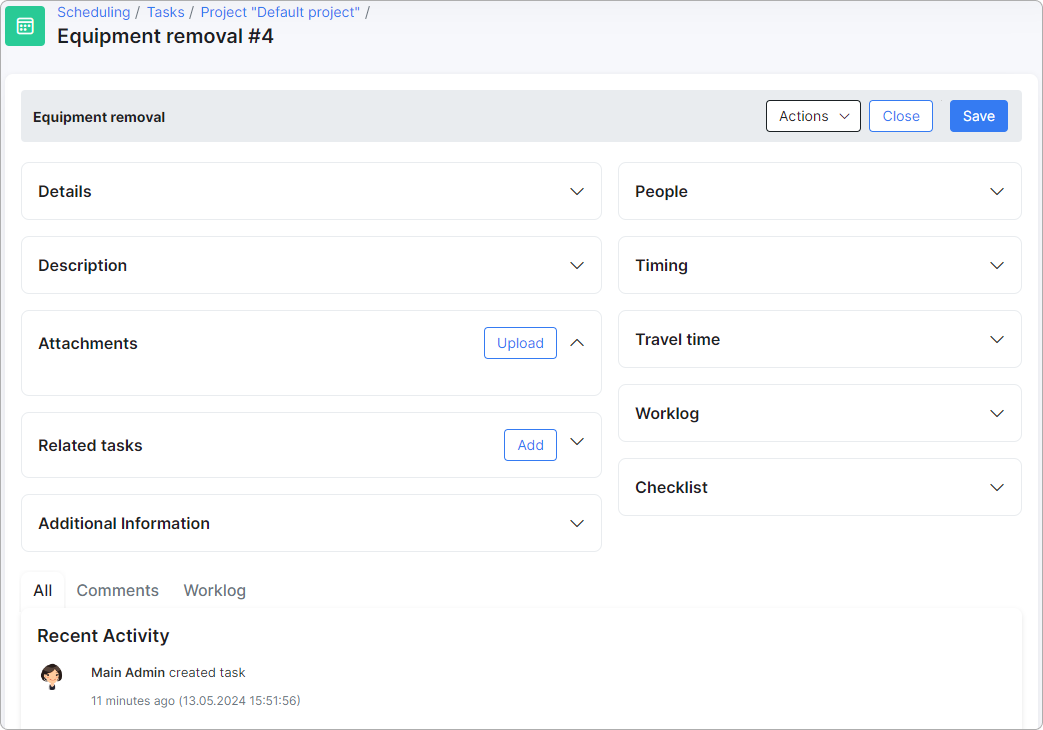
Click either the task name or the View icon ![]() to open the task details:
to open the task details:
 Starting with Splynx 5.0, the task page has undergone significant changes in layout and logic, making it easier to manage your task from a single page.
The task page is divided into three major sections: the Top Bar (with task actions), the Task section (details related to the task), and the Customer section (details related to the client for whom the task is performed).
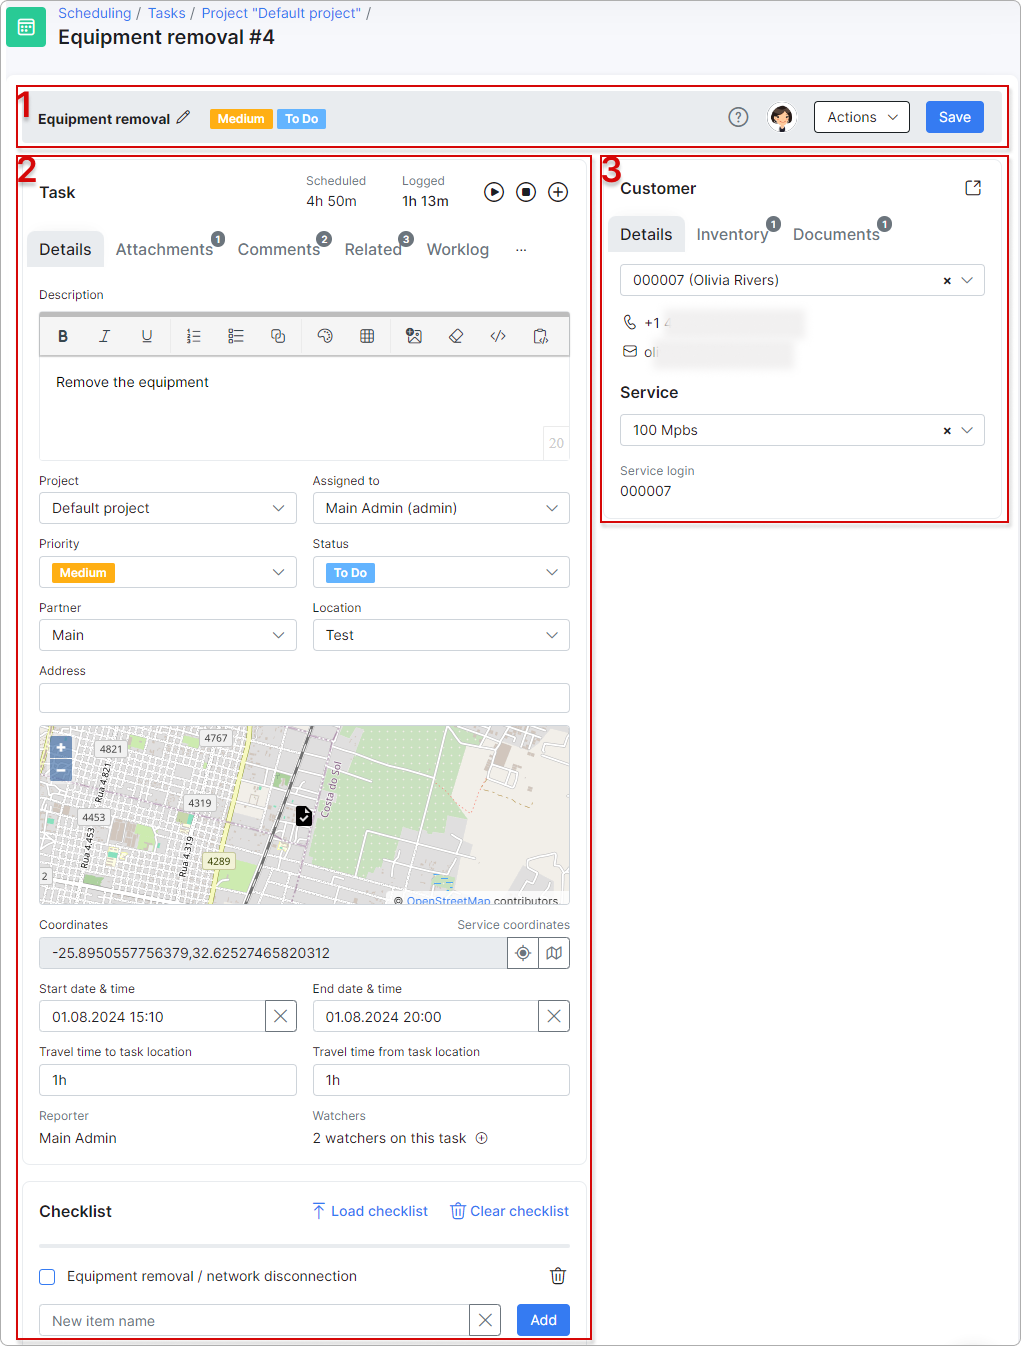
¶ Top bar
Here, you can change the task name by clicking the Edit icon, view its Priority and Status, access onboarding and documentation by clicking the Question Mark icon, see the profile icon of the Assignee, perform various actions via the respective drop-down menu, and save any changes made on the task page.

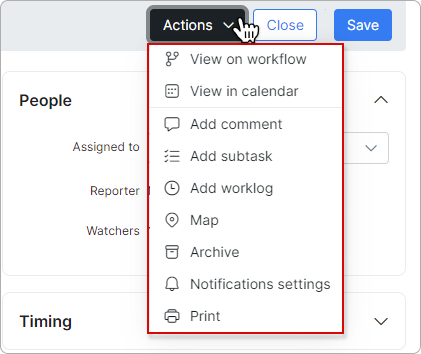
¶ Actions
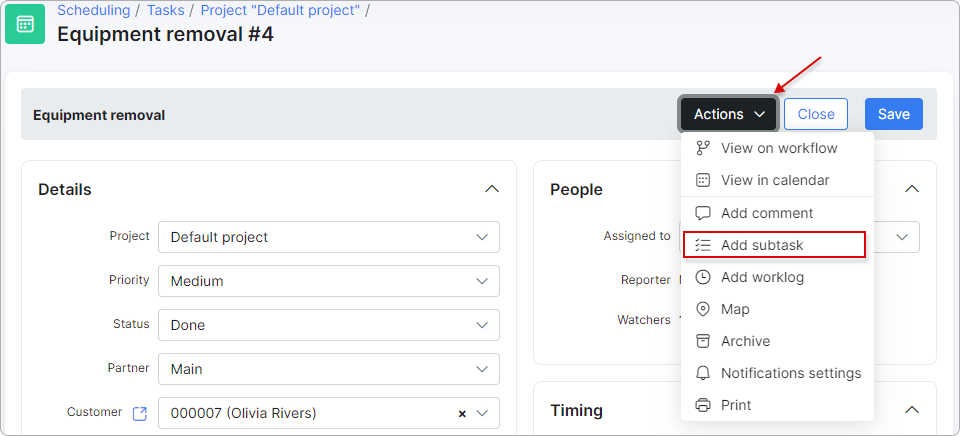
In the Actions drop-down menu in the Top bar within the task, you can perform various actions related to the task:
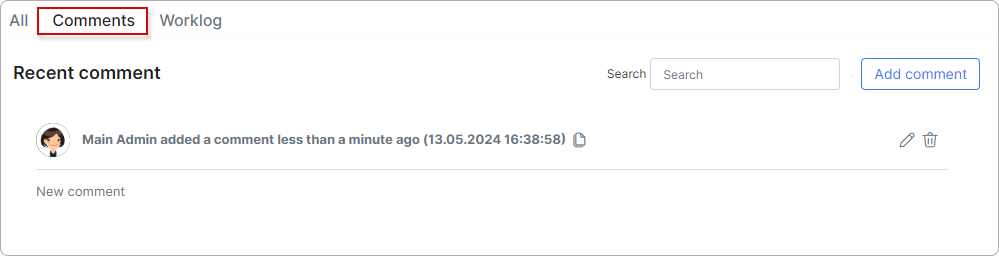
The comment will appear under the Comments tab in the Task section:
- Add subtask
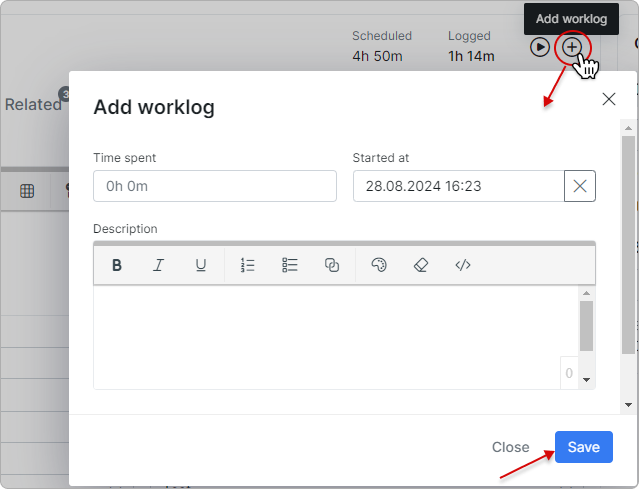
- Add worklog
The information will appear under the Worklog tab in the Task section:
You can view the archived tasks related to a certain customer from their Information tab:

If you need to archive more than one task at once, you can use the mass actions feature located at the top left corner of the task table:
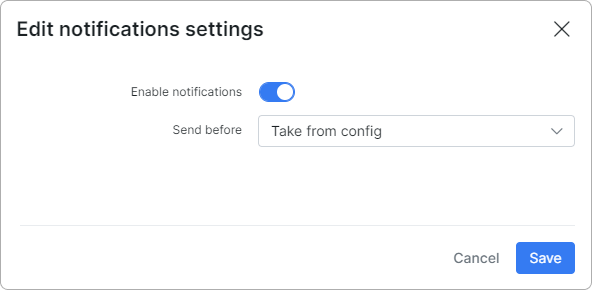
- Notifications settings
From here, you can enable or disable notifications for the task and set the time for notifications if they are enabled:
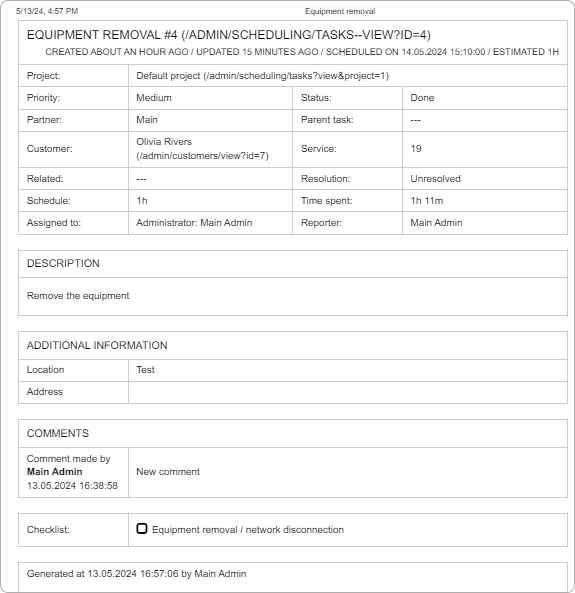
By clicking this button, you can print out the information related to the task:
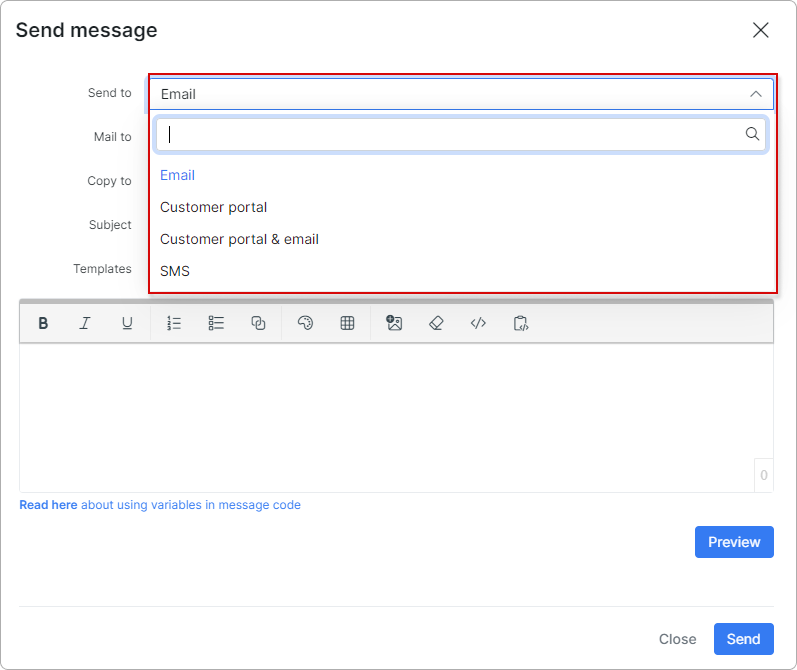
- Send message
You can send a message to the customer's email, portal, portal & email, or send an SMS:
¶ Task section
In this section, you can add task details and items to the checklist, manage time spent, add attachments, comments, and worklogs, as well as create subtasks, link related tasks, and monitor task activity.
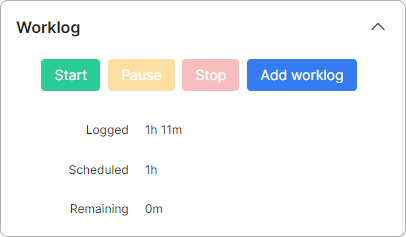
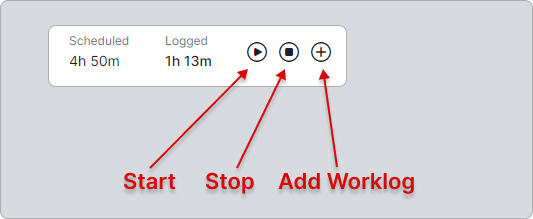
¶ Scheduled and Logged time
At the top of the Task section, you can view the scheduled time and manage logged time. You can start, pause, or stop work on a task and add notes in the worklog.
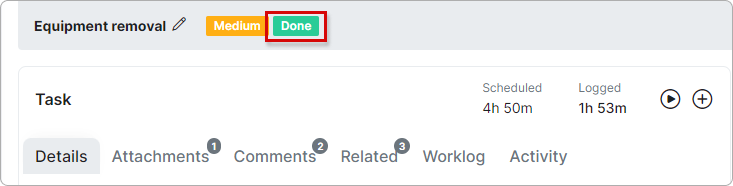
If the task is new and work hasn't started, its status will be To Do by default. Once you click the Start button near the Logged time, its status will automatically change to In Progress. If you click the Pause button, it will remain In Progress. All active work time will be logged.
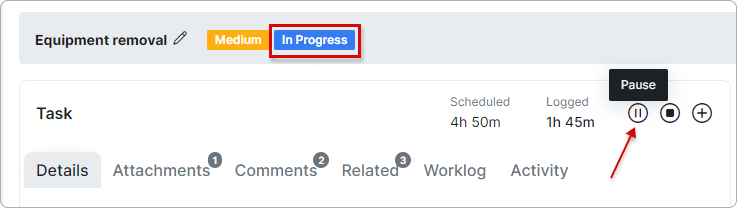
Once you click the Stop button, the task status will change to Done:
Click the Add Worklog button to add notes to your worklog:
All scheduled tasks will be added to your Calendar.
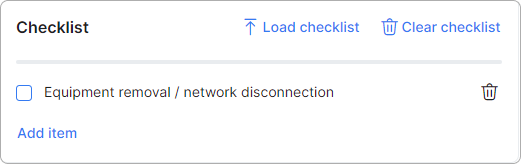
¶ Checklist
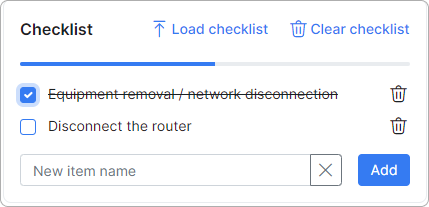
The Checklist feature enables efficient tracking and management of items that need to be completed within a task.
Here, you can add and remove milestone steps, check off completed items, load the checklist, and clear it.
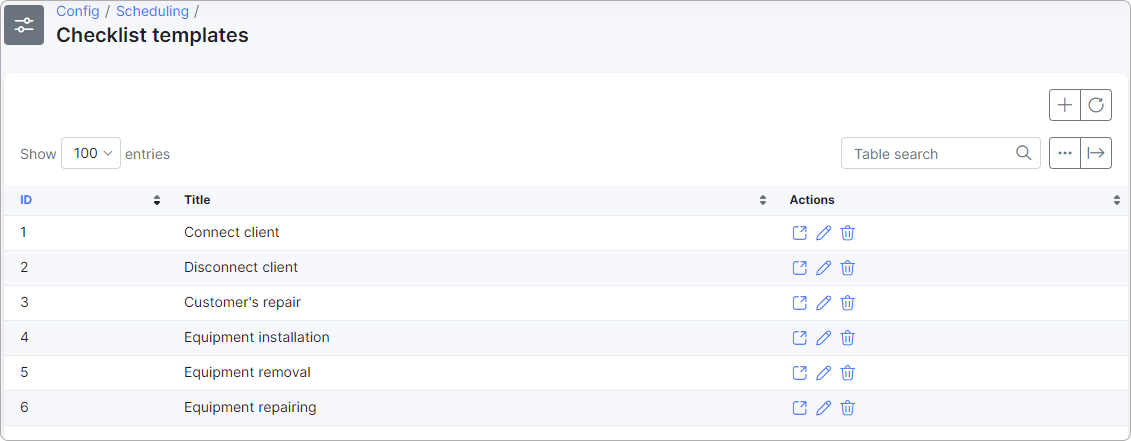
To manage checklist templates, go to Config → Scheduling → Checklist templates. Here, you can view, edit, remove, or add new templates.
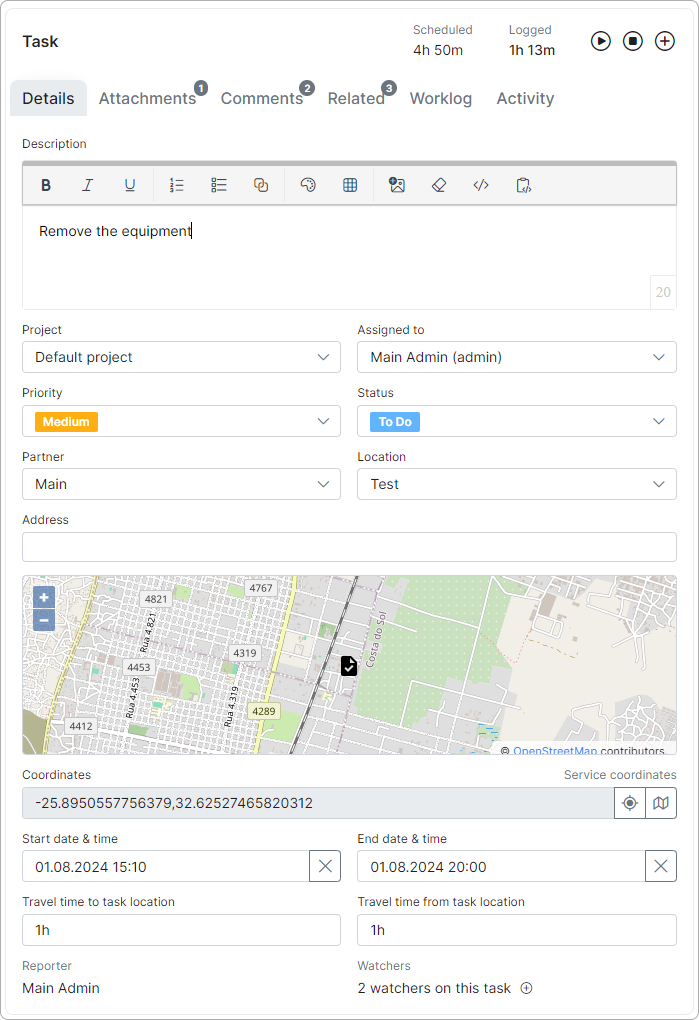
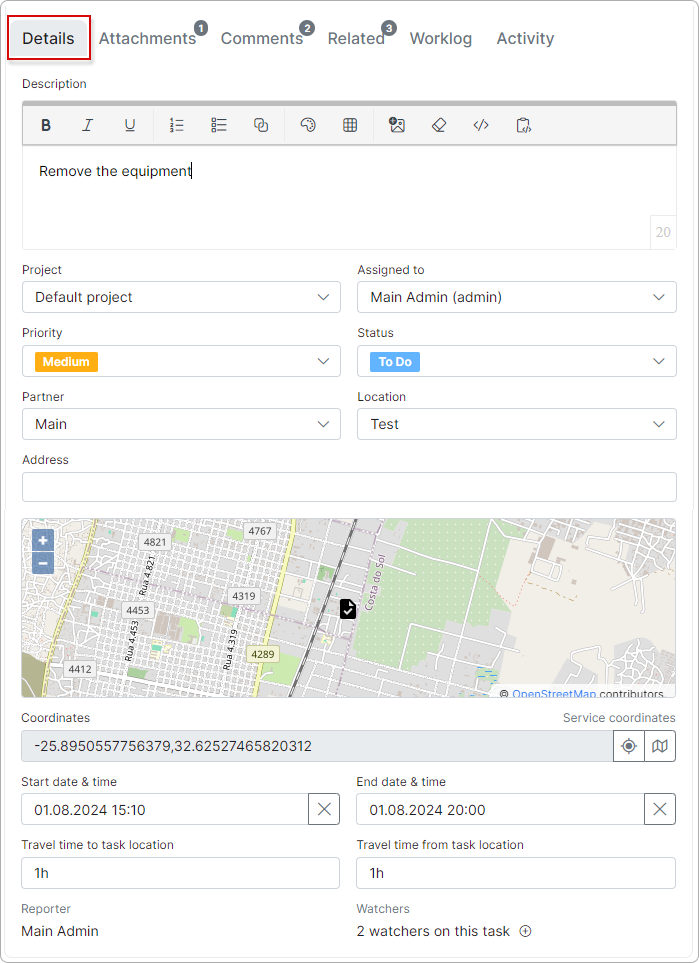
¶ Details tab
In the task details, you can add a task description, select a project, assign or reassign the task, set the priority (Low, Medium, High) and status (To Do, In Progress, Done), and select a partner and location.
You can also enter the address where the task will be performed and set coordinates for better mapping.
Manage the time spent on the task by specifying the start and end date & time. You can also enter the travel time to and from the task location if it’s remote.
The reporter and watchers of the task will be indicated below. By clicking the plus button next to the watchers, you can add or remove watchers.
¶ Attachments tab
You can add files in various formats to your task to streamline the workflow.
Formats: jpg, jpeg, png, heic, doc, docx, txt, pdf, rtf.
File size: up to 50 MB.

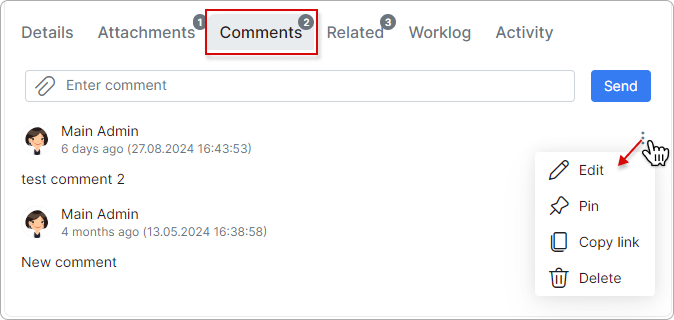
¶ Comments tab
Here you can see all comments left on the task, along with information about the comment's author, date, time, and the comment itself.
You can edit, pin, copy the link, or delete each comment.
To create a new comment, simply enter it in the provided field, where you can also add attachments, and then click Save.
¶ Related tab
In this subsection, you will find subtasks, related tasks, and the linked ticket.
You can link and unlink existing items by simply clicking the respective button.
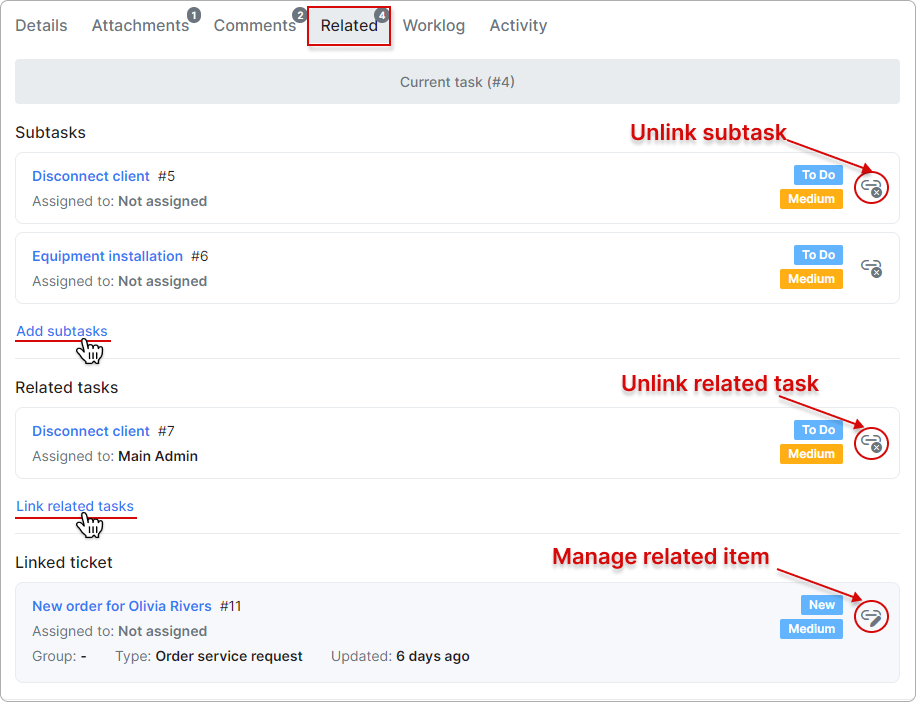
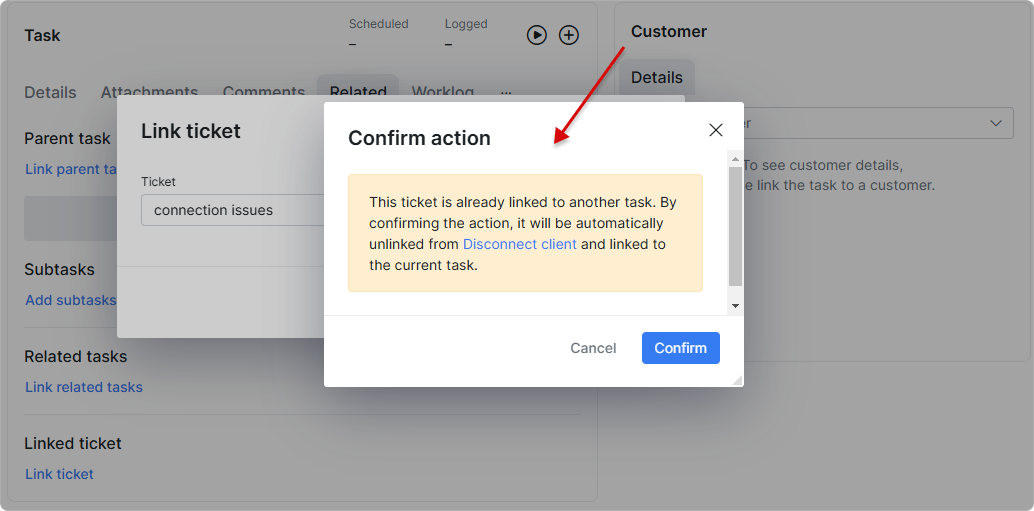
However, for the ticket, you cannot link a new one until you unlink the current linked ticket:
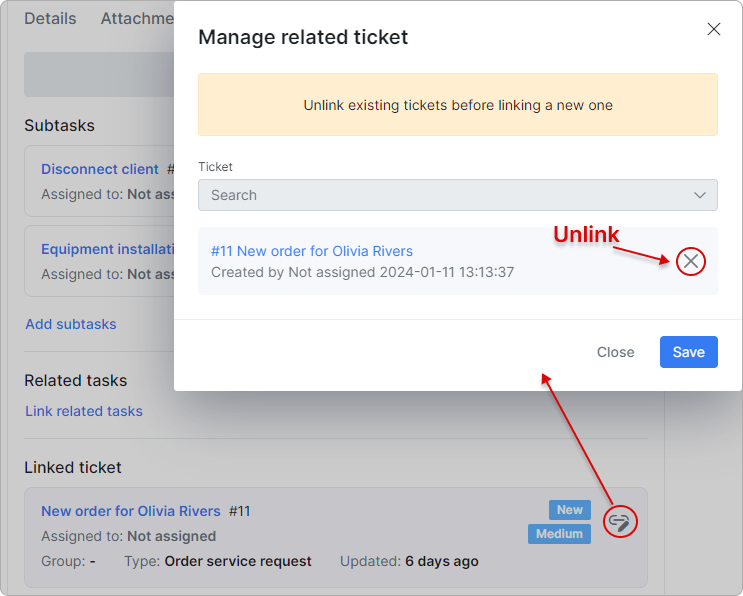
If you attempt to link a ticket that is already associated with another task, you will need to confirm the action. This is because the ticket will be unlinked from the previous task and linked to the current one instead.
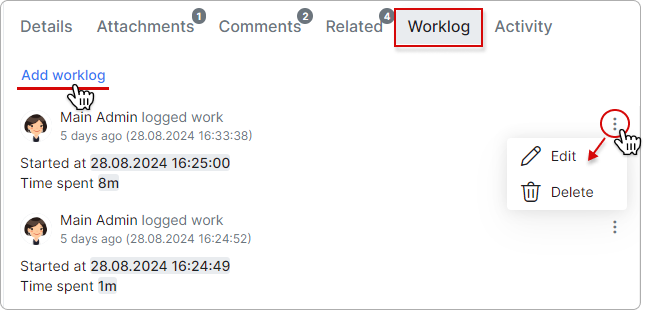
¶ Worklog tab
The feature is essential for tracking the time spent on specific tasks by admins and team members. It helps in accurately recording the effort put into each task, which is crucial for any project. By maintaining a detailed worklog, you can ensure transparency and accountability in task management.
You can add a worklog entry, as well as edit or delete existing ones:
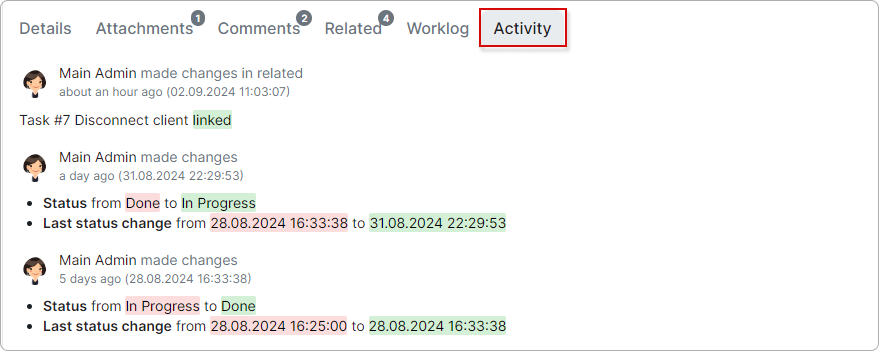
¶ Activity tab
Here, you can track all the changes made by admins:
¶ Customer section
In this section, you can view and update customer details, their inventory products, and all related documents.
To open the customer profile related to the task, simply click the corresponding icon at the top right corner of the Customer section within the task:
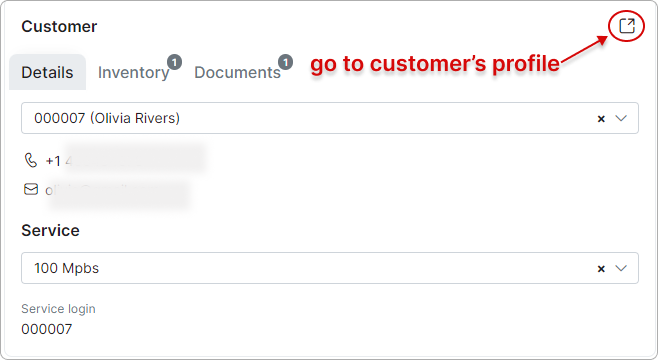
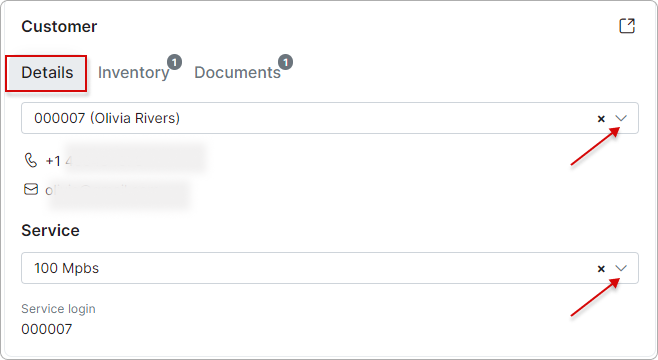
¶ Customer details
You can add or remove a customer, as well as manage the services related to that customer. Additionally, you can view the customer's phone number, email address, and service login:
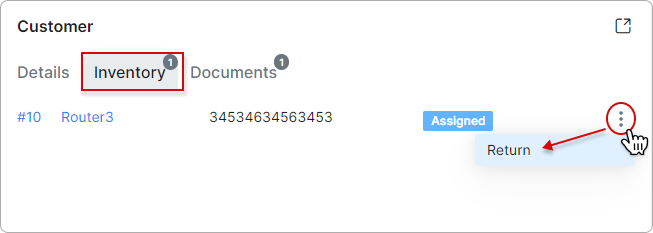
¶ Inventory
Under this tab, you can view products related to the customer. If needed, you can return the product directly from this location.
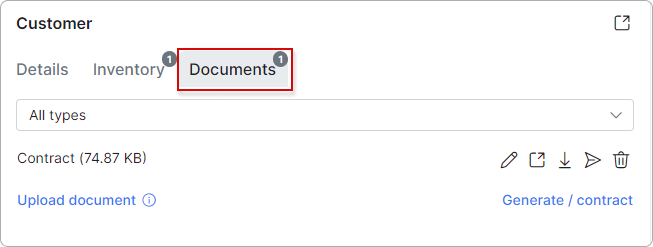
¶ Documents
Here, you can view the customer's documents, filter them by type, and manage them by editing, viewing, downloading, sending (via email, the customer's portal, or both), or deleting them.
You can also upload new documents and generate new contracts.
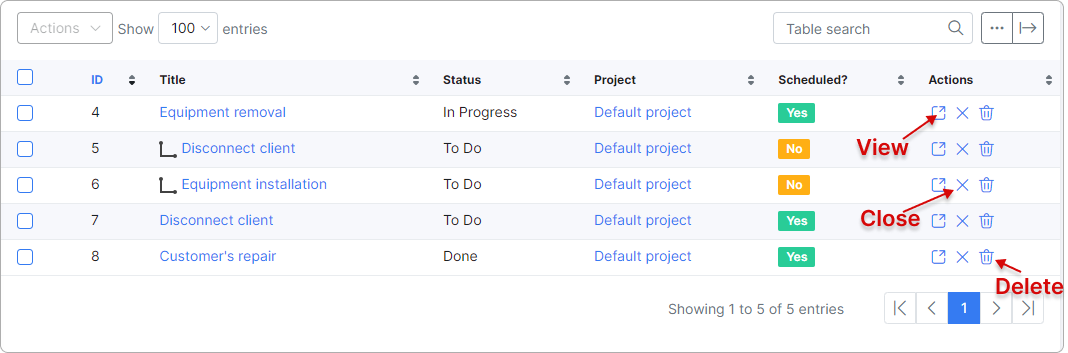
¶ Action buttons
With the following action buttons, you can View, Close, or Delete existing tasks:
¶ How to close and reopen tasks
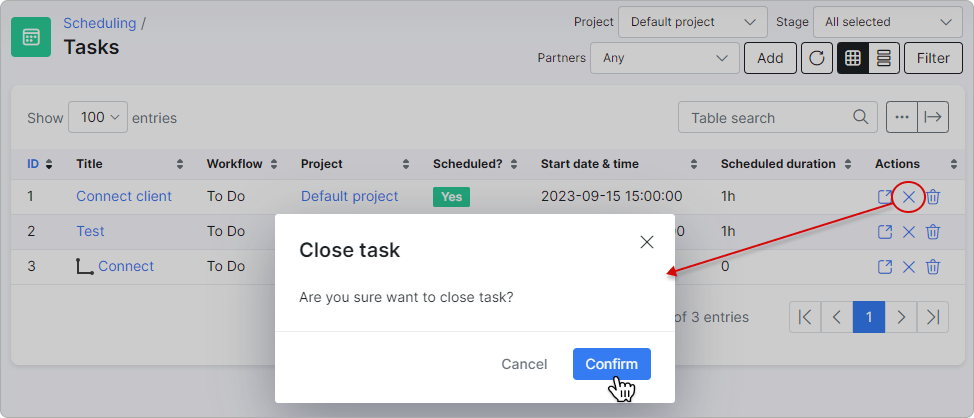
To close a task, click the Close icon ![]() next to it:
next to it:
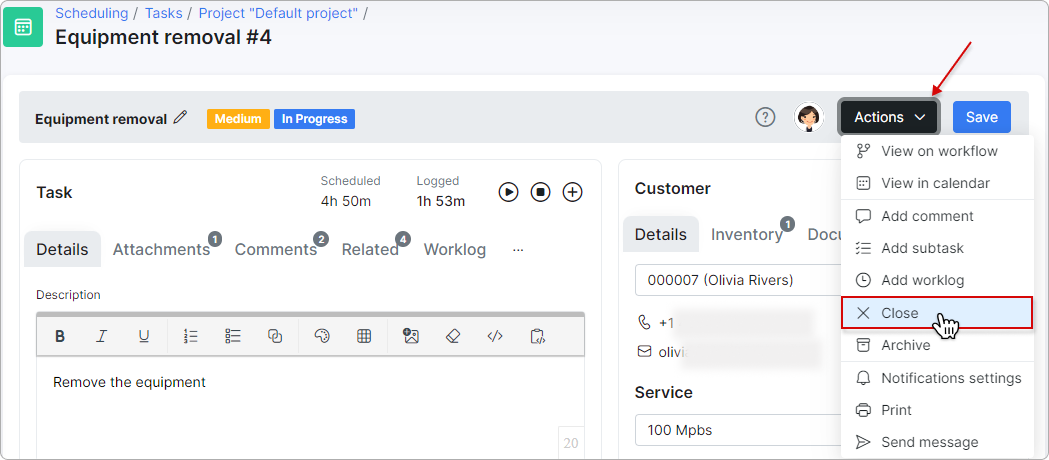
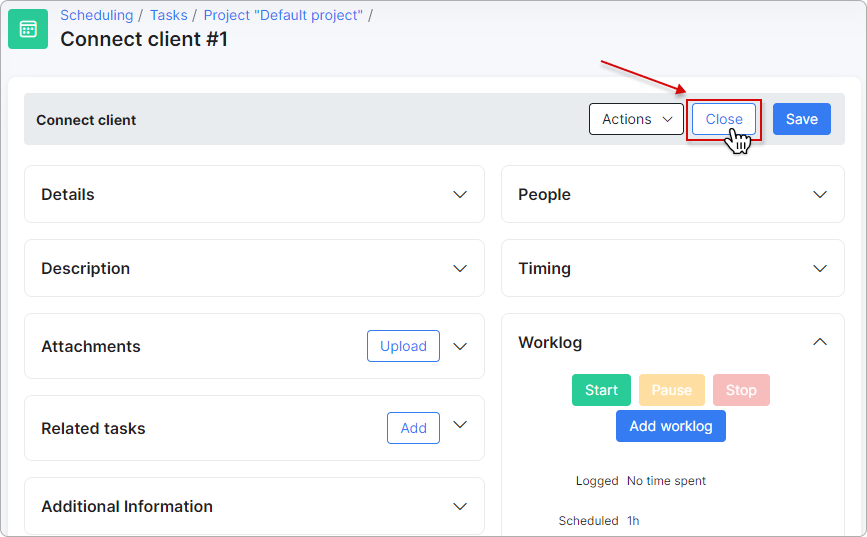
You can also close a task by opening it and clicking the Close button in the Actions drop-down menu:
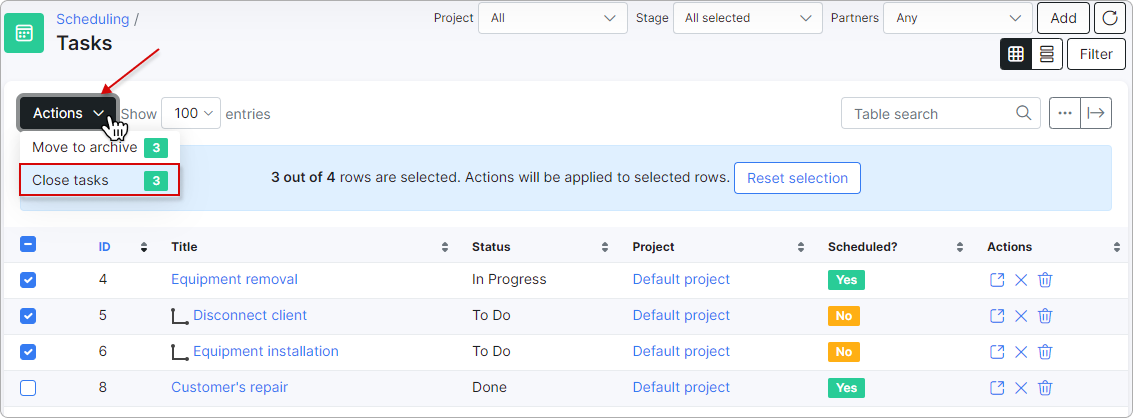
If you need to close more than one task at once, you can use the mass actions feature located at the top left corner of the task table:
If there's a ticket linked to the task, you need to choose whether to close the task and go to the ticket, or close both the task and the ticket:
To access all of your closed tasks, you can filter the task table by clicking the Filter button and selecting either All or Closed from the Condition dropdown menu:

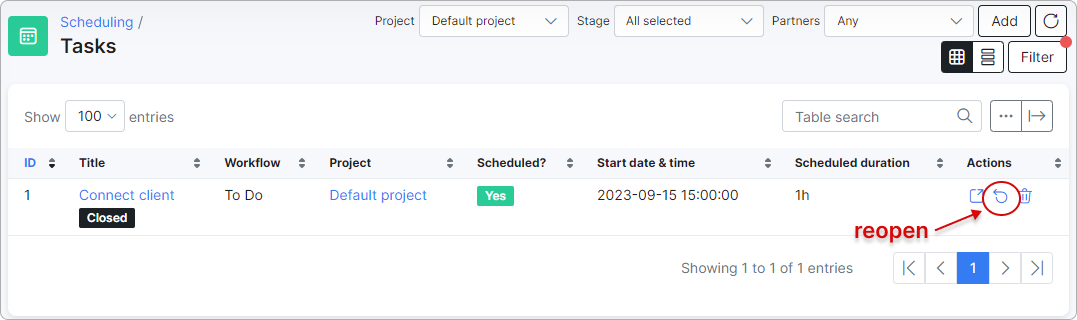
The task can be reopened by clicking the Re-open icon ![]() next to it:
next to it:
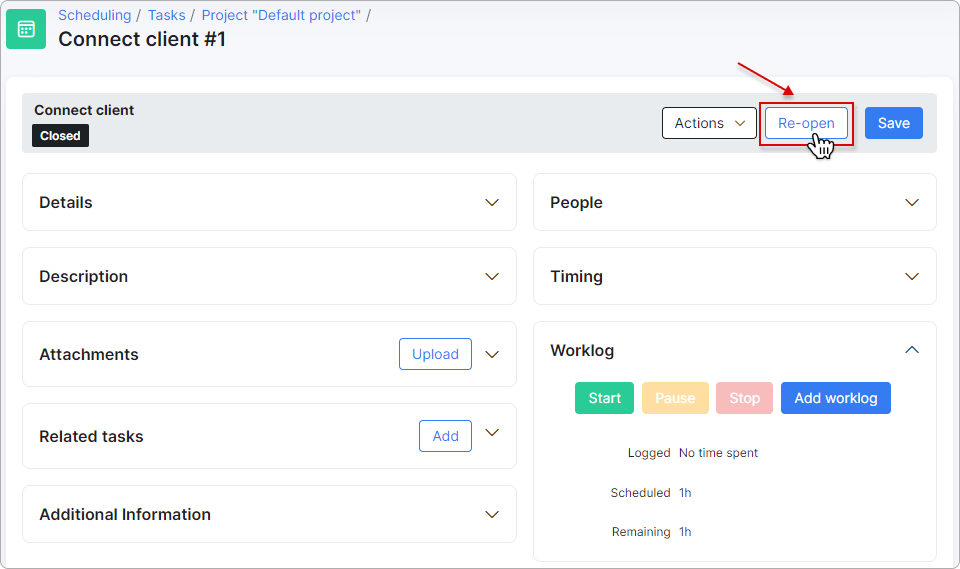
Likewise, a closed task can be reopened by clicking the Re-open button in the Actions drop-down menu within the task:
¶ Table and Workflow view
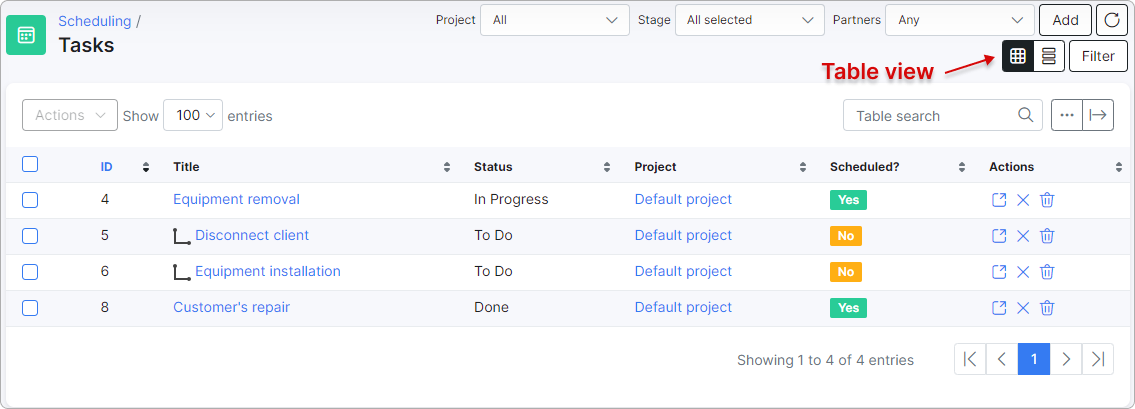
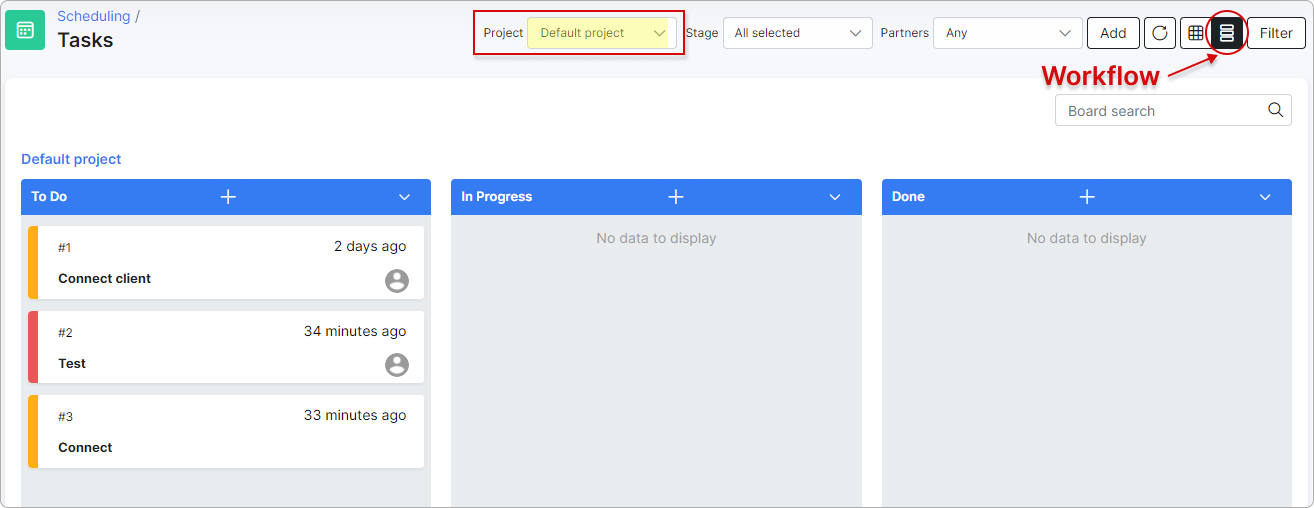
With the respective buttons  , you can watch tasks in Table view or Workflow view:
¶ Templates
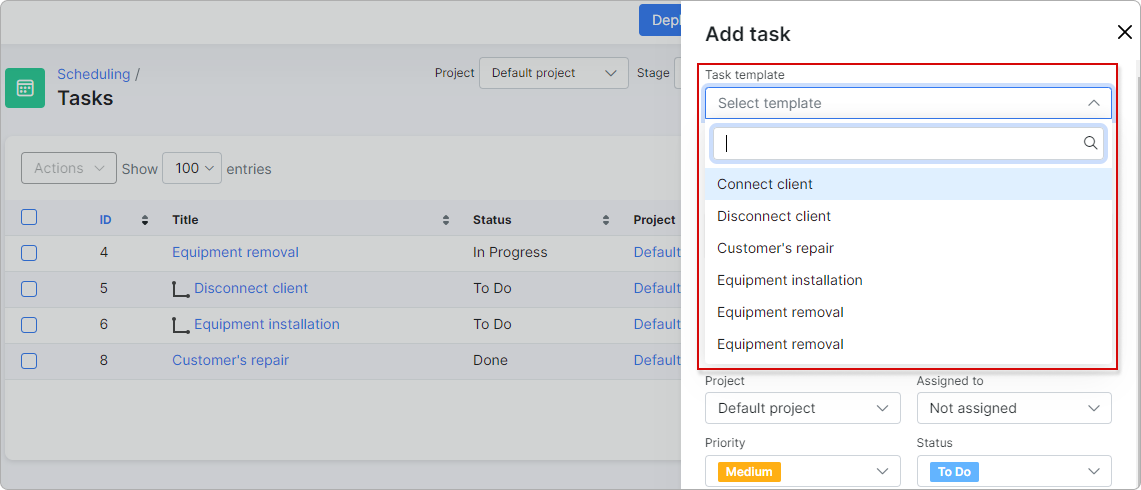
It is possible to have various task templates to optimize the routine/process of adding new tasks. You can create your own templates in Config → Scheduling → Task templates or choose from the existing ones:
¶ Subtasks
You can add a subtask to your main task under the Related tab within the main task:
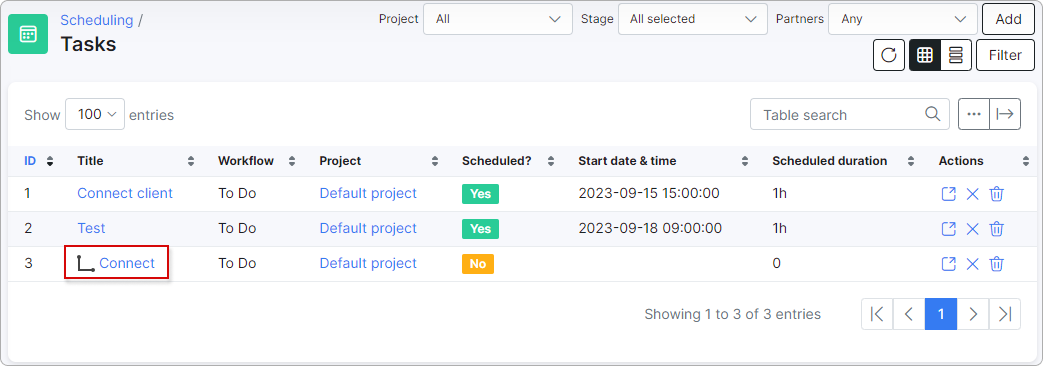
Now, your main task becomes the parent task, and the subtask you created will be marked in the task list with the following sign as linked to its parent task:
You should remove all item relations before deleting the parent task.