¶ Gocardless
- Overview
- Installation
- GoCardless Configuration
- Registration
- Basic configuration
- Enabling intelligent retries
- Invoice payment
- Charge invoices and balances
- Top up balance
- Payment refunds and voids
- Export customers
- Direct payments
¶ Overview
Gocardless is a Splynx add-on which allows customers to pay for invoices via the payment gateway - https://gocardless.com/.
Customers using the Gogardless platform can pay for invoices through banks, or you can charge your customers' bank accounts via debit orders.
¶ Installation
The add-on can be installed in two methods: via the CLI or Web UI of your Splynx server.
To install the Gocardless add-on via CLI, the following commands can be used:
apt-get update
apt-get install splynx-gocardless-rb
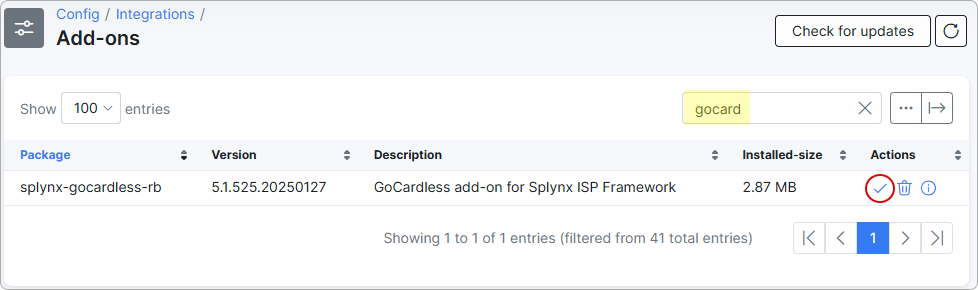
To install it via the Web UI, navigate to Config → Integrations → Add-ons:

Locate or search for the splynx-gocardless-rb add-on and click on the Install icon in the Actions column:
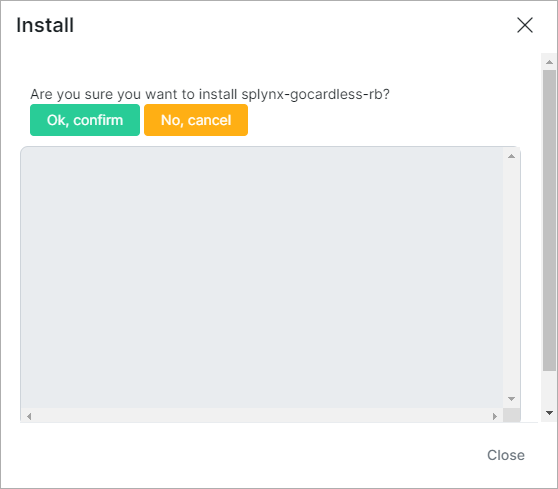
Click the OK, confirm button to start the installation process:
¶ GoCardless Configuration
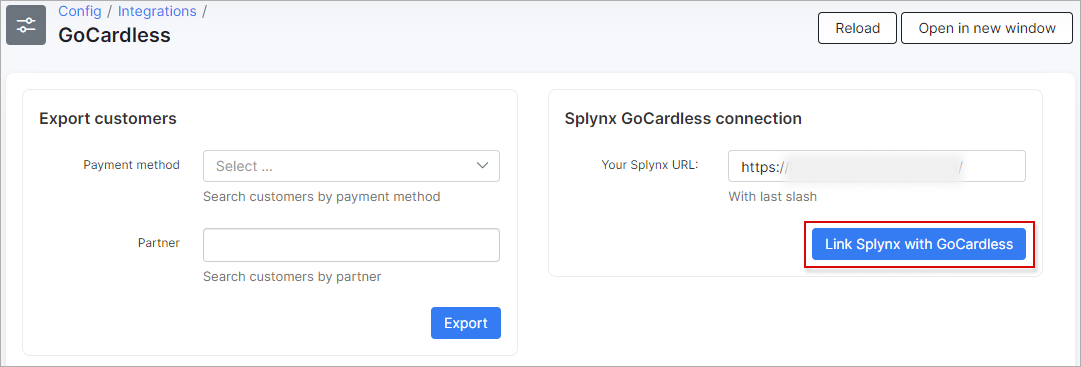
Once the installation process has been completed, we can proceed to configuring the add-on in Config → Integrations → GoCardless:

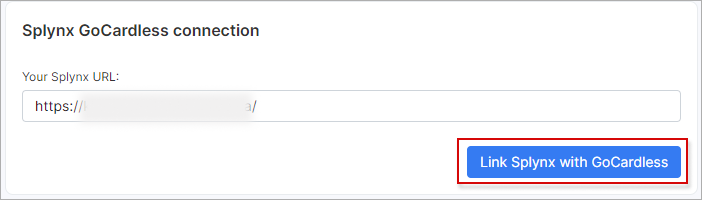
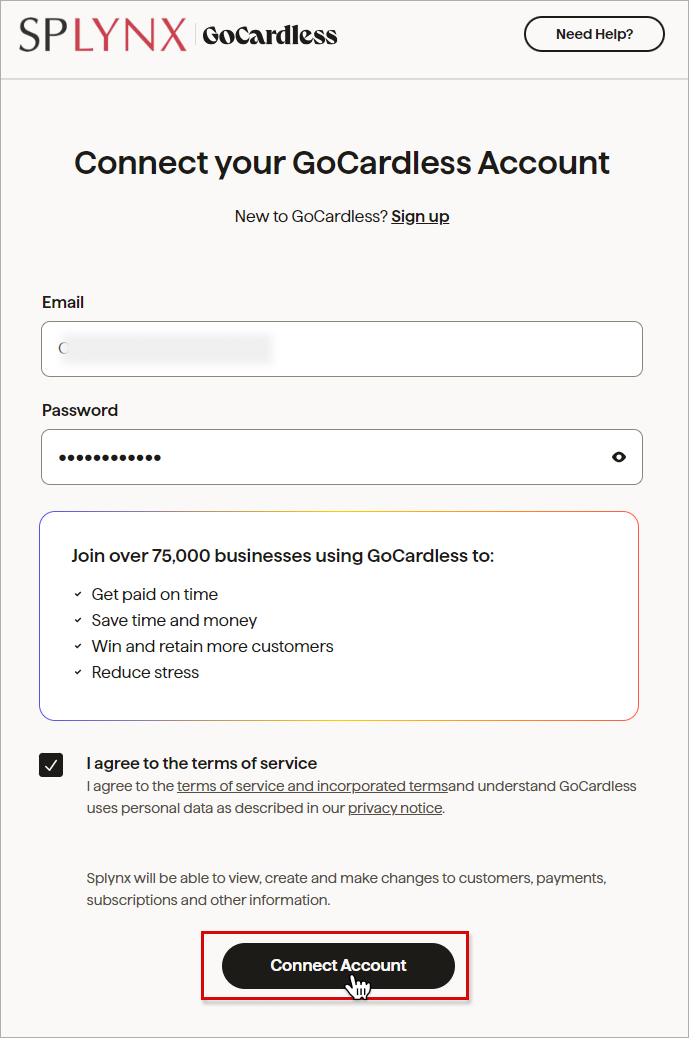
Enter your Splynx URL in the provided field and click the Link Splynx with GoCardless button. You will be redirected to the GoCardless registration page:
Enter your registration data in the registration form and click the Connect Account button.
¶ Registration
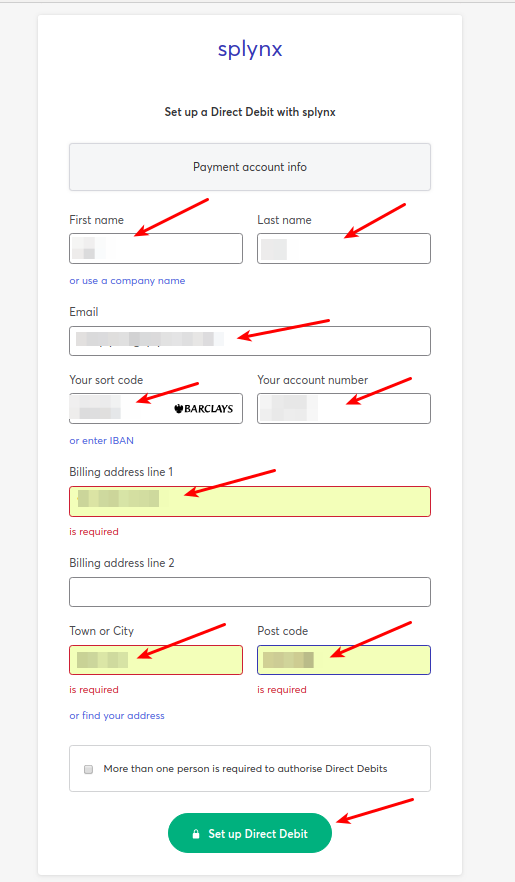
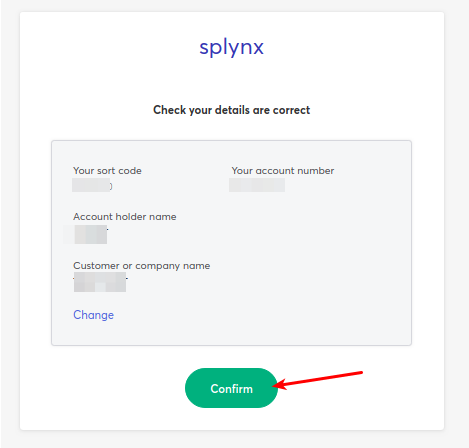
After that, the customer should enter the registration details in the provided fields, navigate to Finance → Gocardless and click the Confirm and allow future charge link.
¶ Basic configuration
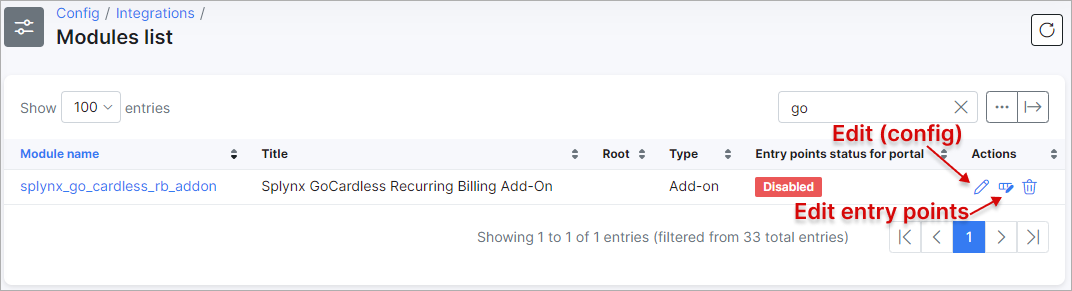
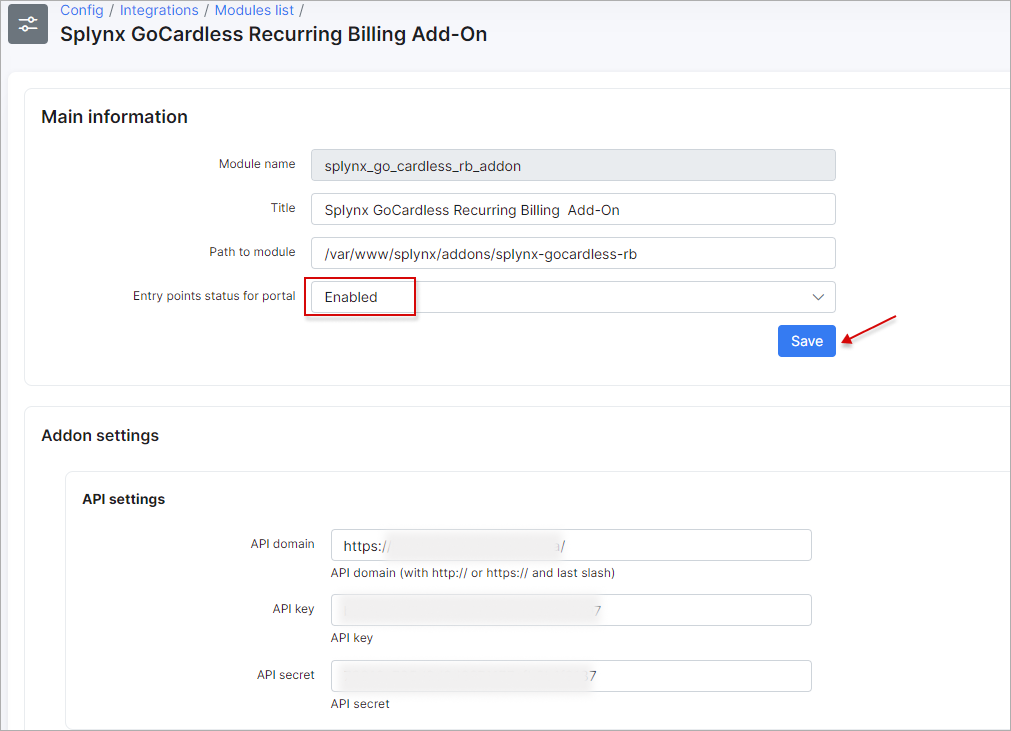
Other Gocardless add-on settings are located in Config → Integrations → Modules list:

Locate or search for the splynx_go_cardless_rb_addon add-on module and click the  (Edit) icon in the Actions column to change the necessary settings:
Main information & API settings
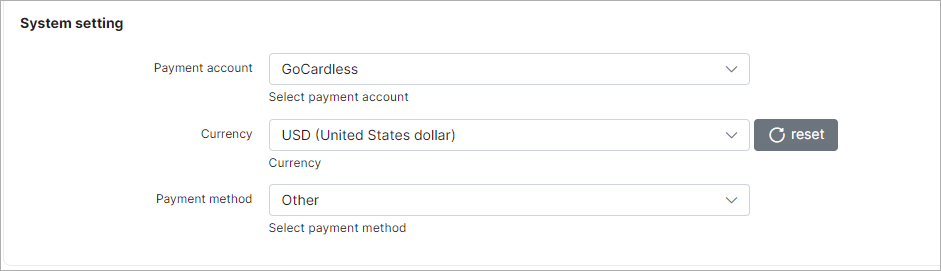
System settings
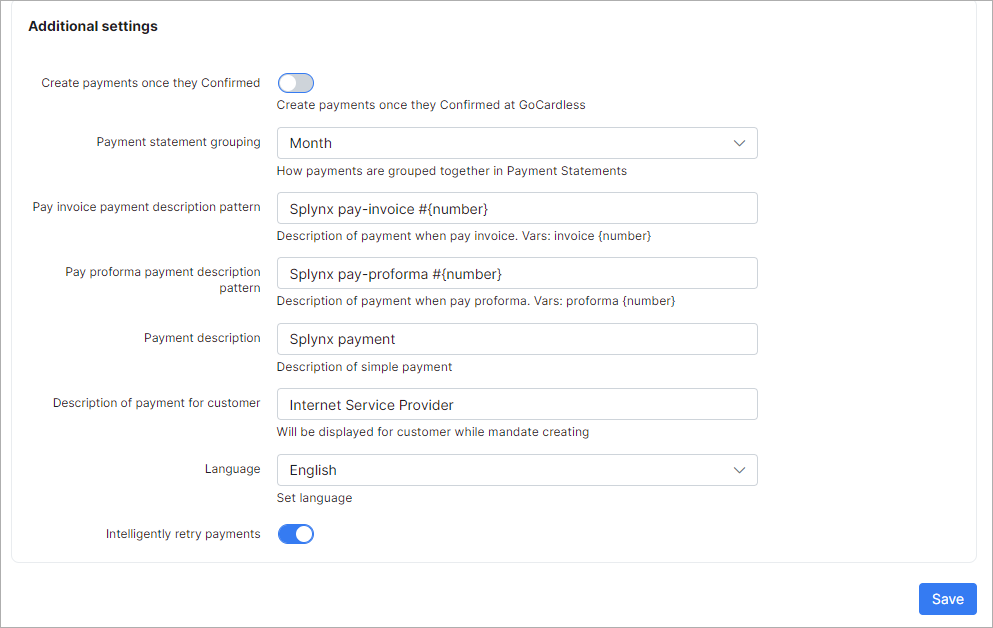
Additional settings
-
Create payments once they Confirmed - create a payment only after it has been confirmed by the customer's bank as a successful collection from their account. Once the payment is confirmed, GoCardless will arrange for it to be paid out to your registered account;
-
Payment statement grouping - choose how to group payment statements (
Finance → Payment Statements → History) - monthly or daily; -
Pay invoice payment description pattern - description of the payment when paying the invoice. By default is used:
Splynx pay-invoice #{number}; -
Pay proforma payment description pattern - description of the payment when paying the proforma invoice. By default is used:
Splynx pay-proforma #{number}; -
Payment description - text that is added to the payment description field;
-
Description of payment for customer - text that will be displayed to the customer while creating a Direct Debit mandate;
-
Language - select the language;
-
Intelligently retry payments - the toggle allows you to enable/disable the automatic retry of any failed payments. Payments can fail for various reasons, with the most common one being insufficient funds in the customer's account. Once you have switched it on, your failed payments will be automatically retried according to the schedule you have configured in your GoCardless dashboard. By default, the toggle is enabled.
¶ Enabling intelligent retries
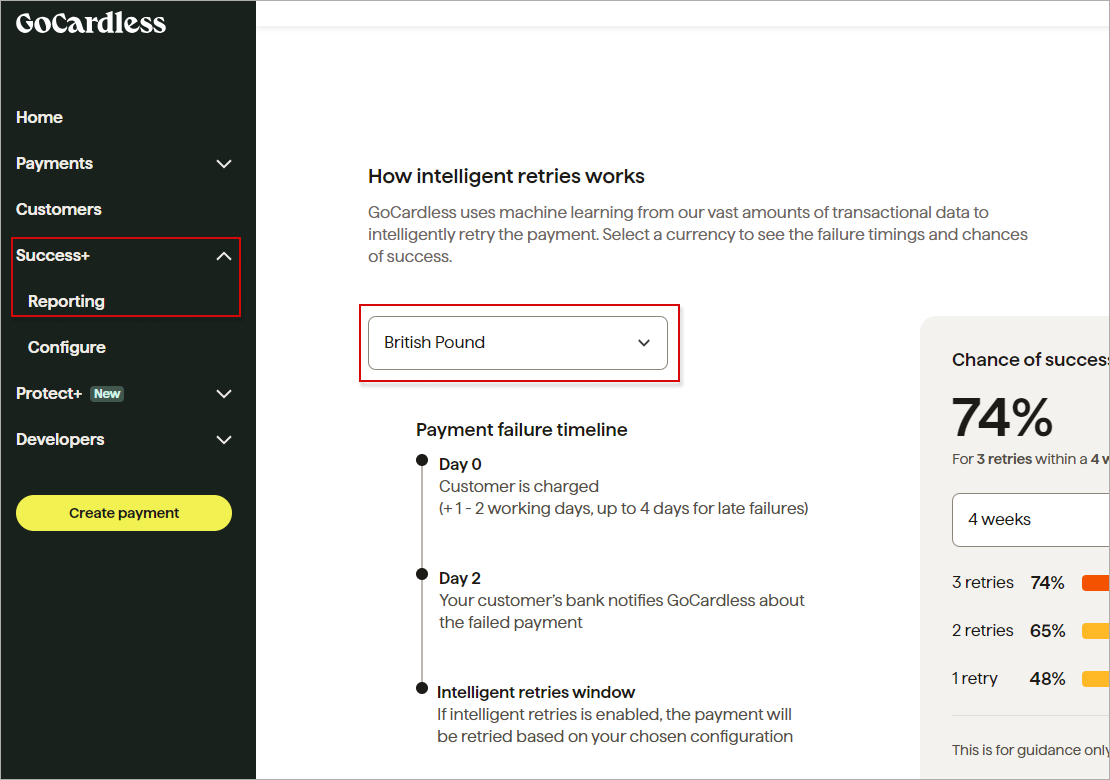
To get Intelligent Retries running for payments that are created, you need to make sure intelligent retries are enabled and configured properly in your GoCardless control panel:
- Click Success+ in the left hand menu bar, and then click Reporting to choose which currencies to turn automatic retries on for:
- Next, you will have to configure you retries for the selected currency:
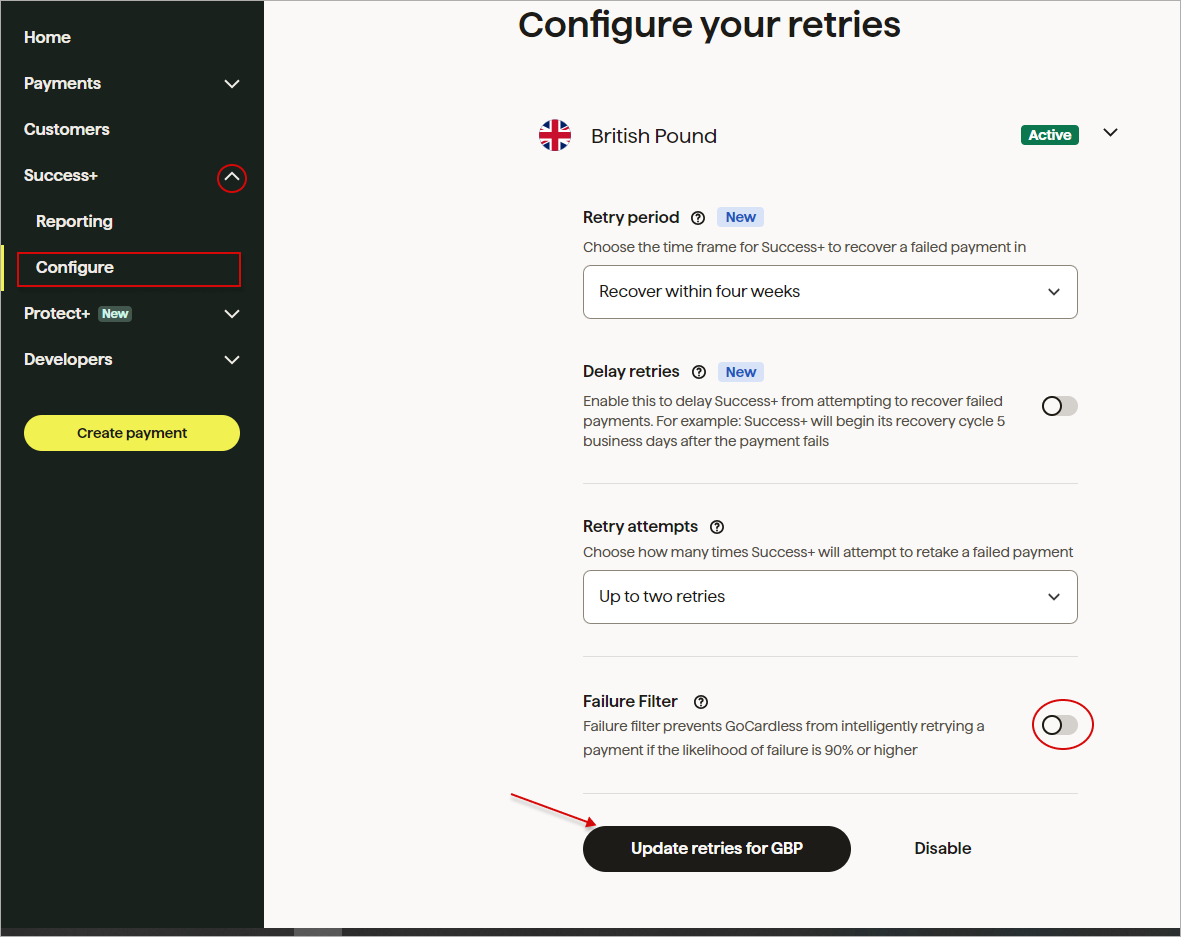
You can also choose to enable the Failure Filter which will prevent retries if the likelihood of the payment failing is very high (90% or higher). You can find more information about this feature here. Then, click the Update retries for... button.
¶ Invoice payment
Once the configuration has been completed, customers can pay their invoices on the Customer portal using the Gocardless system in Finance → Invoices:
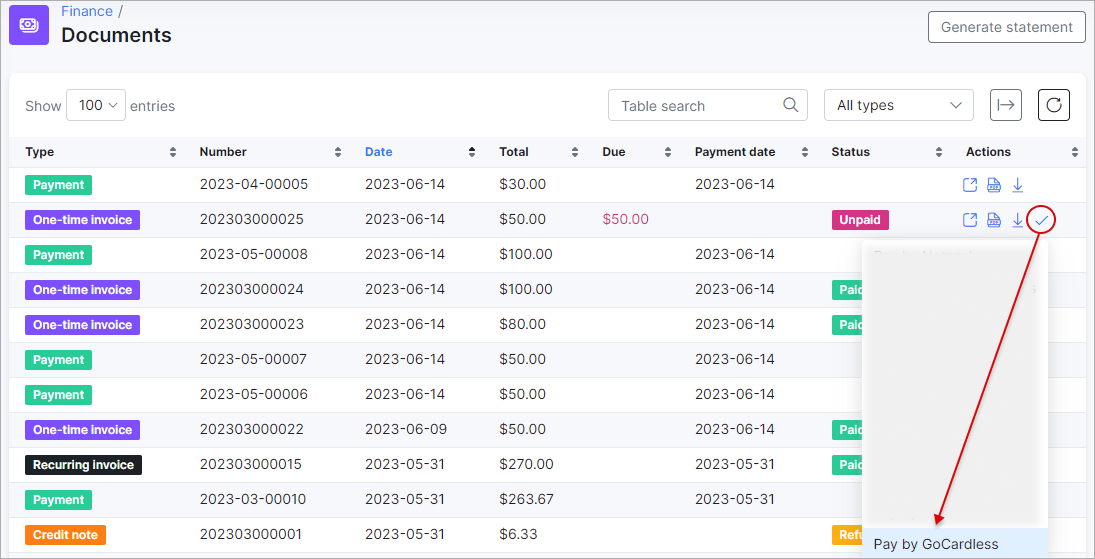
Or from the Dashboard on the Customer portal:

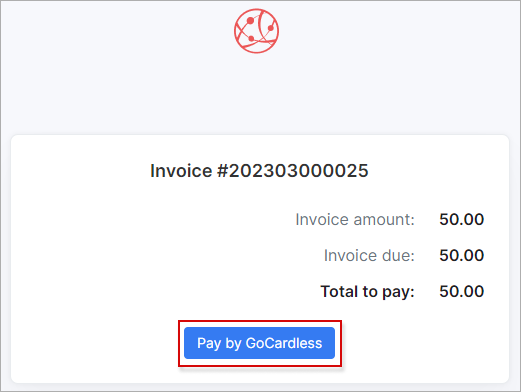
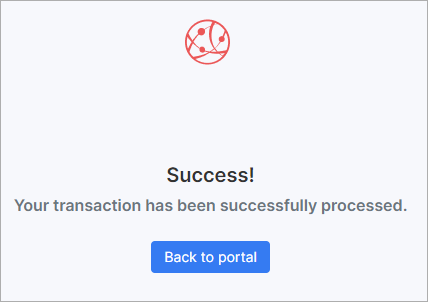
If everything goes well, you will see the status of the invoice marked as Paid (on the customer and admin portal).
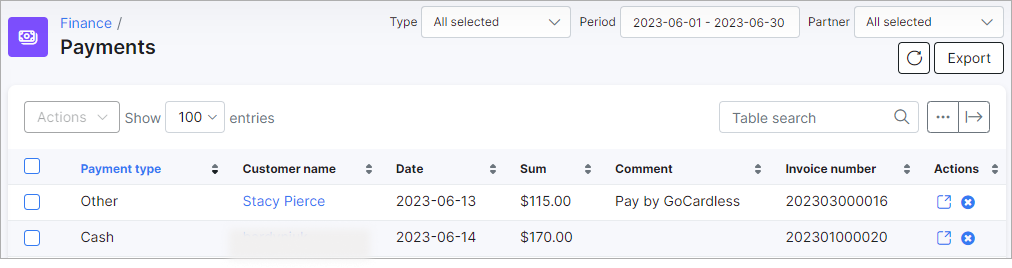
 All customer personal information related to their bank account is stored encrypted in the database.
¶ Charge invoices and balances
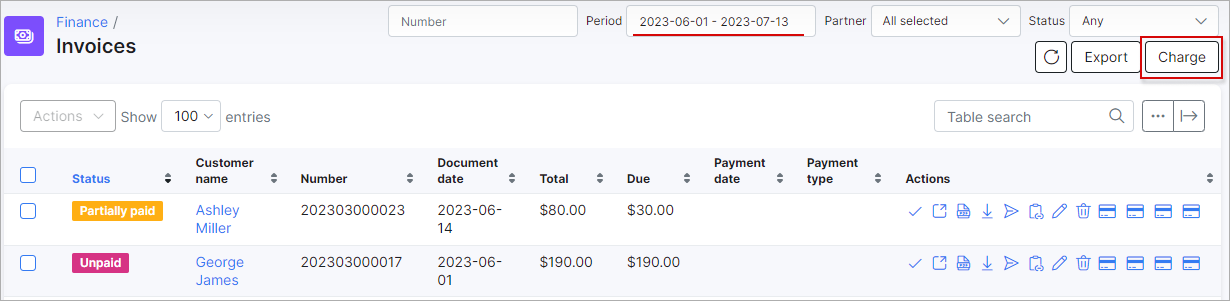
You can charge all customers in one click. Navigate to Finance → Invoices, set the period, and click the Charge button as depicted below:
¶ Charge invoices
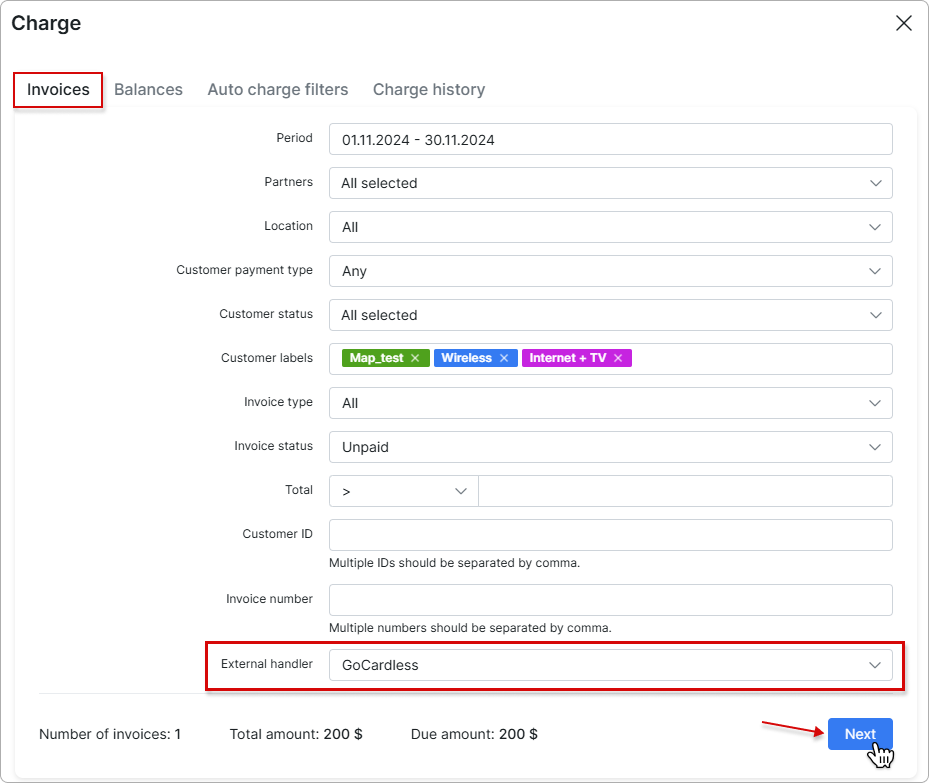
To charge invoices, select GoCardless as the External handler in the Invoices tab, and then click the Next button:
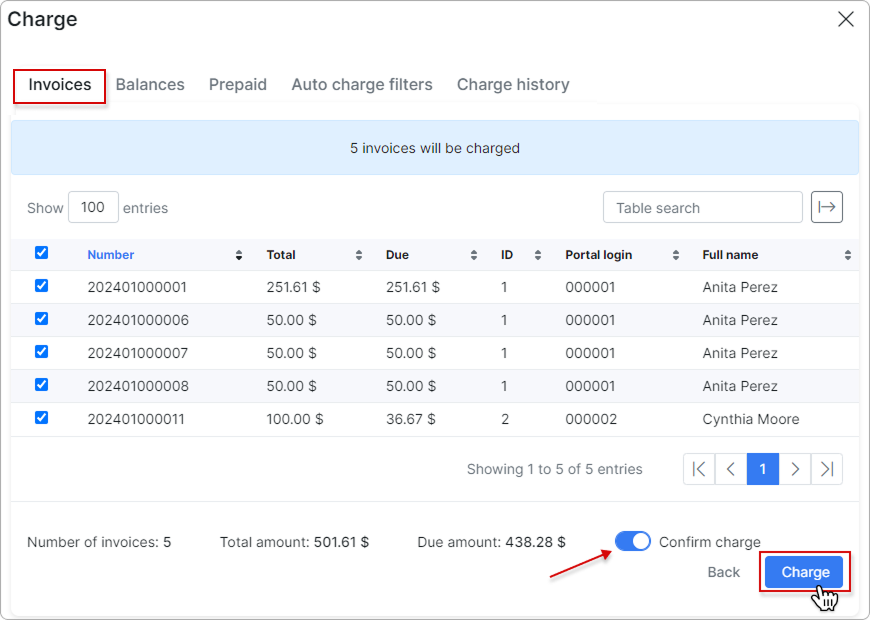
In the new window, toggle the Confirm charge switch to enable it, and then click the Charge button to complete the charging process:
¶ Charge balances
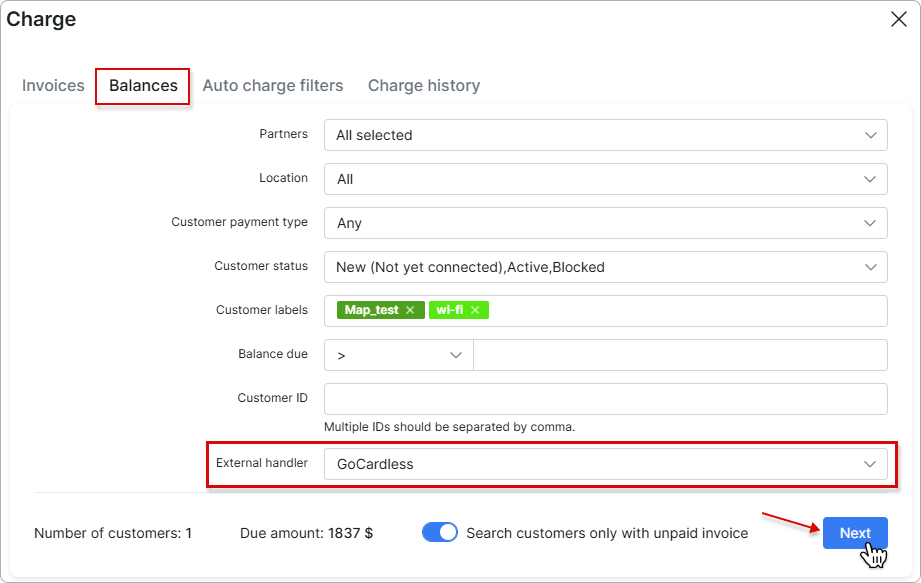
To charge balances, select GoCardless as the External handler in the Balances tab, and then click the Next button:
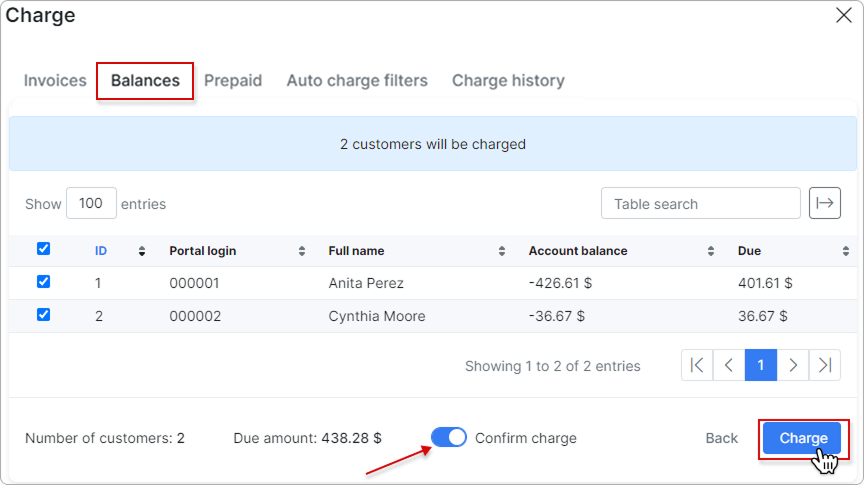
In the new window, toggle the Confirm charge switch to enable it, and then click the Charge button to complete the charging process:
To learn more details about how to charge invoices and balances, please read Invoices

¶ Top up balance
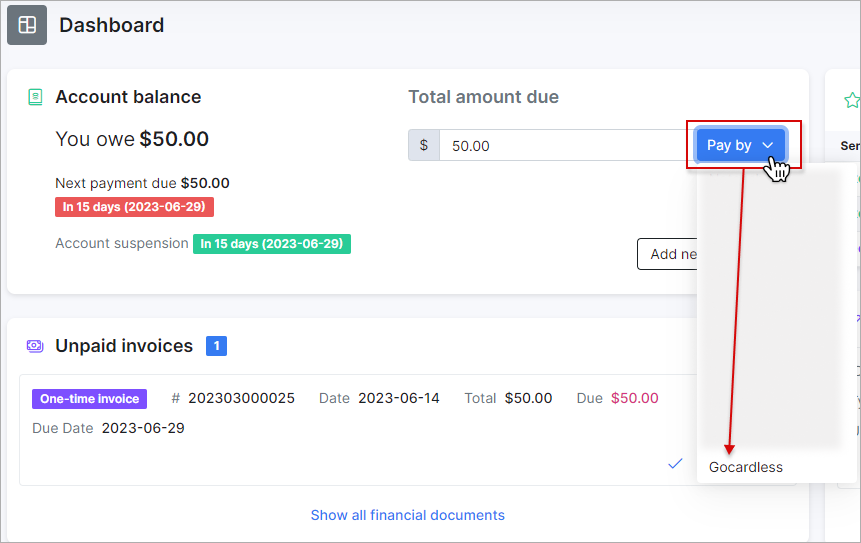
Customers can also top up their balances using the Pay by button on the Customer portal's Dahsboard:
¶ Payment refunds and voids
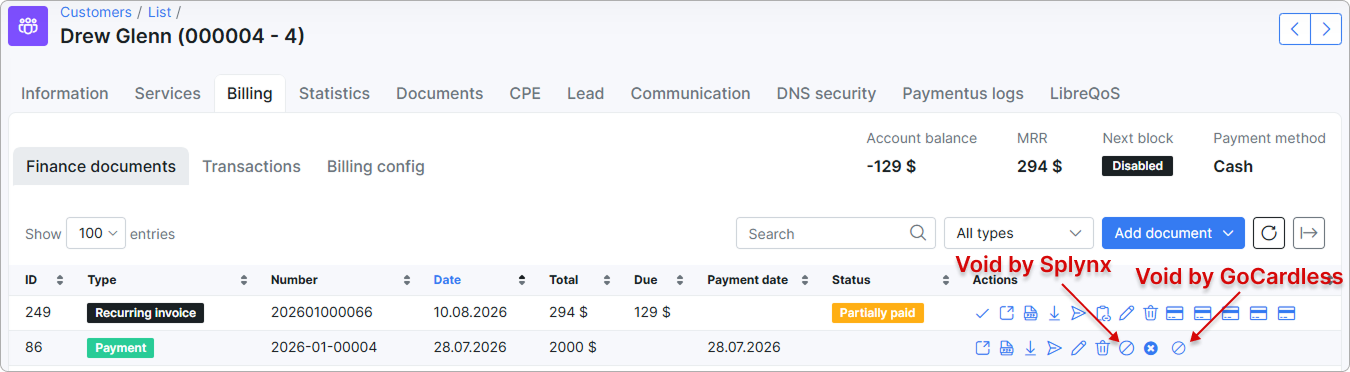
A payment received through GoCardless can be reversed directly from the payment record. Two actions are available: Void by GoCardless sends the request to the gateway, and Void cancels the payment in Splynx only. Gateway payments cannot be deleted — you void or refund them instead.
The reversal actions are controlled by hidden configuration options that are enabled per client on request. Contact our support team (support@splynx.com) to enable them for your instance.
¶ What happens to the payment
Void by GoCardless behaves differently depending on whether GoCardless has already settled the payment, so the same action can end in either a refund or a void:
| Payment not settled yet | Payment already settled | Void (Splynx side) |
|
|---|---|---|---|
| What GoCardless does | Cancels the payment | Refunds the amount | Nothing — no request is sent |
| Amount | Full amount only | Full or partial | Full amount only |
| Document created in Splynx | None | A credit note for the refunded amount | None |
| The original payment | Status becomes Voided, transaction removed |
Stays in the payments list unchanged | Status becomes Voided, transaction removed |
Refunding keeps the payment on record and offsets it with a credit note, which is what most accounting rules expect once the money has actually moved. Voiding is for payments that should never have counted — the payment is struck from the balance instead of being offset.
¶ Reversing a payment through GoCardless
Click the circular 
Void by GoCardless icon in the Actions column next to the payment:
Splynx checks the state of the payment at GoCardless and adjusts the confirmation window accordingly:
- If the payment has not settled yet, only the full amount can be reversed, so the Amount field is locked to the payment sum. The window warns you that the payment has not been settled and will be voided, and the confirmation button reads
Void. - If the payment has settled, enter the refund amount. You can enter the full amount or make a partial refund. Refund amount can only be equal to or less than the invoice amount.
For a settled payment, a credit note is generated for the refunded amount and the refund is processed immediately. For an unsettled payment, GoCardless cancels the collection and the payment receives the Voided status.
If the payment has already been refunded, you will receive a warning message.
¶ Voiding a payment in Splynx
Void sends a void request from the Splynx side, cancelling the payment directly in Splynx. No request is sent to GoCardless, so use it when the money never reached your GoCardless account. This action is available in the customer's Billing → Finance documents list and works regardless of the state of the payment at the gateway.
¶ After a payment is voided
Once a payment has been voided, its Status changes to Voided (shown as a purple label) and its amount is displayed struck through in the payments list:
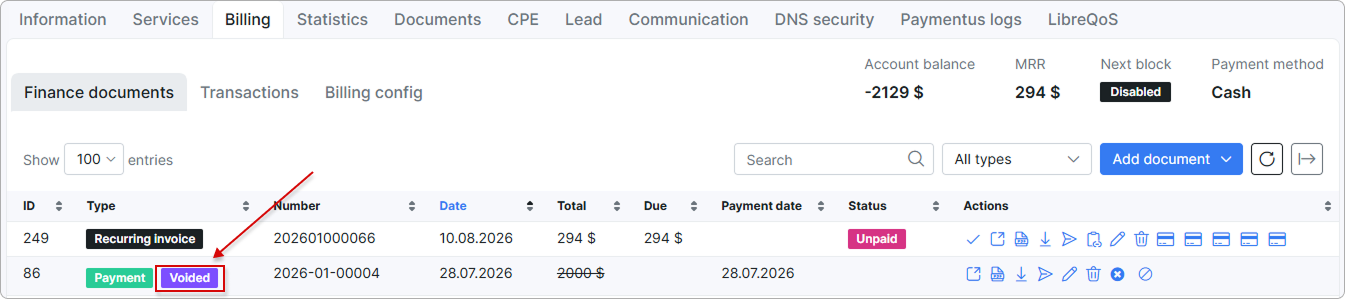
Splynx then adjusts the customer's finances:
- The payment transaction is removed, so the amount no longer counts towards the customer's balance. In Finance → Transactions the correction is shown under the Correction section.
- The payment is unlinked from its invoice. The invoice stays active and is due again for the full amount.
- If the customer is left with an outstanding balance, account suspension is applied again.
For the re-allocation of funds that follows a void or refund, and for how void operations reach connected accounting integrations, see Refunding and voiding gateway payments.
¶ When GoCardless rejects the operation
GoCardless can refuse the request — for example when the payment has already been paid out and can no longer be cancelled, or when refunds are not enabled for your GoCardless account. In that case, Splynx shows the error returned by GoCardless and leaves the payment unchanged: no Voided status is set and no transaction is removed.
If the payment can no longer be reversed at the gateway, refund the customer outside Splynx and record it manually — either as a payment with a negative value or as a credit note.
¶ Export customers
To sync all customers from Splynx to GoCardless, follow the steps below:
Navigate to Config → Integrations → GoCardless :
Select the Payment method and Partner. Then click the Export button:
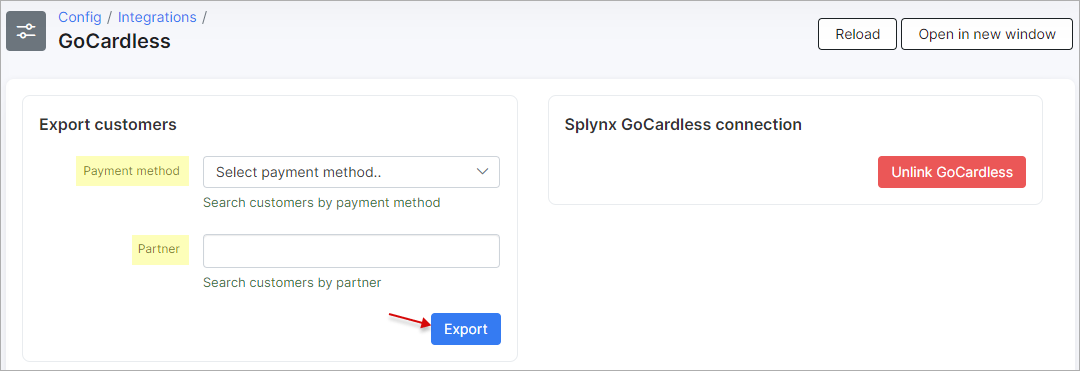
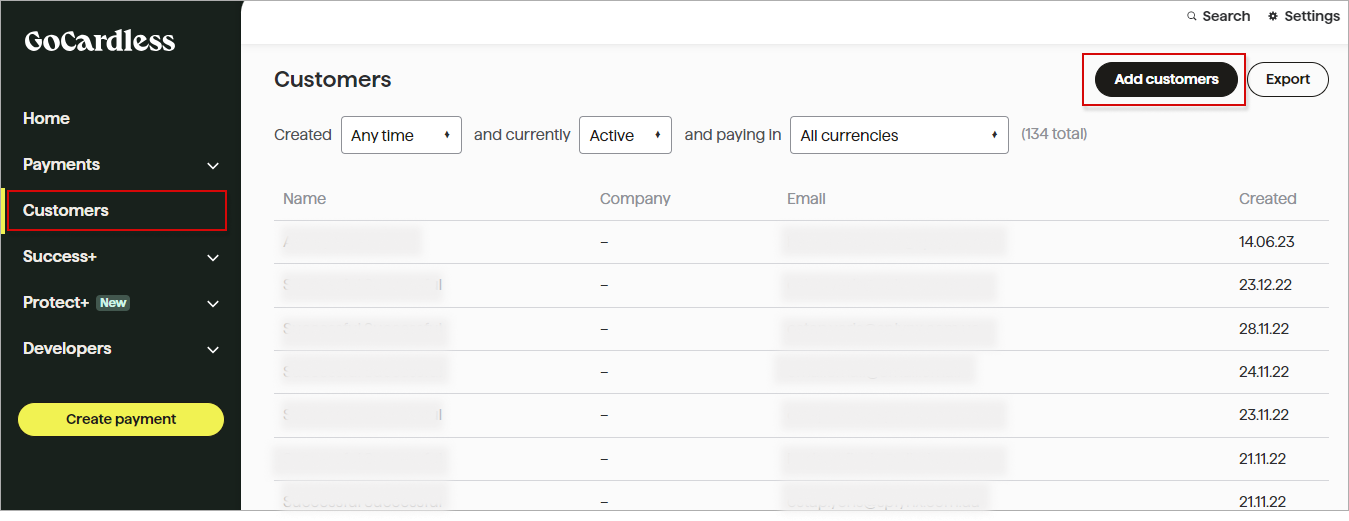
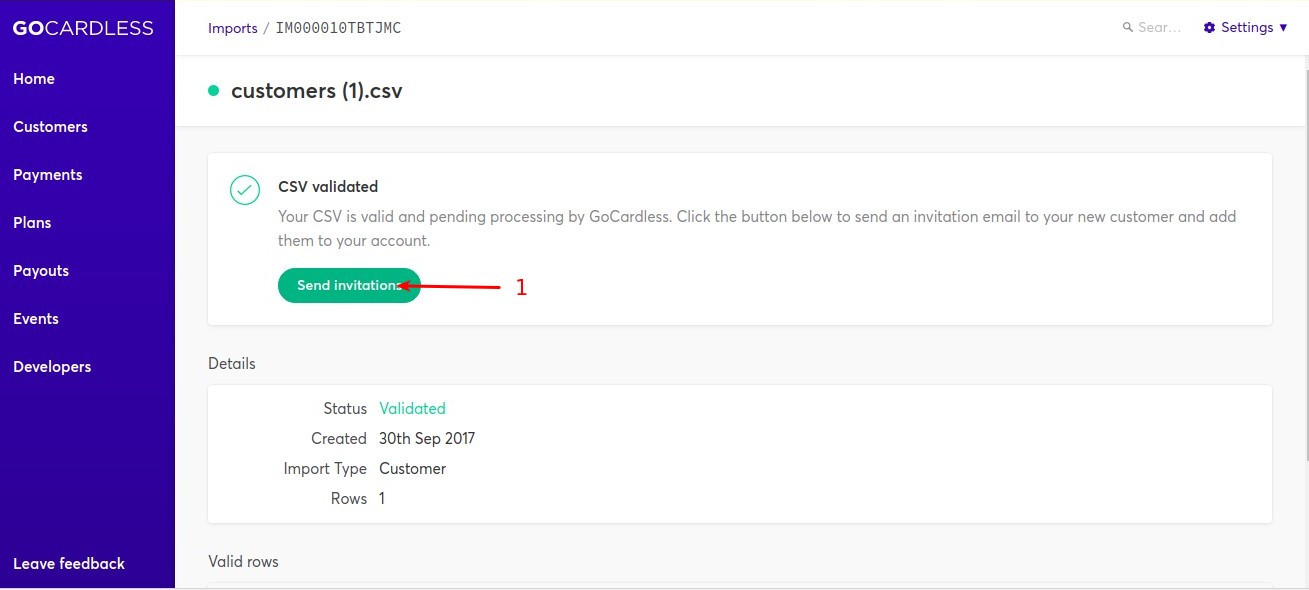
You will receive your customer list as a CSV file. Then, you can open your GoCardless dashboard on https://gocardless.com/ and upload the CSV file, as depicted below:
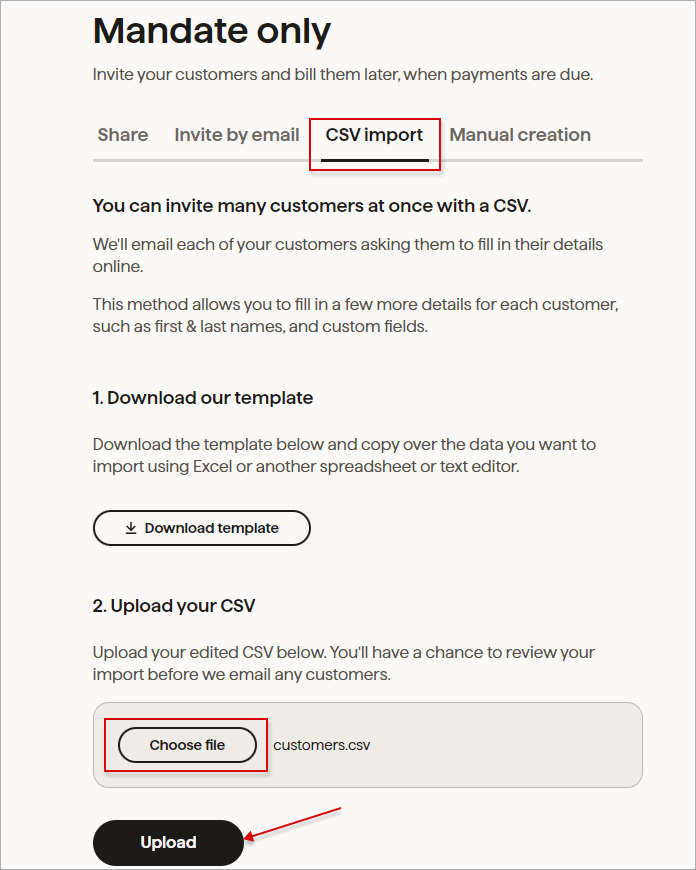
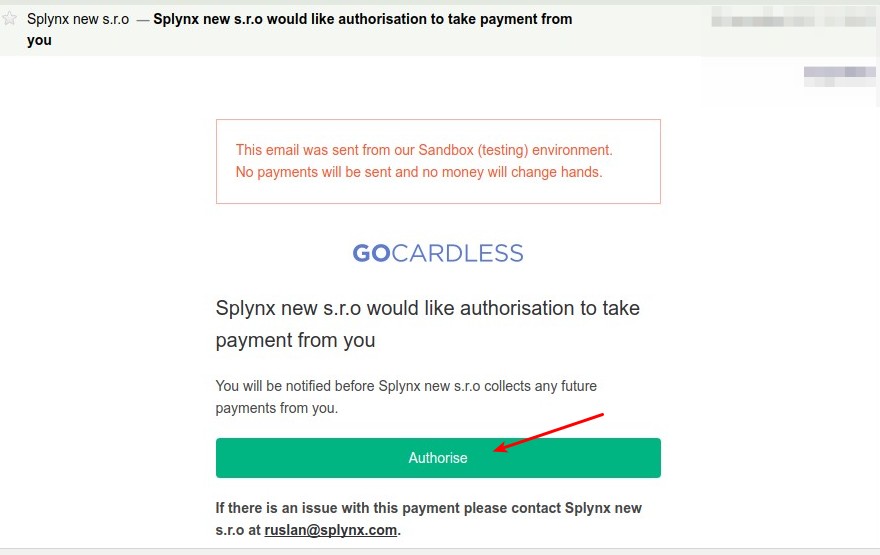
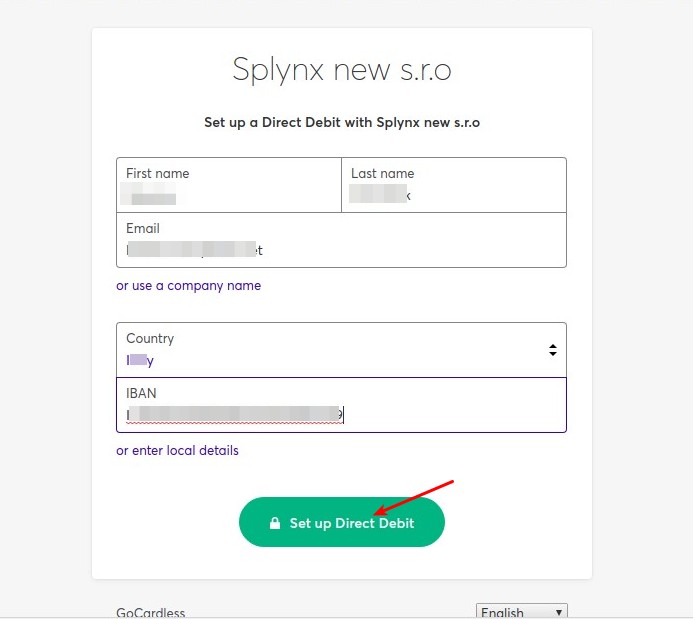
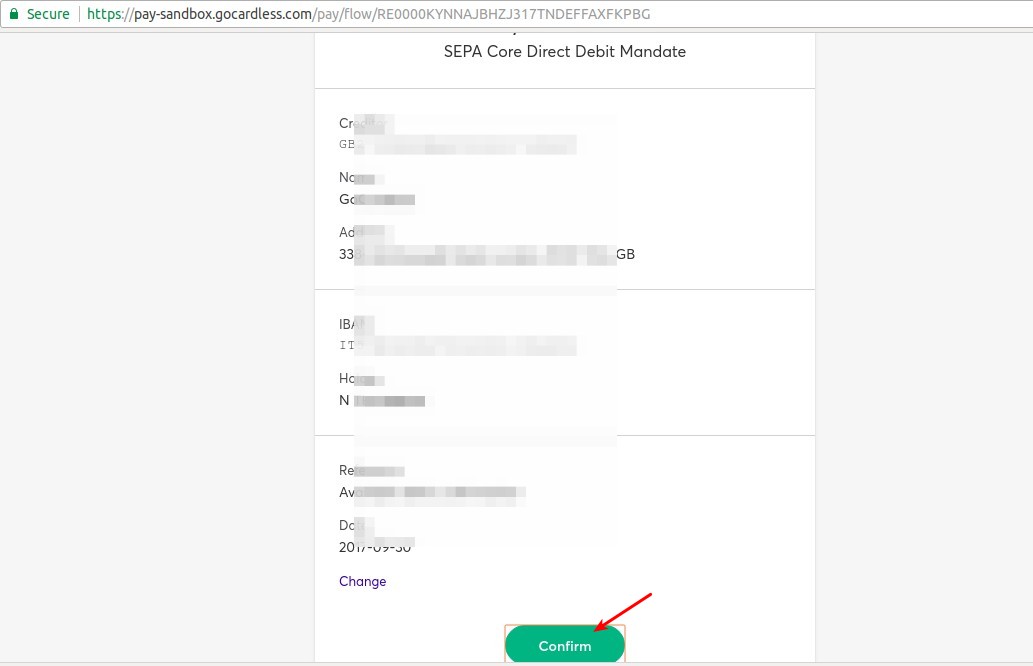
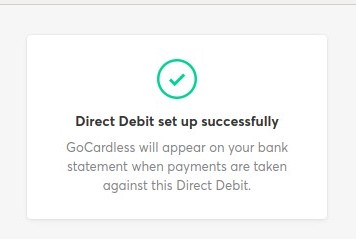
All customers from the list will receive emails to authorize the action:
¶ Direct payments
You can add a direct payment link to your invoice (proforma invoice) template or include it in your invoice/proforma invoice email notification template, allowing your customers to pay an invoice without authorization.
Invoice:
by invoice ID
https://<splynx_domain_address>/gocardless/direct-pay-invoice-by-id?item_id=<Invoice_id>
by invoice number
https://<splynx_domain_address>/gocardless/direct-pay-invoice?item_id=<Invoice_number>
Proforma Invoice:
by proforma invoice ID
https://<splynx_domain_address>/gocardless/direct-pay-proforma-by-id?item_id=<proforma_id>
by proforma invoice number
https://<splynx_domain_address>/gocardless/direct-pay-proforma?item_id=<proforma_number>