¶ Huawei GPON
- Overview
- Installation
- Prerequisites
- Adding an OLT
- Assigning the ONT
- Customers Huawei ONT
- Video tutorial
- Related pages
¶ Overview
The Huawei GPON (Gigabit Passive Optical Network) add-on allows you to manage Huawei GPON OLT (Optical Line Terminal) devices directly from Splynx. With this module, you can add and configure OLTs, manage VLANs (Virtual Local Area Networks), discover boards, sync tariff profiles, and assign ONTs (Optical Network Terminals) to customers without leaving the Splynx interface.
¶ Installation
To use the Splynx Huawei GPON management system, you need to install the splynx-huawei-olt module.
From the CLI of your server, run the following commands:
apt update
apt install splynx-huawei-olt
Alternatively, you can install it from Splynx:
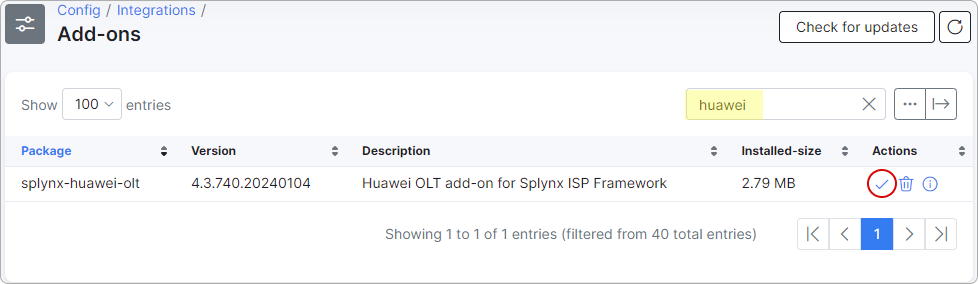
Navigate to Config → Integrations → Add-ons:

Locate the splynx-huawei-olt add-on and click on the install button:
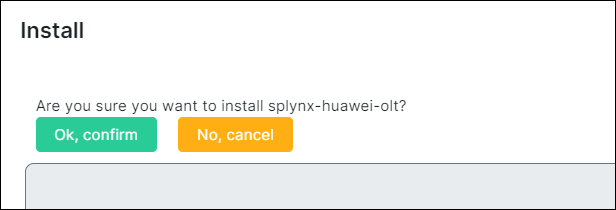
Click OK, confirm to begin the installation process:
¶ Prerequisites
Before adding an OLT, you need to configure tariff plans and create Huawei Groups that bundle your tariffs together. The add-on uses these to generate the correct DBA profiles, traffic tables, and line/service profiles on the OLT.
¶ Tariff plans
The Huawei GPON add-on reads the speed and priority settings from your tariff plans to generate DBA profiles and traffic tables on the OLT. Make sure these fields are configured for the Internet, Voice, and Recurring tariff plans that you intend to use with the GPON add-on.
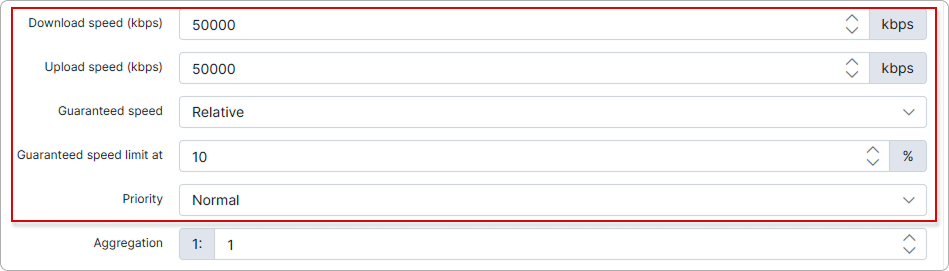
Navigate to Tariff plans → Internet (or Voice / Recurring depending on the plan type) and edit the relevant tariff plan. The following fields are used by the add-on:
- Download speed (kbps) and Upload speed (kbps) — used to set the maximum rates in DBA profiles and traffic tables on the OLT
- Guaranteed speed and Guaranteed speed limit at — used to set the assured bandwidth in DBA profiles
- Priority — used for traffic table QoS priority settings on the OLT
After changing speed or priority values on existing tariff plans, go to the OLT's Actions tab and click Sync Tariffs to push the updated DBA profiles and traffic tables to the device.
¶ Huawei Groups
Huawei Groups bundle an Internet tariff, a Voice tariff, and a Recurring tariff into a single GPON group (line profile). Each group defines which services a customer receives when their ONT is provisioned on the OLT.
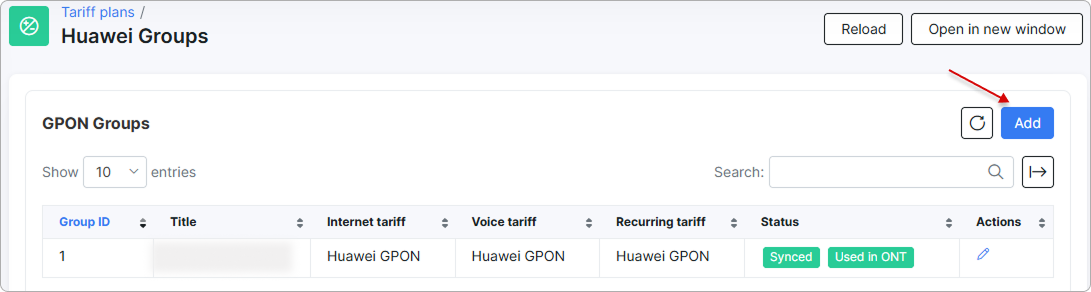
Navigate to Tariff plans → Huawei Groups and click Add to create a new group. Specify a Title and select the Internet tariff, Voice tariff, and Recurring tariff for the group:
For more details, see Huawei Groups.

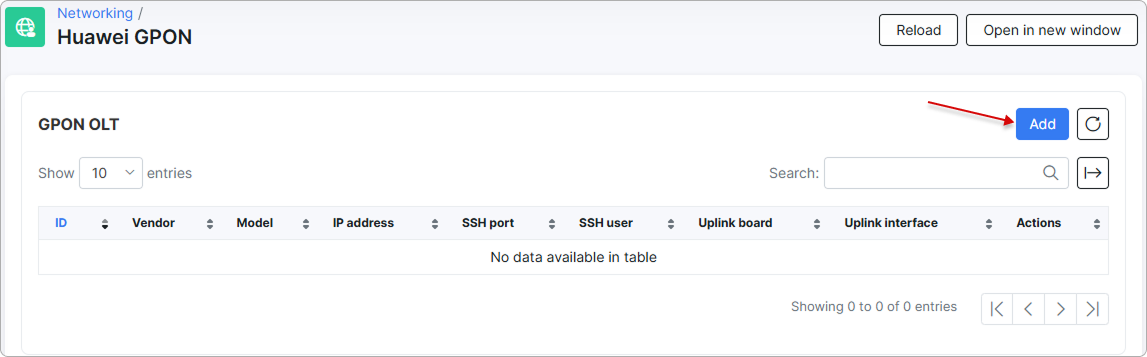
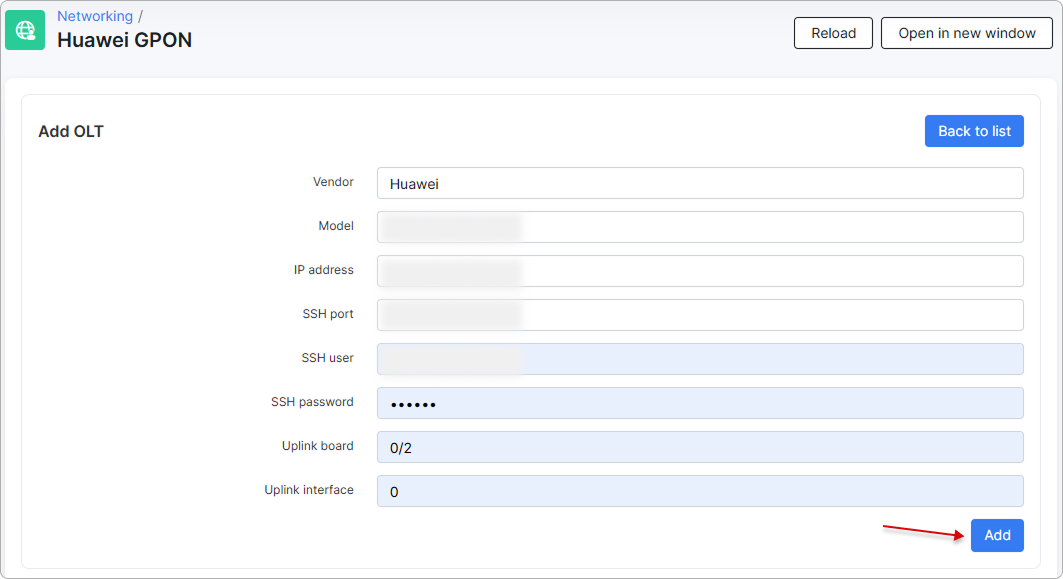
¶ Adding an OLT
To add an OLT, navigate to Networking → Huawei GPON. The IP address, SSH port, and login/password are required to add the device. It is also important to set the Uplink Board and the Uplink Interface correctly.
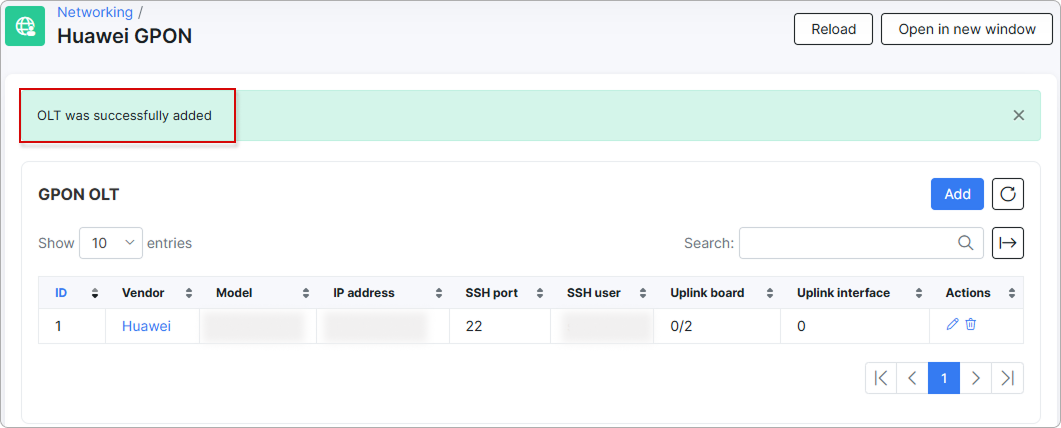
After the OLT is added, you will see a menu with four tabs:
- Information
- Actions
- VLAN
- Boards
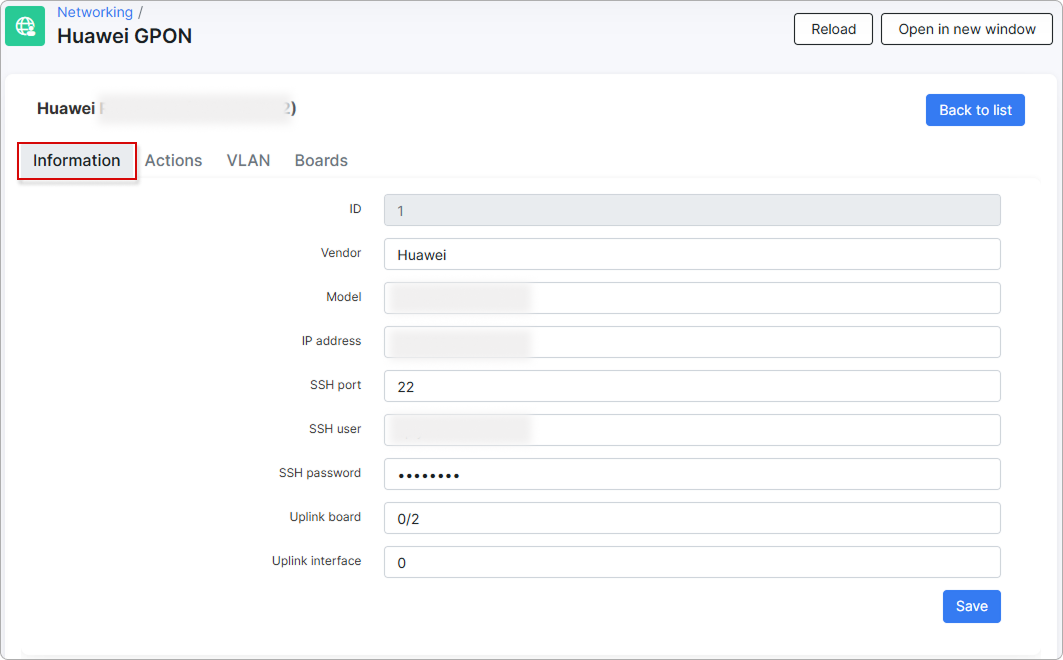
¶ Information
The Information tab displays the OLT connection details such as IP address, SSH port, login credentials, and uplink settings. You can edit the OLT configuration from this tab.
¶ Actions
The Actions tab provides tools to manage the OLT configuration. The following action buttons are available:
Set Vlans— pushes the VLAN configuration to the OLTSet Uplink— configures the uplink board and interface on the OLTSync Tariffs— generates and pushes DBA profiles and traffic tables to the OLT based on the bandwidth and priority values from your tariff plansSync Profiles— generates and pushes line profiles (ont-lineprofile) and service profiles (ont-srvprofile) to the OLT based on your Huawei Groups configuration
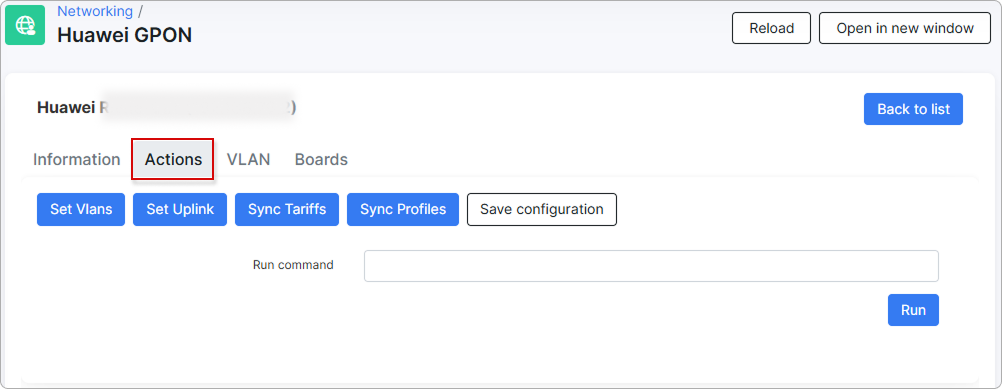
The Run command field at the bottom of the tab allows you to execute custom Huawei CLI commands directly on the OLT. The output is displayed in the Result area below.
After creating or modifying tariff plans and Huawei Groups, click
Sync Tariffsand thenSync Profilesto push the updated configuration to the OLT.
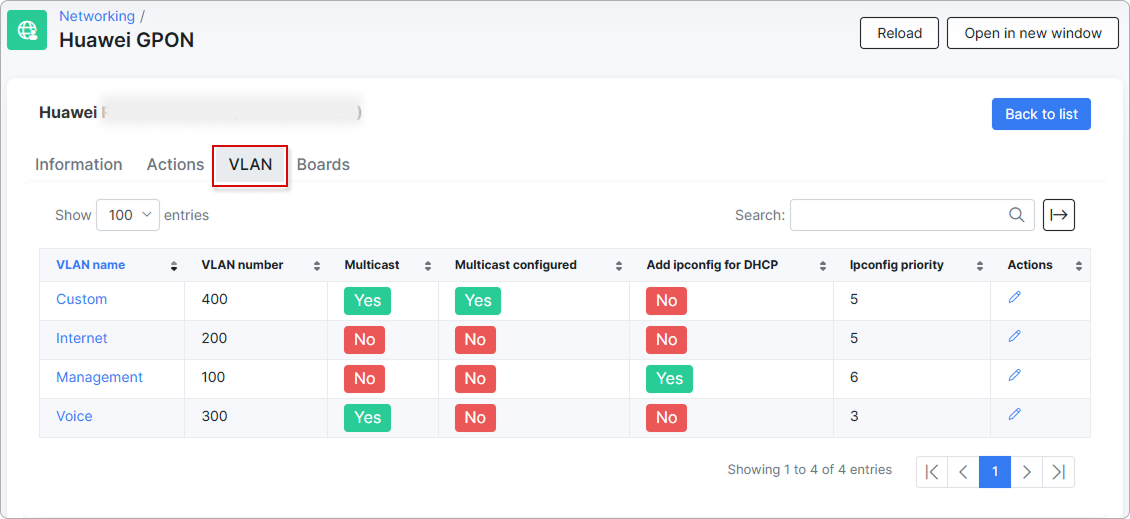
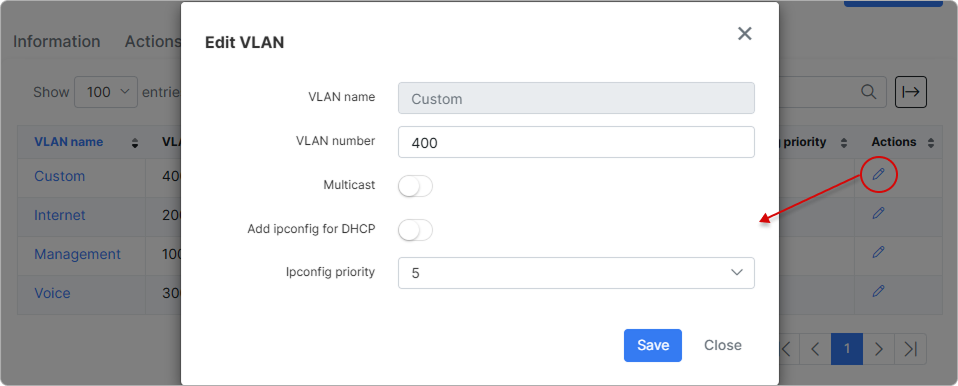
¶ VLAN
The VLAN tab allows you to manage VLANs associated with the OLT. You can view, add, and edit VLAN names and VLAN numbers here.
¶ Boards
The Boards tab shows the hardware boards detected on the OLT. You can run an auto-find of boards and enable auto-find on the ports from Splynx.
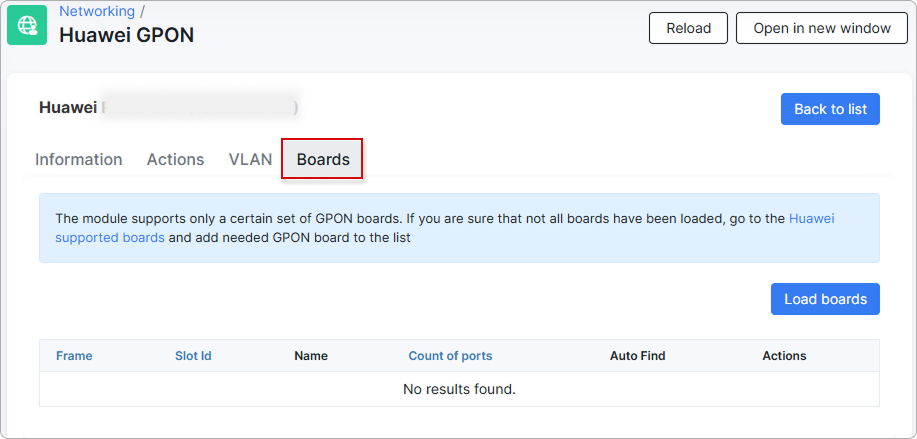
Click Load boards so that available boards appear in the table. The table displays the Frame, Slot Id, Name, Count of ports, and Auto Find status for each board. Click Enable auto find to start ONT discovery on a board's ports.
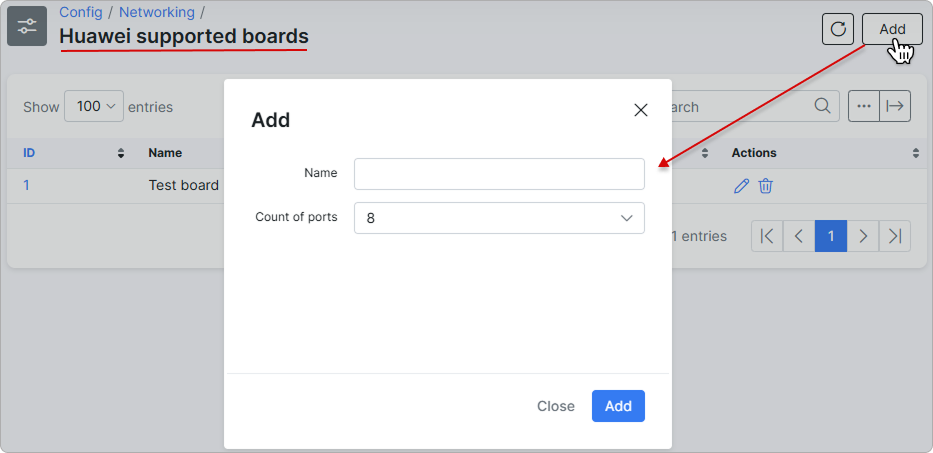
You can add new boards in Config → Networking → Huawei Supported Boards:
¶ Assigning the ONT
Once the OLT is configured and at least one Huawei Group is created, you can assign an ONT to a customer from the customer's profile.
Open the customer's profile and go to the Information tab. Scroll down to the additional fields section and click Show more to reveal the extended fields:
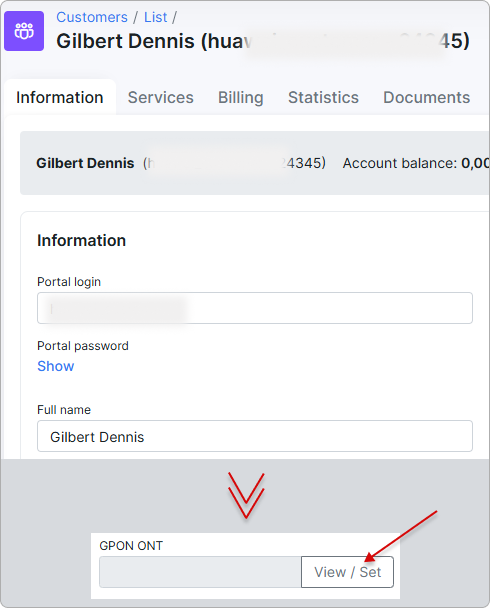
Locate the GPON ONT field and click View / Set to open the Splynx Huawei OLT dialog. The dialog shows the Customer's ONT table with any ONTs already assigned to this customer and an Add ONT button in the top-right corner.
Click Add ONT. The GPON OLT selection list opens, showing all configured OLTs:
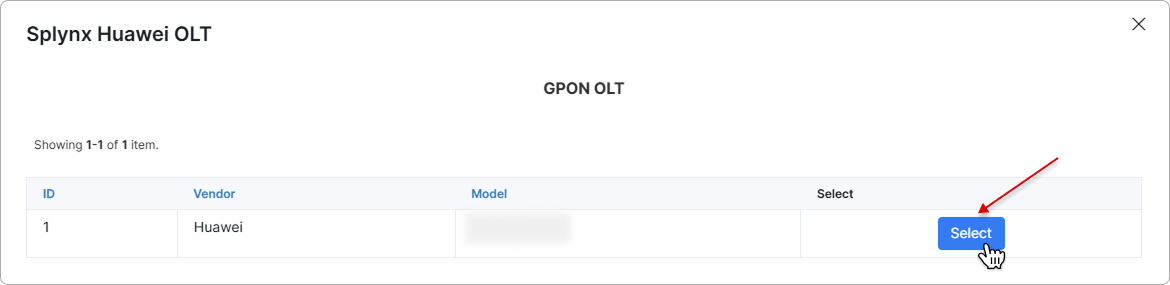
Click Select next to the OLT where the customer is connected. The Add ONT form opens:
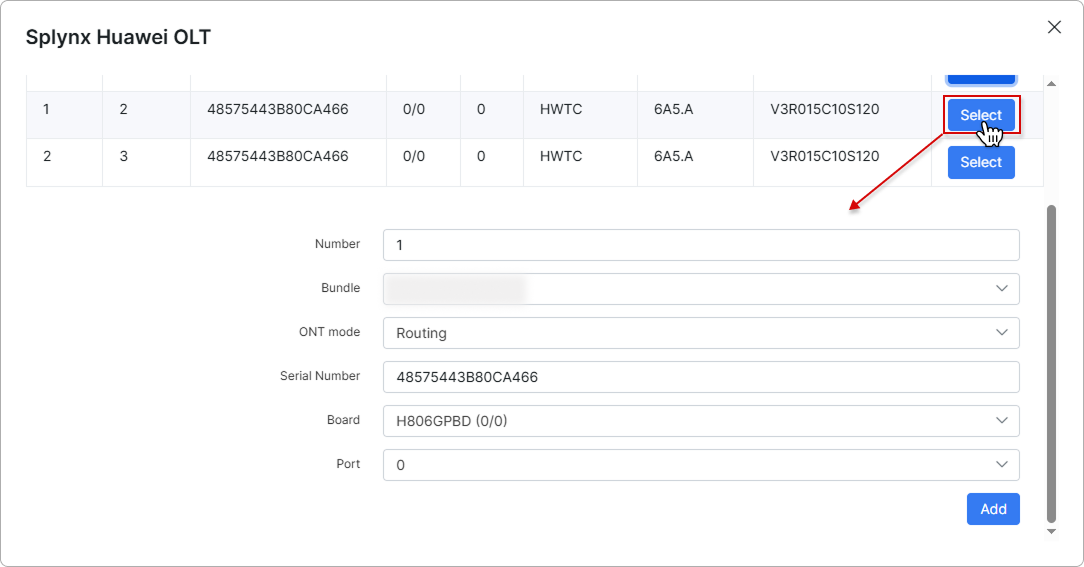
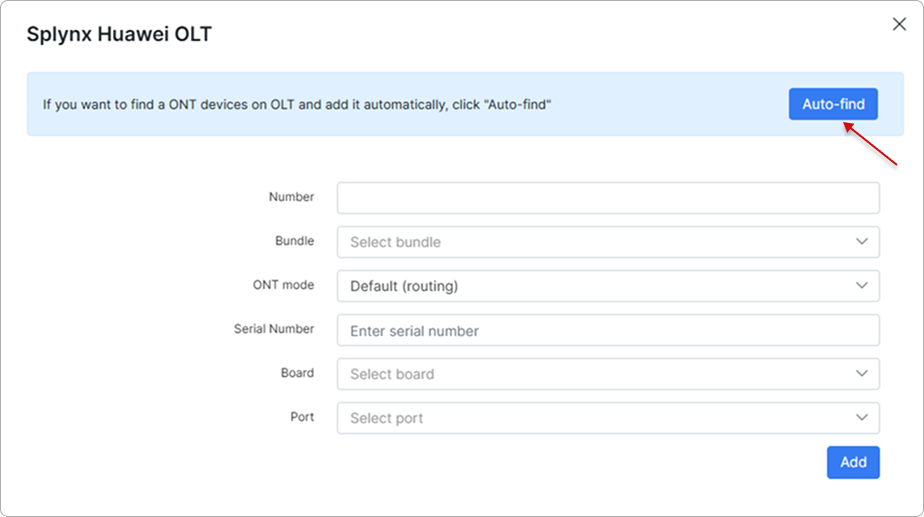
Fill in the form:
- Number — the ONT number (identifier for this ONT on the OLT).
- Bundle — select the Huawei Group (GPON group) that defines the tariff bundle for this ONT.
- ONT mode — select the service profile mode. Available options:
- Routing
- Routing/multicast
- 1 port transparent
- 1 port transparent/multicast
- 2 port transparent
- 2 port transparent/multicast
- 4 port transparent
- 4 port transparent/multicast
- Access port to VLAN Internet
- Serial Number — the unique serial number of the ONT.
- Board — select the board slot from the dropdown (for example,
H806GPBD (0/0)). - Port — select the port number on the selected board.
Click Add to assign the ONT to the customer.
¶ Using Auto-find
Instead of entering the ONT details manually, you can click Auto-find at the top of the Add ONT form to discover unregistered ONTs on the selected OLT. Splynx queries the OLT, lists the available ONT units with their detailed information, and allows you to pick the correct one and add it to the customer automatically.
After the ONT is added, it appears in the Customer's ONT table.

¶ ONT info
The Customer's ONT table lists the ONTs assigned to the customer with the following columns: Number, OLT Device, Bundle, Serial Number, Board, Port, ONT ID on board port, Customer Id On Device, and Actions.
To view detailed information about an ONT, click the Load info icon in the Actions column. A detailed ONT info table will be displayed below the Customer's ONT table:
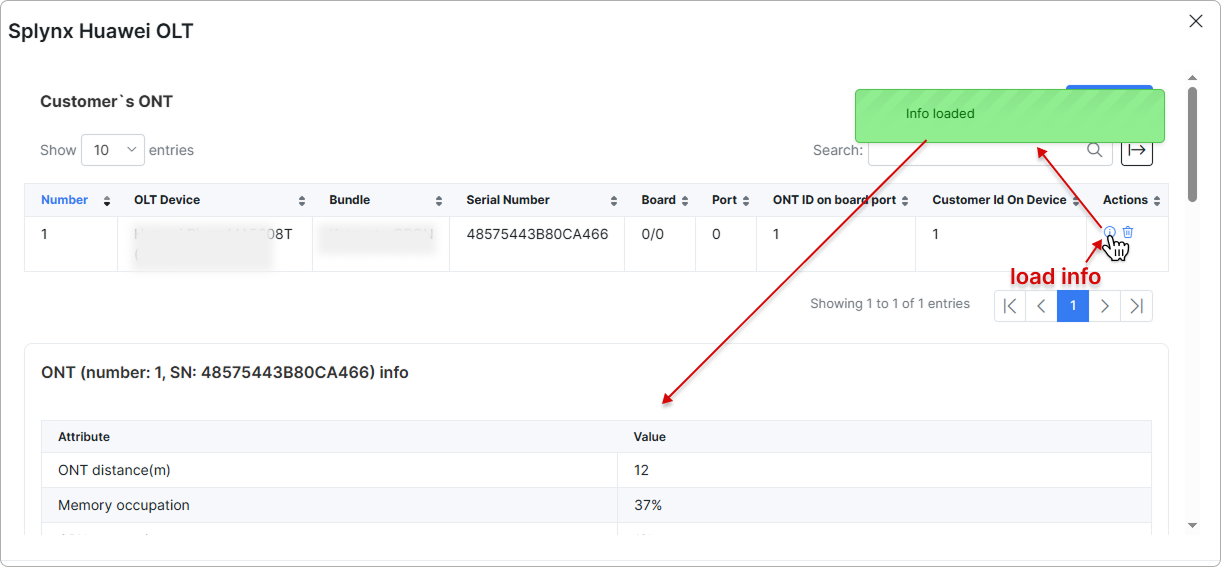
The ONT info table presents the data as Attribute / Value pairs retrieved from the OLT, such as:
- ONT distance (m) — the measured distance between the OLT and the ONT in meters
- Memory occupation — the percentage of memory used on the ONT
¶ Customers Huawei ONT
To see the list of customers who already have a Huawei ONT assigned, navigate to Networking → Customers Huawei ONT. The page opens a single table that lists every ONT linked to a customer across all configured Huawei OLTs, grouped by OLT device.
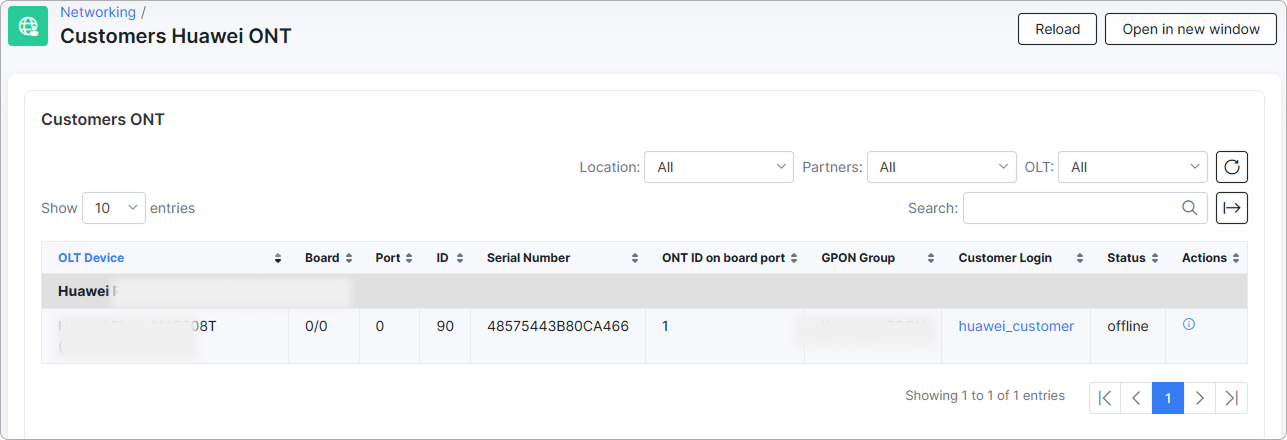
Use the buttons in the top-right corner to refresh the data or open the page in a separate browser window.
Each row in the table represents one ONT assigned to a customer. The table groups rows by OLT device and shows the following columns:
- OLT Device — the OLT the ONT is connected to, with its IP address.
- Board — the board slot on the OLT (for example,
0/0). - Port — the port number on the board.
- ID — the internal ONT identifier in Splynx.
- Serial Number — the unique ONT serial number reported by the device.
- ONT ID on board port — the sequence number of the ONT on its board port.
- GPON Group — the GPON group (line profile) the ONT belongs to.
- Customer Login — the login of the customer the ONT is assigned to. Click the login to open the customer profile.
- Status — current connection state of the ONT (online or offline).
- Actions — quick actions for the ONT, such as viewing extended information.
Click any column header to sort the table by that column in ascending or descending order.
Filters appear above the table and can be combined to narrow the list. After changing a filter value, click the refresh icon on the right to apply it.

- Location — shows only ONTs of customers assigned to the selected Location. Select All to clear the filter.
- Partners — shows only ONTs of customers belonging to the selected Partner. Select All to clear the filter.
- OLT — shows only ONTs connected to the selected Huawei OLT device. Select All to display ONTs from every configured OLT.
If a customer is missing from the list, make sure the ONT is assigned on the customer's profile as described in the Assigning the ONT section.
¶ Video tutorial
View the video below for a step-by-step tutorial: