¶ Coverage maps
¶ Overview
The Coverage maps feature in Splynx allows you to visualize network coverage by connection type across different locations. Coverage maps can be linked to network sites, making it easier to understand which services are available in specific areas.
The coverage areas configured here also power the address check in the Sign-up flow. When the coverage checker is enabled, a prospective customer enters their address and Splynx uses these KML/KMZ areas to confirm whether your services are available at that location.
The connection type is what matches a plan to a coverage area, but it is no longer required for the plan to be offered: a plan with no active coverage map is available at any address while Show plans without coverage map is on in the sign-up flow Plan selector.
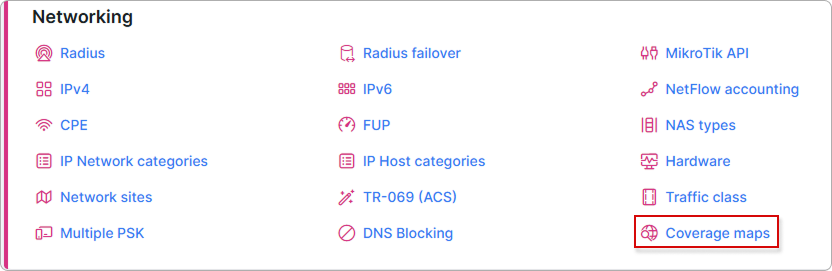
¶ Adding coverage files
To display coverage on maps, first enable Google Maps in Config → Main → Maps by selecting 'Google Map' in the Map type field.
You can add coverage files by clicking the Add button in the Coverage files section.
Supported coverage file formats are KML and KMZ. File size is up to 5 MB.
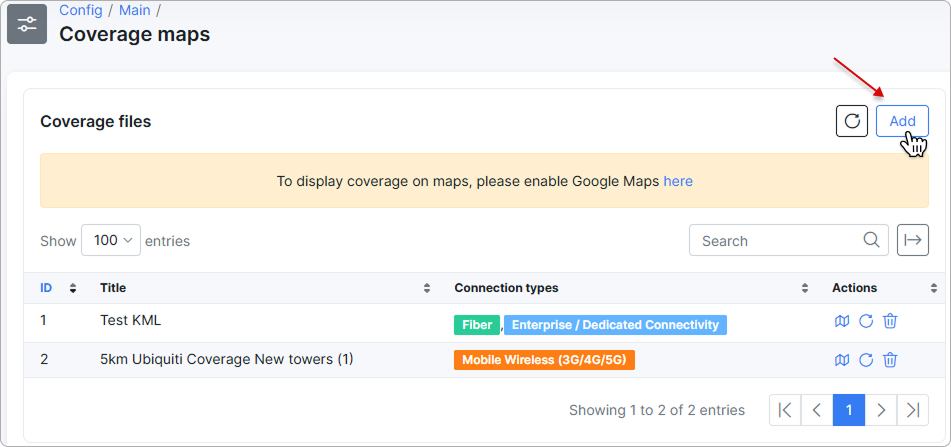
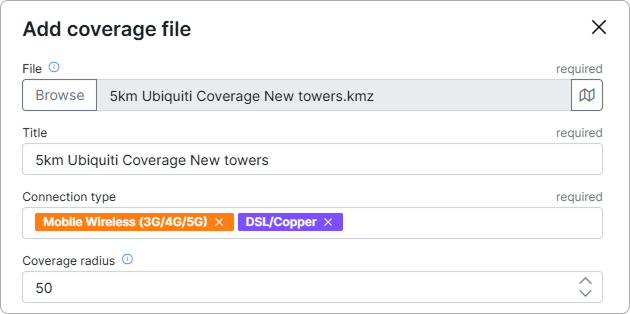
In the new sidebar window, browse for the required file with a .kml or .kmz extension, upload it, add a title, select the connection type(s), and specify the coverage radius. Then click Add below.
The coverage radius defines the maximum distance (in meters) from point or line network elements to be included in the coverage area.
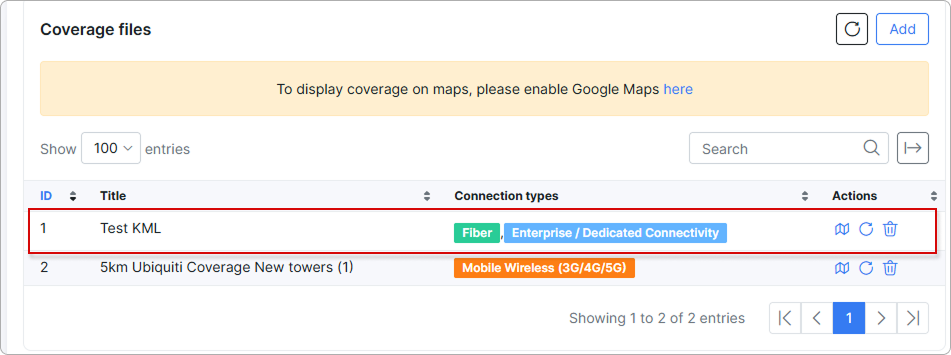
The newly added coverage file will appear in the list below:
¶ Actions with coverage files
Uploaded coverage files can be viewed on a map, updated, or deleted.
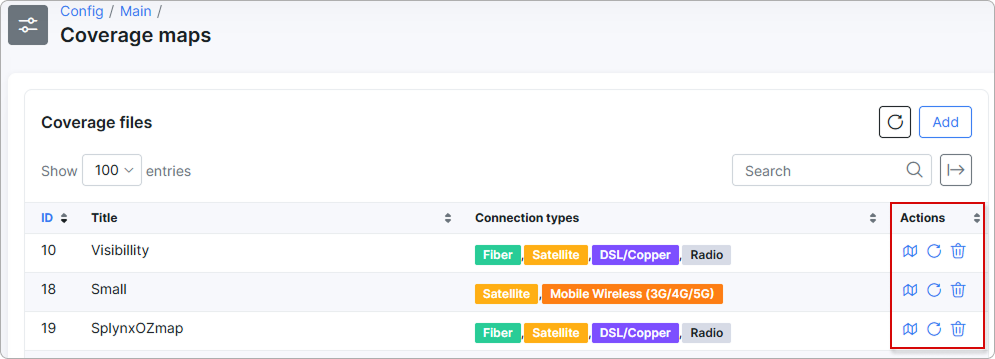
- To display the coverage area on a map, click the map icon
 .
.
Maps (examples)
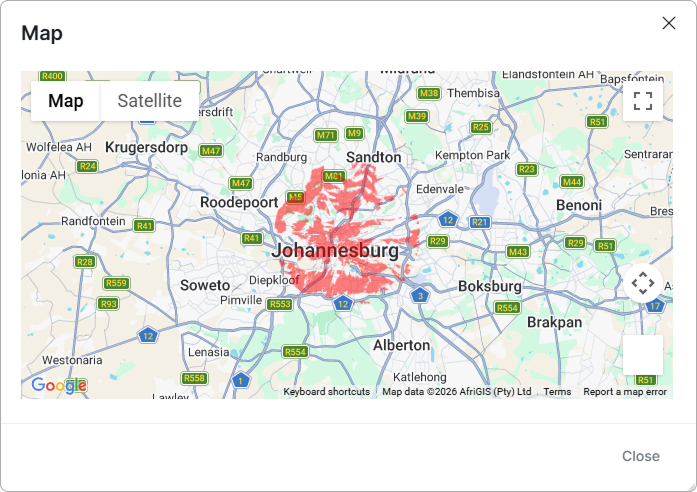
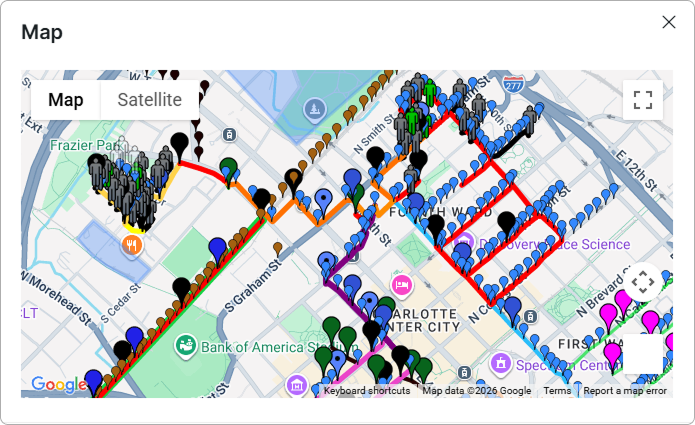
Coverage maps provided in KML or KMZ format can display coverage areas more precisely than manually drawn or static maps. This is because these formats allow coverage data to be represented using exact geographic coordinates rather than approximated shapes.
The level of precision depends on the data contained within the file, not the format alone. When coverage boundaries are generated from detailed modeling or measurement data, KML/KMZ files can show those boundaries accurately on an interactive map.
Example 1:
Example 2:
Example 3:
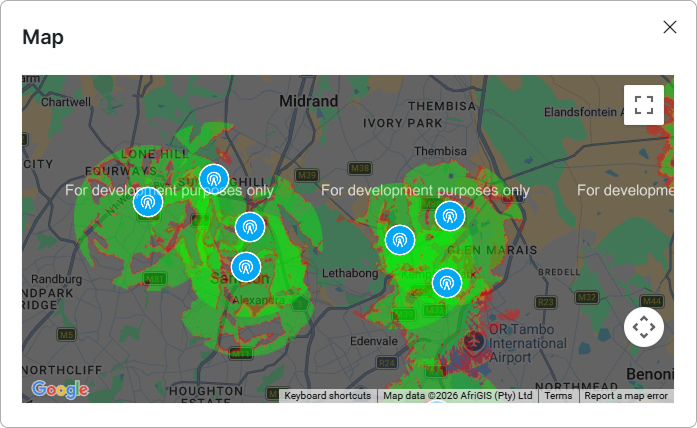
-
To update the file, click the update icon
 .
. -
To remove a coverage file from the list, click the delete icon
 .
.
 To download all active KMZ/KML files at once, click
 Download all above the Coverage files table. Splynx packs them into a single archive named coverage-maps-kmz-{current date}.zip.

¶ KMZ format
As a rule, a KMZ file is a compressed KML file. While a KML file contains only the markup and coordinates, a KMZ file includes the same data along with any custom icons or images, all packaged into a single file:
This format is ideal if you want to view your coverage area in Google Maps or share all necessary details in a single file.
It is generally recommended to use KMZ when sending the file to others, as it ensures that custom formatting and images are preserved.
Exporting maps to KMZ format
The following methods are effective for exporting maps or coordinates (if a map is not available) in KMZ format:
Method 1. Export from Google My Maps (Easiest)
- Open your map in Google My Maps.
- Look at the white menu box on the left side (where your layers are listed).
- Click the three vertical dots (⋮) next to the map title (at the very top of that box).
- Select
Export to KML/KMZ. - Choose your settings:
- Entire Map: Select this to export everything.
- Keep data up to date: (Optional) Leave unchecked for a standard static file.
- Export as KML instead of KMZ: (Optional) Leave this unchecked (KMZ is better because it includes your custom icons/images).
- Click
Download.
Method 2: Export from QGIS (Advanced)
- In the Layers Panel (usually on the left), right-click the layer you want to export.
- Go to Export → Save Features As...
- Format: Click the dropdown and select Keyhole Markup Language [KML].
QGIS natively exports KML. If you specifically need KMZ, you can just zip the resulting KML file, but KML works in all the same places).
- File Name: Click the
...button to choose where to save it. - CRS: Ensure this is set to EPSG:4326 - WGS 84 (this is the standard for Google Earth).
- Click
OK.
Method 3: Direct CSV to KMZ (Google Earth Pro)
If you haven't made a map yet and just want to go straight from Excel/CSV → KMZ, you can use the desktop version of Google Earth.
- Download and open Google Earth Pro (Desktop version).
- Go to
File → Import. - Select your CSV file.
- Follow the Data Import Wizard (it works exactly like the "Text Import Wizard" in Excel). Ensure you tell it which columns are Latitude/Longitude or Address.
- Once the points appear on the globe, find the folder in the "Places" sidebar on the left.
- Right-click the folder and select "Save Place As..."
- Choose
Kmzas the type and save.
¶ Connection type
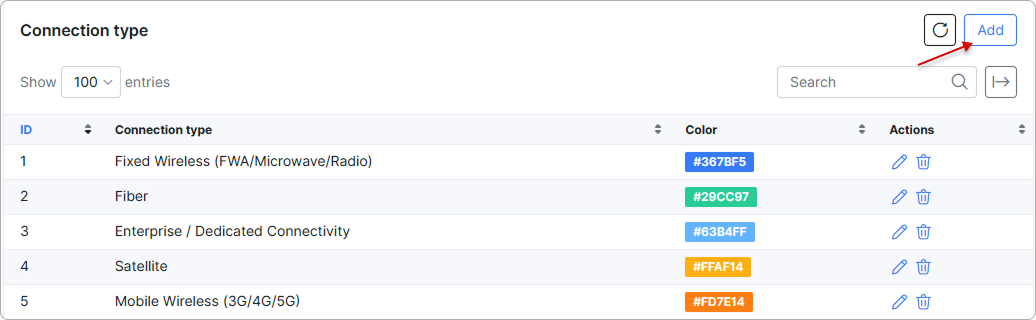
Connection types allow coverage maps to be grouped, filtered, and displayed using functional names and color coding, and to be associated with specific Internet or Voice tariff plans.
Click Add to create a new connection type:
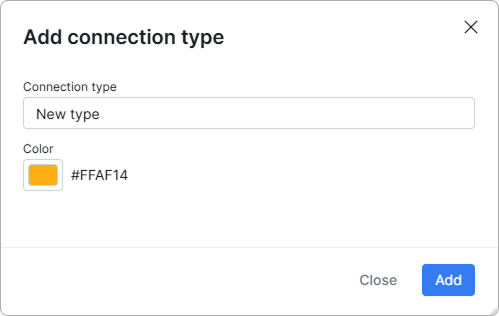
In the new window, enter a name, select a color, and click Add:
You can then edit  or delete
  connection types as needed.
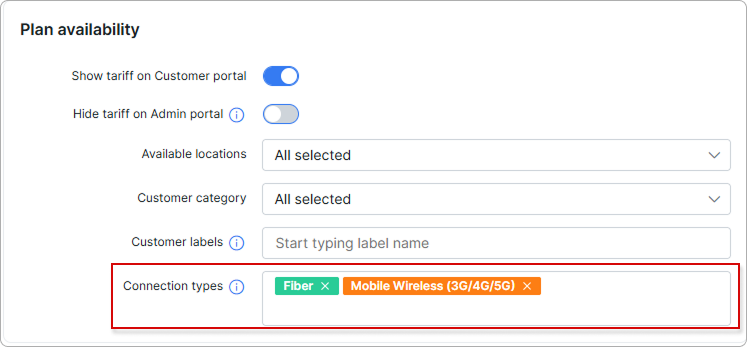
Then you can link the available connection types to Internet or Voice tariff plans:
¶ Network sites
A Network site represents a physical infrastructure location (such as a tower or POP), while a coverage map represents the geographic area where a specific connection type is available.
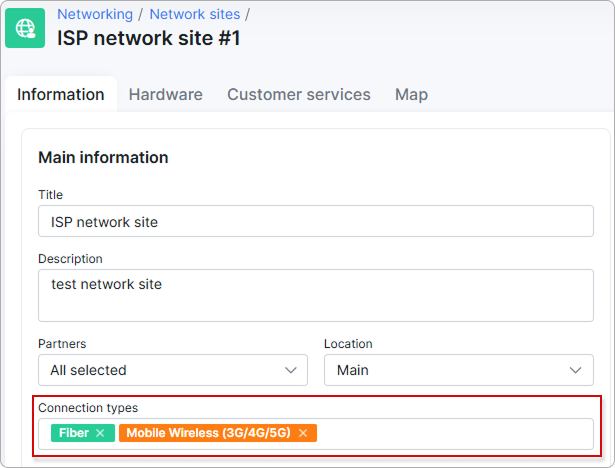
You can assign previously created connection types to a network site to indicate which internet technologies are available at that infrastructure location:
Coverage maps and network sites may appear in different locations on the map because the area where a service is available does not always correspond to the exact location of the infrastructure:
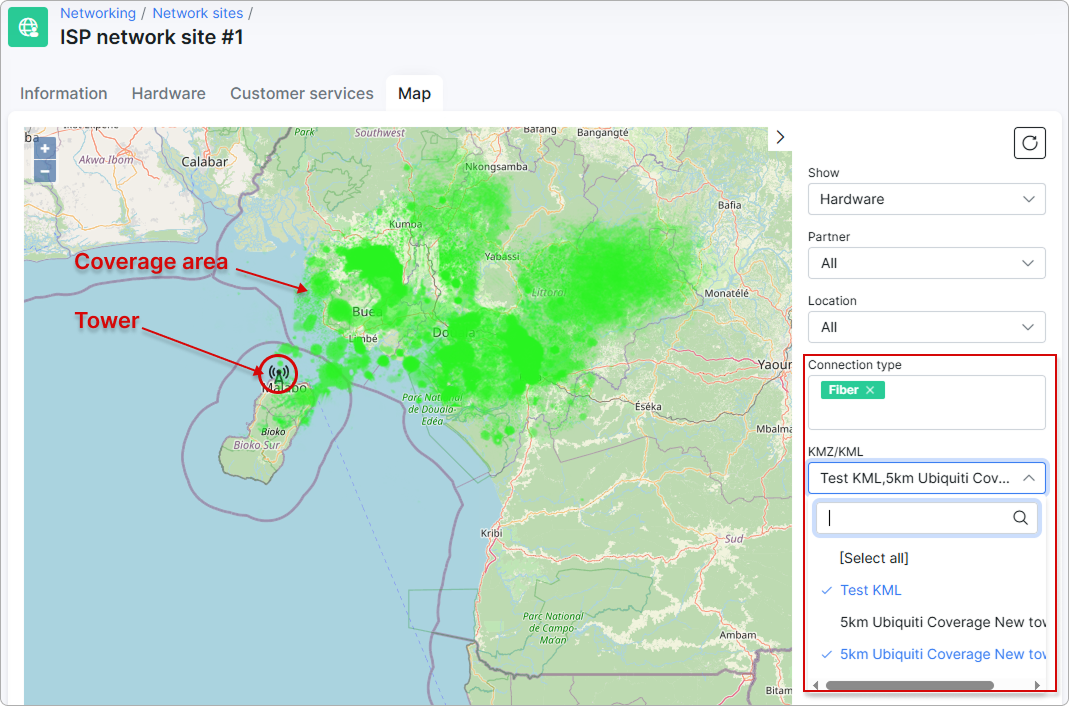
Connection types act as the main filter for coverage maps.
When a connection type is selected in the map filters, only coverage maps assigned to that connection type are displayed.
The KMZ/KML filter allows users to select which coverage map files should be displayed.
Multiple coverage maps can exist for the same connection type (for example, Tower sector coverage, Regional fiber coverage, Mobile network coverage).
Using this filter, you can enable or disable specific coverage layers on the map.
¶ CSV to Coverage Map
Converting a CSV of addresses into a coverage map depends on the number of addresses and whether you need a simple map showing specific locations or a map showing density or territory.
The easiest approach is to use Google My Maps, which handles all geocoding automatically. This method works best for fewer than 2,000 addresses, basic visualization needs, and sharing with a team.
Follow these steps to convert your CSV into a coverage map:
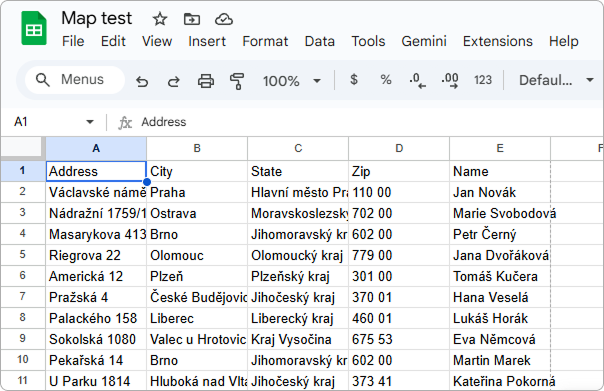
- Prepare your CSV: Ensure your spreadsheet has clear headers in the first row (e.g., Address, City, State, Zip, Name).
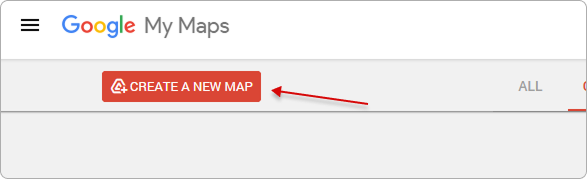
- Go to My Maps: Visit google.com/mymaps and click
Create a New Map:
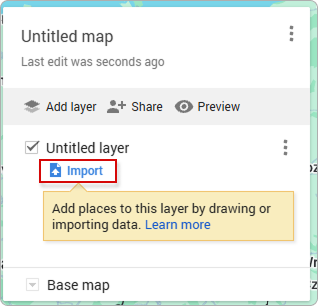
- Import Data: In the "Untitled layer" box on the left, click
Import:
-
Upload: Drag and drop your CSV file.
-
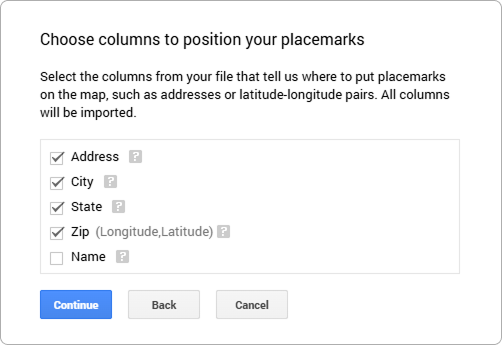
Select Location Columns: Check all boxes that apply to the location (Address, City, State, Zip). Click
Continue:
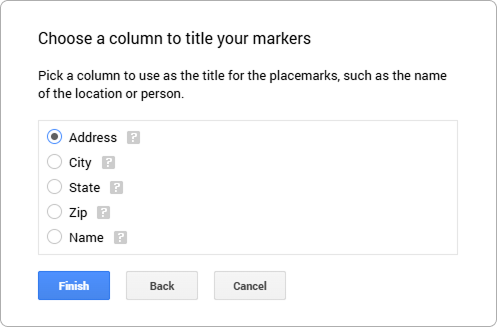
- Select Title Column: Choose the name of the location or client. Click
Finish:
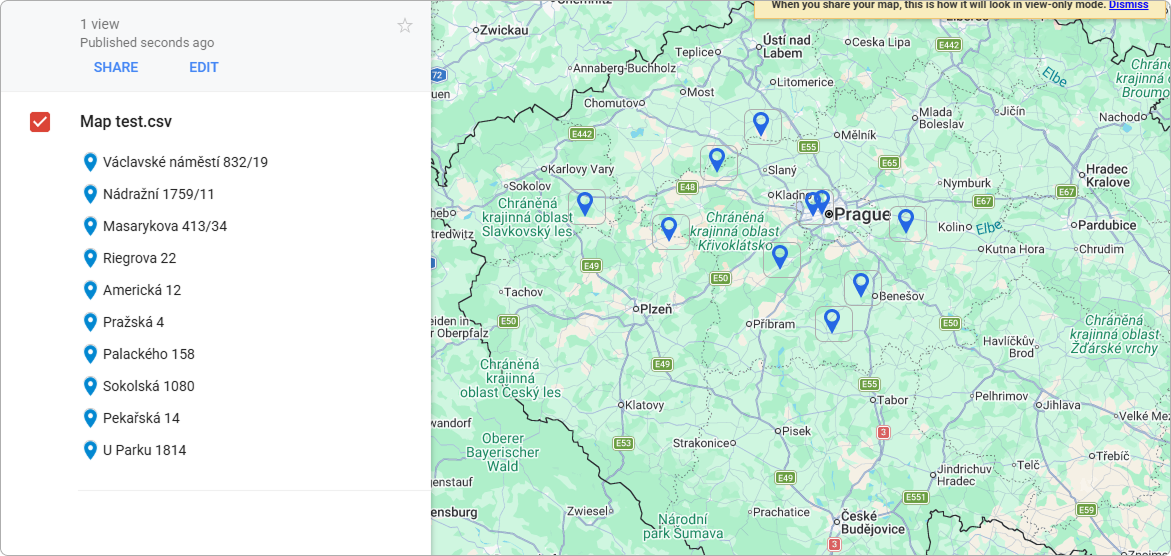
- You will see pins for all your addresses:
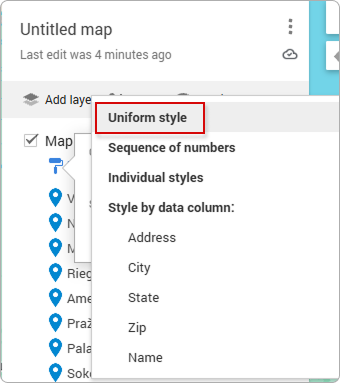
Click 'Uniform style' in the menu to color-code pins based on a column (e.g., "Active vs. Inactive"):
¶ Permissions
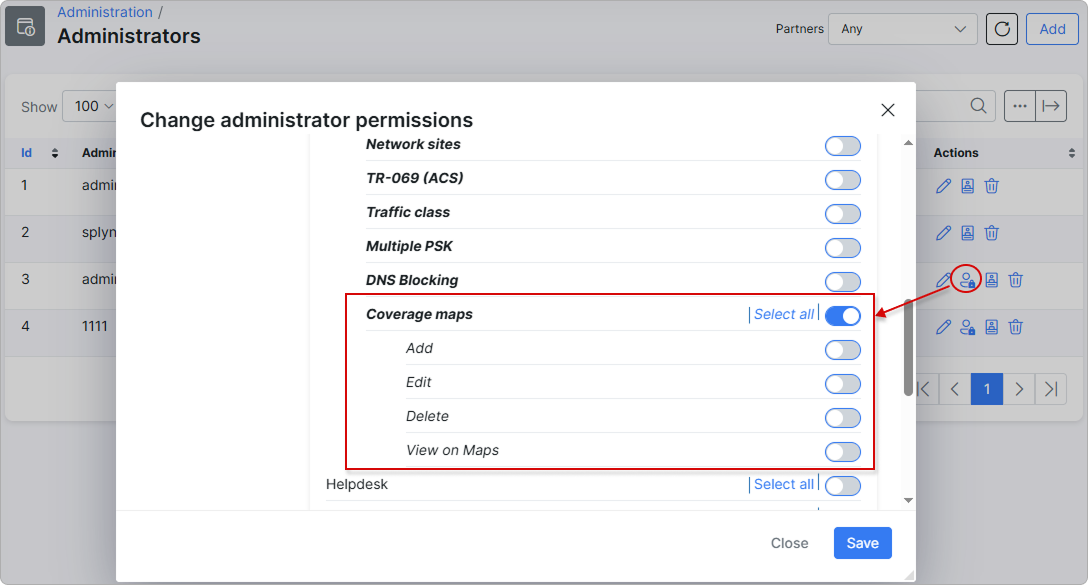
The Super admin role has full Networking permissions by default. For other roles, you can control access to coverage maps by enabling or disabling the corresponding toggles in the Config section for Networking permissions: