¶ Network sites
¶ Overview
The Network Sites feature in Splynx enables administrators to manage and organize multiple network sites within their infrastructure efficiently.
This feature supports adding an unlimited number of network sites, each with linked hardware devices, access devices, and customer services. Administrators can upload photos and documents to each site and accurately map them using addresses or coordinates.
 Access device is hardware that connects customers to the internet and links network sites and customer services for easier management.
This comprehensive registry aids in keeping clients informed, tracking the number of clients attached to each network site, and ensuring all network infrastructure is well-documented and easily accessible.
Network sites can be linked to tasks and associated with coverage maps.
For more information, see Tasks (Network site) and Coverage maps.
¶ Adding a network site
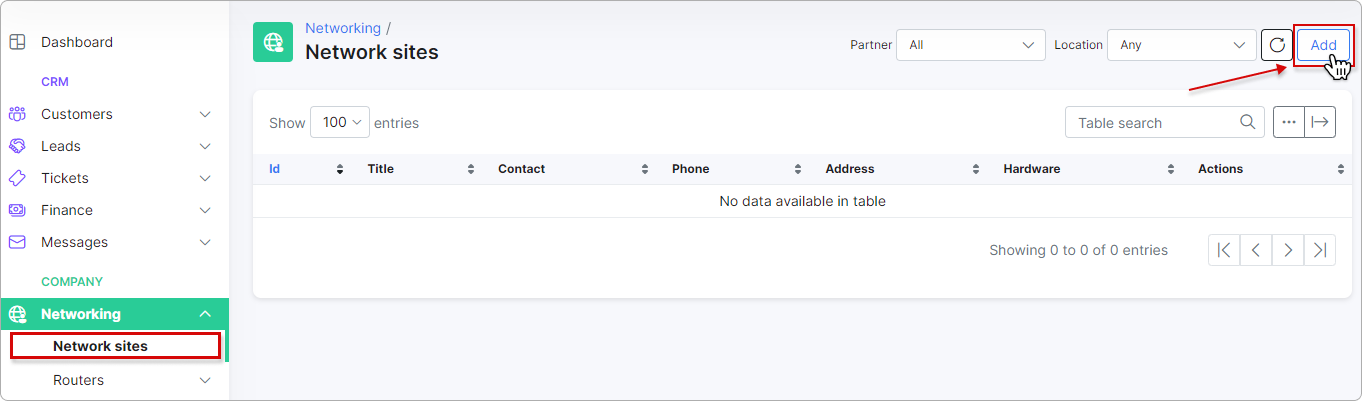
To add a new network site, go to Networking → Network sites and click the Add button located at the top right corner of the page:
A sidebar will appear where you need to enter all the necessary details:
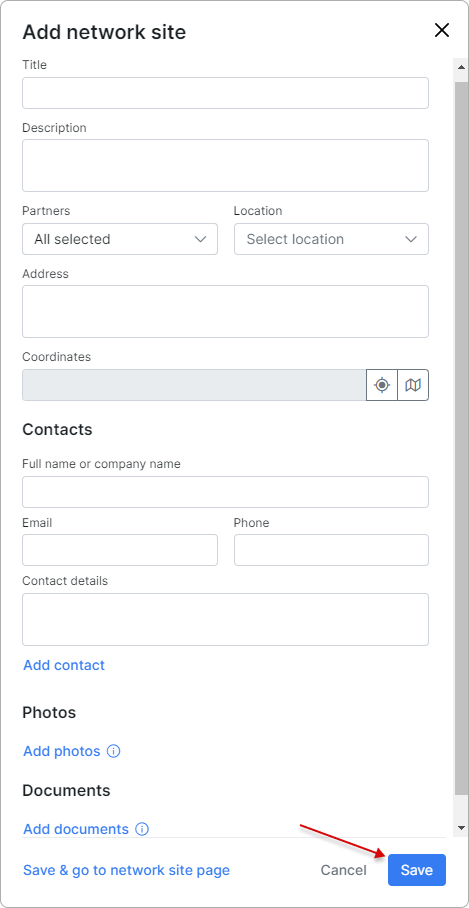
- Title - specify a name for your network site.
- Description - add a relevant description.
- Partners - select a specific partner.
- Location - add a location.
- Connection types - select the connection types for this network site.
- Address - state the address where the network site is located.
- Coordinates - enter the coordinates, which is particularly useful for remote areas without a physical address).
- Full name or company name - specify the name of the responsible person or company.
- Email - provide the contact email, if needed.
- Phone - provide the phone number for easier communication.
- Contact details - include any additional necessary information related to the contact.
- Add contact - click this link to add another contact.
- Add photos - upload any photos necessary for proper maintenance of the network site.
- Add documents - upload any documents necessary for legal purposes.
Photos: jpeg, jpg, png, heic. Up to 10 MB per photo.
Documents: doc, docx, txt, pdf, rtf. Up to 50 MB per document.
Then, you need to either click on Save & go to network site page to save your changes and be redirected to the newly created page of the network site, or simply click the Save button to save your changes.
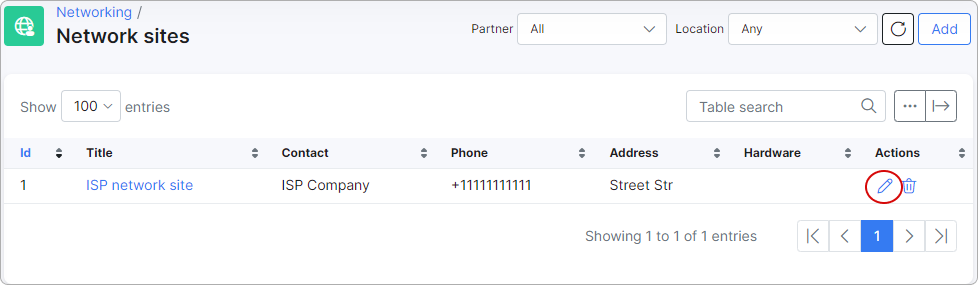
The new entry will then appear in the Network sites table:
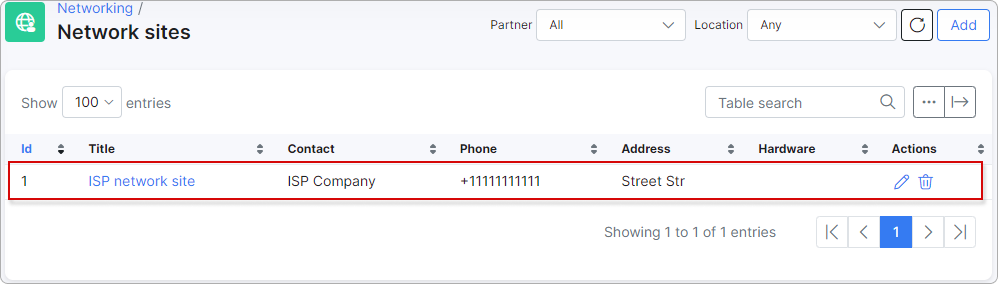
You can filter the created items by Partner and/or Location, and you can also edit  or delete
  them.
them.
To learn more about Network sites configuration, please read Network sites (config)

¶ Details
By clicking the edit icon next to the respective entry, you can modify the information and manage your network site:
¶ Information
There are three sections in the Information tab inside each network site: Main Information, Contacts, and Documents.
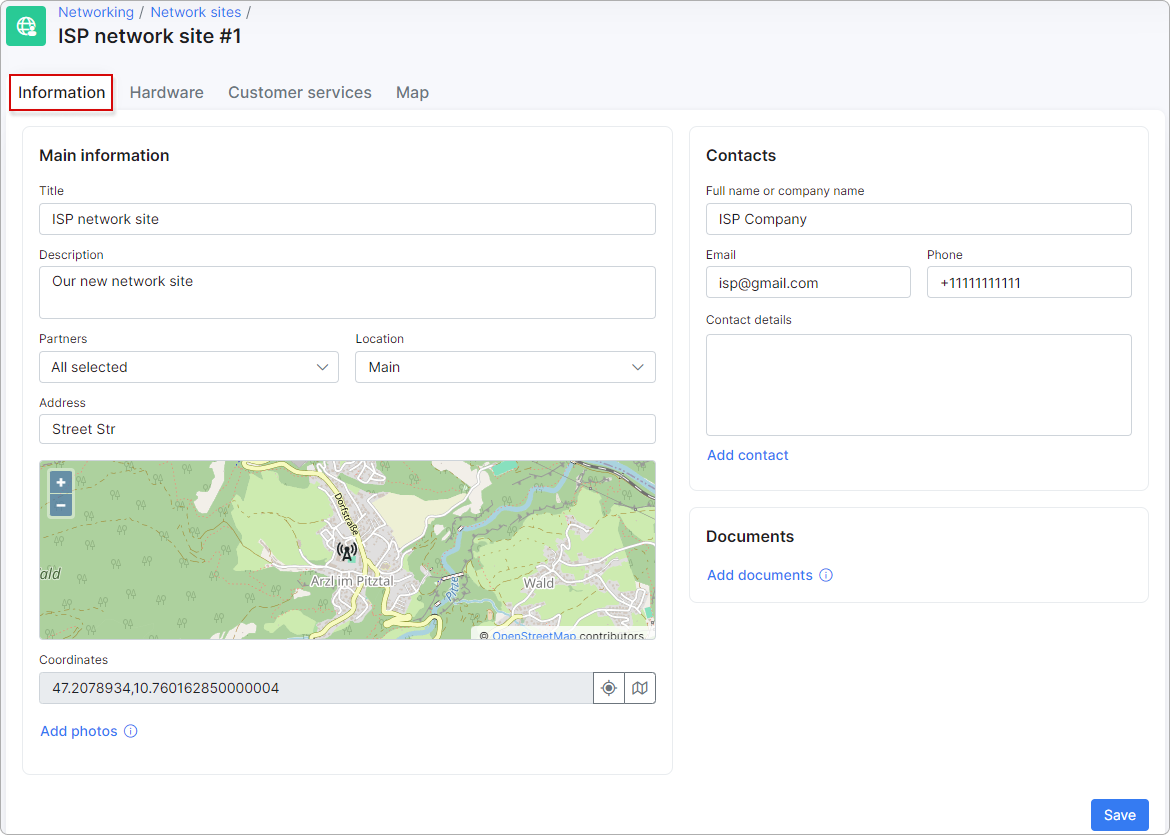
To change the network site details, the admin needs to have the necessary permissions and belong to the same category of partners.
Here, you can change the previously added details as well as add more contacts, and upload documents and photos.
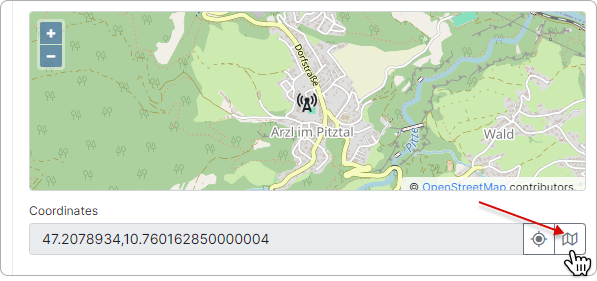
To change the coordinates and address, click on the map icon next to the Coordinates field:
In the new window, you can enter a new address and update the coordinates by clicking this icon: 
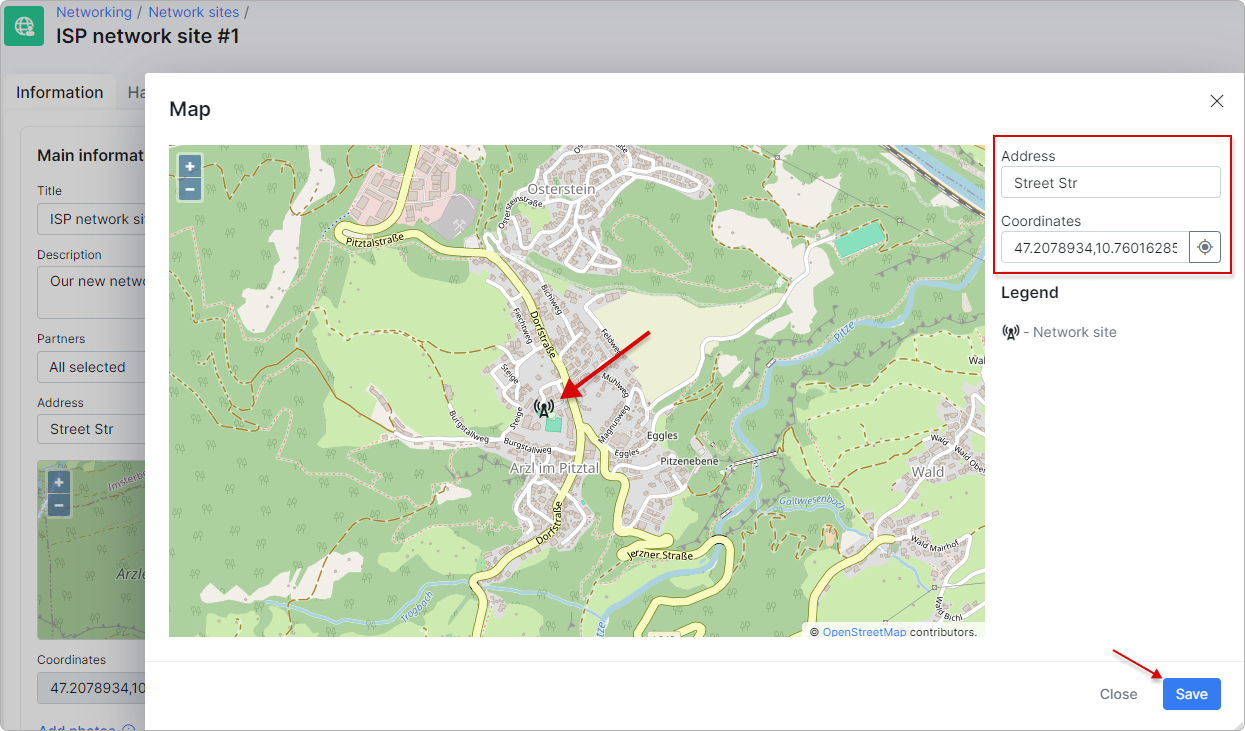
When all the necessary changes are done, click the Save button at the bottom left corner of the page.
¶ Hardware
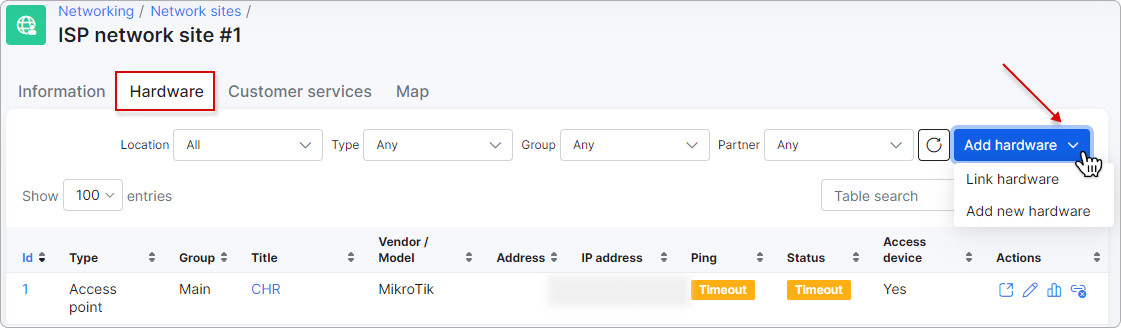
In the Hardware tab, you can link existing hardware devices to your network site or add a new hardware device by clicking the respective button:
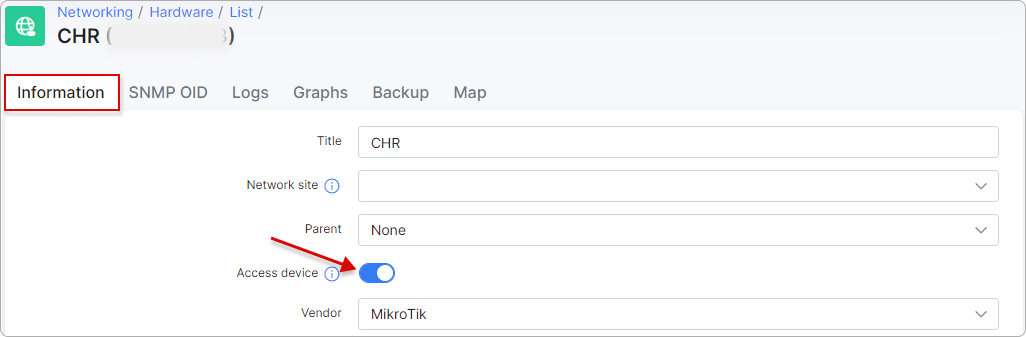
To add an existing or new device, ensure the Access device toggle is enabled within the hardware device:
Link hardware:
This implies you've previously added a hardware device in the Hardware section, and you can link it to your network site if the hardware device is accessible for this purpose (its access device toggle is enabled).
Type in the name of the hardware device, select it, and then click the Link button below:
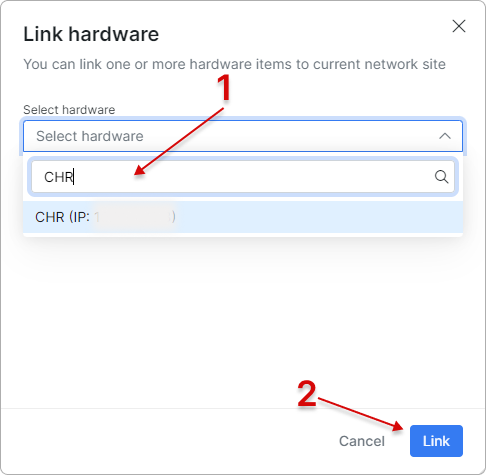
You can only link hardware with the same partner(s) or location(s).
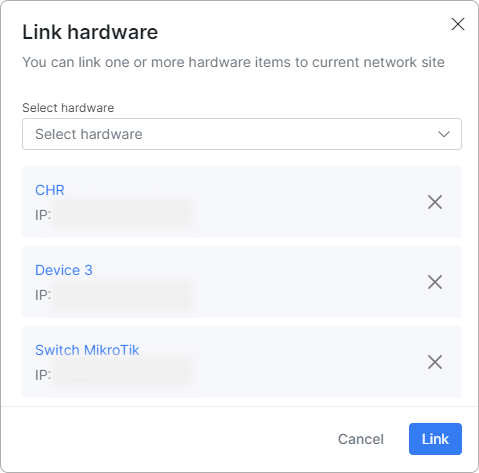
You can link more than one hardware device to a single network site at once:
Add new hardware:
When you click the Add new hardware button, you will be redirected to the Hardware form, where you need to fill in the necessary details. The network site will be automatically filled in:
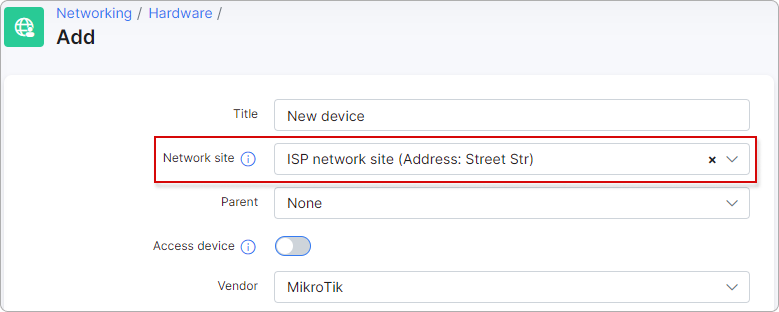
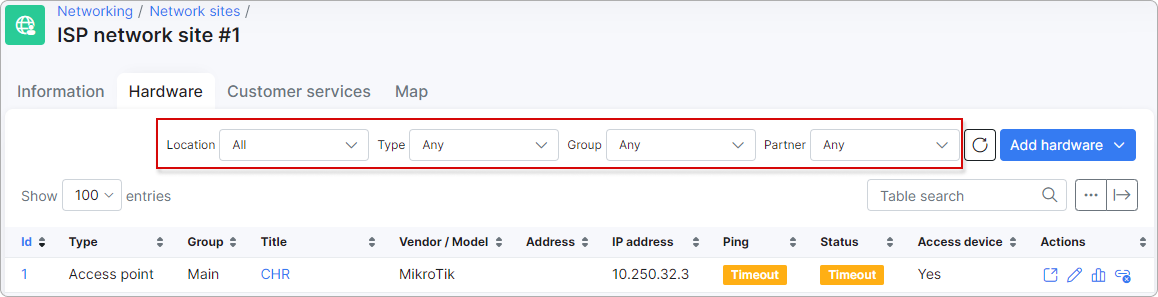
All the linked/added devices to your network site will then appear within the network site under the Hardware tab.
You can filter them by Location, Type, Group, or Partner:
Actions:
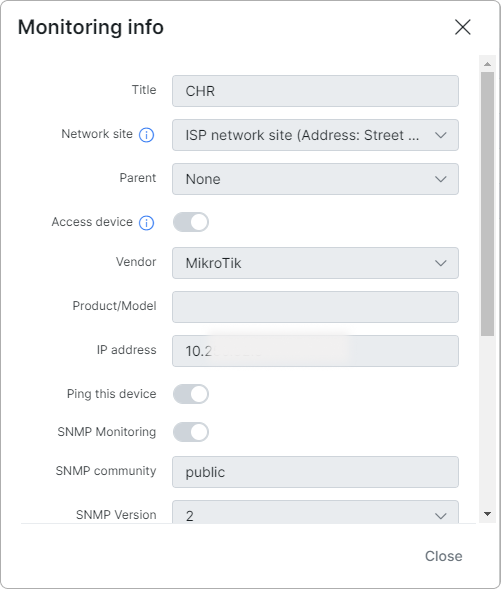
 View the hardware device details:
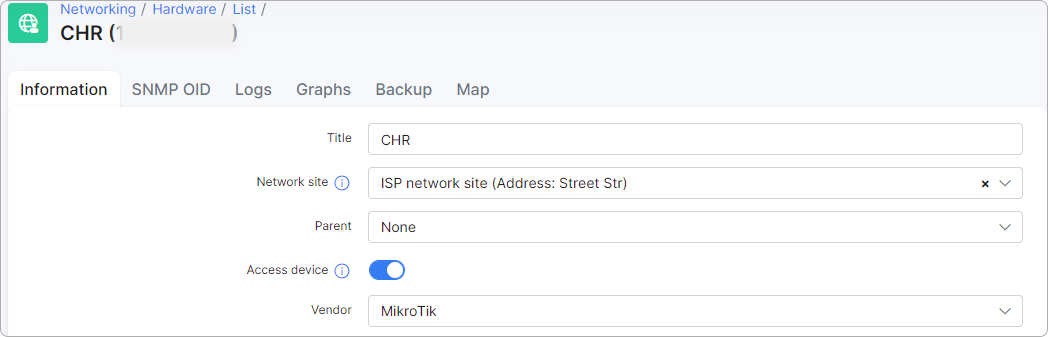
- Edit the hardware device details:
 View the ping graph:
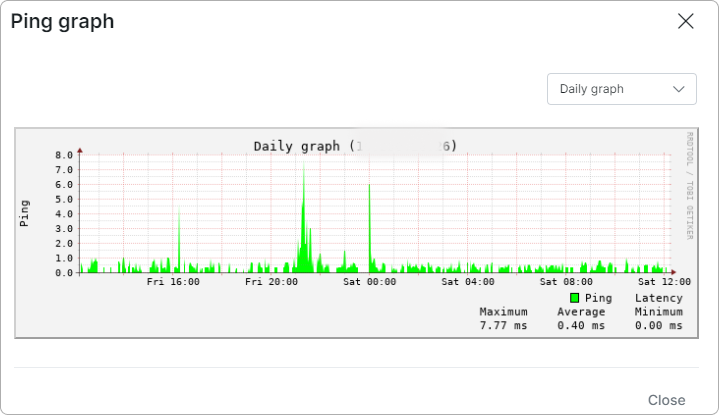
 Unlink the hardware device. This device will be removed from the network site.
For more information, please read Hardware (Monitoring)
¶ Inventory
The Inventory tab lists the inventory items linked to this network site:
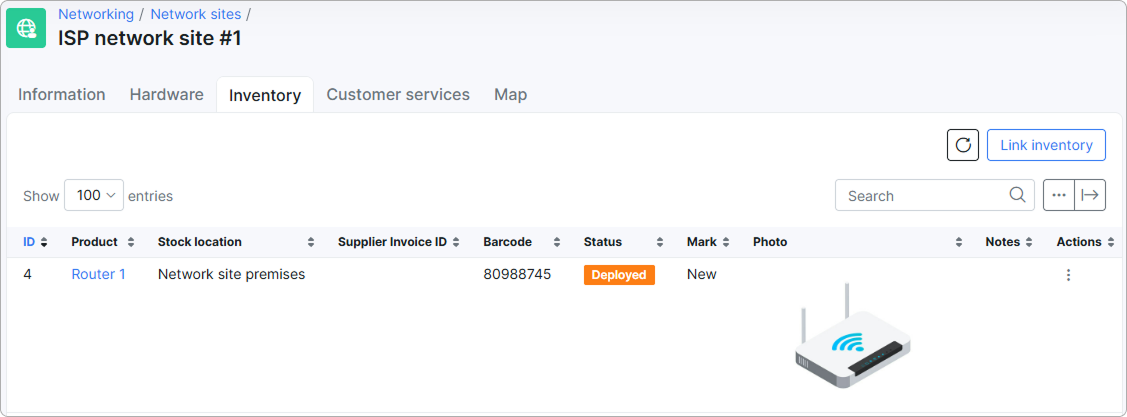
The table shows the following columns: ID, Product, Stock location, Supplier Invoice ID, Barcode, Status, Mark, Photo, Notes, and Actions.
Link inventory:
Click the Link inventory button to attach an existing item to this network site. In the Link inventory window, use Select inventory item to search for an item (shown as {Product} ({ID})) and click Link:
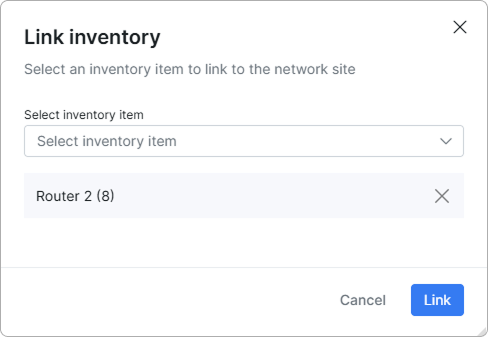
- Only items with the status
In stock,In task,In transit, orInternal usageare available. - Items already linked to another network site are not shown.
- One item can be linked to only one network site.
- On linking, the item's status changes to
Deployedand its stock location becomesNetwork site premises.
Items can also be linked to a network site from a task — see Tasks. If the task is linked to this network site, the site is preselected in the linking modal, and the linked item is shown in the read-only Inventory tab of the Network site block on that task.
If the linked item has an associated hardware device, that hardware is automatically linked to the same network site (and vice versa).
Actions:
For a linked item you can Edit it, View history, or Unlink from network site:
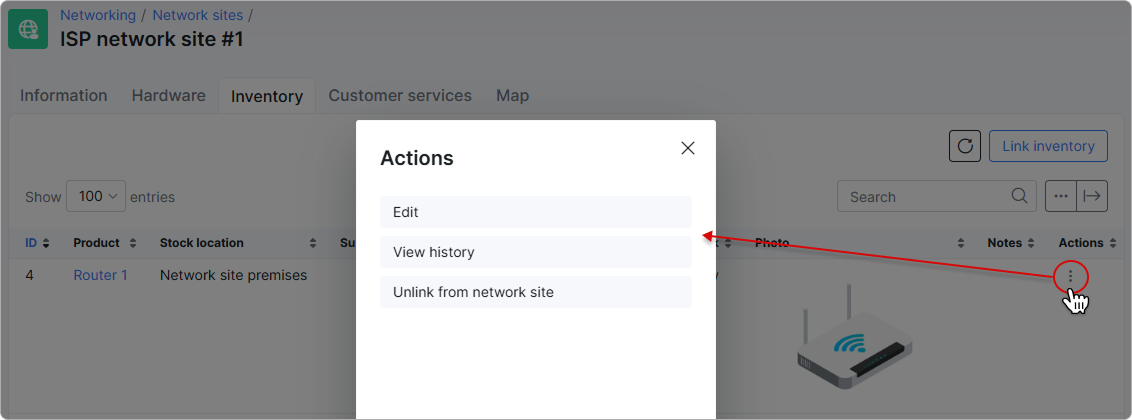
To unlink, choose Unlink from network site. In the Unlink inventory from network site window, confirm the item and pick a new Stock location, Status (a Vehicle location allows only In transit), and Mark. If a hardware device is linked, the modal adds: "Unlinking this inventory item will also unlink the associated hardware {Title} ({ID}) from the network site."
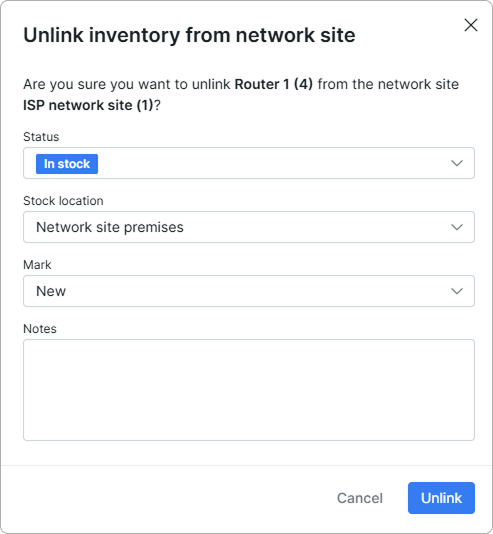
Hardware and inventory items can be linked to each other. Once linked, the two follow each other between network sites:
- Linking — if a hardware device is already linked to a network site and you then link an inventory item to that hardware, the item immediately becomes
Deployedand is linked to the same network site. If the hardware is not linked to any network site, nothing happens until either the hardware or the item is linked to a site — then the other follows automatically. - Relinking — on the Hardware page you can remove the network site and select a different one before saving. The linked item stays
Deployedand switches to the new network site. - Unlinking — if the hardware ↔ item link is broken first, unlinking one of them from the network site leaves the other unchanged. If the link still exists, unlinking either one prompts you to choose a new stock location and status for the item (as described above), and unlinks both from the site.
¶ Customer services
When hardware and access devices are added to your network site, the next step is to link customer services to the access devices where necessary.
If you don't use network sites you also can link access devices to customer services to aggregate information per each device.
All linked customer services will appear in a separate tab within the hardware device:
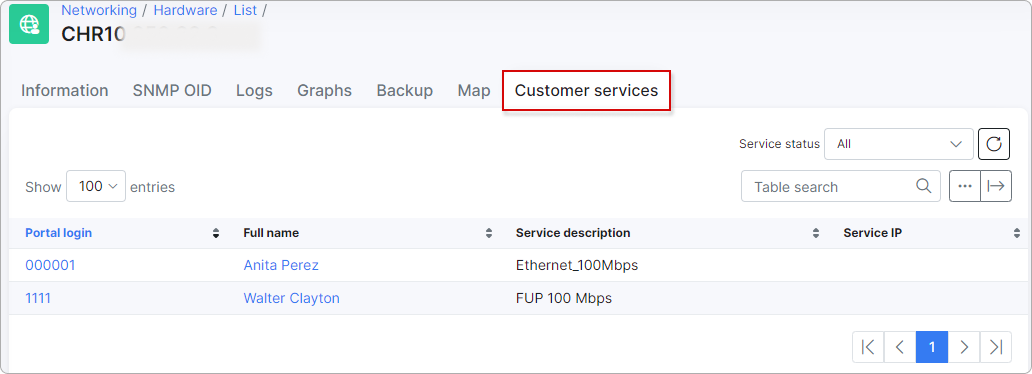
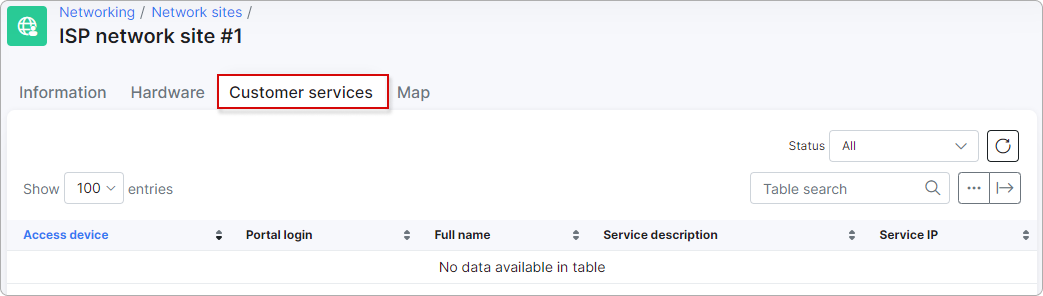
Customer services can be linked either individually (per customer) or in bulk (when multiple customers are selected).
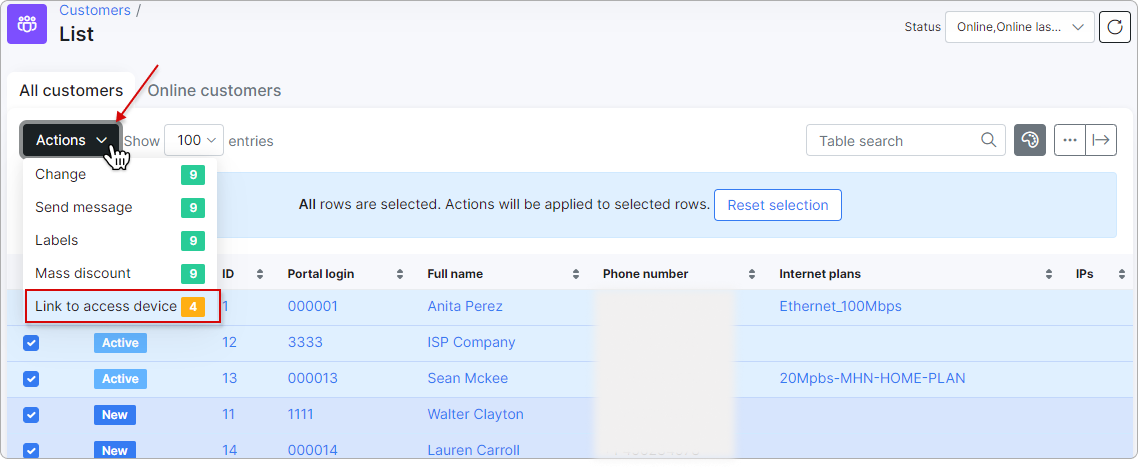
To link multiple customer services, use the mass actions button at the top left corner of the customers' list and click on Link to access device. The number of customers available for linking their services will be displayed next to it:
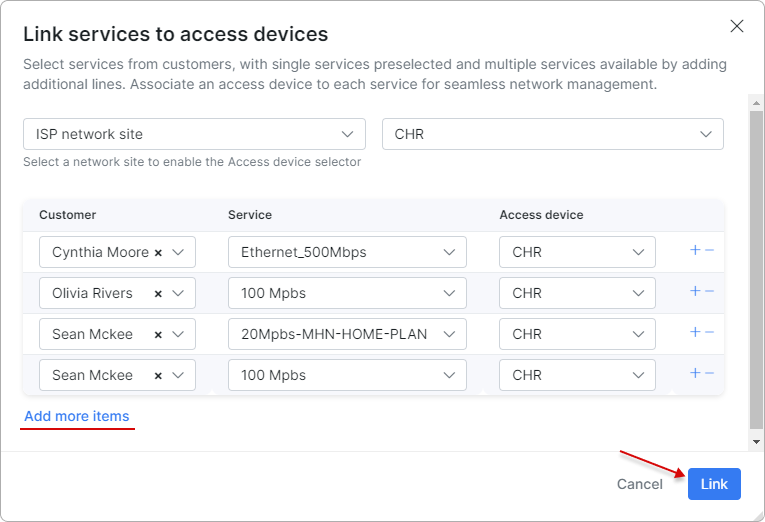
In a new window, select a network site to enable the Access device selector. Then, select the access device, if applicable, for all items.
Similarly, you can adjust customers, services, and access devices manually. Use the + and - buttons to add or remove items below. Click Add more items to add an item to the end of the list. When everything is done, click the Link button:
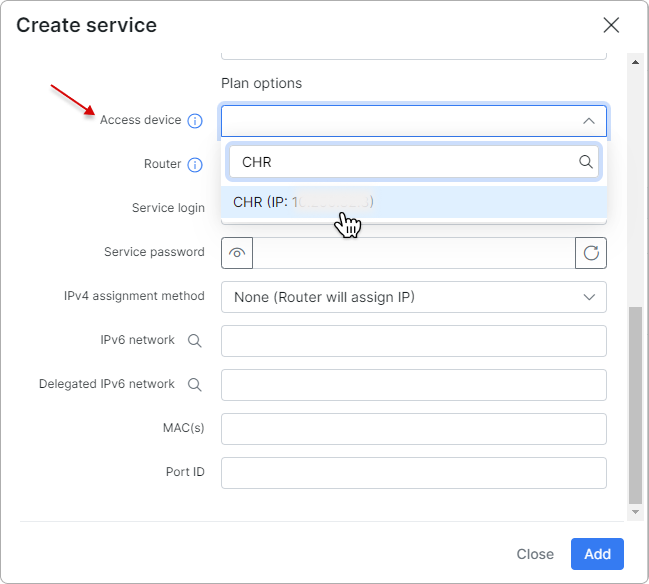
To link a specific customer service, go to the customer’s profile page. Under the Service tab, when creating or editing their internet service, you can choose a device for linking:
If the internet service is part of the bundle, you can also link it to the access device.
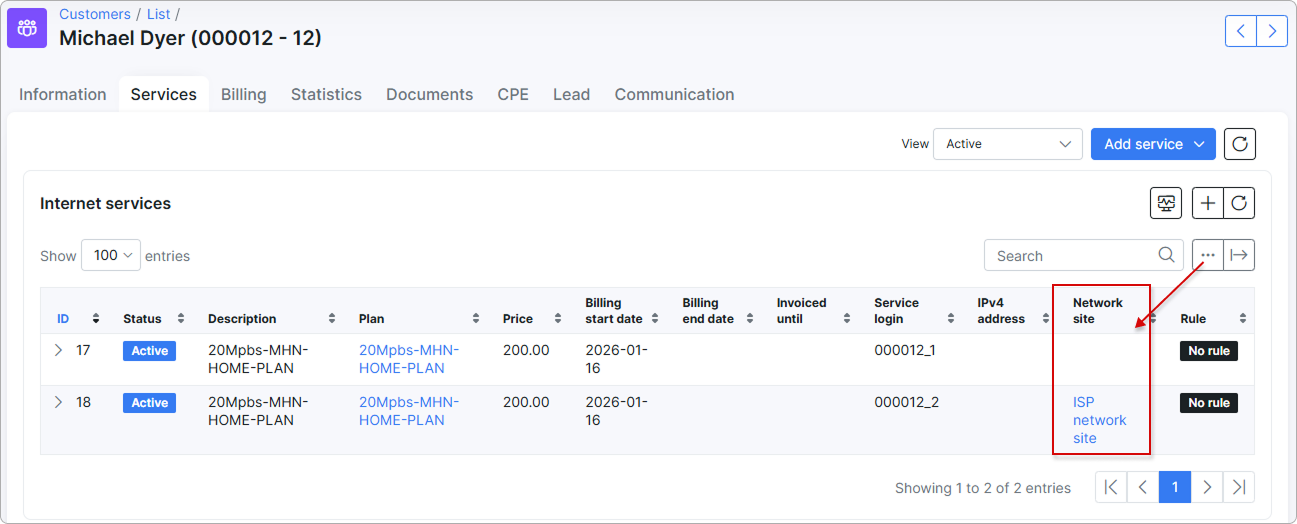
You can enable the Network site column for the list of the customer’s services to see which services are linked to which network site:
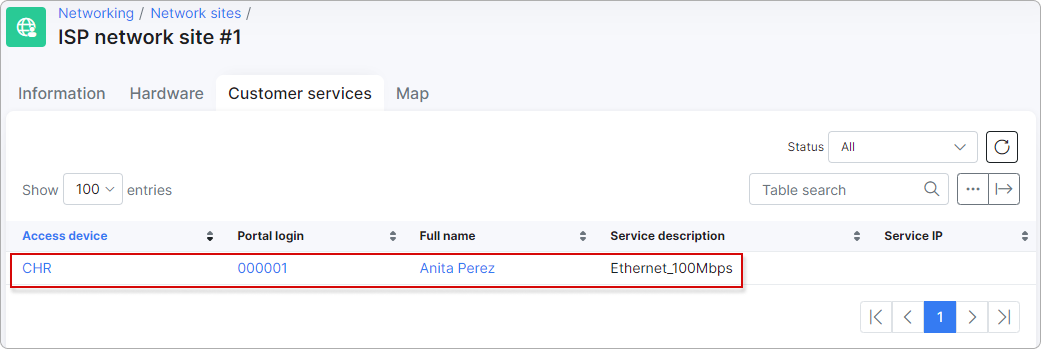
After this, a new entry will appear under the Customer services tab within the network site to which that access device is linked. You will also see the customer service linked to this device:
When you have multiple customer services linked to access devices, it's easier to use the filter at the top-right corner of the page. This allows you to arrange the representation of items in the table by their status:
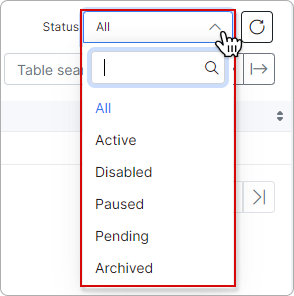
Actions:
— Unlink removes the access device from a customer service directly from this tab. A confirmation window appears:
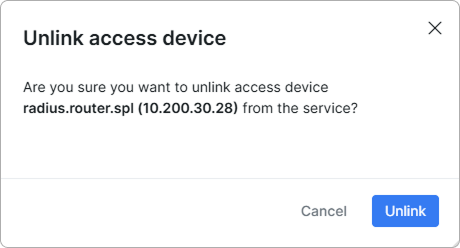
Click Unlink to confirm. The service is removed from this Customer services list and from the network site's map.
Manual edits and auto-linking:
When a service authenticates through RADIUS, Splynx can auto-link it to an access device based on the NAS identifier + Called Station ID pair.
If you manually change or unlink the access device for a service — either from this tab, from the customer's Service tab, or via mass linking — the service is flagged as manually linked. From that point on:
- Auto-linking will no longer overwrite that service. Your manual choice is preserved across reconnects.
- Using the Unlink action clears the flag. The next time the service authenticates with a matching NAS identifier + Called Station ID pair, auto-linking can assign an access device again.
This is useful in bridged networks where one Called Station ID covers customers on different physical devices — manual mappings stay in place even when the same pair would otherwise auto-link to a different device.
For more information, please read Customer services
¶ Map
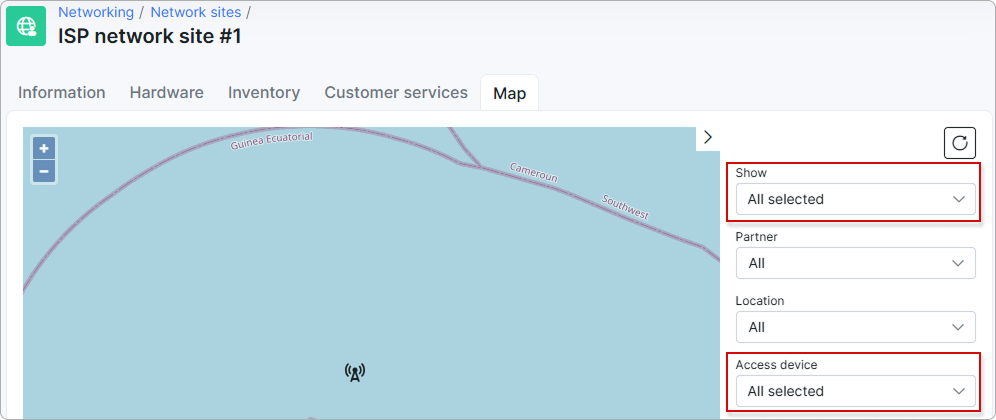
The map provides a convenient tool for monitoring the coverage of your network site. Here, you can view the network site's location along with the associated services, hardware, and access devices.
Each item will be marked with its respective legend.
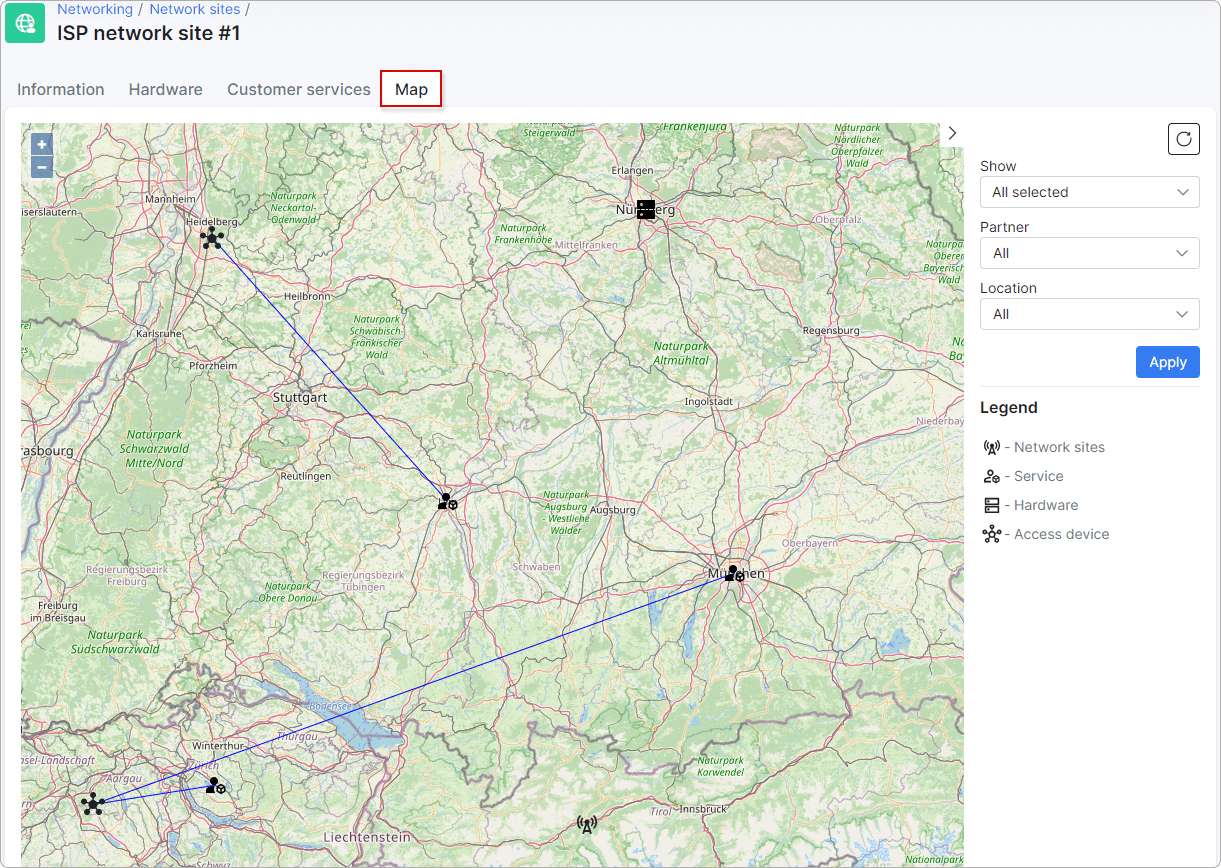
You can filter the representation of items on the map by Partner, Location, Connection type, and KMZ/KML.
Additionally, you can specify particular items to display, such as Hardware, Services, Access devices, and Services linked to an Access device:
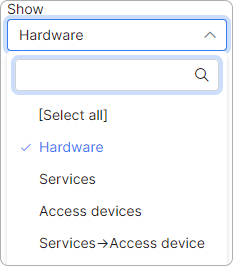
When Access device is selected in the Show field, an extra Access device multi-select appears in the sidebar. Use it to limit the map to one or more specific access devices on this site. The field is search-enabled and defaults to All (no filtering); your selection is applied together with the other filters using AND logic when you click Apply.
For more information, please read Maps (Networking) and Coverage maps (Network sites)
¶ Table management and export
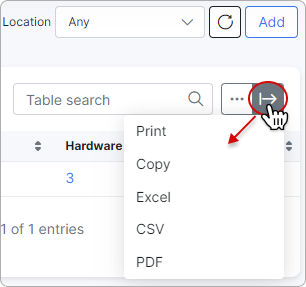
Like all tables in Splynx, the icon  at the top-right corner of the network sites list can be used to export the table by printing, copying, or saving it in a preferred file format:
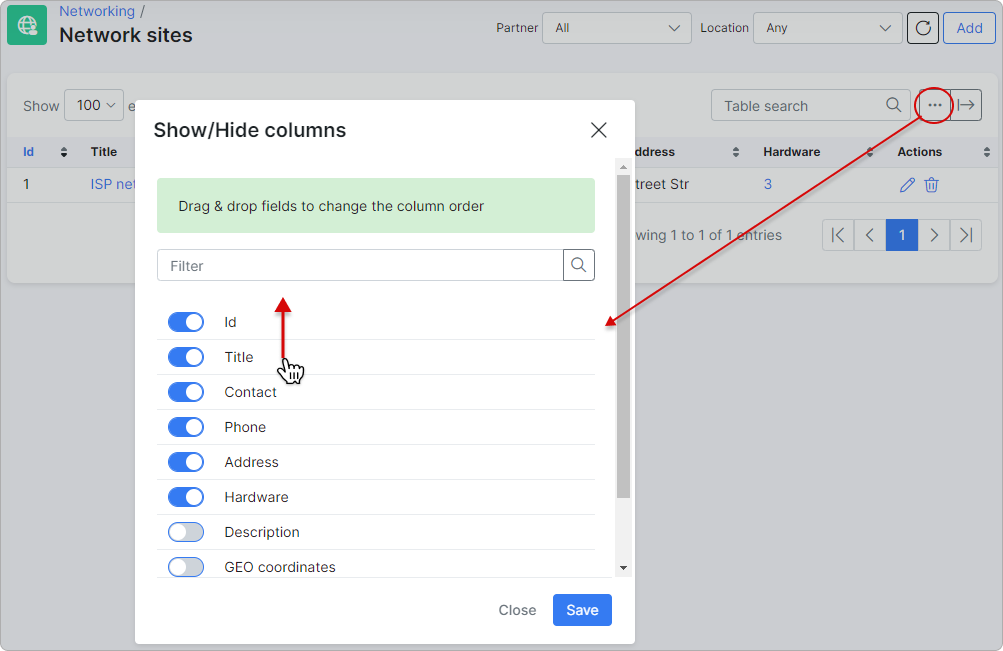
Customize the table to display desired fields or columns using the breadcrumbs icon  . Drag and drop items to arrange columns in your preferred order: