¶ Linked accounts
- Overview
- Linking accounts
- Actions with sub-accounts
- Sub-account management
- Customer portal
- Selecting accounts in finance documents
- Statuses and relations
- Search by main account
- Permissions
- Notifications
¶ Overview
Linked accounts is a feature that allows the consolidation of payments for services from multiple sub-accounts into a designated main account.
This feature is particularly useful when a single individual pays for an entire family or when a company manages billing for multiple accounts.
Both individual and business profiles can be linked under this system.
Sub-accounts can be configured as either Aggregated or Independent, depending on the selected billing mode.
Only an administrator can link accounts.
¶ Linking accounts
You can designate an account as either a main or a sub-account. To do this, follow these steps:
-
Go to the account you want to designate as either a main or a sub-account.
-
Open the Actions menu.
-
To link the account:
-
Select
Link main accountif you want to connect it to a main account. -
Select
Link sub-accountif you want to connect a sub-account to it.
-
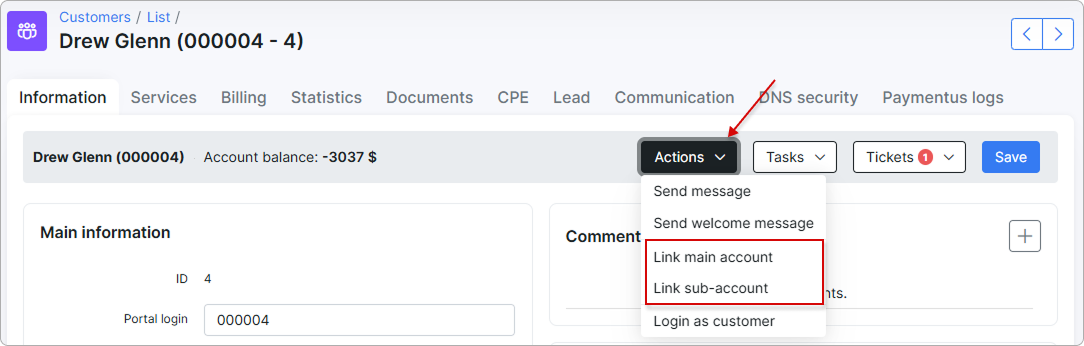
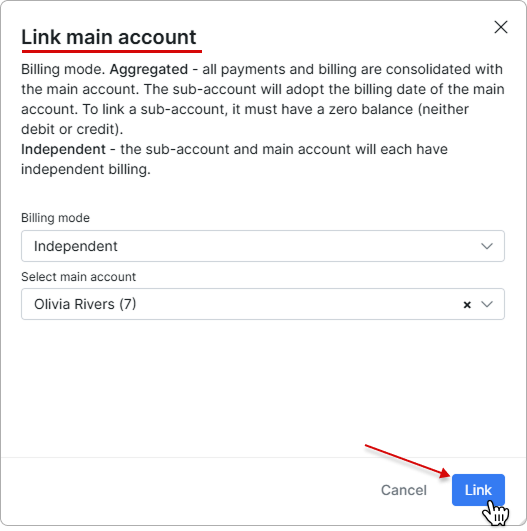
In the new window, select the Billing mode (Aggregated or Independent) and the account for linking. Then click Link.
You cannot link accounts that are assigned to different partners.
Linking main account:
Linking sub-account:
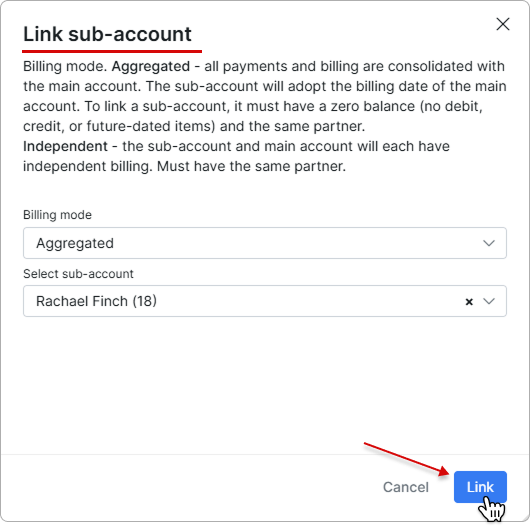
Sub-accounts must have a zero balance (no debit/credit or future items) to be linked to a main account with aggregated billing mode.
Billing modes for sub-accounts:
Aggregated – all payments and billing are consolidated under the main account. The sub-account adopts the billing date of the main account. To link a sub-account, it must have a zero balance (i.e., no debit, credit, or future-dated items).
Independent – the sub-account and main account each maintain separate billing.
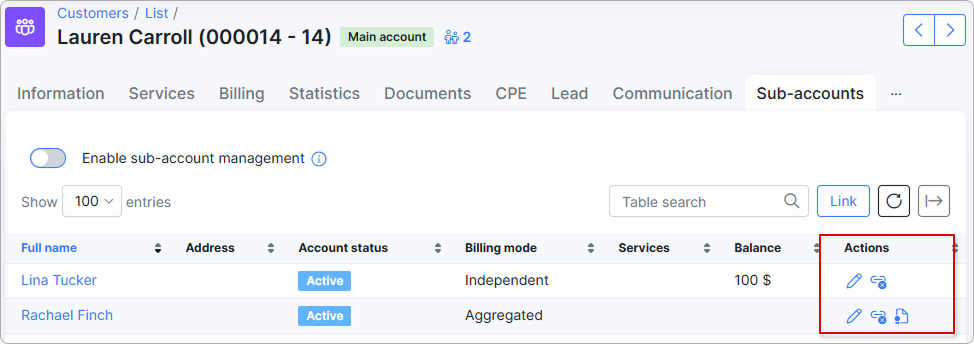
The added sub-accounts will then appear in the Sub-accounts tab of the main account's profile, with their billing modes and other details indicated:

After that, the main account will receive the corresponding label indicating the number of its sub-accounts:

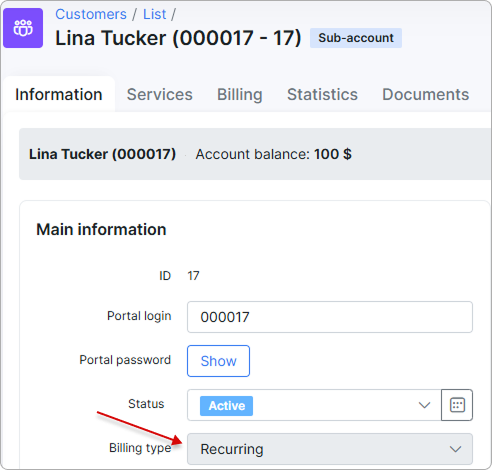
The sub-account will also receive a label, along with a link to the main account:

You cannot change the billing type of a sub-account once it has been linked to the main account:
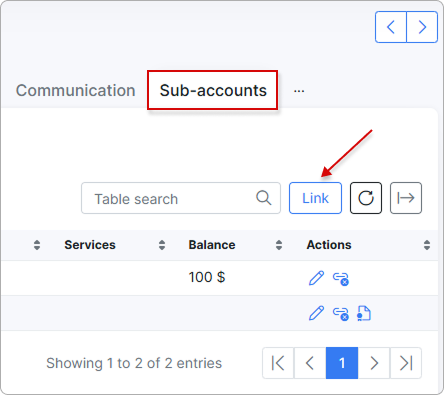
You can also link new sub-accounts using the Link button under the Sub-accounts tab:
¶ Actions with sub-accounts
Once sub-accounts are added, you can perform the following actions based on their billing modes:
 - Edit sub-account.
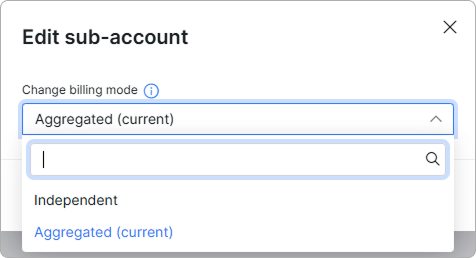
You can change the billing mode for the sub-account here:
To edit sub-accounts, the main account must be active and have a positive balance.
![]() - Unlink sub-account. Click this icon to unlink the sub-account.
- Unlink sub-account. Click this icon to unlink the sub-account.
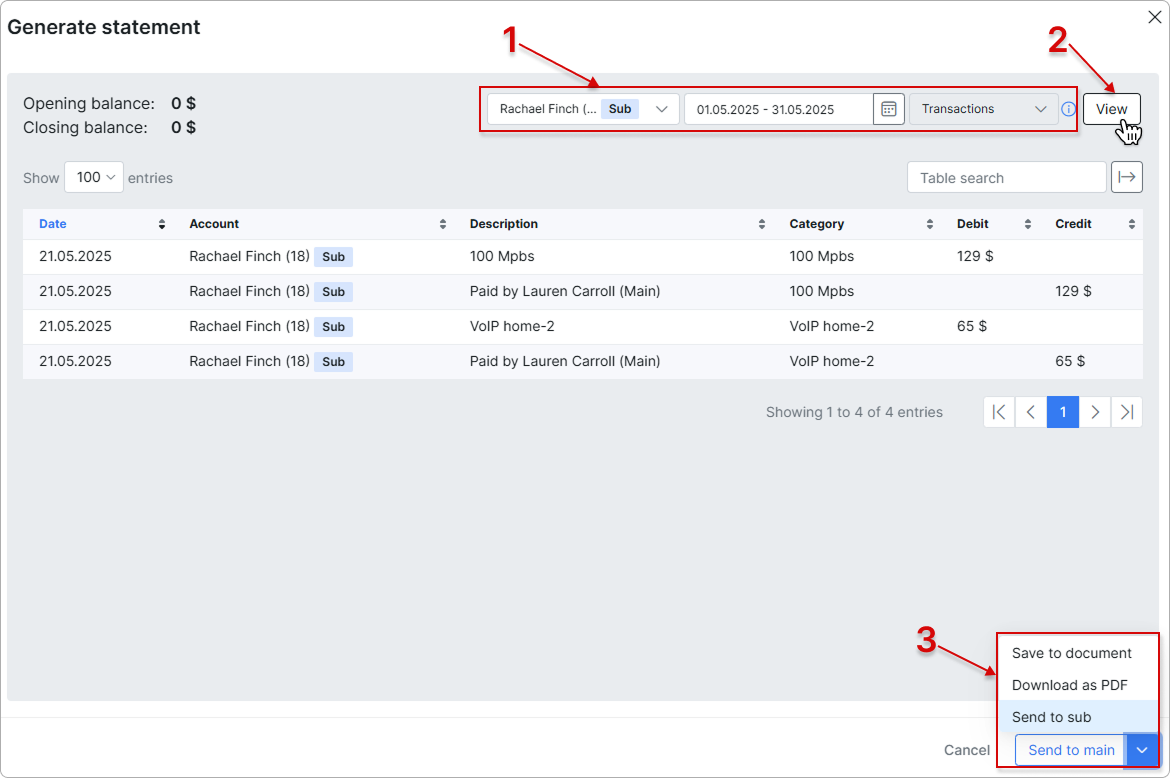
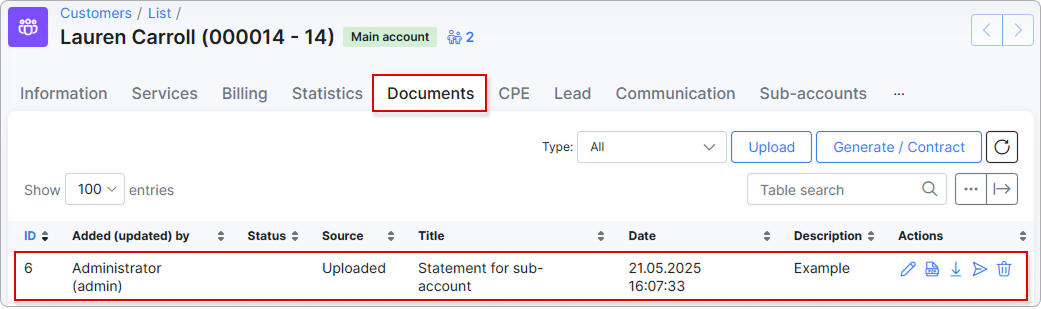
![]() - Generate statement. This feature is used to produce a financial summary of a sub-account’s/main account's activity within a specified date range.
- Generate statement. This feature is used to produce a financial summary of a sub-account’s/main account's activity within a specified date range.
First, adjust the filters by selecting the sub-account or main account, date range, and transaction type (only available for main accounts).
Then, click View.
Once the data appears in the table below, you can choose one of the following actions: save the statement to Documents, download it as a PDF, or send it to the sub-account or main account.
If the statement is saved to documents, it will appear in the main account’s Documents list:
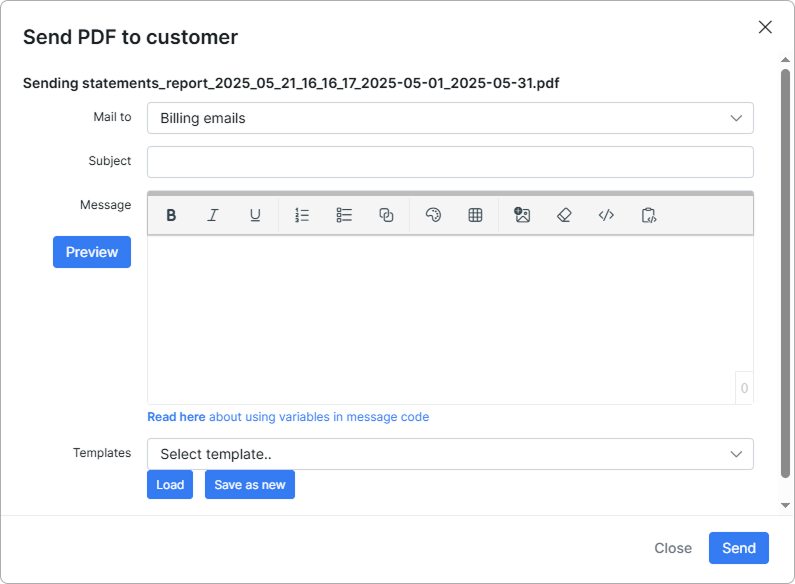
If you choose to send the statement to Sub/Main, the following window will appear, prompting you to enter the necessary details to email the document as PDF:
To unlink a sub-account from its main account, go to the sub-account's profile. In the Actions menu, click Unlink main account:
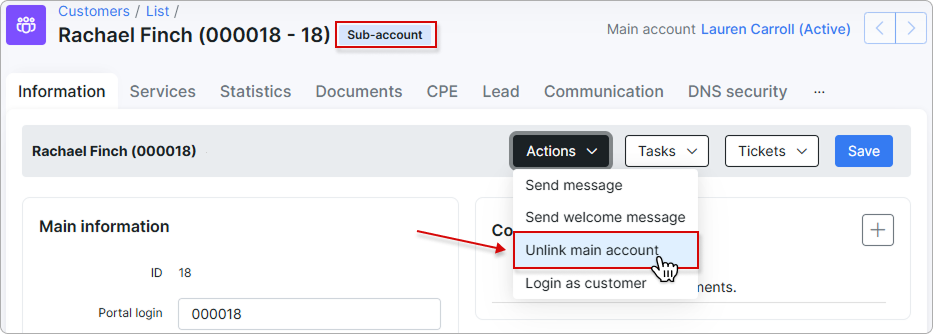
If the main account is blocked or has a negative balance, you cannot unlink an aggregated sub-account. To proceed, the main account must be active and have a positive balance.
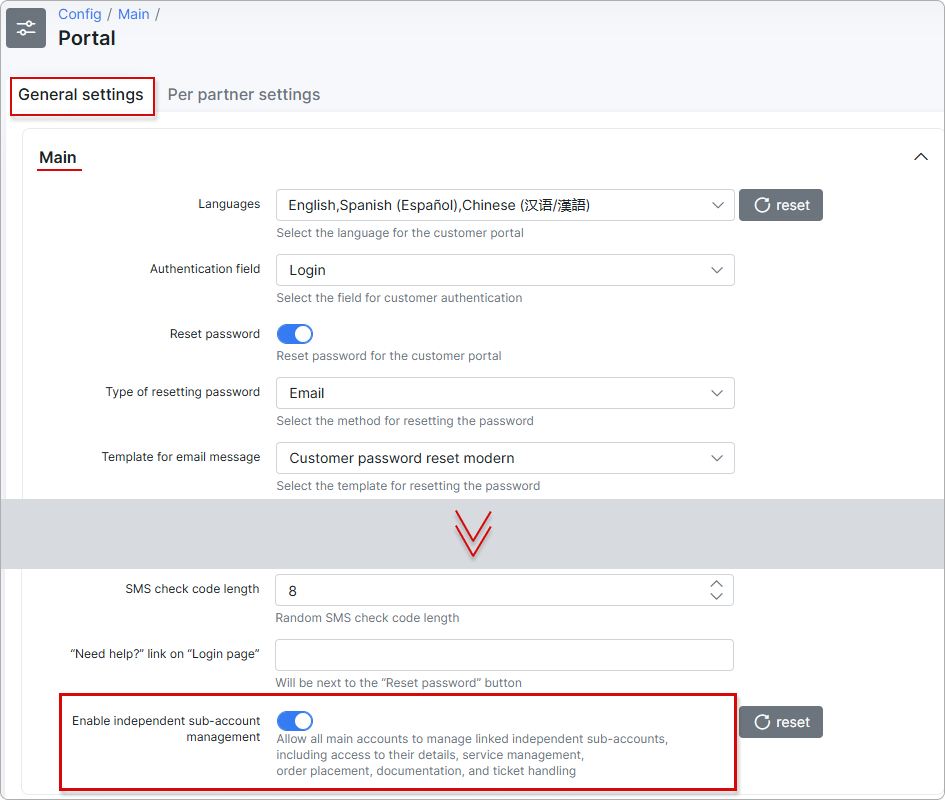
¶ Sub-account management
To allow the main account to fully manage its linked aggregated sub-accounts, go to the Sub-accounts tab in the main account's profile and enable the Sub-account management toggle.
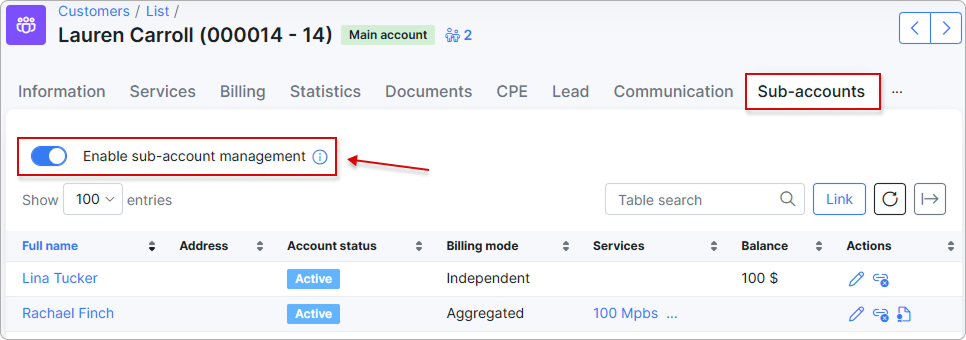
After this, the main account will have access to sub-account details, service management, order placement, documentation, and ticket handling.
To enable the same functionality for independent sub-accounts, activate the option in the Portal config:
¶ Selecting accounts in finance documents
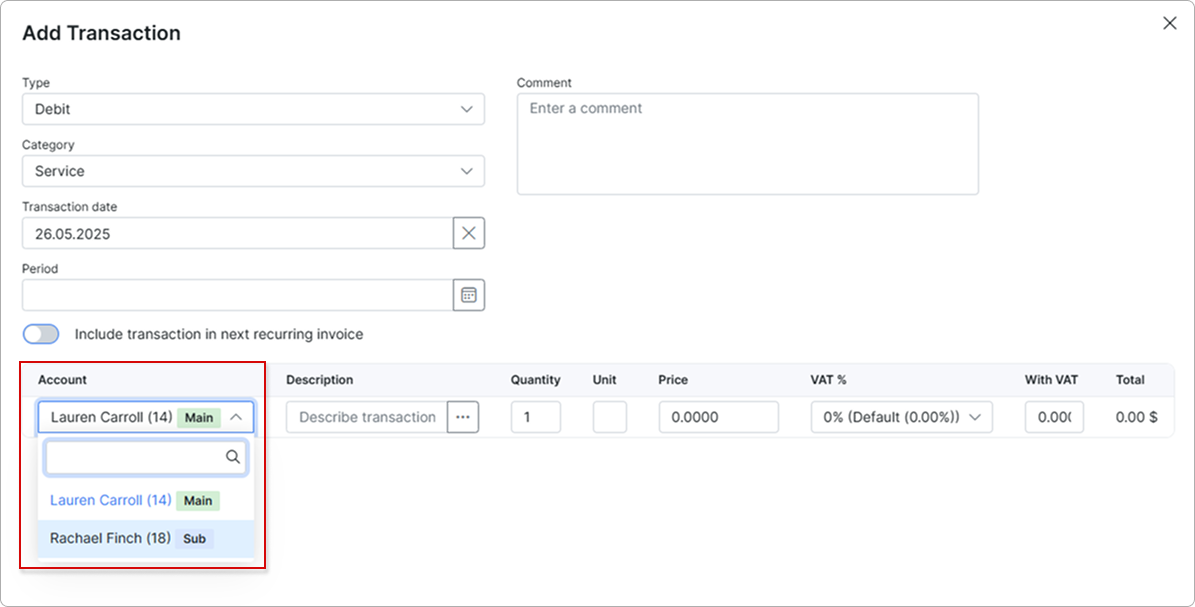
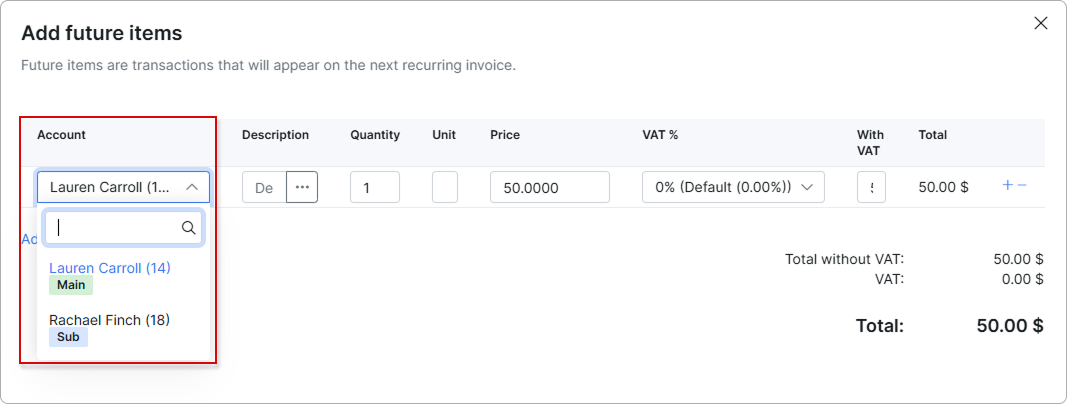
When adding a finance documents (invoices, transactions, future items, credit notes, etc.) for the main account, a new Account menu will appear, allowing you to specify the designated account for the transaction. This can include aggregated sub-accounts as well.
Transactions:
Future items:
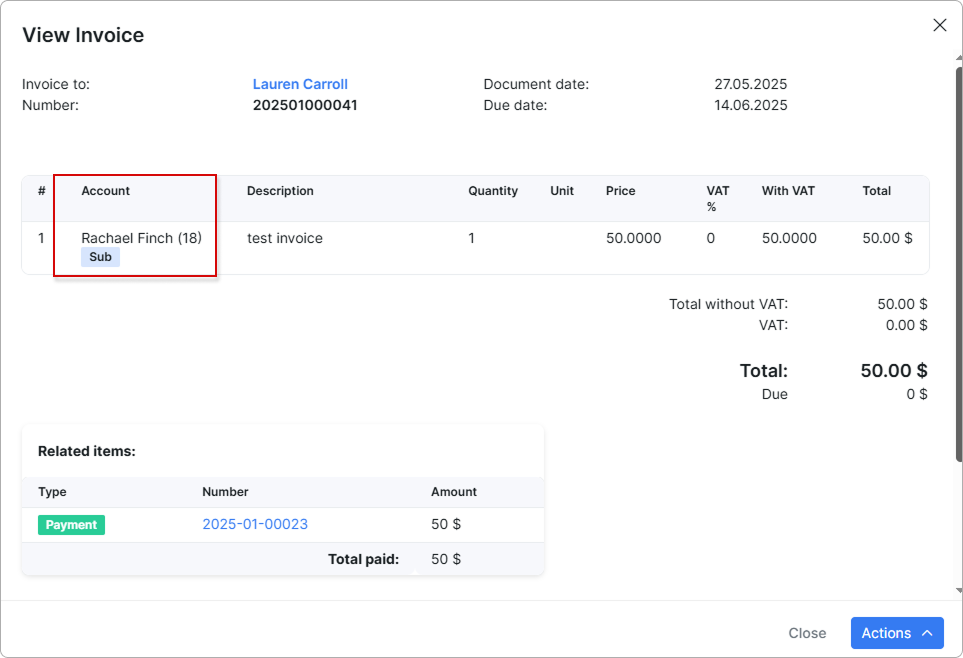
When viewing a finance document, you will also be able to see which account it was issued for:
¶ Statuses and relations
When you change the main account status to Blocked or Inactive, all linked sub-accounts in aggregated mode will inherit the same status.
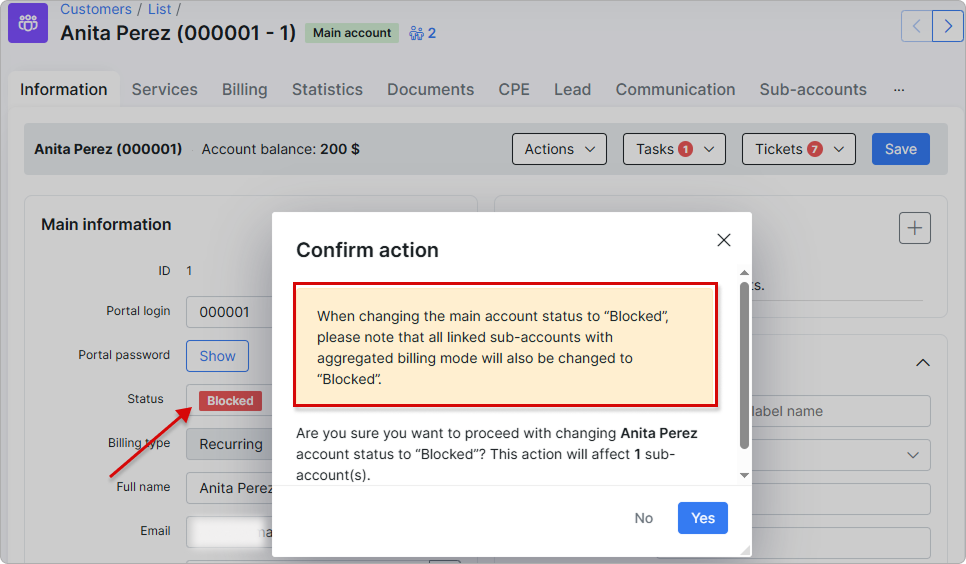
If the sub-accounts were manually set to Blocked or Inactive along with the main account, reactivating the main account will not change their statuses; they will remain Blocked or Inactive, respectively.
Blocked sub-accounts and main accounts can be linked, but Inactive ones cannot.
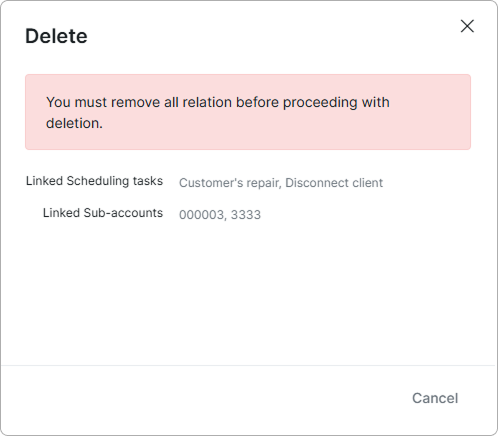
Before removing the main account, you must disconnect all associated relation, including any linked sub-accounts:
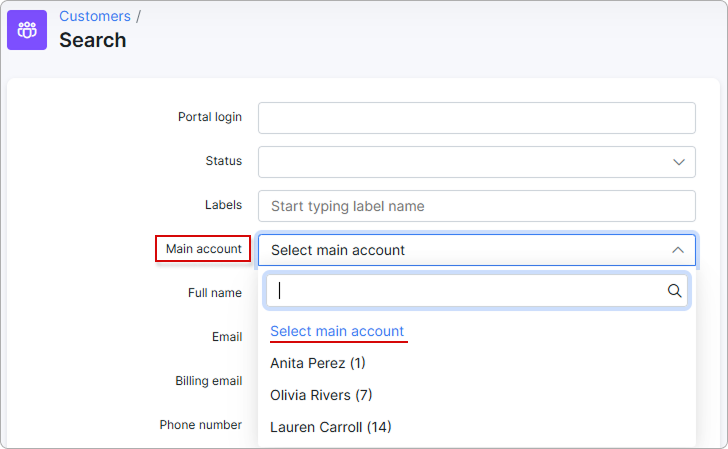
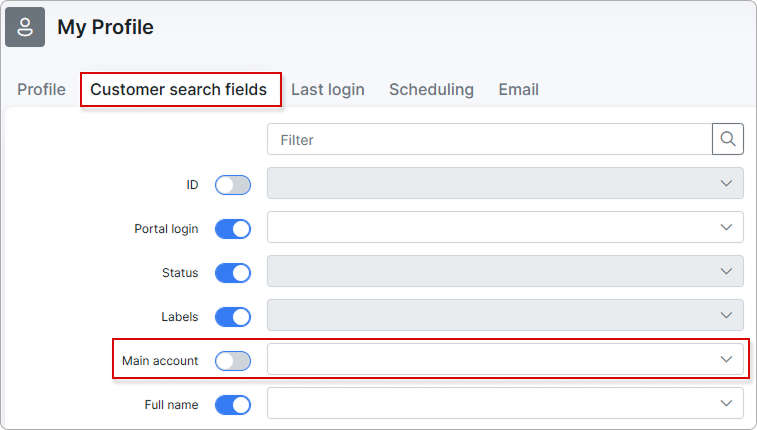
¶ Search by main account
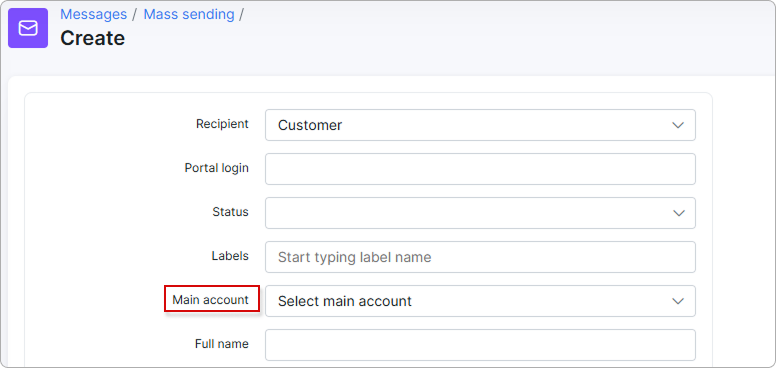
When searching for customers or creating mass messages in Messages, you can search by main account:
To enable this field, go to My Profile and, under the Customer search fields tab, enable the Main account toggle:
¶ Permissions
By default, only the Super administrator has permissions enabled to manage sub-accounts. However, you can enable these permissions for other administrators if necessary:
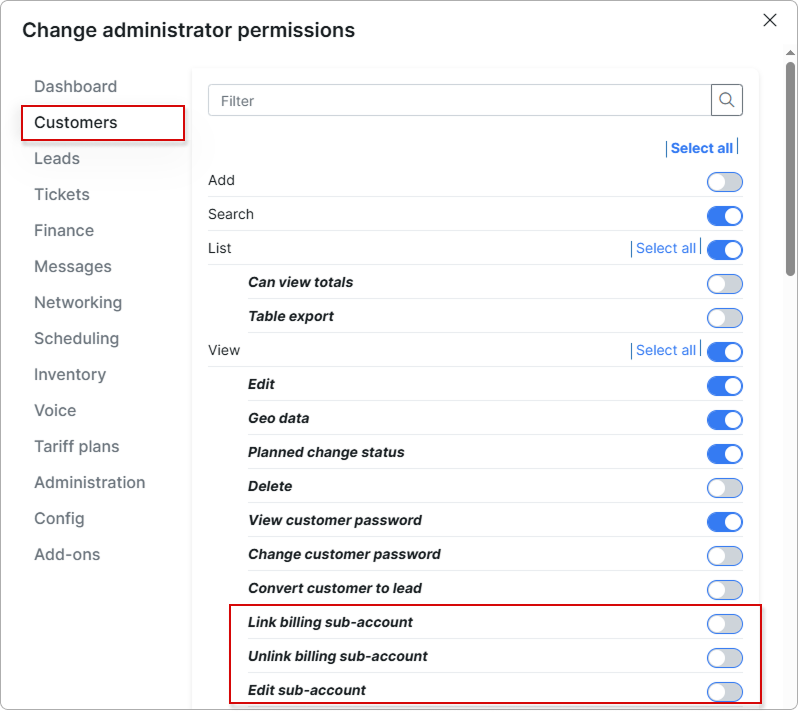
For more information, please read Default roles and permissions

¶ Notifications
To enable blocking notifications for sub-accounts, go to Config → Finance → Notifications, where you can also select templates for SMS and email.
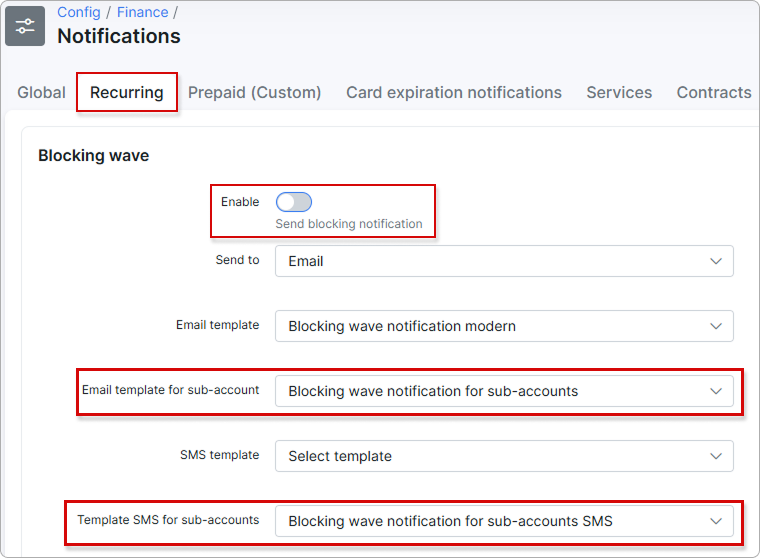
For more information, please read Notifications (Recurring).