¶ Mass sending
¶ Creating a message
The messages option in Messages → Mass sending → Create allows you to send an email to the customer(-s) directly from Splynx using different templates and attaching financial or other documents.
It is necessary to configure SMTP first in
Config → Main → Emailbefore sending an email to a customer. More information about email configuration can be found in Email config.
If you regularly send bulk emails (more than 5,000 per day to Gmail addresses, or large campaigns to Yahoo), configure SPF, DKIM and DMARC on your sending domain. Without these DNS records, Gmail and Yahoo may filter your messages as spam and the native "Unsubscribe" button will not appear. See Email deliverability (SPF, DKIM, DMARC) for the full setup.
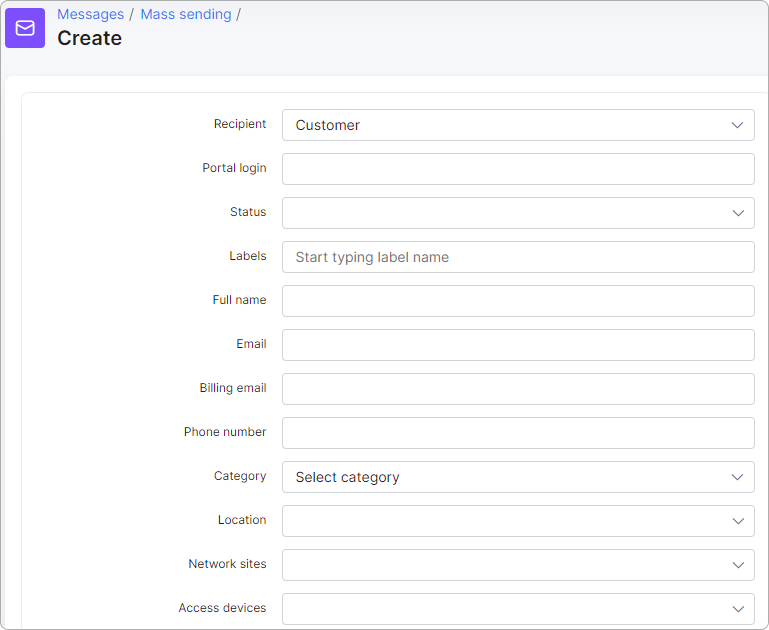
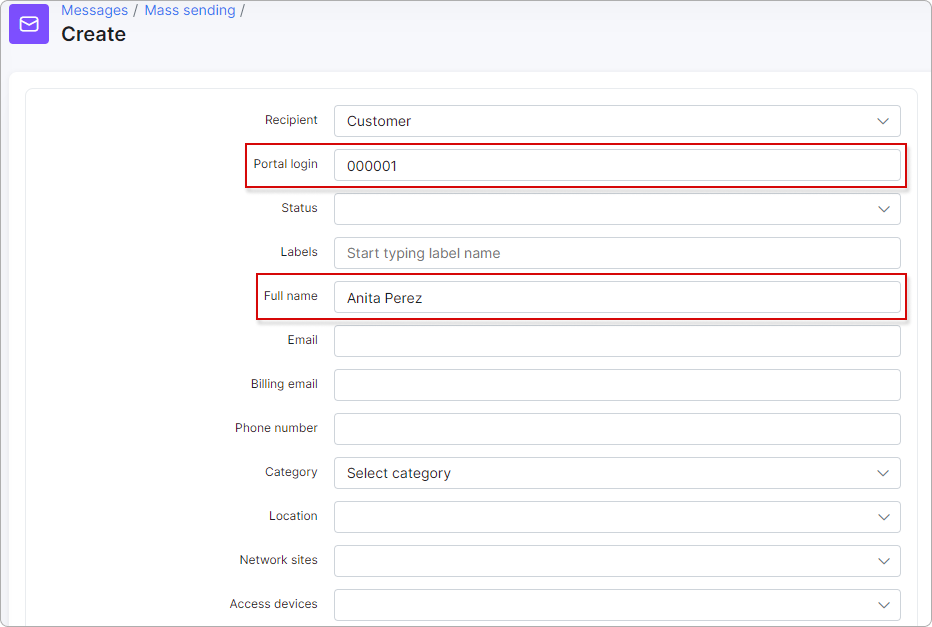
To create a new message click on Create in Messages → Mass sending, a window will appear with the following fields:
-
Recipient - select who receives the message: Customer or Lead;
-
Portal login - the login that customer uses to login to Portal, e.g.
000040; -
Status - there are New, Active, Inactive, Blocked statuses of the customer and it's possible to Select all;
-
Labels - select the label(s) that are applied to this customer(s);
-
Full name - full name of the customer;
-
Email - email address of the customer;
-
Billing email - email address of the customer for the billing correspondence;
-
Phone - phone number of the customer;
-
Category - could be
Individualperson orBusiness; -
Location - location of the customer;
-
Network sites - select the network site(s) associated with the customer(s);
-
Access devices - select the access device(s) to which the customer's service(s) is linked;
-
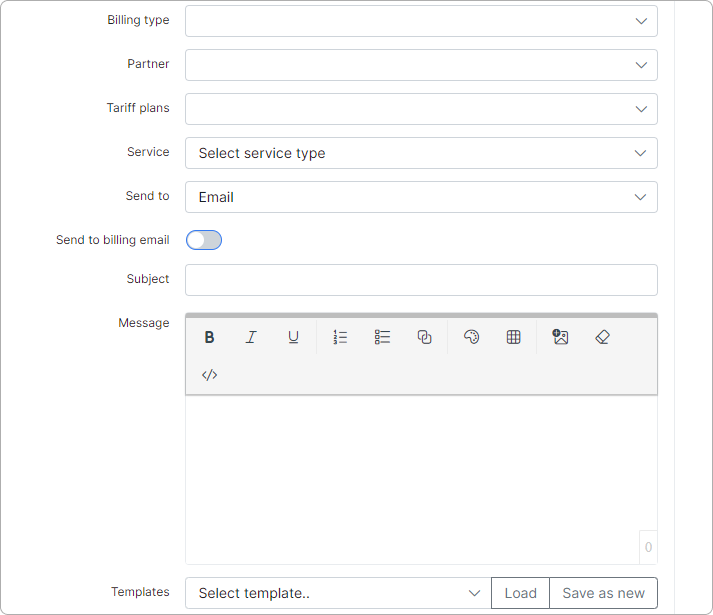
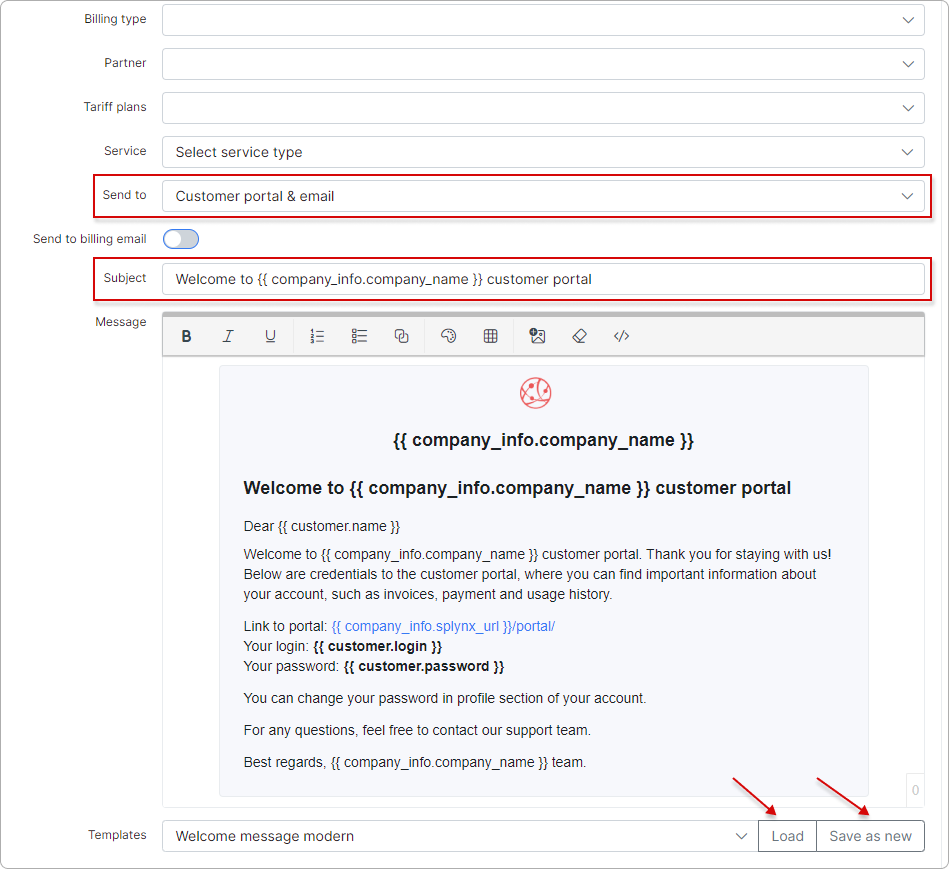
Billing type - Recurring or Prepaid (Custom);
-
Partner - partner, service provider of the customer
-
Tariff plans - all available tariff plans in Internet, Voice, Recurring, Bundles categories;
-
Service - type of service: Bundles, Internet, Voice, Recurring;
-
Send to - the options are: Email, Customer portal, Customer portal & email, SMS, or WhatsApp.
-
Send from - choose which outgoing mailbox the email is sent from. The dropdown shows mailboxes available to the current admin (and the customer's partner where applicable) that are enabled in Outgoing mailboxes. Options follow the
{Sender email} ({Category})format — for example, sales@isp.com (Sales). Defaults to the Sales mailbox; if Sales isn't configured, falls back to the Default mailbox;
Send from is shown only when Send to is Email or Customer portal & email. Switching to SMS or Customer portal hides the field.
-
Send to billing email - toggle enables/disables to send message to customer's Billing email;
-
Notification category - the communication-preference category this message is tagged with. Customers can opt out of individual categories (from the Customer portal or their customer card), and Splynx respects those choices when sending: recipients who have opted out of the selected category are automatically excluded from the send. The field applies to SMS, Email, and Customer portal & email. Choose from:
- Promotions & Offers - marketing campaigns, discounts, new-plan announcements (this is the default value for new messages);
- Billing & Payments - invoices, payment reminders, payment confirmations, overdue notices;
- Service & Support - service outages, maintenance windows, ticket updates, technical advisories;
- Sub-accounts notification - messages addressed to linked sub-accounts;
- Account & Security - password resets, login alerts, account-status changes, two-factor reminders.
-
Subject - subject of the email;
-
Message - body of the message;
-
Templates - templates of Email, SMS, Customer portal can be used;
-
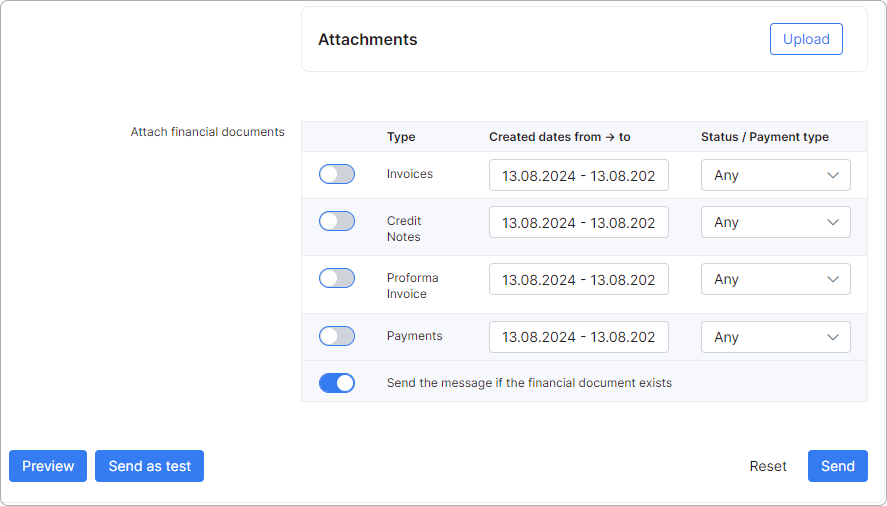
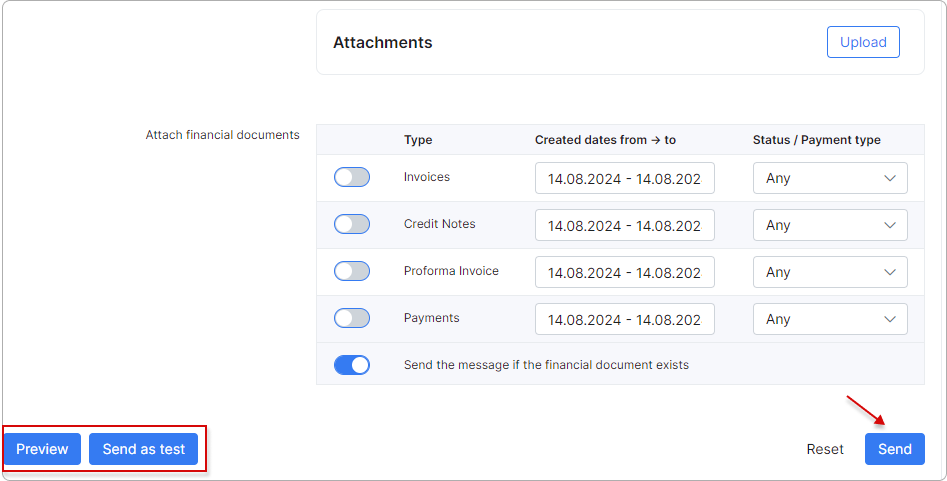
Attachments - file (-s) sent along with a message;
-
Attach financial documents - Invoices, Proforma Invoices, Credit Notes and Payments from Splynx.
You don't have to fill out all the fields to send an email to a customer. The easiest way is to enter a customer's Portal login or Full name, choose the Send to option, type a Subject and write a message.
You can choose a message body from templates or write particular text to populate the body of the message. You can also type your own message and save it as a new template by clicking on Save as new button or load the existing one. There is also an option to attach customer's financial documents.
¶ Preview
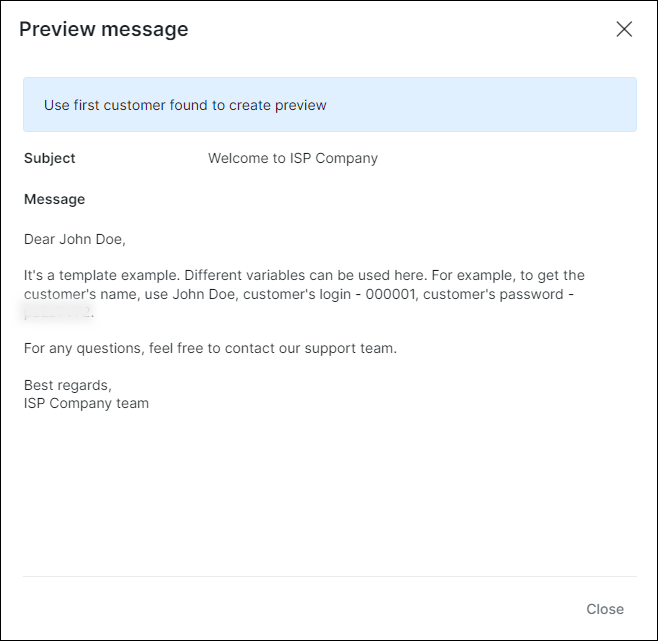
You can view your message before sending it by clicking on Preview button at the bottom of the page.
¶ Sending a message
When you click on Send button, a window will appear with the confirmation details of the recipient.
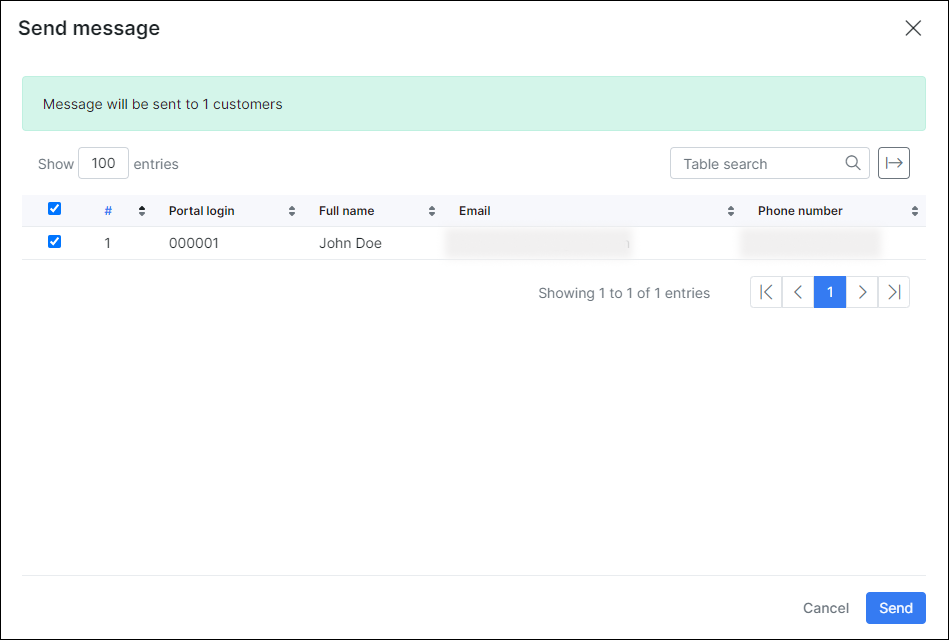
When you send to Email, SMS, or Customer portal & email, Splynx filters the recipient list by the selected Notification category and excludes customers who have opted out of it. For Customer portal & email, the portal message is delivered to every recipient, while the email is sent only to customers who are still opted in. The confirmation window shows how many recipients remain:
Message will be sent to {number} customers based on their communication preferences.
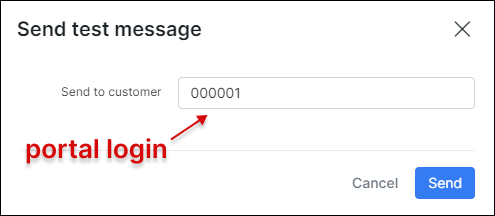
If you click on Send as test button, a window will appear where the customer's Portal login has to be entered.
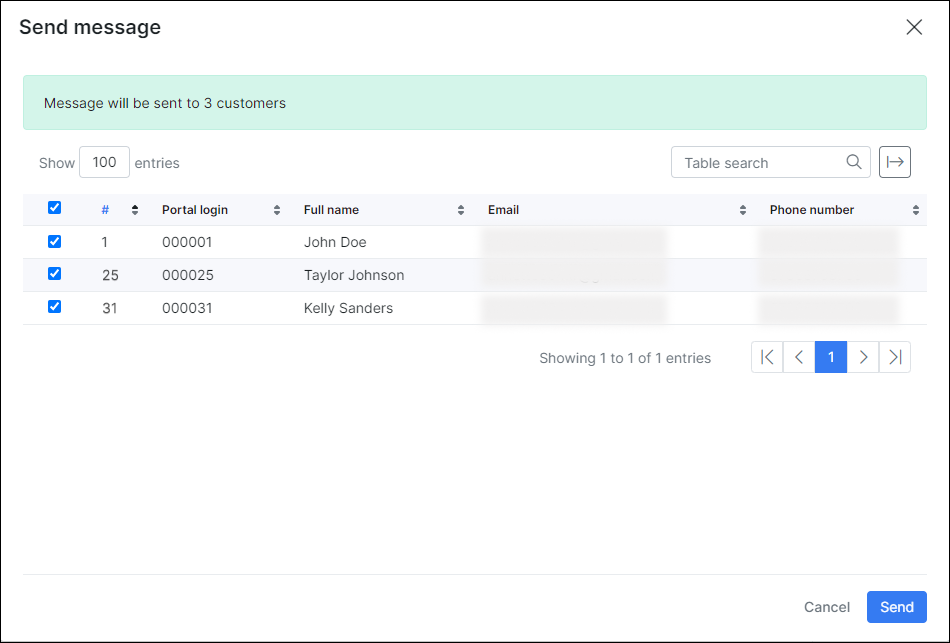
There is also an option of mass sending, for example, you can choose particular recipients by Partner or Location.
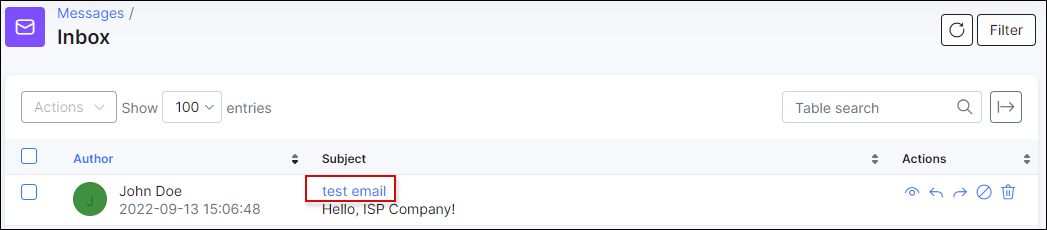
If you choose the sending option as Send to Customer portal or Customer portal & email, customers will be able to read messages in their portal in the Messages section:
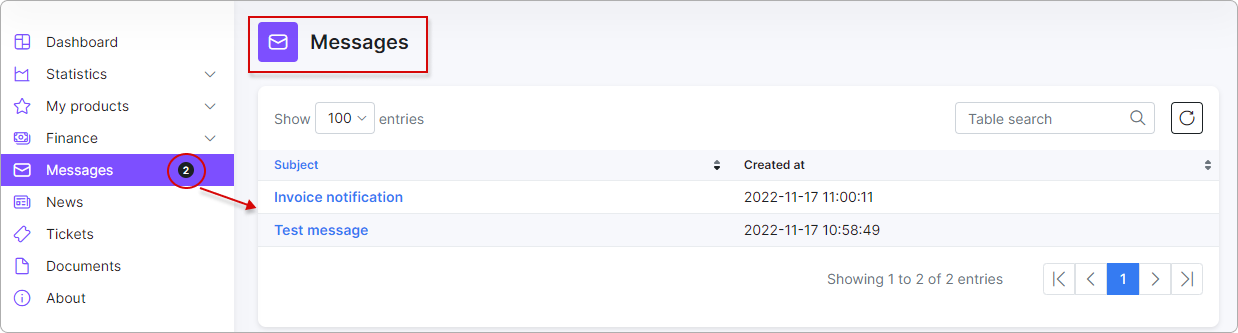
Click on the subject to open the message:
¶ History
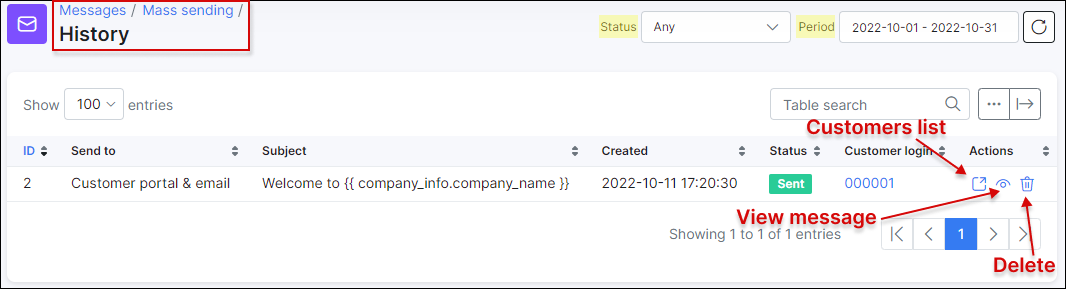
It is possible to track all emails that were sent in Splynx by navigating to Messages → Mass sending → History. You can sort all items by their status (Any, New, Processing, Sent, Cancelled, Removed, Sent with error) or by period of time (Today, Yesterday, Last 7 days, Last 30 Days, This month, Last month, Custom Range).
¶ Logs
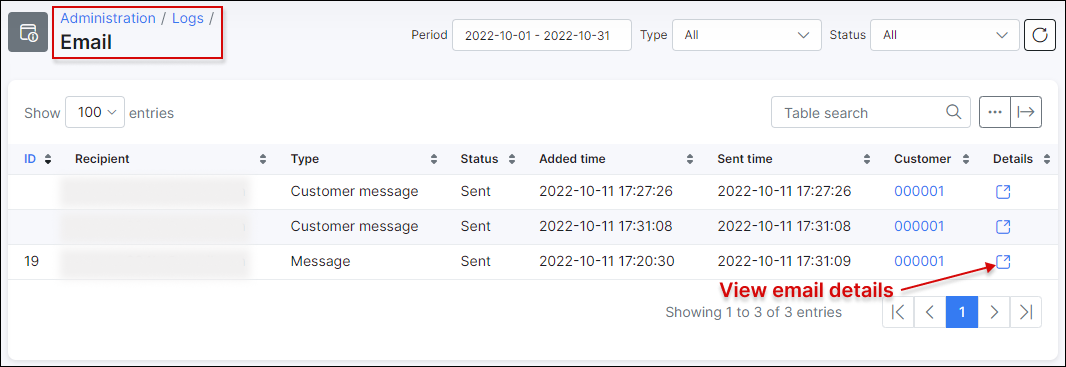
It is also possible to check all recipients list by their IDs and Email addresses in Administration → Logs → Email, where you can set a particular period, type of email message or its status.