¶ Recurring plans
- Overview
- Creating a plan
- Mass actions
- Statistical graph
- Changing a plan
- Assigning services to customers
- Updating name and price
- Table management
- Related pages
¶ Overview
Recurring plans bill services that repeat every billing period, other than internet and voice, such as public IP addresses, equipment rental, hosting, or IPTV.
¶ Creating a plan
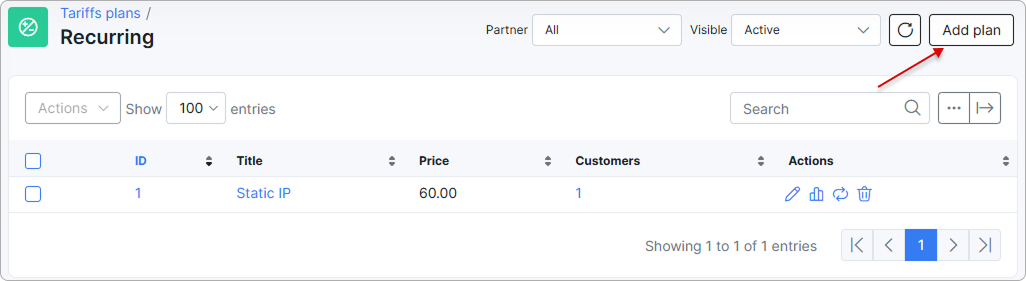
To create a recurring plan, go to Tariff plans → Recurring and click the Add plan button at the top right of the page.
The Add plan page opens, where you enter the details of the plan in the provided fields.
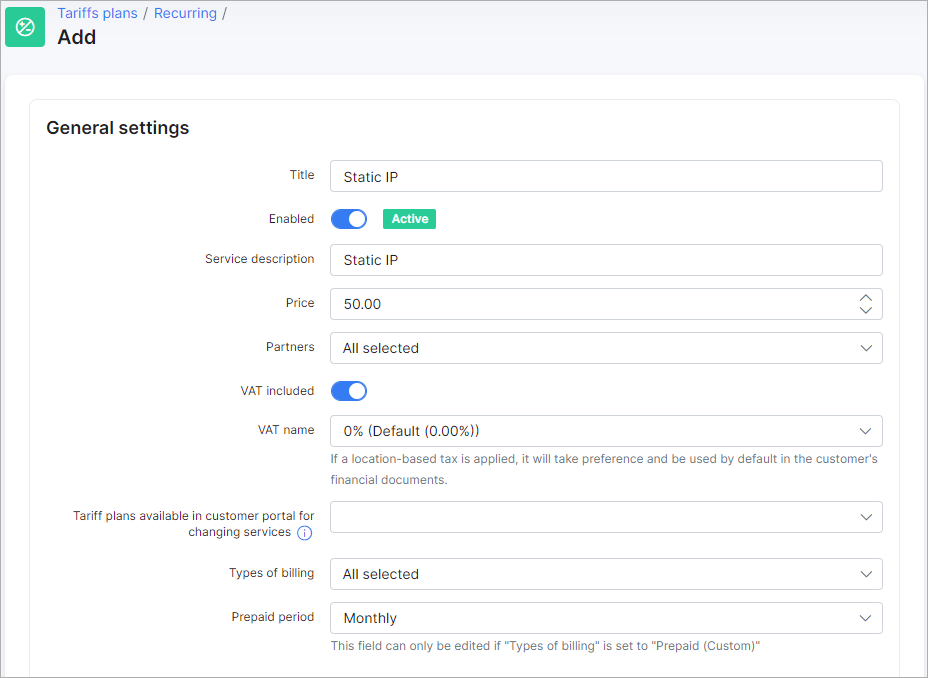
- Title — the name of the tariff in the list/table of recurring tariffs.
- Enabled — enable or disable this plan (when disabled, you can't create new services).
- Service description — a brief description of the plan.
- Price — the default price for the service.
- Labels — select one or more labels to identify this tariff.
- Partners — the partners this plan is available to.
- VAT included — whether VAT is included in the price of the plan.
- VAT name — the percentage of the VAT.
 First add the tax rate in Config → Finance → Taxes, then select it in the VAT name field. For more information, see Taxes.
- Tariff plans available in customer portal for changing services — the list of other tariff plans the customer can switch to from the current tariff on the Customer portal. For more information, read My Services.
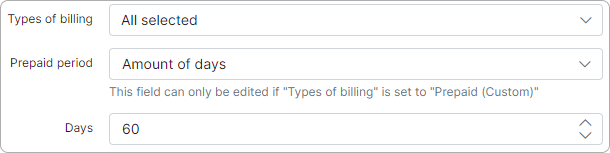
- Types of billing — the type of billing the plan is available for.
- Prepaid period — by default, it is set to Monthly and customers are charged for a period of a month. You can also select Amount of days, which shows another field, Days, where you set a period in days (7 days (week), 10 days, etc., up to 365 days).

- Bandwidth — the bandwidth reserved for the recurring service, in kbit/s. It sets how much capacity is set aside for this plan. Enter
0for no bandwidth limit. - Priority — the traffic priority assigned to the service, where
1is the highest priority. It determines how service traffic is prioritized over other traffic on the network during congestion.
¶ Plan availability
-
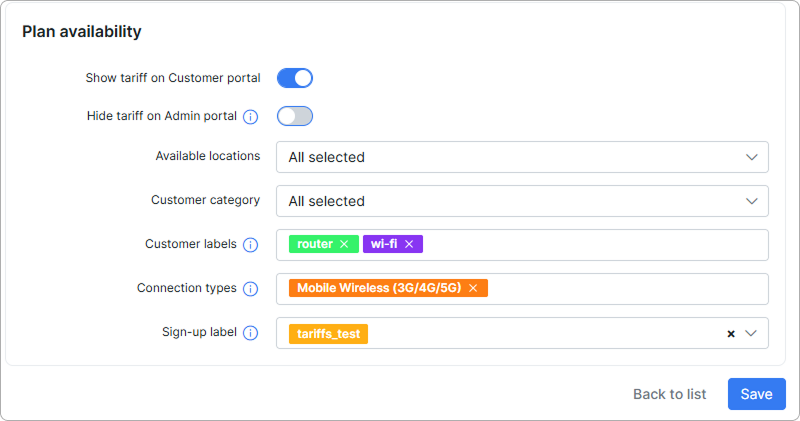
Show tariff on Customer portal — enable this option to make the tariff appear for ordering by customers.
-
Hide tariff on Admin portal — when this option is enabled, the tariff is not available to add as a service if the customer's location, category, and/or label differs from the tariff's values.
-
Available locations — select available locations.
-
Customer category — select the customer category (Individual, Business, or All).
-
Customer labels — select labels if you want this tariff to be available only for customers with the selected labels. Labels let you efficiently manage which services customers can order on the Customer portal.
-
Sign-up label — highlight tariff plans on the sign-up website with marketing labels like Best offer, Promotion, etc. Labels can be configured on the Labels config page. See also Sign-up flow.
To learn more, read Labels and Order new products.

You can automatically create transaction categories for the respective tariff plan.
To learn more, read Load categories from tariffs.
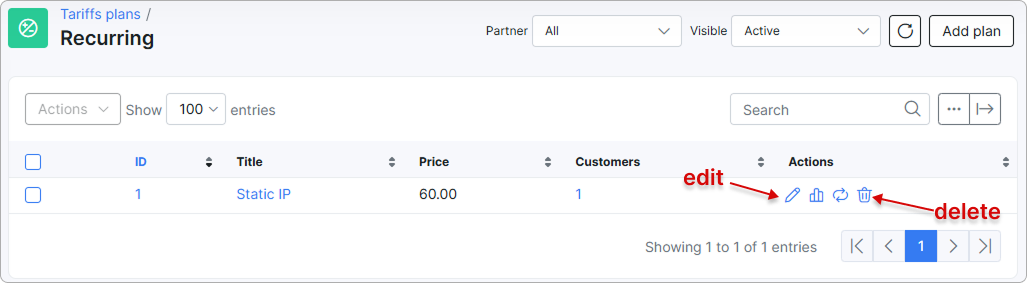
Once the recurring plan is created, you can edit or delete it with the icons in the Actions column of the table.
¶ Mass actions
You can change labels and connection types on several recurring plans at once. On the Tariff plans → Recurring list, select the plans with the checkboxes in the table rows, or select all plans with the checkbox in the table header. Then open the Actions menu and choose an action. The number next to the action shows how many plans are selected.
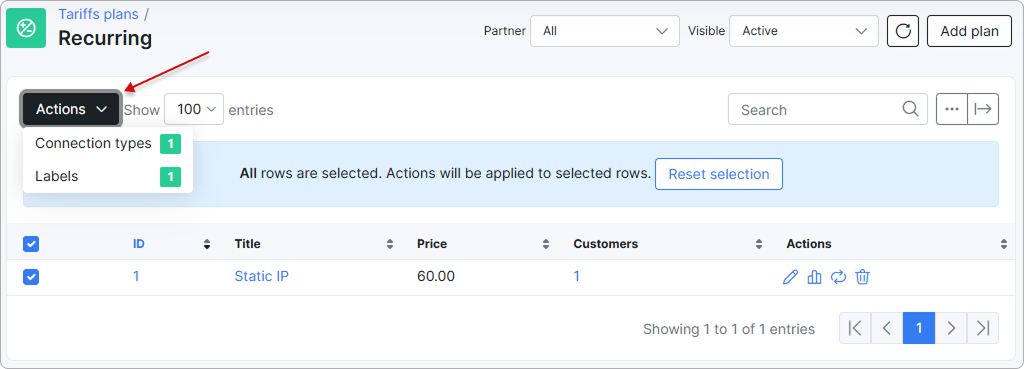
The following mass actions are available for recurring plans:
- Labels — adds tariff plan labels and customer labels to the selected plans, or replaces the existing ones.
- Connection types — adds connection types to the selected plans, or replaces the existing ones. Connection types link plans to coverage maps.
To learn what each option in the action window does, see Internet plans (Mass actions).
¶ Statistical graph
You can view a graph of the number of customers on this plan from the Actions column:
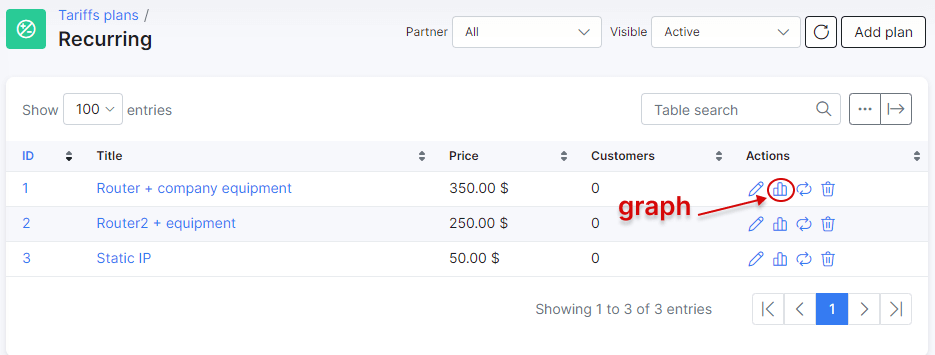
After you click the graph icon, the following window appears:
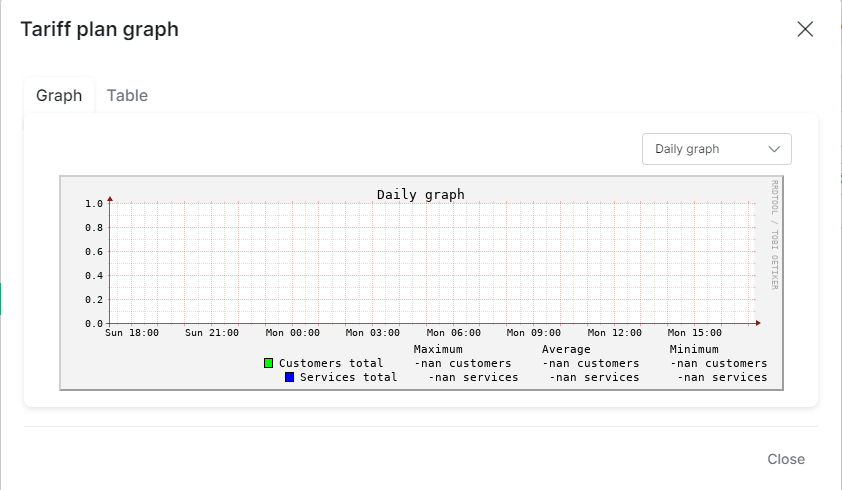
The graph can be shown by hour, day, week, month, or year.
¶ Changing a plan
The Change plan icon  changes the plan for all customers subscribed to this plan in one operation. For details, see Change plan.
¶ Assigning services to customers
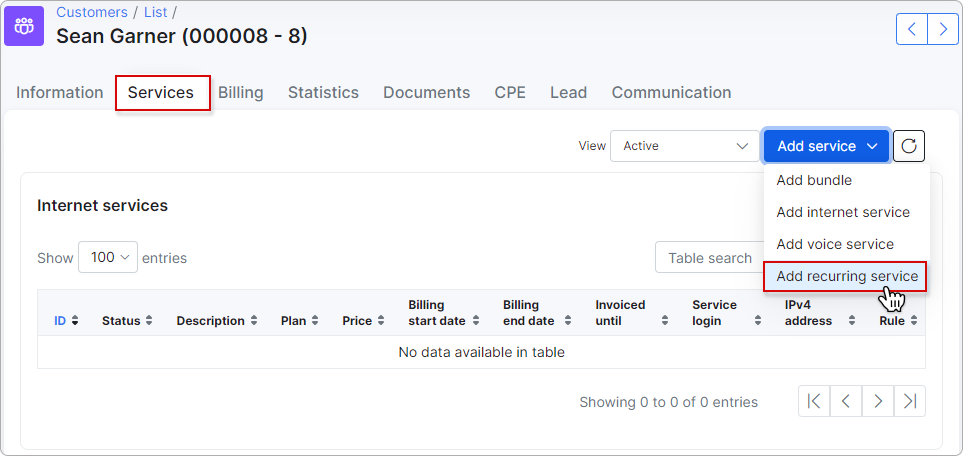
After creating a recurring plan, you can assign it as a service to a customer. Go to Customers → List, select the customer, open their Services tab, and click the Add service button at the top right of the page:
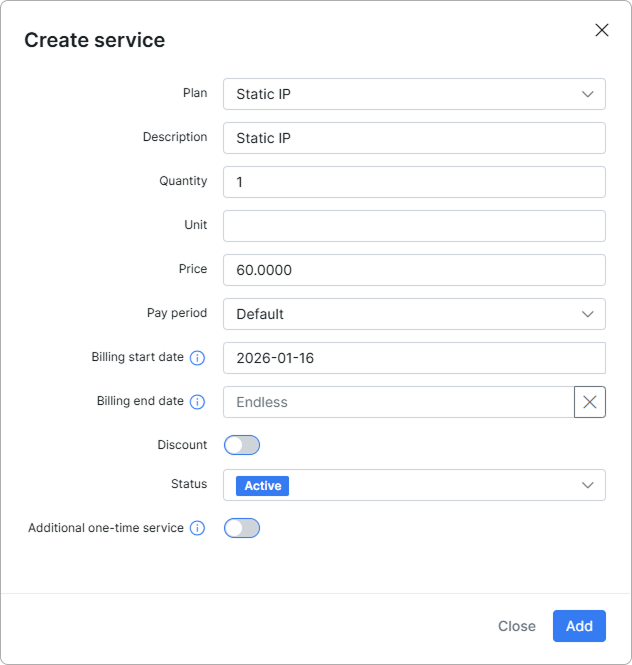
In the new window, select a plan from the dropdown and fill in the service fields:
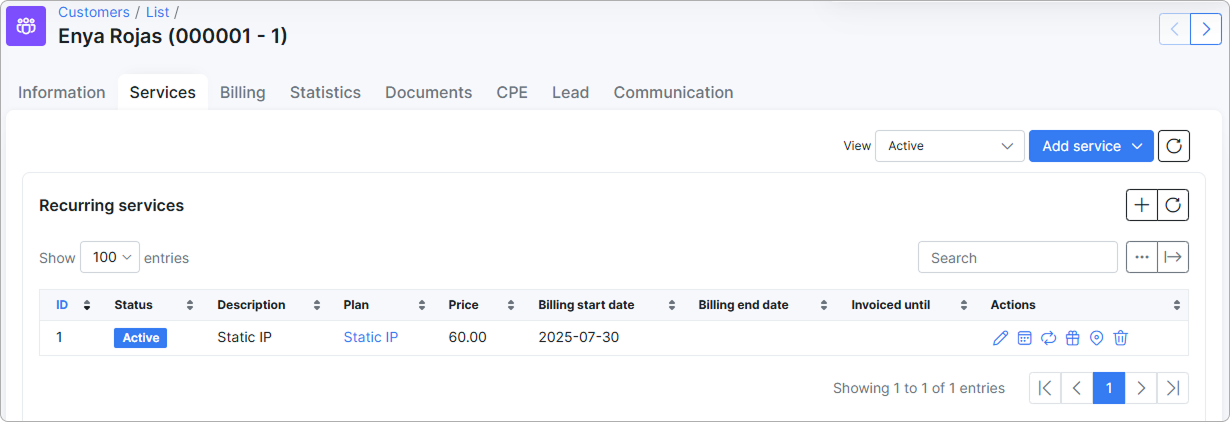
The service then appears on the customer's Services tab:
¶ Updating name and price
To change a plan's description or price, click Edit  next to the plan. The following window opens with additional toggles under the description and price fields:
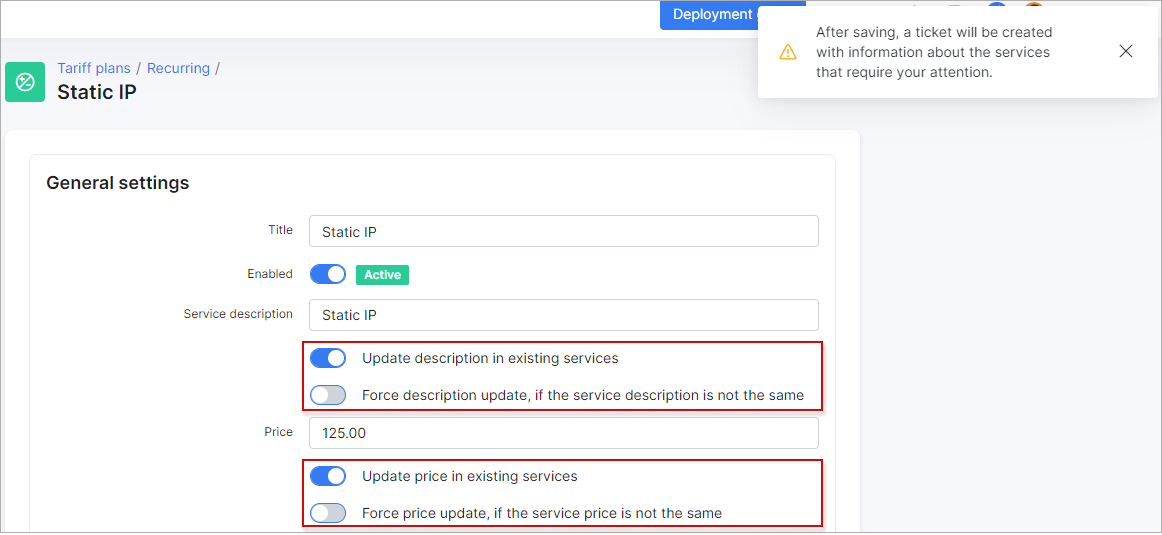
If you need to change the Service description and/or Price but do not want to overwrite changes made to the description and price in customer services subscribed to this tariff plan, enable Update description in existing services. Services are updated only if their description and price match the plan's. If they differ, they remain unchanged.
If you need to change the Service description and/or Price for all services subscribed to this tariff plan, enable Force description/price update, if the service description/price is not the same.
Be careful with the Force description/price update option: all previous changes made in services subscribed to this tariff plan are overwritten.
¶ Table management
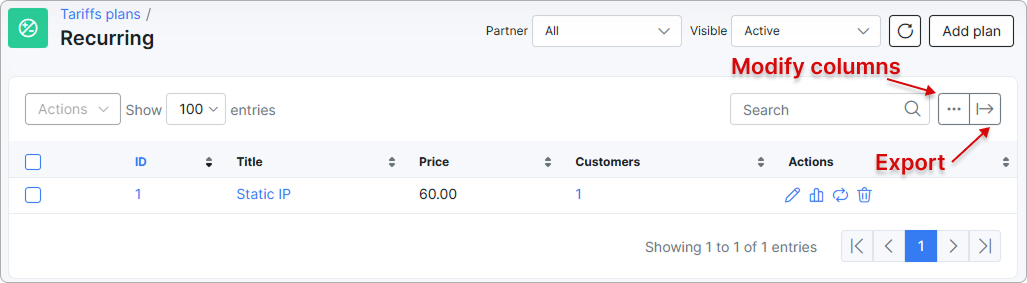
Like all tables in Splynx, you can modify the appearance of content to be displayed and export the table into Excel, CSV, or PDF formats. You can also copy or print the table: