¶ Voice plans
- Overview
- Adding a plan
- Mass actions
- Statistical graph
- Changing a plan
- Pricing
- Adding a service for the customer
- Updating the name and price
- Table management and export
- Related pages
¶ Overview
Voice plans define the voice services you sell to customers.
Why use Voice plans in Splynx?
Use voice plans in Splynx to:
- Charge customers monthly fees for voice services such as VoIP, toll numbers, number rentals, or mobile plans.
- Process VoIP CDRs (Call Detail Records). Splynx can automatically or manually process CDRs from voice platforms, attach calls from CDRs to the corresponding customers, create transactions for voice service usage, and make one common invoice for voice and internet services.
¶ Adding a plan
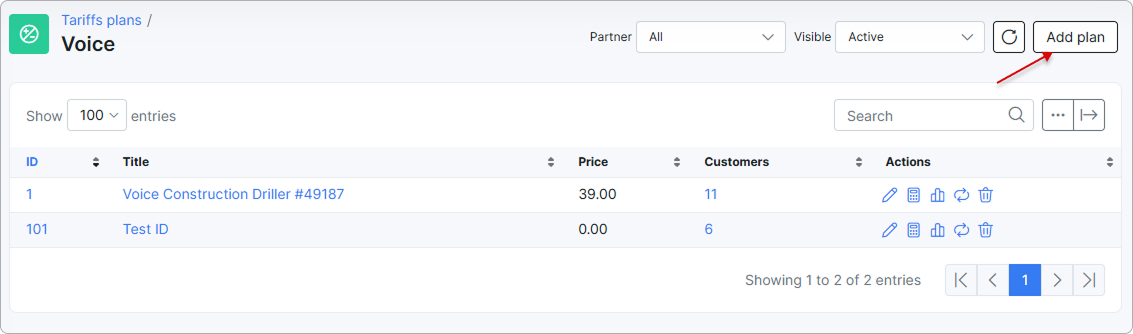
To configure a voice plan, go to Tariff plans → Voice and click the Add plan button at the top right of the page:
The Add plan page opens, where you create a new voice plan by filling in the following parameters:
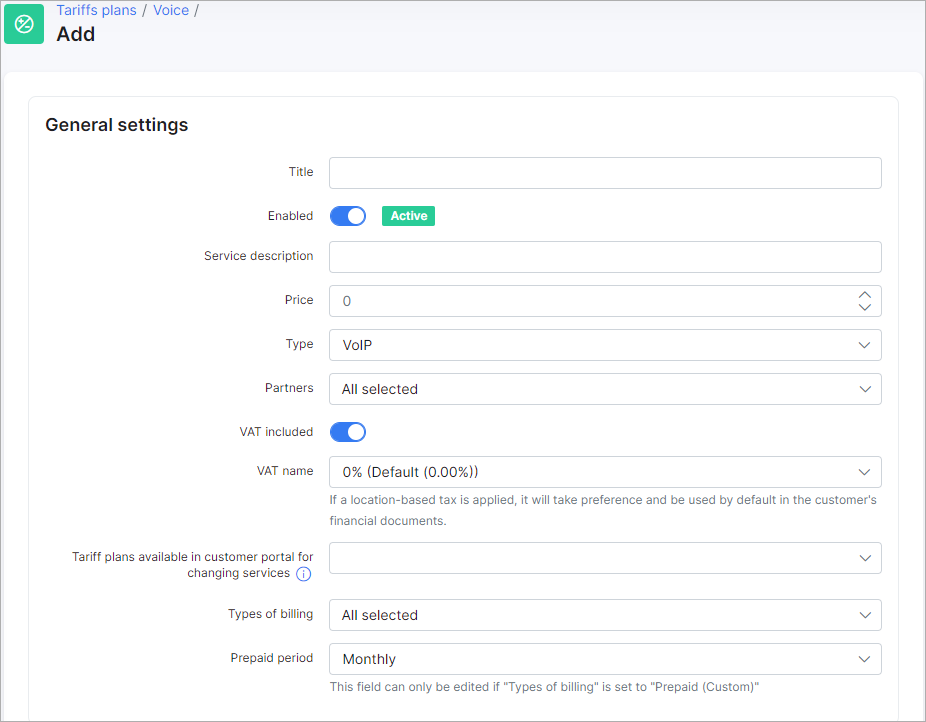
- Title — the name of the tariff in the list of voice tariffs.
- Enabled — enable or disable this plan (when disabled, you can't create new services).
- Service description — the description of the plan.
- Price — the price for the service.
- Type — the options are VoIP, Fix, or Mobile.
- Labels — select one or more labels to identify this tariff.
- Partners — the partners this plan is available to.
- VAT included — whether VAT is included in the price of the plan.
- VAT name — the percentage of the VAT.
 First add the tax rate in Config → Finance → Taxes, then select it in the VAT name field. For more information, see Taxes.
- Tariff plans available in customer portal for changing services — the list of other tariffs the customer can switch to from the current tariff on the Customer portal. For more information, read My Services.
 If the customer is on this tariff plan and the Portal configuration permits plan changes, they can select any plan from the dropdown list to switch to.
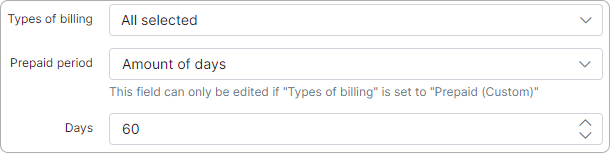
- Types of billing — the types of billing the plan is available for.
- Prepaid period — by default, it is set to Monthly and customers are charged for a month. You can also select Amount of days, which shows another field, Days, where you set a custom period in days (7 days (week), 10 days, etc., up to 365 days).

- Bandwidth — the bandwidth reserved for the voice service, in kbit/s. It sets how much capacity is set aside for calls on this plan. Enter
0for no bandwidth limit. - Priority — the traffic priority assigned to the voice service, where
1is the highest priority. It determines how voice traffic is prioritized over other traffic on the network during congestion.
¶ Plan availability
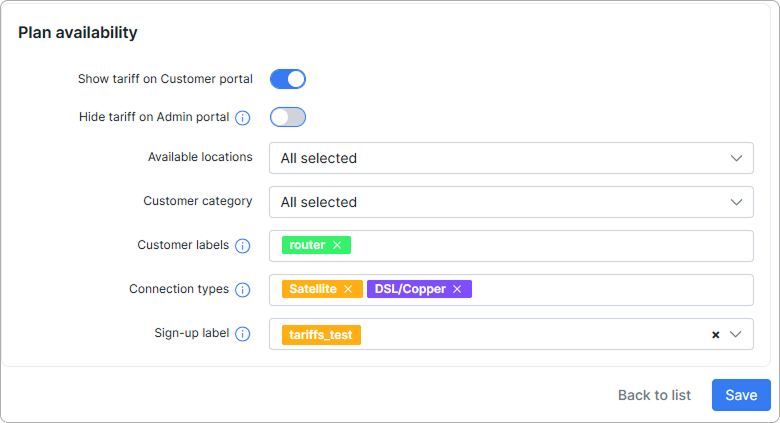
-
Show tariff on Customer portal — enable this option to make the tariff appear for ordering by customers.
-
Hide tariff on Admin portal — when this option is enabled, the tariff is not available to add as a service if the customer's location, category, and/or label differs from the tariff's values.
-
Available locations — select available locations.
-
Customer category — select the customer category (Individual, Business, or All).
-
Customer labels — select labels if you want this tariff to be available only for customers with the selected labels. Labels let you efficiently manage which services customers can order on the Customer portal.
-
Connection types — choose one or more connection types to filter tariffs by linking them to coverage maps.
-
Sign-up label — highlight tariff plans on the sign-up website with marketing labels like Best offer, Promotion, etc. Labels can be configured on the Labels config page. See also Sign-up flow.
To learn more, read:
You can automatically create transaction categories for the respective tariff plan.
To learn more, read Load categories from tariffs.
Once the voice plan is created, you can edit or delete it with the icons in the Actions column of the voice plans list:  or
or  .
.
¶ Mass actions
You can change labels and connection types on several voice plans at once. On the Tariff plans → Voice list, select the plans with the checkboxes in the table rows, or select all plans with the checkbox in the table header. Then open the Actions menu and choose an action. The number next to the action shows how many plans are selected.
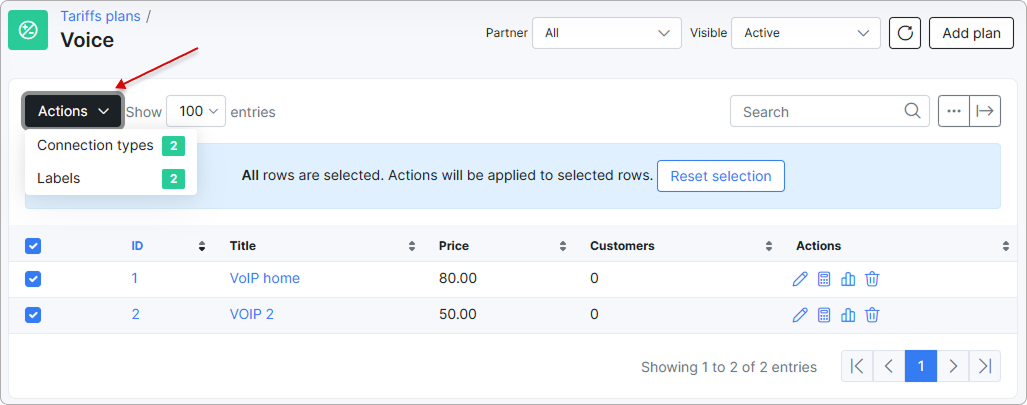
The following mass actions are available for voice plans:
- Labels — adds tariff plan labels and customer labels to the selected plans, or replaces the existing ones.
- Connection types — adds connection types to the selected plans, or replaces the existing ones. Connection types link plans to coverage maps.
To learn what each option in the action window does, see Internet plans (Mass actions).
¶ Statistical graph
To view a statistical graph of traffic for this plan, click the graph  icon in the Actions column.
You can filter the data displayed in the graph by hour, day, week, month, or year:
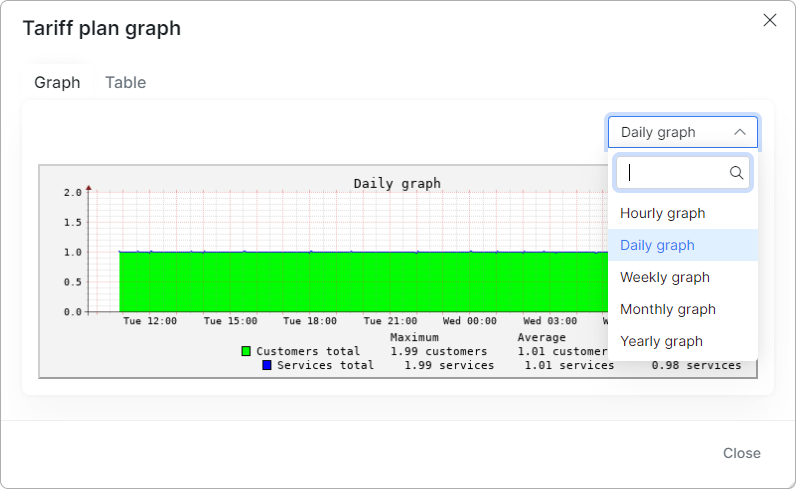
You can also view this data in a table and filter it by a specific period of time:
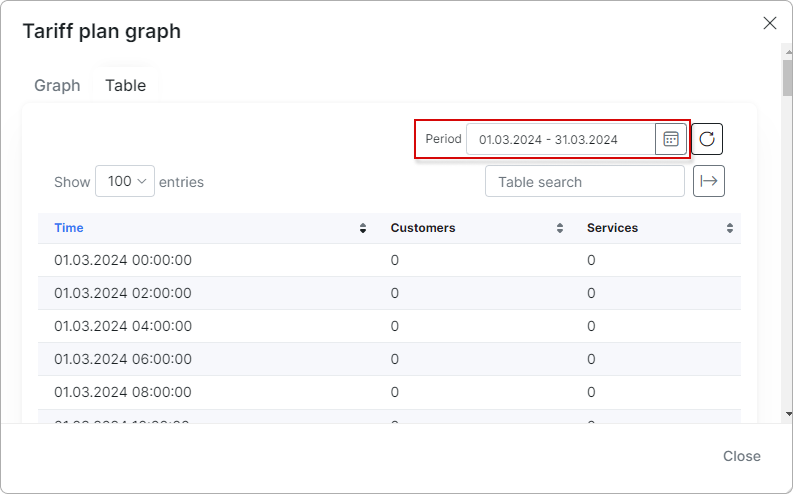
¶ Changing a plan
The Change plan  icon changes the plan for all customers subscribed to this plan in one operation. For details, see Change plan.
¶ Pricing
Pricing controls how Splynx rates calls and other voice events for a Voice plan. Here you choose which rate table the plan uses, mark up the provider's buy price, set free allowances that are included in the plan, and create rules that adjust prices for specific call types, days, or time windows. A built-in preview lets you test how any call will be charged before customers start using the plan.
To open it, go to Tariff plans → Voice, find the plan in the list, and click the Pricing icon  in the Actions column.
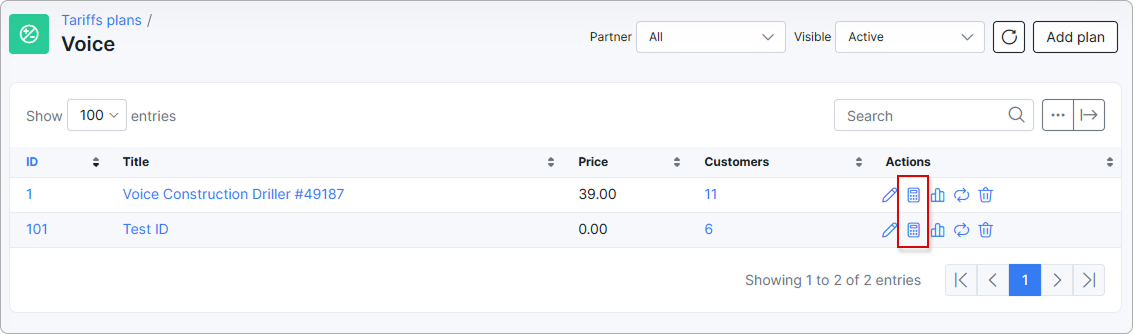
The Pricing configuration opens with two tabs: Groups, where you set up rates and rules, and Preview, where you test them.
The rates and prices configured here are based on the preconfigured/loaded rate tables for CDRs. For CDR processing, see Voice.
¶ Rates
The Rates section, at the top of the Groups tab, links the plan to a rate table and defines the base markup applied to it.
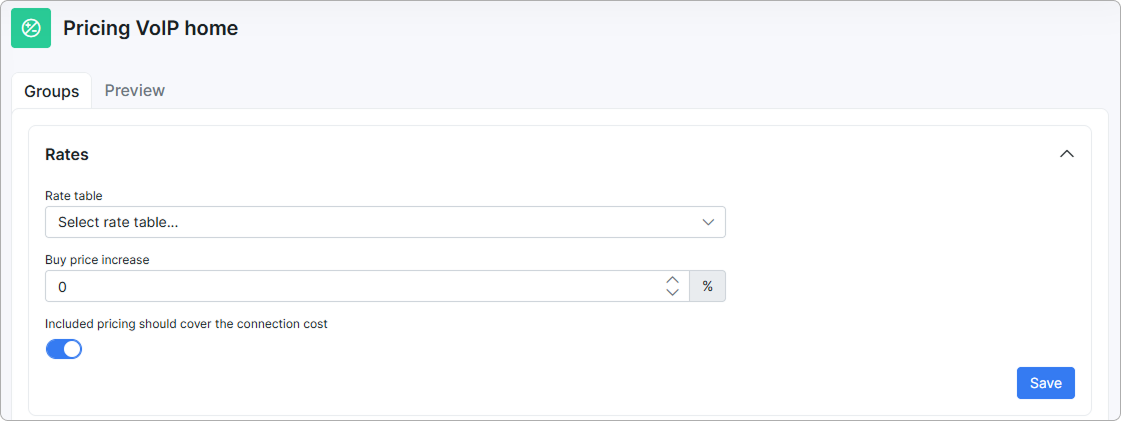
- Rate table — select the rate table that holds the per-destination prices for this plan.
- Buy price increase — a percentage added to the provider's buy price to form the sell price. For example,
0sells calls at the buy price, while20adds a 20% markup. - Included pricing should cover the connection cost — when enabled, the connection cost (call setup fee) is taken from the customer's included allowance instead of being charged separately.
Click Save to store the rate settings.
¶ Included pricing
Included pricing defines the free allowances bundled into the plan — for example, a number of call seconds included before charges begin. Use the + button to add an entry and the refresh button to reload the table.
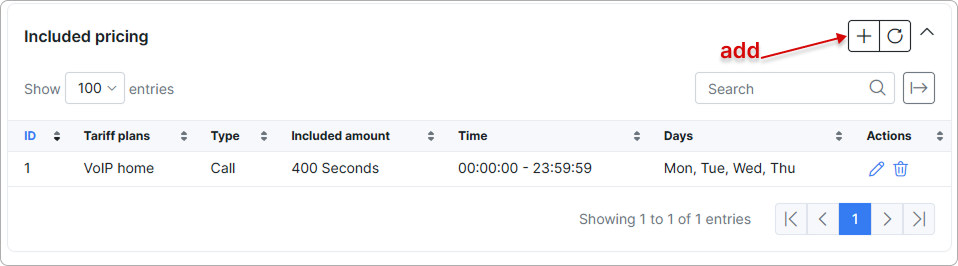
Each entry shows its ID, Tariff plans, Type, Included amount, Time, Days, and Actions.
To add an allowance, click + and fill in the Add included pricing dialog:
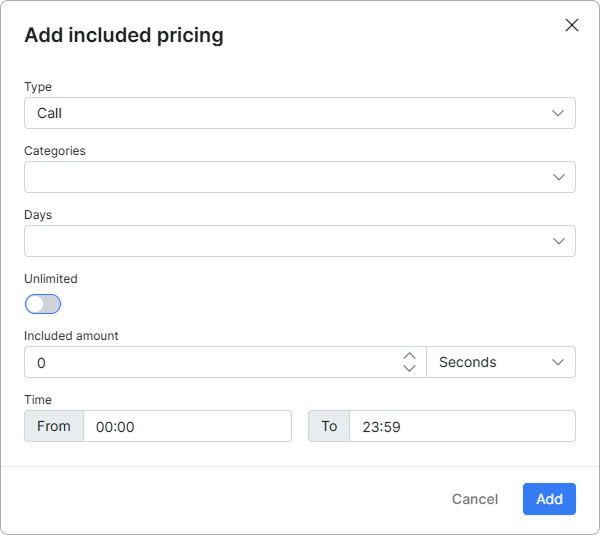
- Type — the event the allowance applies to (e.g., Call).
- Categories — the rate categories the allowance covers. Leave empty to apply to all categories.
- Days — the days of the week the allowance is active.
- Unlimited — enable to make the allowance unlimited; the Included amount field is then ignored.
- Included amount — the included quantity and its unit (e.g., Seconds).
- Time — the daily window the allowance applies to, set with From and To.
Click Add to save the allowance.
¶ Pricing groups
Pricing groups apply price adjustments to a set of calls that match the conditions you define — for example, increasing or discounting the price for a call type during certain days or hours. Use the + button to add a group and the refresh button to reload the table.
Each group shows its ID, Tariff plans, Title, Type, Time, Days, Operation, Value, and Actions.
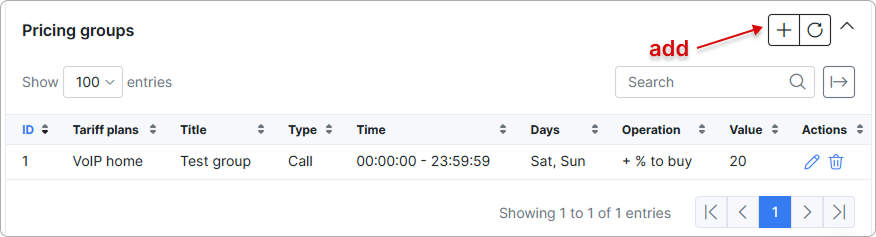
To add a group, click + and fill in the Add pricing group dialog:
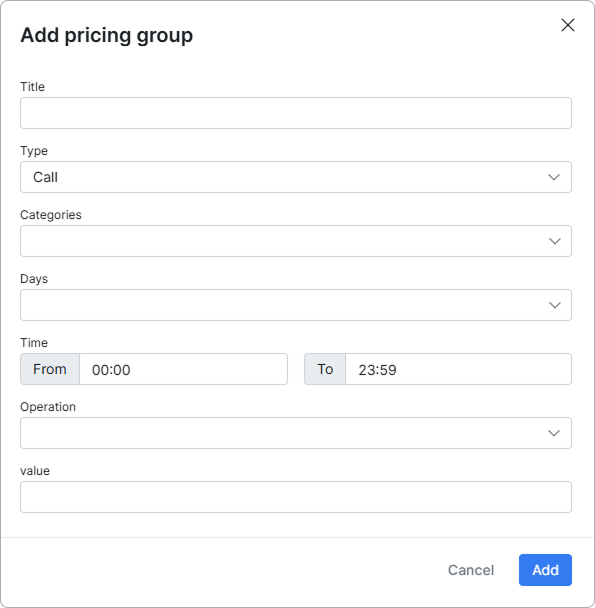
- Title — a name to identify the group.
- Type — the event the rule applies to (e.g., Call).
- Categories — the rate categories the rule covers.
- Days — the days of the week the rule is active.
- Time — the daily window the rule applies to, set with From and To.
- Operation — the adjustment to perform on the matching price.
- Value — the amount used by the operation.
Click Add to save the group.
¶ Preview
The Preview tab lets you test how a call will be rated under the current settings without making a real call. Enter the details of a sample call and click Preview to see the calculated price; click Reset to clear the form.
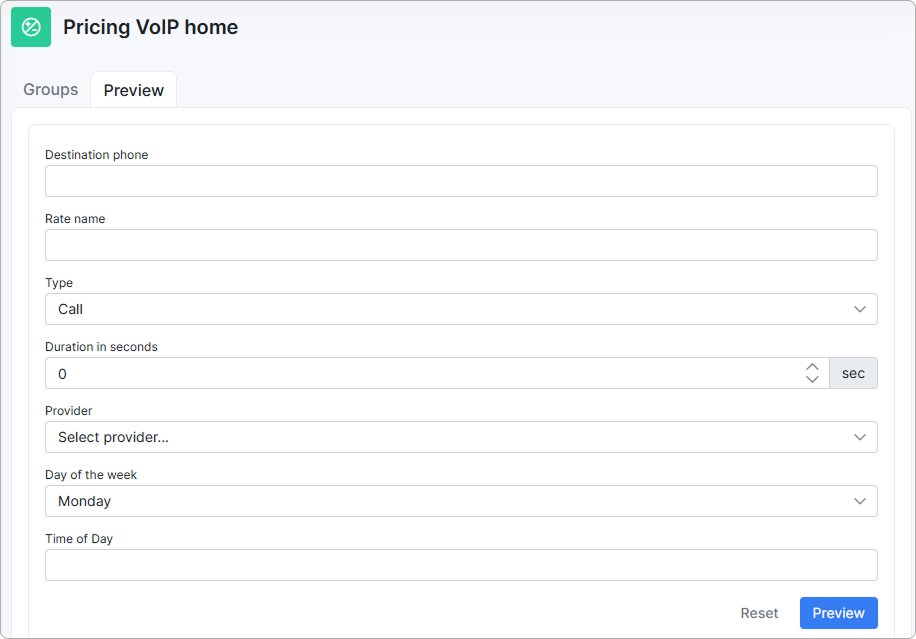
- Destination phone — the number being called.
- Rate name — the rate to match, if you want to test a specific one.
- Type — the event type (e.g., Call).
- Duration in seconds — the length of the call.
- Provider — the provider whose rates are used.
- Day of the week — the day the sample call takes place.
- Time of Day — the time the sample call takes place.
The preview reflects the rate table, included pricing, and pricing groups currently saved for the plan. Save your changes before previewing to test the latest configuration.
¶ Adding a service for the customer
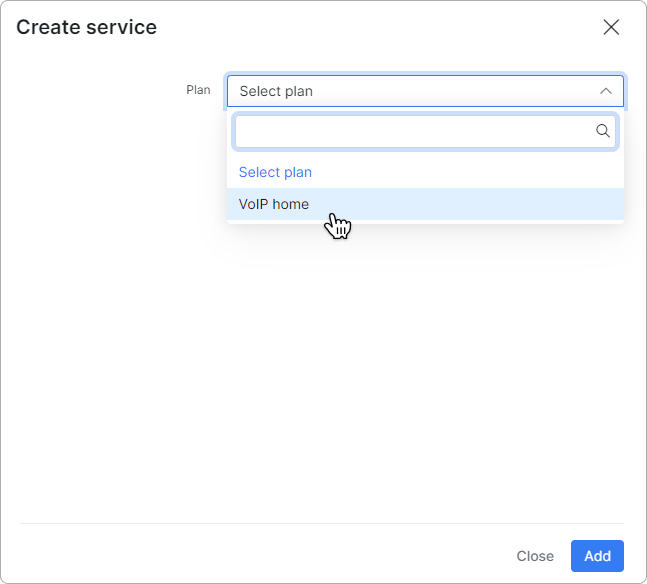
After creating a voice plan, you can assign it to a customer as a service. Go to Customers → List, select the customer, open their Services tab, and click the Add service button at the top right of the page:
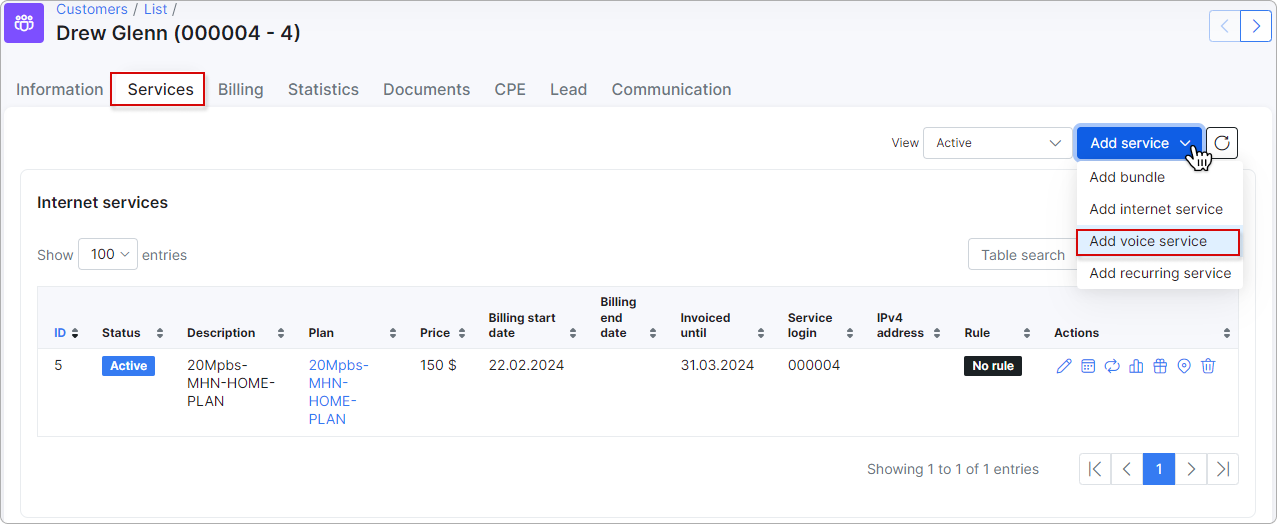
In the window that opens, select a plan from the dropdown and fill in the service fields:
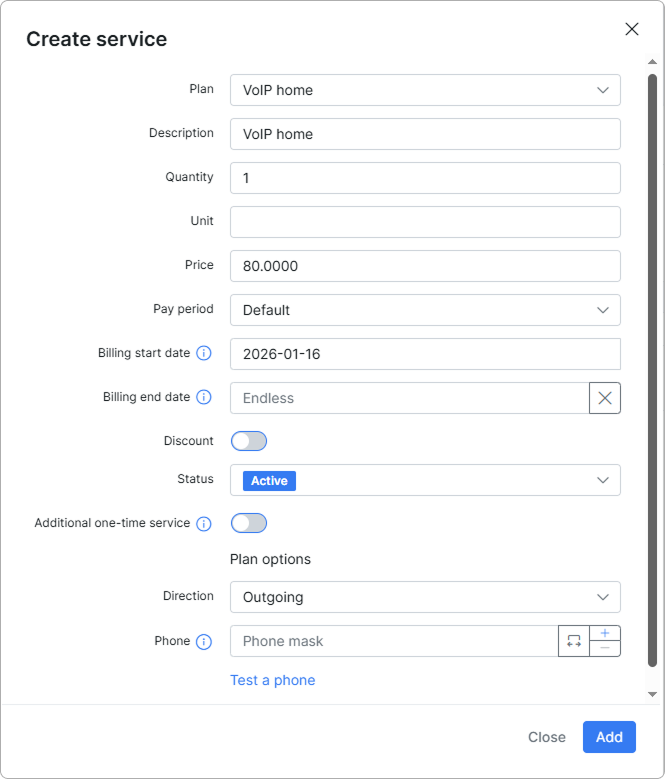
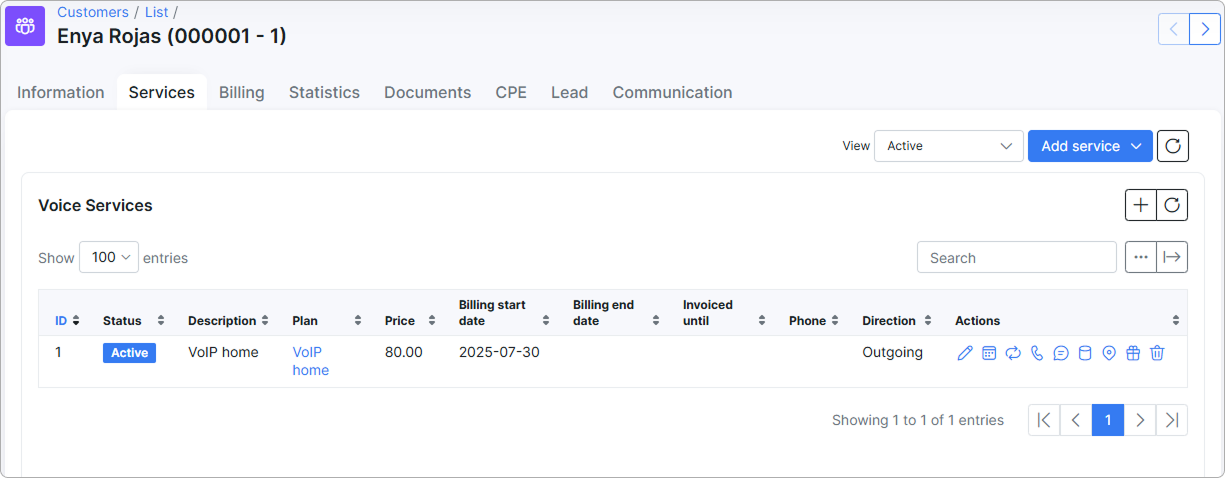
The service appears in the customer's services table:
¶ Updating the name and price
To change a plan's description or price, click Edit next to the plan. The following window opens with additional toggles under the description and price fields:
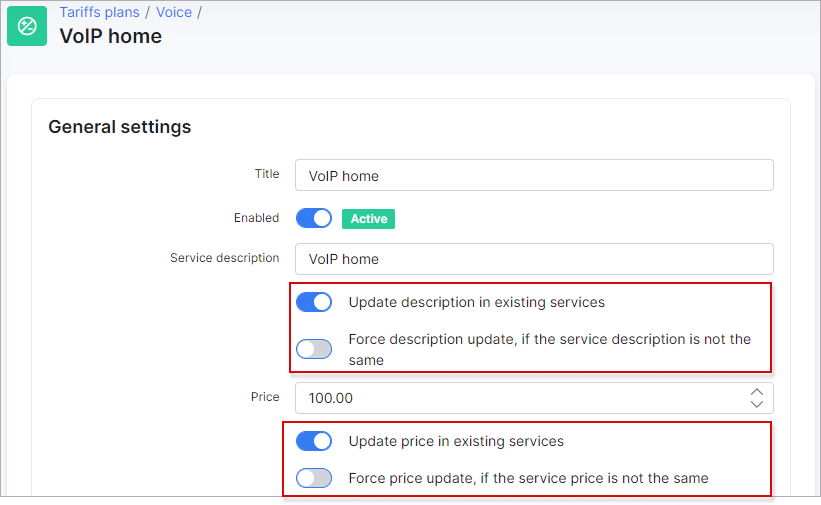
If you need to change the Service description and/or Price but do not want to overwrite changes made to the description and price in customer services subscribed to this tariff plan, enable Update description in existing services. Services are updated only if their description and price match the plan's. If they differ, they remain unchanged.
If you need to change the Service description and/or Price for all services subscribed to this tariff plan, enable Force description/price update, if the service description/price is not the same.
Be careful with the Force description/price update option: all previous changes made in services subscribed to this tariff plan are overwritten.
¶ Table management and export
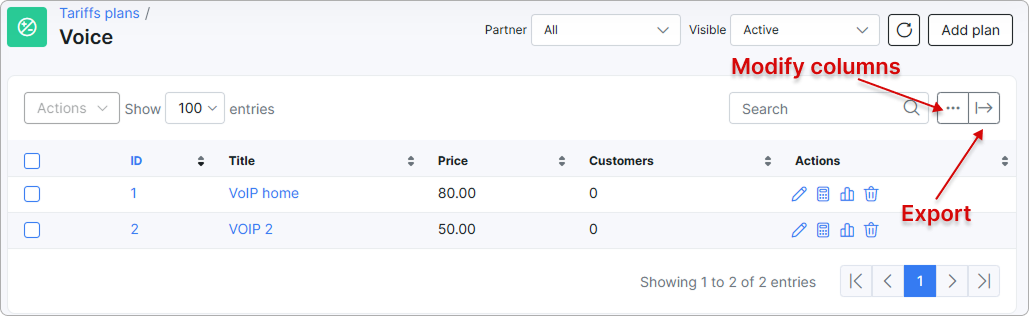
Like all tables in Splynx, you can modify the appearance of content to be displayed and export the table into Excel, CSV, or PDF formats. You can also copy or print the table: