¶ Dashboard
- Overview
- Account balance
- Unpaid invoices
- My services
- Tickets
- CAP and FUP
- Live bandwidth usage
- Speedtest
¶ Overview
The Dashboard is the main control & overview page on the Customer Portal. Here, customers can view general information about their account balance, unpaid invoices, current services, latest active tickets, CAP/FUP (if applicable for a customer's service), etc. If any payment add-ons are installed, its widgets will be displayed (only if the entry points are enabled in Config → Integrations → Modules list) to pay specific invoice (-s), settle outstanding amount with a single payment or top-up the customer's account balance.
¶ Account balance
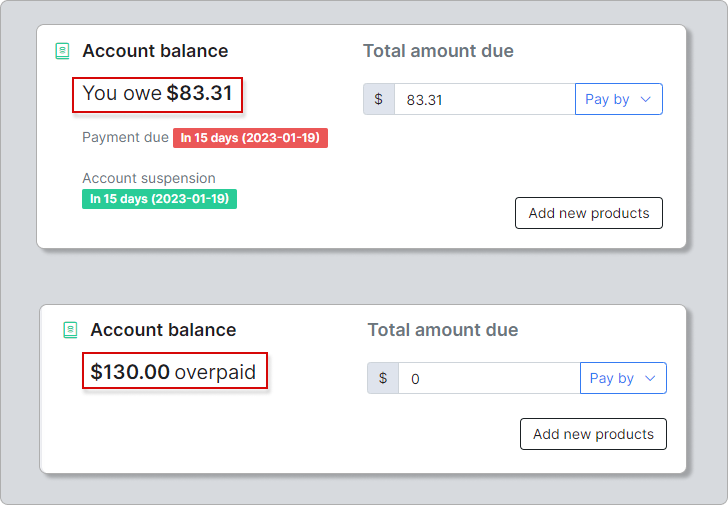
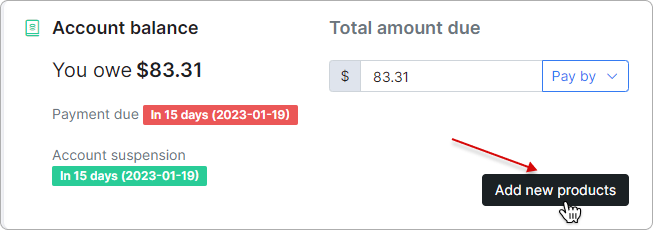
The customer's account balance is shown in an easy to understand format. We do not use plus or minus with the account balance which makes it globally suitable (from all perspectives).
You owe is used when the customer's account balance is in a debit (customer owes the company), and overpaid - if in a credit (customer has overpaid):
”Total amount due” shows the amount due for all unpaid/partially paid invoice (-s). Settling this amount will bring the customer’s account balance to zero. If the amount is zero in this section, the customer’s account is either paid in full or they are in credit:
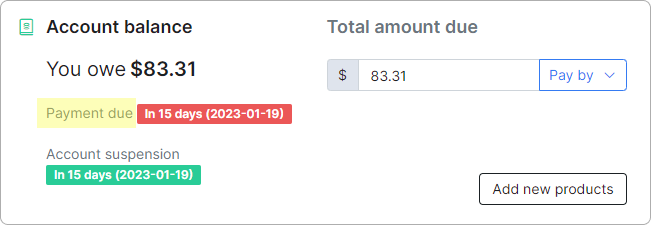
The “Payment due” function indicates the number of days (and date) before the next invoice is due.
This section is shown only if all of the following conditions are met:
- the customer's Billing type is Recurring;
- the option “Show ‘Payment due’” in Config → Main → Portal (Per partner settings → Dashboard) is enabled;
- there is at least one invoice due (but not overdue);
- if the account balance is less than the minimum balance.
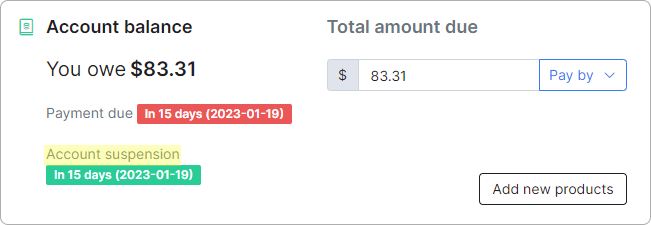
The Account suspension section indicates the number of days (and date) before the customer's account will be eligible for blocking (if the account balance is less than the minimum balance.)
This section is shown only if all of the following conditions are met:
- the customer's Billing type is Recurring;
- the option “Show
Account suspension” in Config → Main → Portal (Per partner settings → Dashboard) is enabled; - blocking is globally enabled in the admin config;
- if the account balance is less than minimum balance.
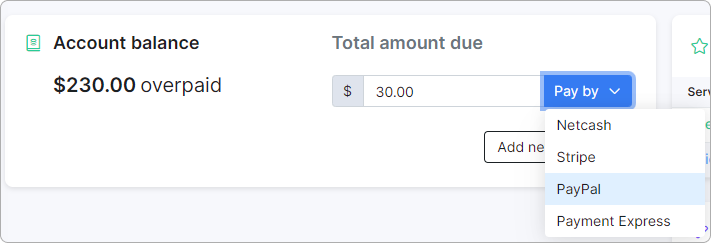
The customer can settle or top-up their account balance using the Pay by button. If more than one payment system is available, they can select a gateway from the drop-down menu:
After clicking the Add new products button, the customer will be redirected to the Order new products section:
¶ Prepaid customers
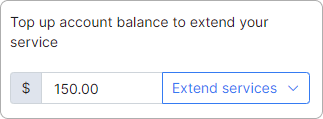
For prepaid customers, the number of remaining days for a service will be shown in the account balance section depending on the balance amount:
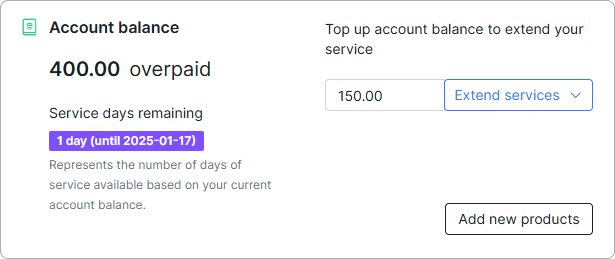
To top up the account balance, the prepaid customer should enter the desired amount in the ‘Extend service’ input and then click on the Extend services button:
By clicking on Add new products, the prepaid customer can add new services.
¶ Unpaid invoices
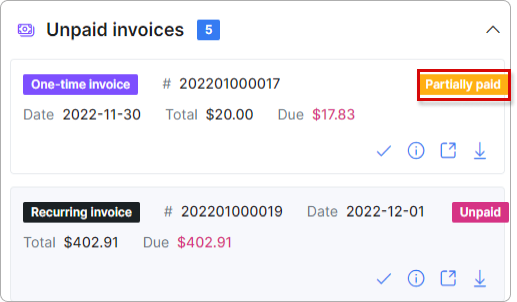
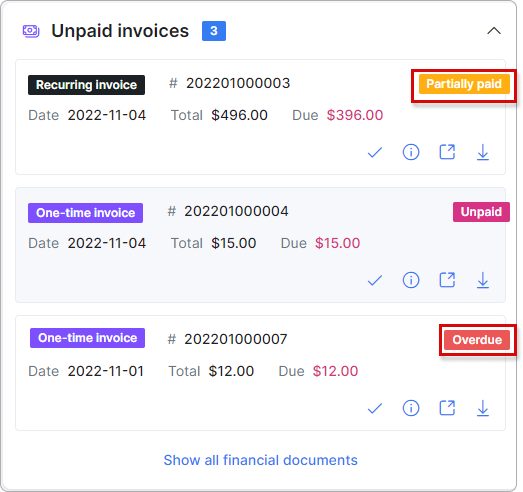
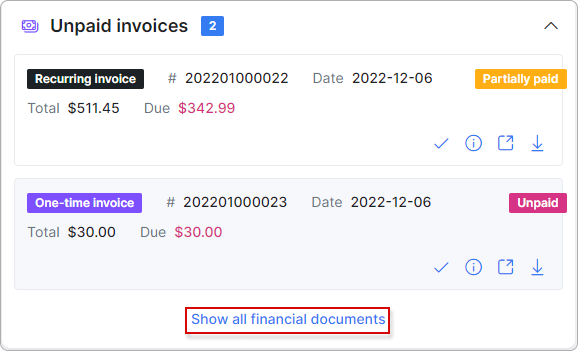
This section is only visible on the Dashboard if the customer has unpaid invoice(-s). Invoices are paid automatically if the customer's account balance is enough to fully settle it. If the available funds on the account balance is not enough to settle an invoice in full, the invoice will receive a Partially paid status:
If no payment is present, by default, invoices have an Unpaid status. Once the due date has passed, the invoice status will become Overdue:
The following information is shown in the unpaid invoice section: invoice number (#), invoice date (Date), the total invoice amount (Total) total (Due).
The customer can manage their unpaid invoices with the following action buttons:
 - the customer can pay the invoice with the Pay button. If there is more than one payment gateway available, the customer can choose which payment gateway to use:
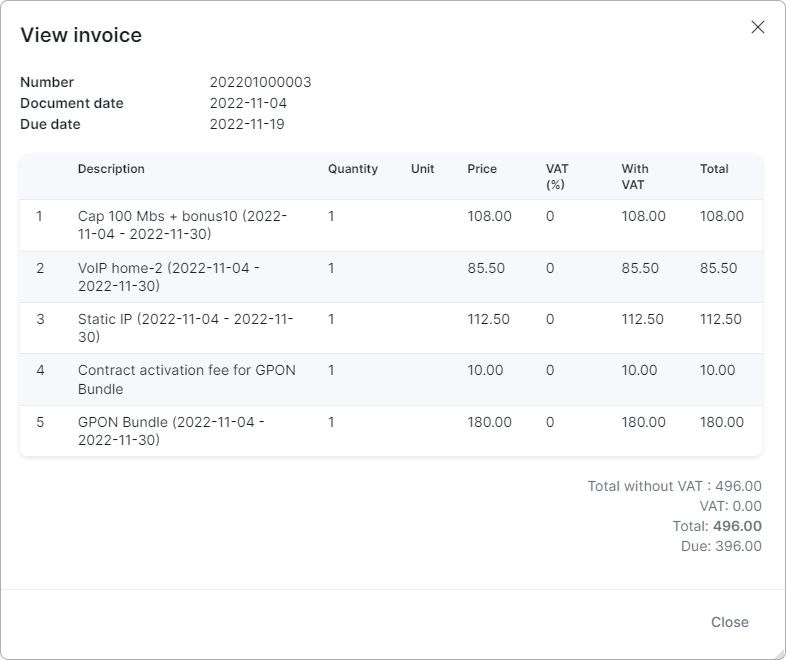
 - the Info button. Detailed information about the invoice:
 - the View button will open the invoice in a new browser window in pdf format.
 - with the Download button, the customer can download the invoice as a pdf file.
To see all financial documents, click on Show all financial documents. You will be redirected to Finance → Documents.
¶ My services
In this section, customer's services are shown with statuses Active, Paused (formerly Stopped in v4.0) and Online (for services that are active with a current online session).
To see statistics for the customer's services, click on the View Statistics button, you will be redirected to the Statistics section for internet and voice services:
The Manage My Services button leads to the Services page where the customer can manage their services:
¶ Tickets
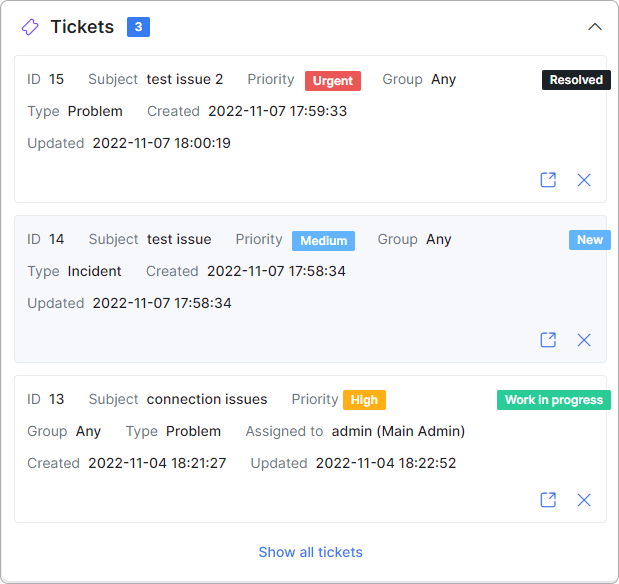
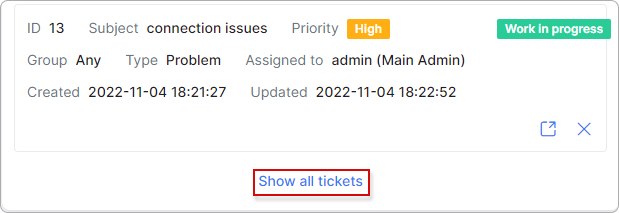
Here, all customer's open tickets are shown:
The information visible to the customer within the ticket section depends on the configuration in Config → Main → Portal → (Per partner settings → Tickets). The admin decides whether to show the following values: ticket ID, Subject, Priority, Status, Group, Type, Assigned to, Created date & time and Updated date & time.
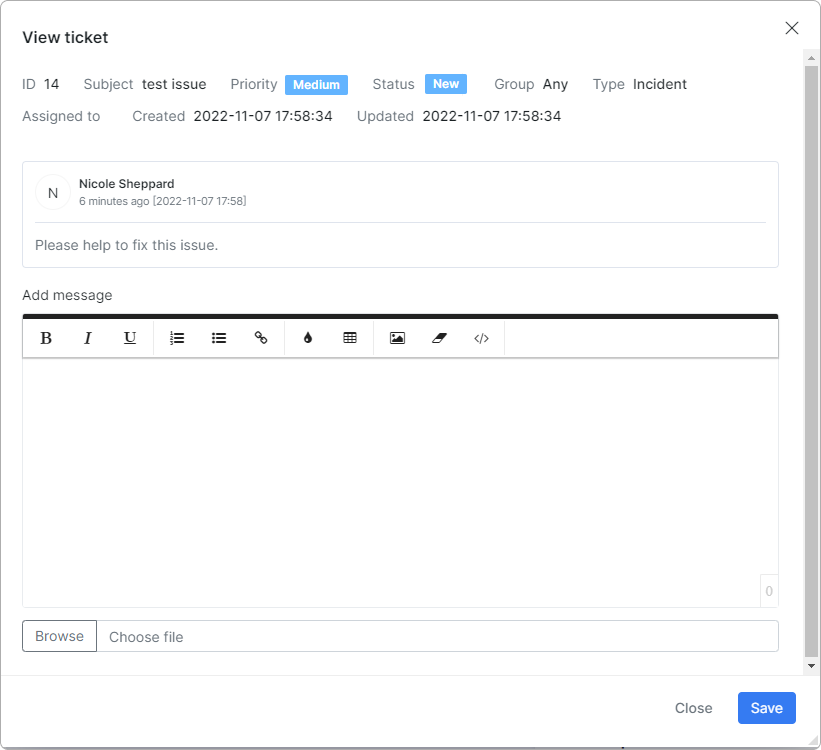
The customer can also close tickets from the Dashboard with the close ticket button  or view the ticket details and update it with the view button
  :
:
To view all tickets, click on Show all tickets located at the bottom of the Tickets section. You will be redirected to the Tickets page on the Customer Portal:
¶ CAP and FUP
The CAP/FUP section will be visible only if preconfigured in Config → Main → Portal → (Per partner settings → Dashboard).
In the example of the CAP section, you can see the current service description, the monthly traffic limit in GB, Used vs Traffic limit, Bonus and Used vs Bonus limit:
To learn more about CAP/FUP features, read these articles: CAP and FUP.
¶ Live bandwidth usage
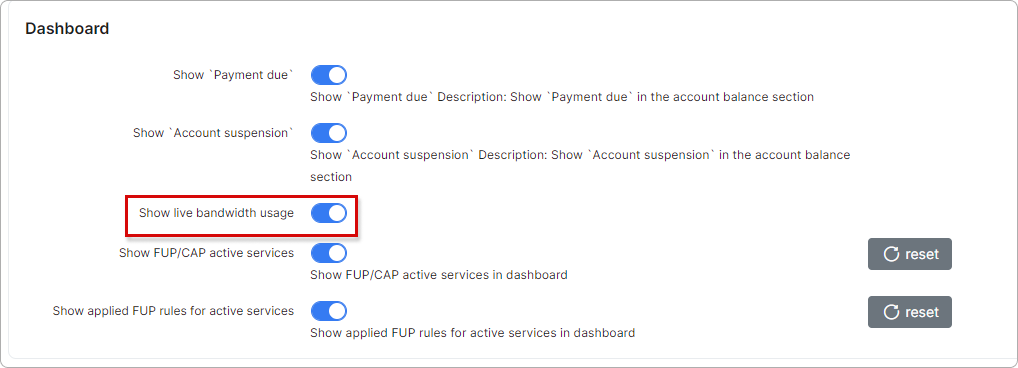
This section should be enabled in Config → Main → Portal → (Per partner settings → Dashboard):
The customer can choose the service graph and the interval in minutes to show the internet usage statistics:
To learn more information, please read MikroTik Live bandwidth.
¶ Speedtest
With the help of the Speedtest add-on, the customer can test their Download and Upload speeds in Mbps, Ping and Jitter in ms as well as see their IP Address. This test simulates a speedtest from the browser it’s run on to the Splynx server.
To make use of this feature, the add-on should be installed in Config → Integrations → Add-ons and then enabled for the customer's Dashboard in Config → Integrations → Modules list.

