¶ Internet plans
- Creating a plan
- Plan availability
- CAP and FUP rules
- Statistical graph
- Table management and export
- Updating the name and price
¶ Creating a plan
Here you can create new internet plans and configure them. You can specify search parameters like Partner or display plans with different visibility statuses. To create a new internet plan, navigate to Tariff Plans → Internet, click Add plan button at the top right of the page.
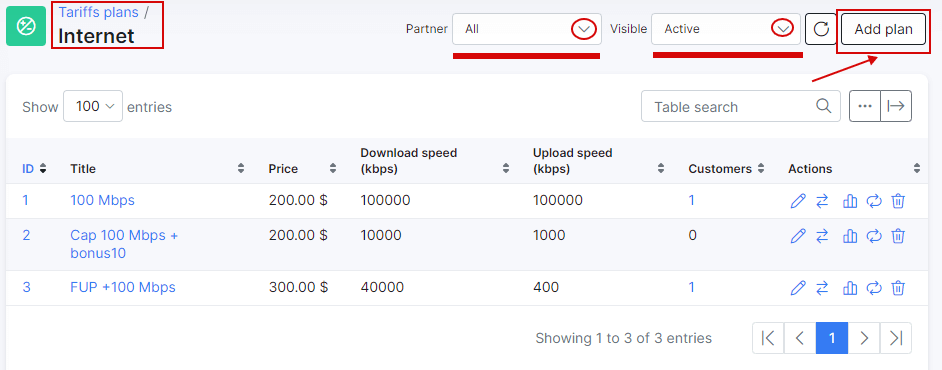
You will be redirected to the Add Plan page where you need to specify internet plan parameters:
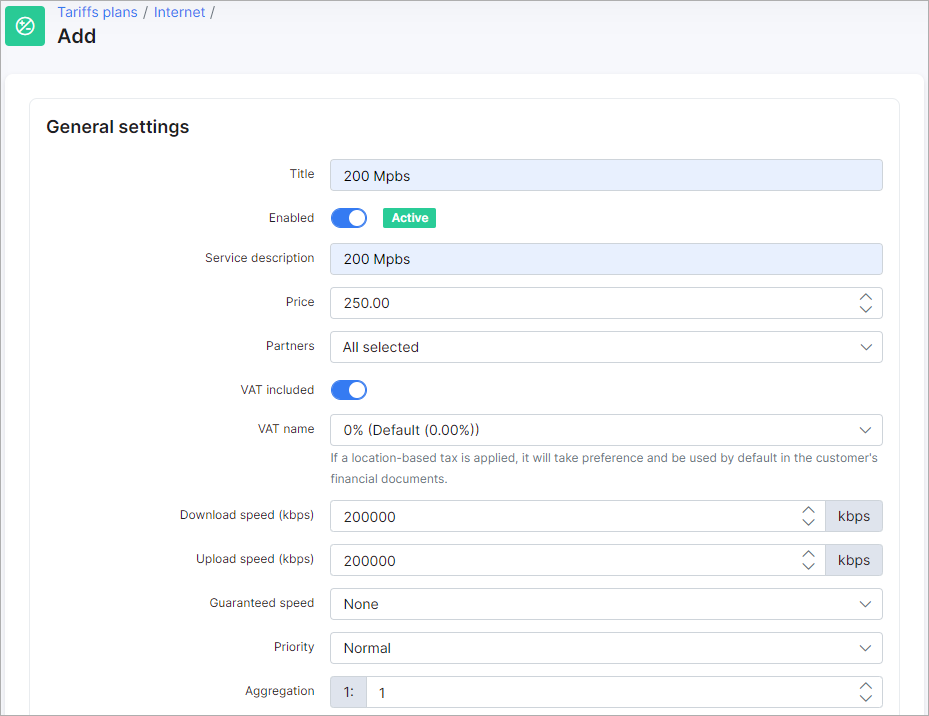
Here is a description of all available options:
-
Title - the name of the plan displayed in the list;
-
Enabled - enable/disable this plan. If disabled - you won't be able to create a service with this plan. Previously created services will be active;
-
Service description - the service description (under customer's internet services list);
-
Price - the price of the service;
-
Partners - select partners who will be able to use this plan;
-
VAT included - select whether the plan's price includes VAT or not;
-
VAT name - the percentage of the tax;
 To be able to set your VAT percentage amount, you need first add it in Config → Finance → Taxes. Then you can select it in VAT field. For more information see Taxes.
-
Download speed (Kbps) - the download speed limit of the internet plan;
-
Upload speed (Kbps) - the upload speed limit of the internet plan.
Values of Download and Upload speeds are MIR (Maximum Information Rate) – best-case scenario, maximum data rate available for flow, if there is any free part of bandwidth; -
Guaranteed speed - the percentage we guarantee for the end-user. Depends on the setup but it is recommended to select always None. This is the CIR (Committed Information Rate) – worst-case scenario, traffic will flow at this rate regardless of other traffic flows, at any given time; the bandwidth should not fall below this committed rate;
-
Priority - the priority of IP packets of the plan. Options are: Low, Normal, High. IP packets of customers subscribed to a plan with a High priority will be forwarded first in a case of traffic congestion. Values are 1 (high), 4 (normal) and 8 (low);
-
Aggregation - how many users will share the speed of the plan;
-
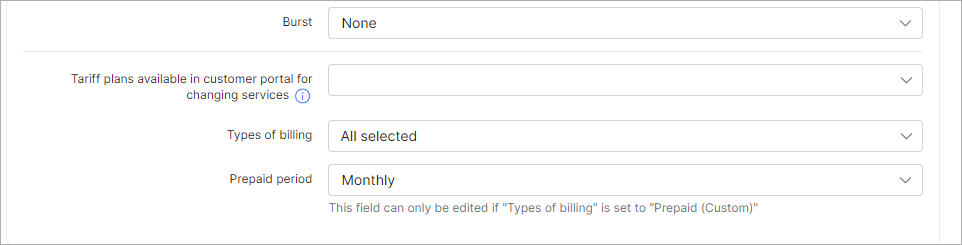
Burst - the maximum burst speed allowed. Options are fixed/relative.
-
Burst threshold - the percentage at which burst speeds are enabled/disabled;
-
Burst Time - the period of time used in the calculation of Burst values.
-
- Tariff plans available in customer portal for changing services - the list of other tariff plans available for changing from the current tariff in the customer's portal. For more information, please read the following tutorial: My Services;
 If the customer is on this tariff plan and the Portal configuration permits plan changes, they can select any plan from the dropdown list to switch to.
-
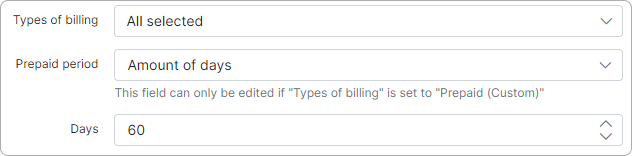
Types of billing - the types of billing the plan will be available to;
-
Prepaid period - by default, it is set to monthly and customers will be charged for a period of a month, but it is possible to select "Days amount" which will cause another field to appear: "Prepaid period (days)" - this will allow you to set a custom period in days. (7 days (week), 10 days, etc up to 365 days);
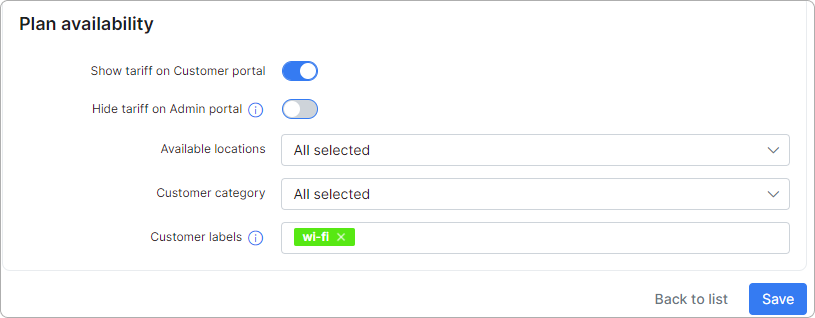
¶ Plan availability
-
Show tariff on Customer portal - enable this option to make the tariff appear for ordering by customers;
-
Hide tariff on Admin portal - if a customer’s location, category, or label does not meet the tariff’s criteria, the tariff will not be available for selection. When the option is disabled, the settings below apply only to the Customer portal. If the option is enabled, these settings will also apply to the Admin portal;
-
Available locations - select available locations;
-
Customer category - select the customer category (Individual, Business or All);
-
Customer labels - select labels if you want this tariff to be available only for customers with the selected labels. Labels allow you to manage efficiently the availability of services for ordering on Customer portal.
To learn more, please read Labels and Order new products.

You can automatically create transaction categories for the respective tariff plan.
To learn more, please read Load categories from tariffs
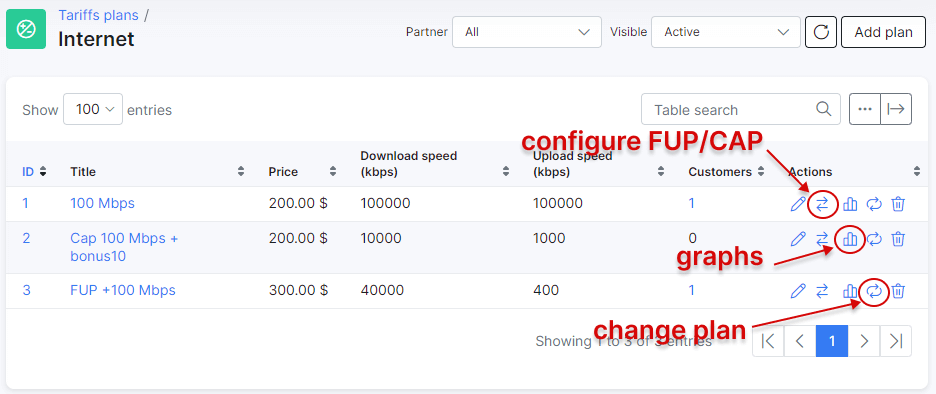
¶ CAP and FUP rules
Once the internet plan has been created, it is possible to configure CAP or FUP rules, see plan usage graphs and change plan for all services:
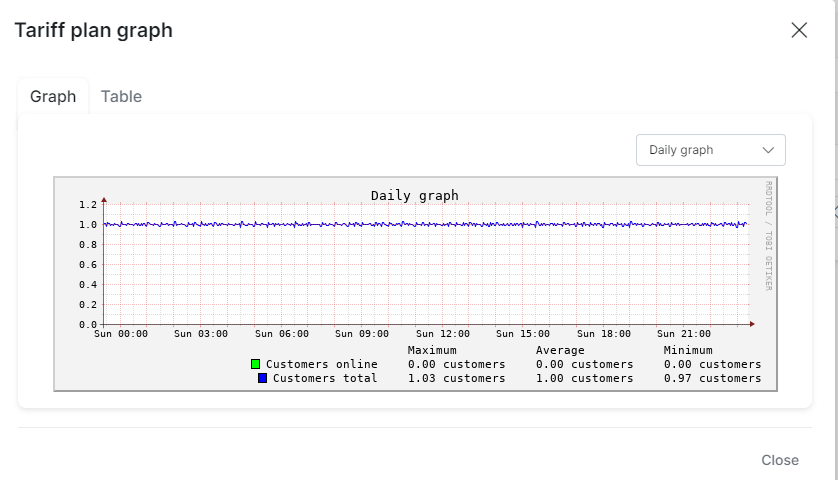
¶ Statistical graph
It is possible to view a statistical graph of traffic for this plan by clicking on the graph icon in the Actions column. Then the following window appears:
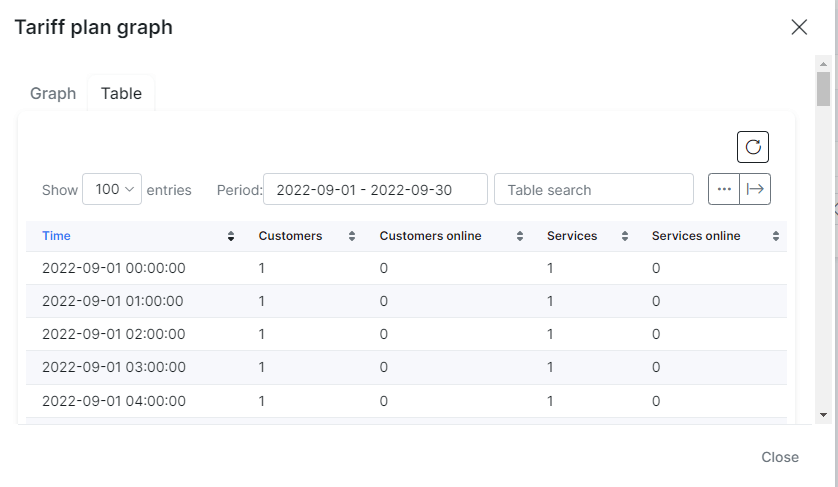
Alternatively, this data can be presented in a table format and can be filtered by a specific period of time:
The Change plan icon can be used to change the plan in mass action for all customers subscribed to this plan. Please follow the link for more information:
Tariff Change
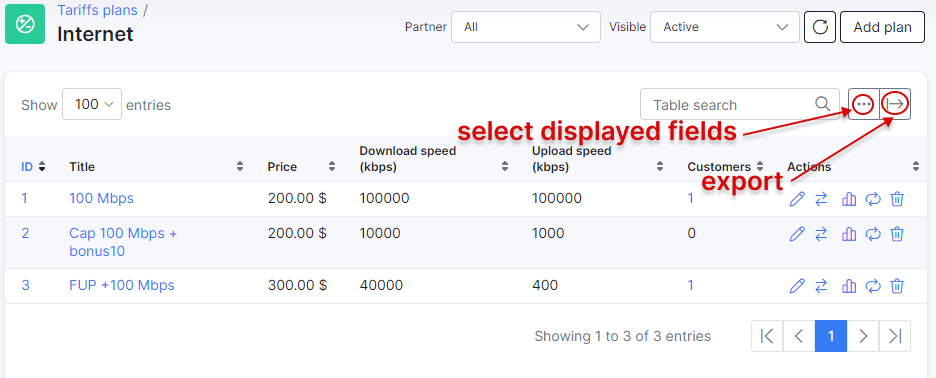
¶ Table management and export
It is possible to export a current view of plans list and select some additional columns to be displayed:
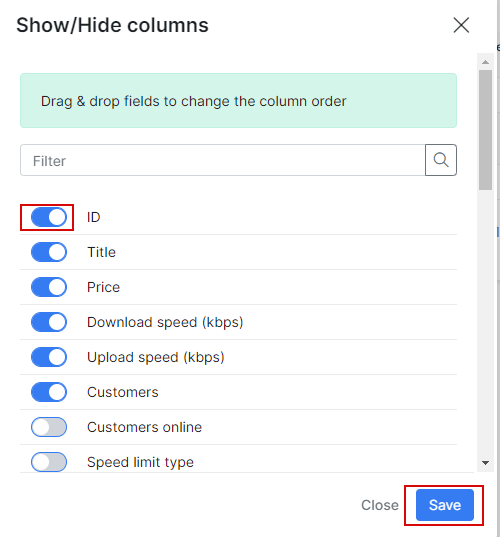
To select some new fields for displaying, enable them with a toggle and save the changes:
Now, when a new plan created, you can add some internet services for customers. Please use this guide as a reference.
Reports based on plan statistic can be found under Administration → Reports.
¶ Updating the name and price
Another option is updating the name and price of a plan. Sometimes a business needs to increase/decrease price for plans or change the description, and in Splynx you can do it by clicking on Edit  next to the tariff plan. The following window will open with the additional toggles under the description and price fields:
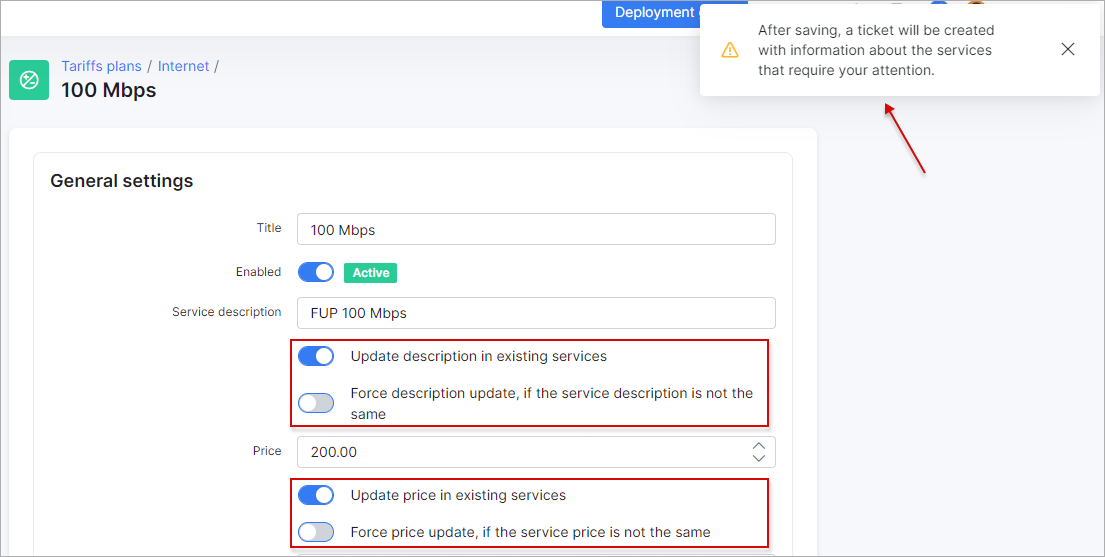
If you need to change Service description or/and Price but you do not want to overwrite the changes (if any) in description and price made in customer services subscribed to this tariff plan, enable Update description in existing services (meaning if they are the same). If the description and price are not the same, they will remain unchanged for such services.
In case you need to change Service description or/and Price even for all services subscribed to this tariff plan, enable Force description/price update, if the service description/price is not the same. Please be careful with this option because all the previous changes made in services subscribed to this tariff plan will be overwritten!