¶ Tickets Overview
¶ Introduction
The Splynx ticketing system was designed to empower technicians and meet customer needs through integration and automation. It offers all the functionalities you'd expect from a support platform for your team and customers.
In this tutorial, we'll learn how to use tickets and explore their features.
To help understand both perspectives, let's separate our ticketing system into two sections or views: one is the administrative perspective and the other is the customer experience.
¶ ADMINS
¶ Dashboard
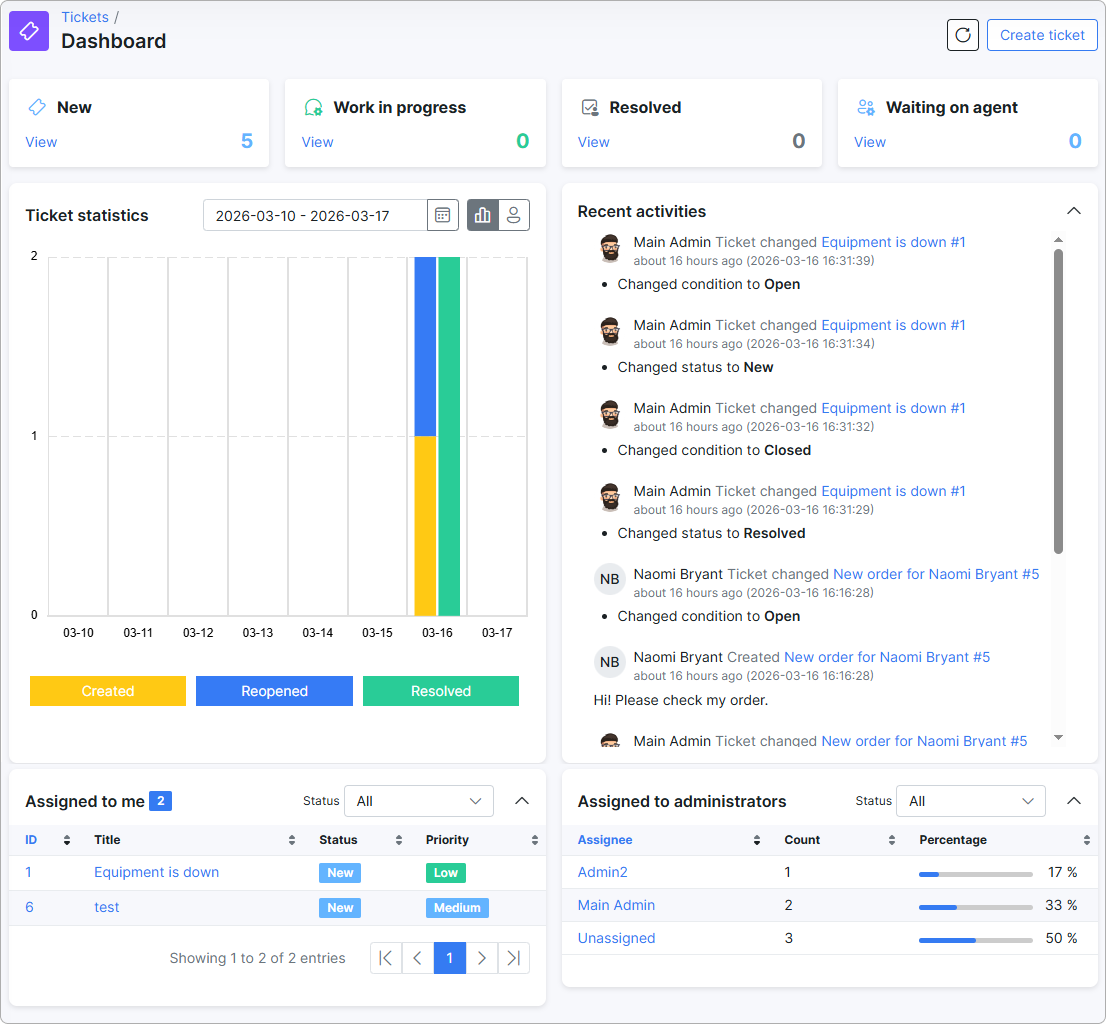
The ticketing dashboard shows the following sections:
- Number of all tickets in the system with the statuses New/Work in progress/Resolved and Waiting on agent;
- General and per-agent (top 10) statistics of tickets with date range selection;
- Live log of recent activities in tickets;
- Quick reference to the tickets that were assigned to the administrator currently logged into the system;
- Statistics of assigned tickets between administrators in the system.
¶ How to create a ticket
Administrators can create tickets in 3 ways:
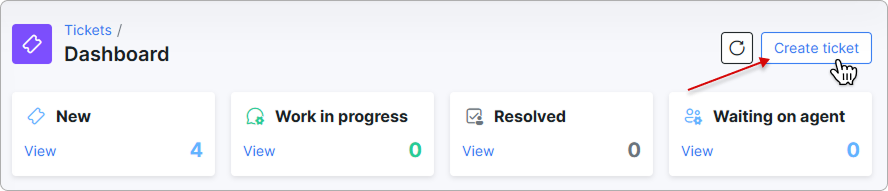
- In
Tickets → Dashboard, click the Create ticket button at the top-right corner of the page.
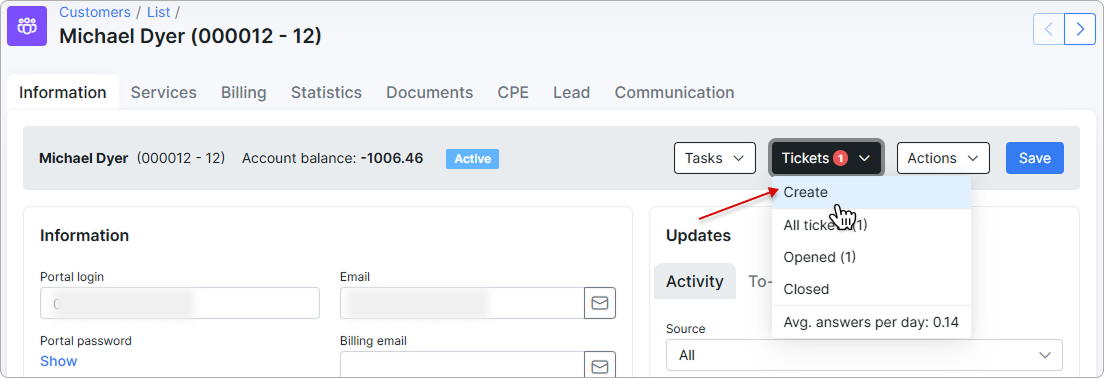
- Directly from a customer's / lead's profile by clicking the Tickets button and selecting the option Create from the drop-down menu.
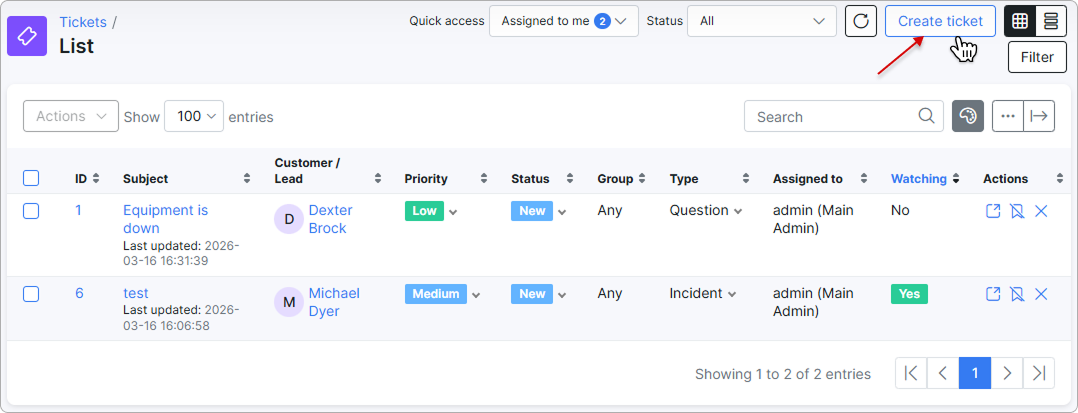
- Within the list of New & open tickets Tickets → List, there is the
Create ticketbutton located at the top right of the page.
After pressing the button using any of the methods described above, you will be redirected to a new window where you need to complete the following fields, along with the message area:
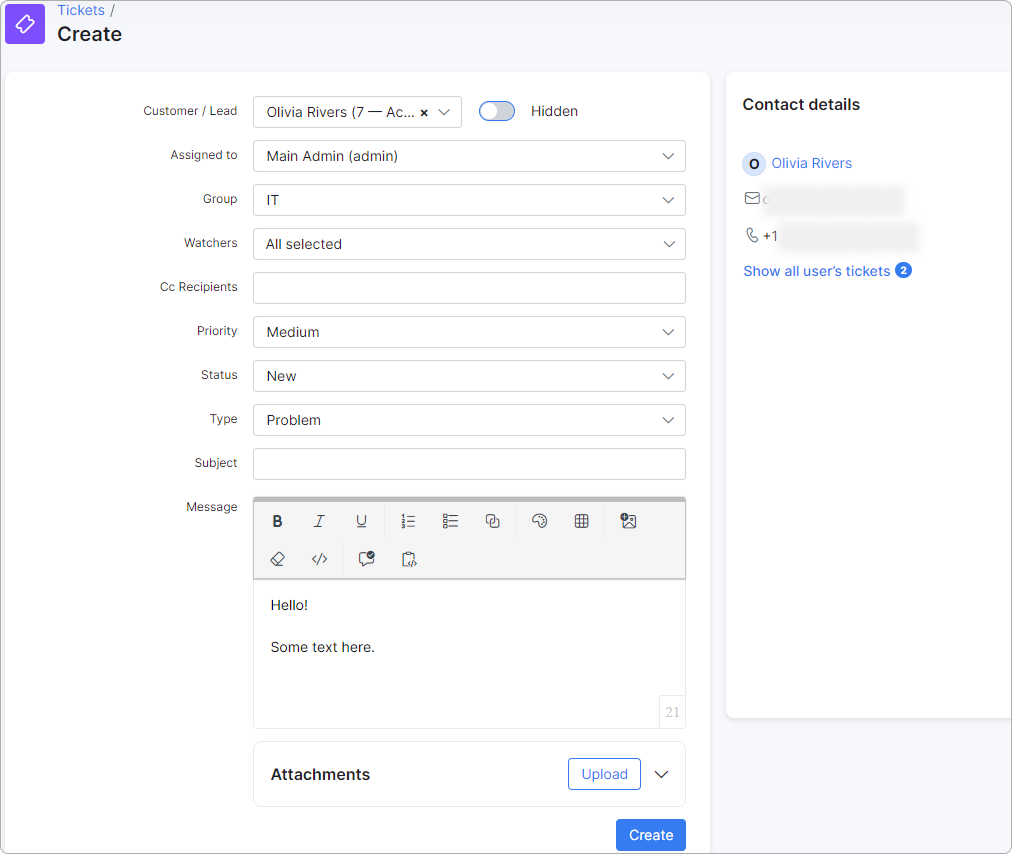
- Hide - a toggle that, when enabled, hides the ticket from the portal and disables customer notifications;
- Customer / Lead - for which client/lead to create a ticket;
- Assign to - the administrator to whom the ticket will be assigned;
- Group - the ticket can be filtered to a specific group of tickets depending on the context of issue. The new group (-s) can be created in
Config → Helpdesk → Miscellaneous ticket configuration(Ticket groups section); - Watchers - administrator in Splynx who tracks the progress of a specific ticket but is not responsible for it. The added watcher will be informed of any changes in ticket activity through notification. The notification and its template can be configured in
Config → Helpdesk → Ticket notifications; - Cc Recipients - CC recipients receive an exact copy of the ticket and any further
Reply Allresponses in the thread. For example, you are sending a ticket to a lead with the network project and you want to send a copy of your email to your managers, so that they are kept in the loop. Pay attention, all recipients of the email will also see who has been CC’d; - Priority - the urgency of the ticket which can be set to
low,medium,highorurgent; - Status - the current state of the ticket, which can be set to
New,Work in Progress,Resolved,Waiting on customerorWaiting on agent. The ticket statuses can be configured inConfig → Helpdesk → Miscellaneous ticket configuration; - Type - the reason for creating the ticket which can be set to
Question,Incident,Problem,Feature requestorLead. The ticket types can be configured inConfig → Helpdesk → Miscellaneous ticket configuration; - Send from - choose which outgoing mailbox the ticket is created from. Options follow the
{Sender email} ({Category})format — for example, support@isp.com (Support). Only mailboxes available to the current admin (and, where applicable, the customer's partner) are listed. Defaults to the Support mailbox configured under Config → Main → Email → Outgoing mailboxes;
Send from appears only when the New ticket (message to customer) notification is enabled under Config → Helpdesk → Ticket notifications. With that notification off, no email goes out on ticket creation, so the field is hidden.
- Subject - a relevant subject of the ticket, usually referring to the reason for opening the ticket;
- Message - the main text content of the ticket can be typed here;
- Attachments - used to attach files to the ticket. You can upload files in the following formats: jpeg, jpg, png, webp, svg, heic, doc, docx, txt, pdf, rtf, odt, ods, odp, odf, eml, csv, xls, xlsx, gif, mov, mp4, avi, wmv, kml, kmz. File size up to 50 MB
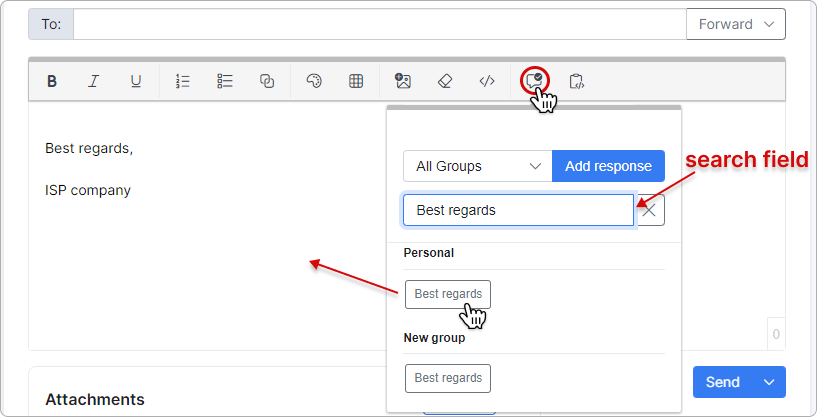
To minimize the typing process and save time of your team in general, use the Canned responses when creating tickets in Splynx. A new canned response can be added by clicking the Add response button.
 By default, a response added in this way will be associated with the
 Personal group.
After a response is added, simply click on  icon and choose your response to insert it into the ticket:
For more information, see Canned response guide.

In the Tickets module you can create new additional fields according to your needs.
For more information, see Additional fields tutorial.
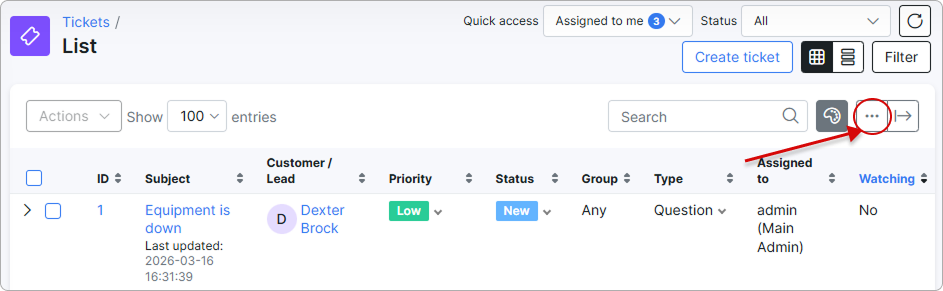
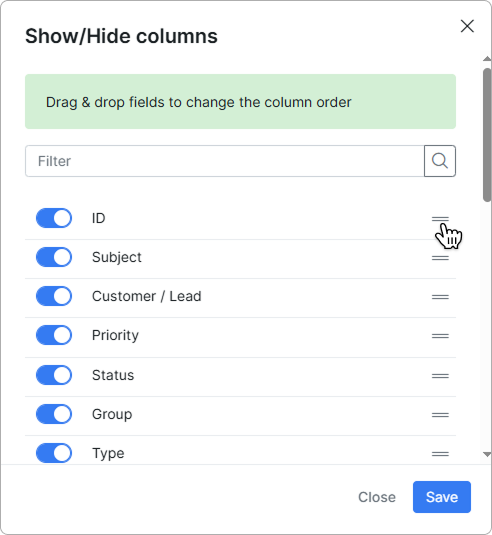
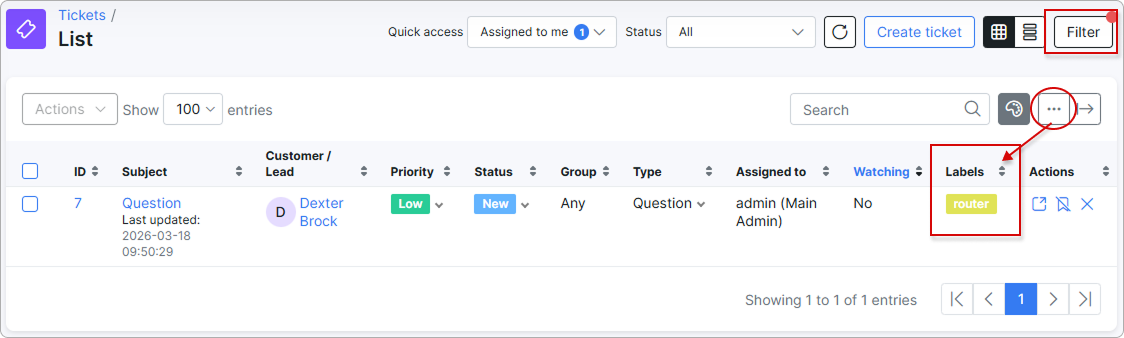
To show / hide the build-in columns or change its order in the ticket list, click on  icon at the top-right corner of the table:
¶ Ticket management
¶ Filtering
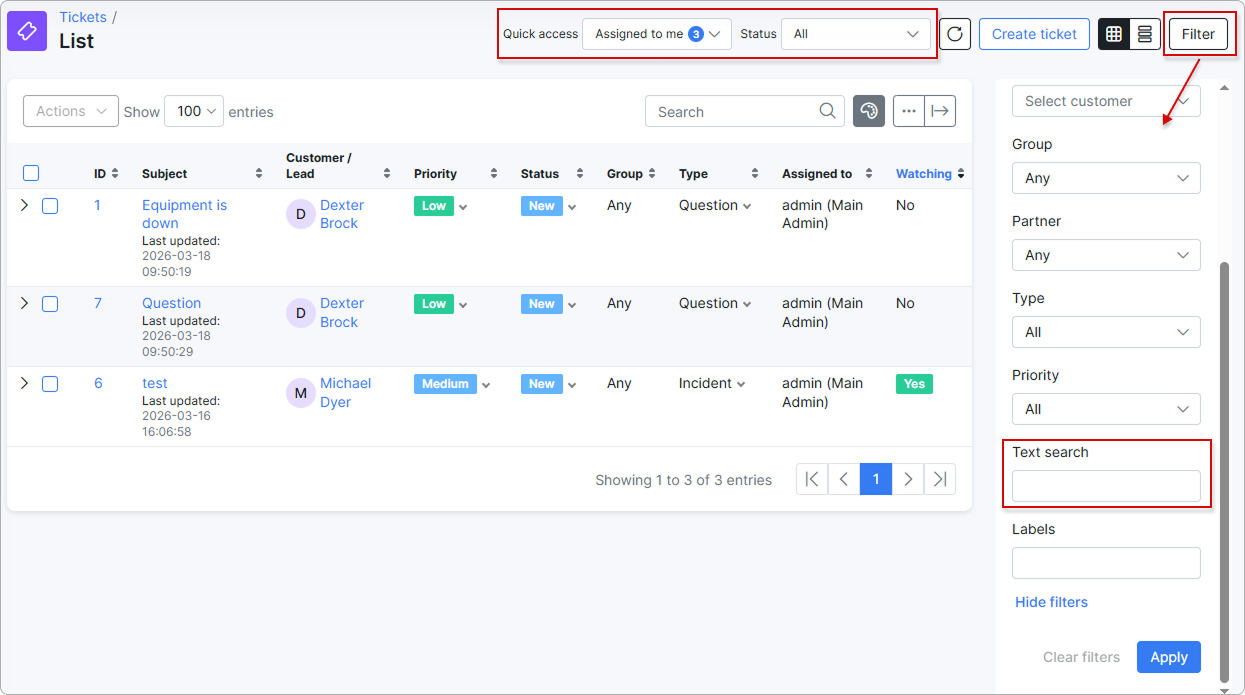
Once the ticket has been created, it becomes visible in the List table. Click on the Filter button to filter tickets by Condition, Period, Customer/Lead, Group, Partner, Type, Priority or Labels.
Also, it's possible to search for specific text with the help of Text search field in the filter sidebar. On the top bar, click on the Quick access menu to filter tickets by assigned administrator or click on Status to show tickets only in a certain status.
The list of tickets can be shown in two layouts: Table view and Card view. Use the  icons to switch to your preferred layout.
¶ Mass actions
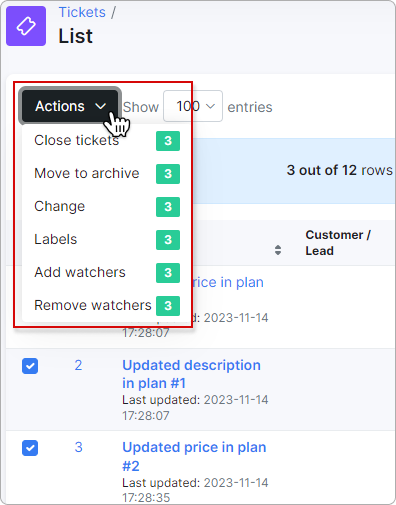
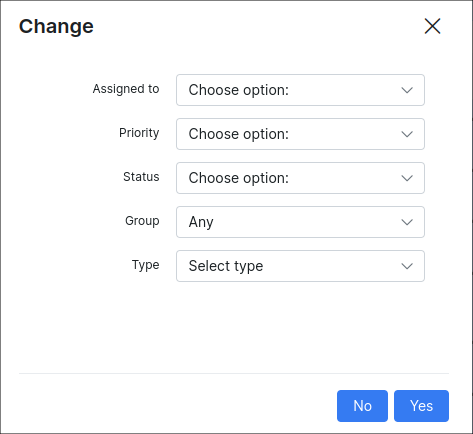
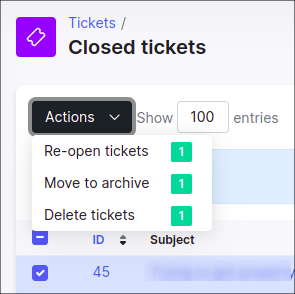
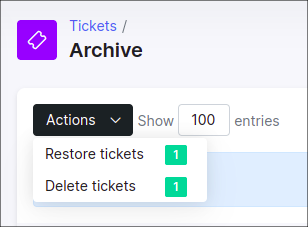
Use the mass Actions menu for selected ticket (-s) to reassign, change the status / priority, type of the ticket etc. directly from the tickets table. The available options in the drop-down list depend on the section that is currently opened.
EXAMPLES
Labels:
You can add labels to tickets using the mass action:
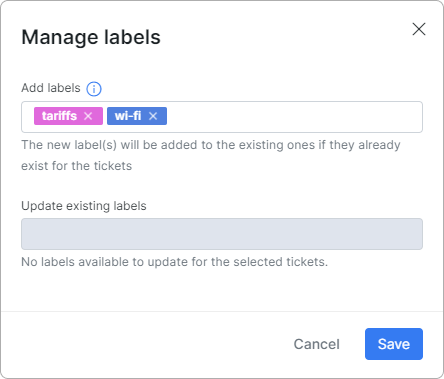
To configure the labels, navigate to Config → System → Labels, and select Tickets from the 'Select module' dropdown menu.
Change:
¶ Action buttons
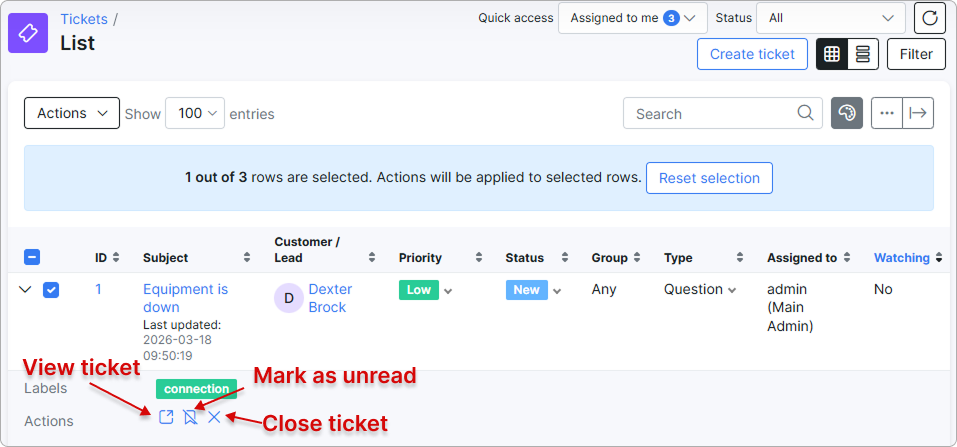
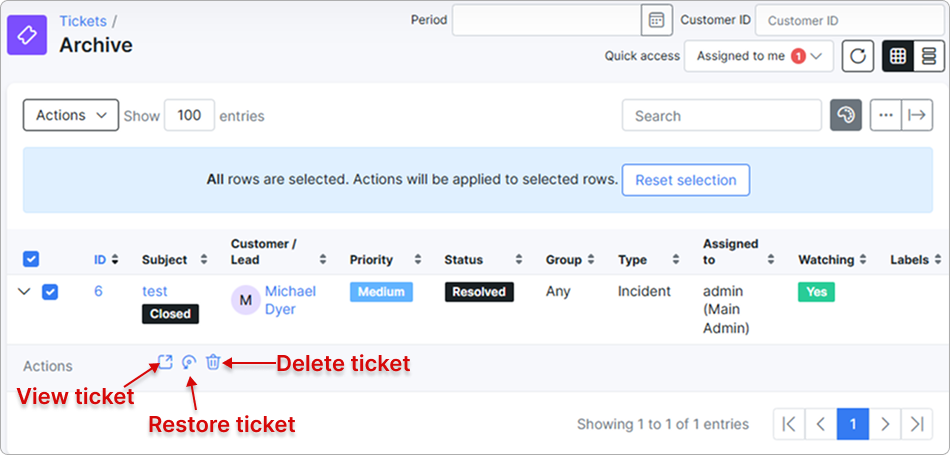
In addition, we can manage each ticket in the table with the available actions in the column with the same name:
Open tickets:
Closed tickets:
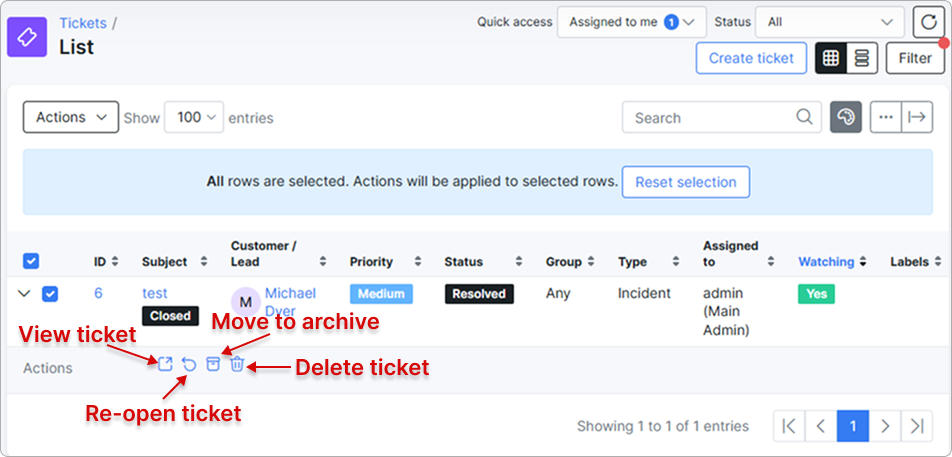
Archived tickets:
¶ Ticket working area
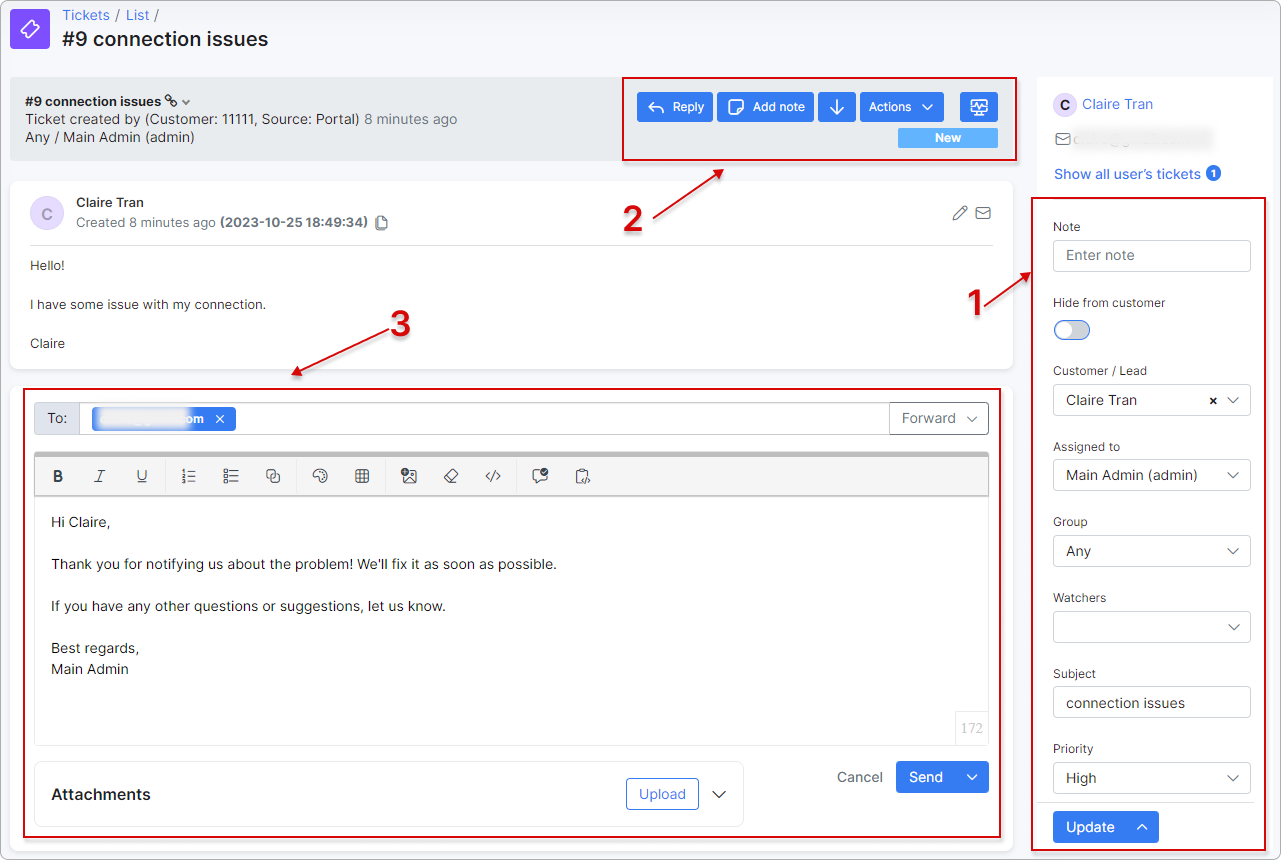
The ticket working area is divided into 3 parts:
- ticket parameters;
- action buttons;
- message area.
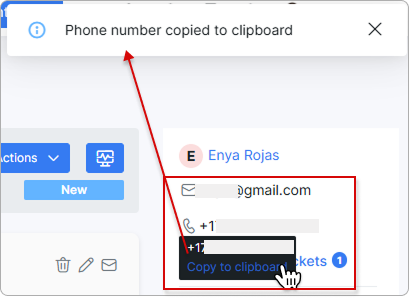
You can copy the customer’s phone number and email address by clicking the areas that appear on hover:
- Ticket parameters:
- Note - area for entering a note that is not visible to the customer. This note is only visible in the sidebar;
If another admin has added a note to the ticket, the admin will be notified before sending a reply:
- Hide from customer - toggle to hide/show the ticket for the customer;
- Customer/Lead - change the customer/list for whom the ticket was opened;
- Assigned to - reassign the ticket to a specific administrator;
- Group - change the group of ticket with which administrators are associated;
- Watchers - add watchers to view all ticket activity;
- Subject - change the subject of the ticket;
- Priority - change the urgency of the ticket;
- Status - change the current state of the ticket;
- Type - change the reason for the ticket;
- Labels - add labels to the ticket or remove them.
Update button is used to save changes made in the sidebar of the ticket properties. Note that the button has an additional function that allows you to save changes and change the status of the ticket at the same time.
- Action buttons:
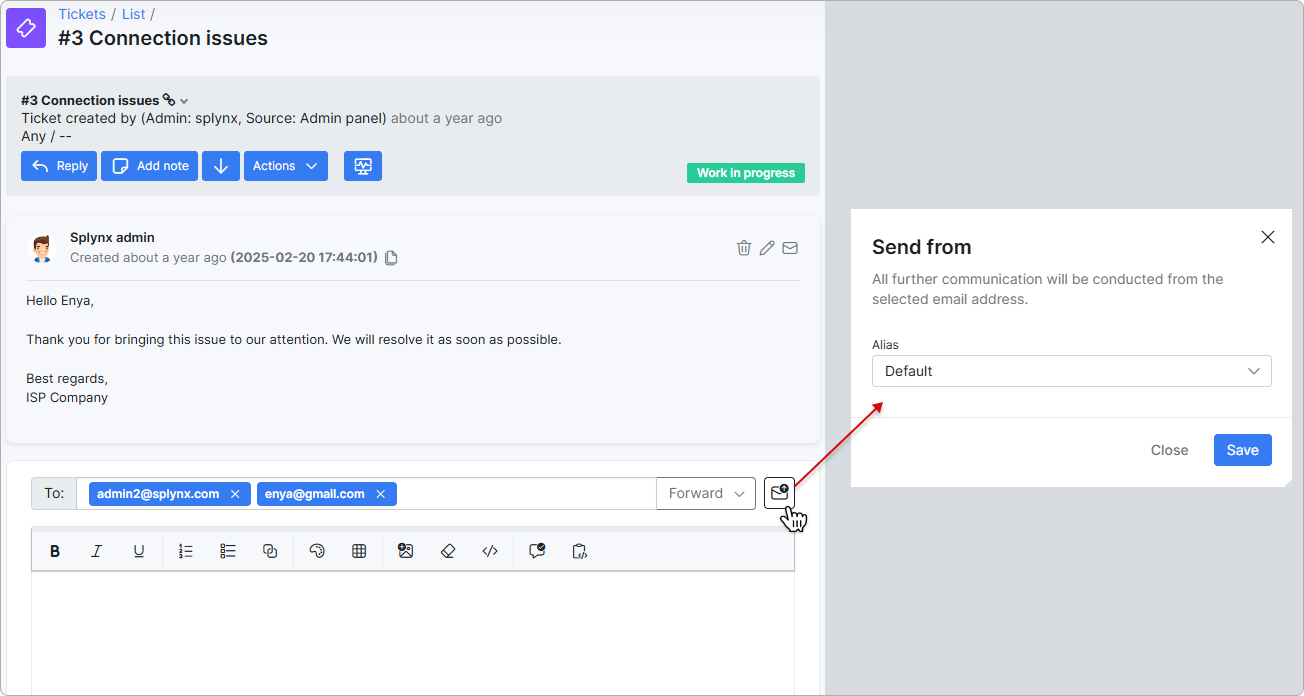
- Reply - used to respond to a message or add a message to a conversation. This button opens the message area for entering or inserting content from canned responses. The reply header shows To: (recipients as removable chips), a Forward / Reply mode selector, and a mailbox icon next to it. Click the mailbox icon to open the Send from modal — pick which outgoing mailbox the reply is sent from in the Alias dropdown (default:
Default), then clickSave. All further messages on this ticket will be sent from the selected address;
-
Add note - add a note to the ticket thread conversation, such note won't be visible for a customer, only to ticket's watchers or other administrators with a permission to view a ticket;
-
Jump to last message - scroll down to the last message in the ticket thread conversation;
-
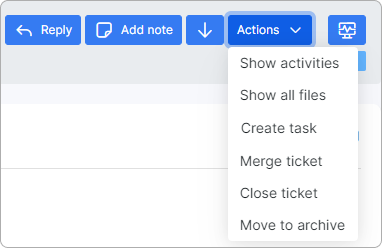
Actions drop-down menu:
-
Show activities - show all activities related to the current ticket, including automatic change of ticket status by the system;
-
Show all files - show all attached files in the ticket;
-
Create task - create a new task for support team, all pre-written messages, including notes, will be quoted in the description of the new task;
-
Merge ticket - merge one ticket into another ticket, e.g. you received two support requests about the same issue from the same customer;
To merge the tickets, they should be assigned to the same customer. -
Close ticket - close the ticket;
-
Move to archive - change the status of the ticket to resolved and move it to Archive;
-
-
Ping & Traceroute - assess the customer's device response.
To learn more, please read the Ping and Traceroute article.
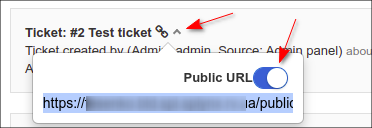
To share a ticket thread conversation with an agent who doesn't have a Splynx account, e.g. from another department in you company, you can enable Public URl for the ticket. Open the necessary ticket, next to its title click on a small arrow sign, a small pop-up window should appear, click on the Public URl toggle to enable the option, the direct link to the current ticket will be copied to the clipboard.
For each text block (message) of the ticket there are additional actions:
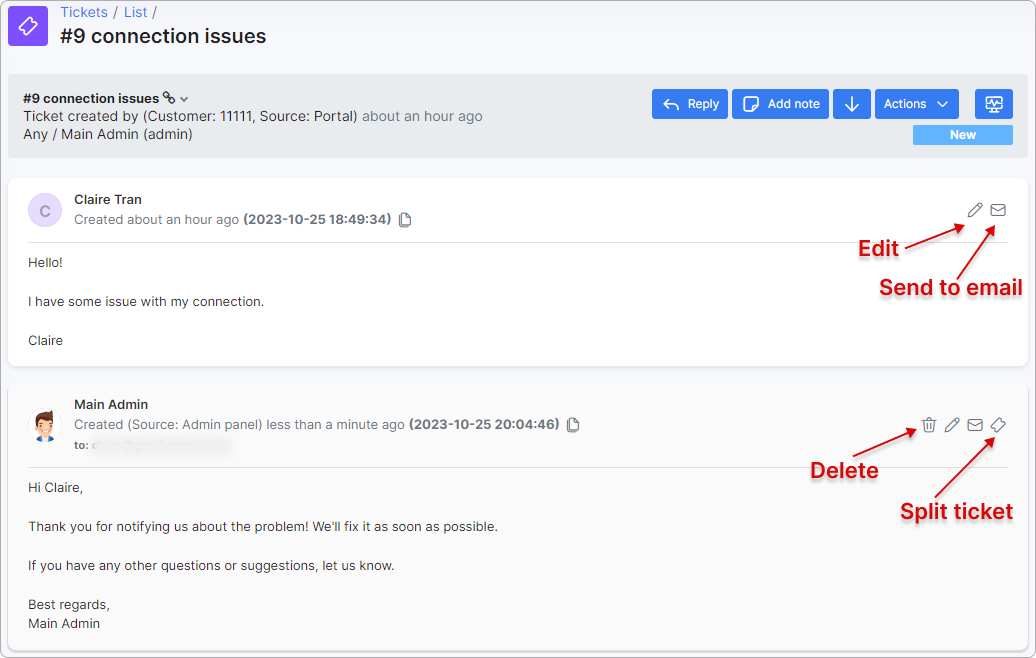
- Edit message - each message in the thread of ticket can be edited by the administrator;
- Send message to email - send a separate message from the ticket thread to the email, a message text will be quoted;
- Delete message - remove separate message from the ticket;
- Split ticket - opens the form to create a new ticket with the quoted response of the client in the message area.
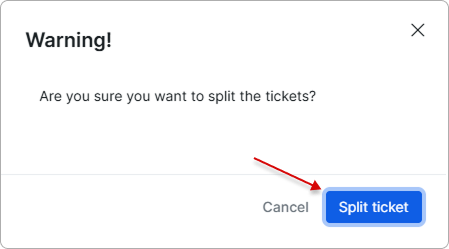
The Split ticket icon appears next to every message after the first one in a ticket — either replies added later or messages pulled in by a merge. Click the icon on the message you want to split from:

Confirm the prompt to continue:
Splynx opens the Tickets → Create form pre-filled with the selected message in the Message field. Adjust Customer / Lead, Assigned to, Group, Priority, Status, Type, Subject, and any other fields as needed.
At the bottom right of the form, the action is a segmented button:
Split ticket(primary action) — creates the new ticket and leaves the original ticket open and unchanged.Close ticket & split(in the dropdown next to the primary button, off by default) — creates the new ticket and closes the original ticket in one step.
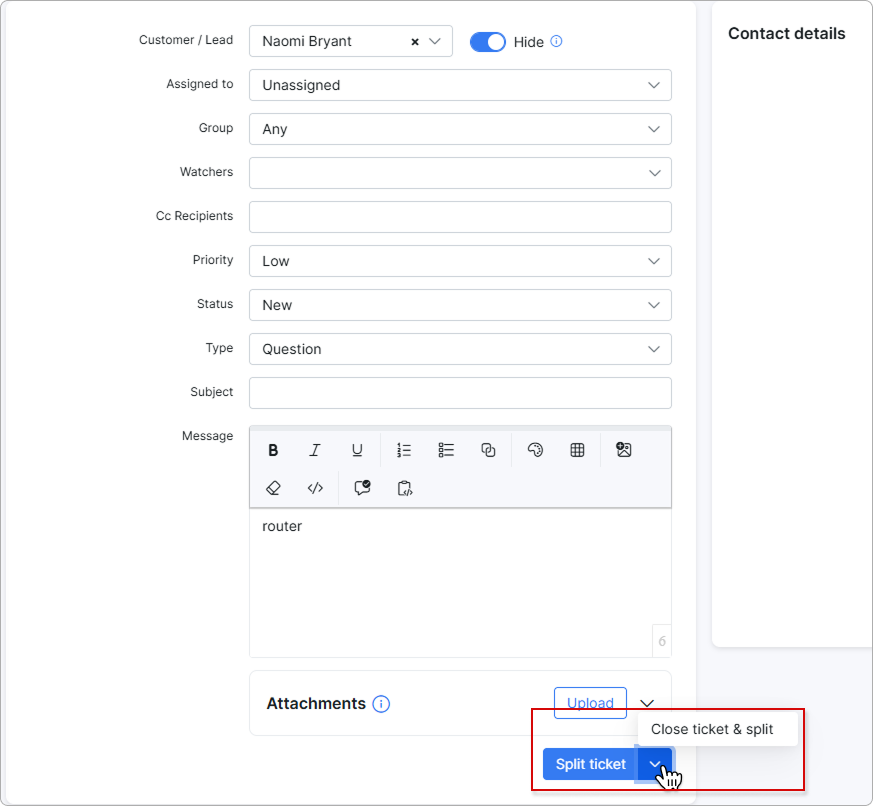
When 'Close ticket & split' is used, the close of the original ticket is written as a separate entry in the operations log, so the split and the close remain individually traceable.
Message area
- Forward - this button opens the
CcandBccfields for forwarding the response as well as ticket content to another email address(s); - Send - send a response to the customer. An additional feature allows you to respond and change the status of the ticket at the same time;
- Upload - used to attach file (-s) to the ticket.
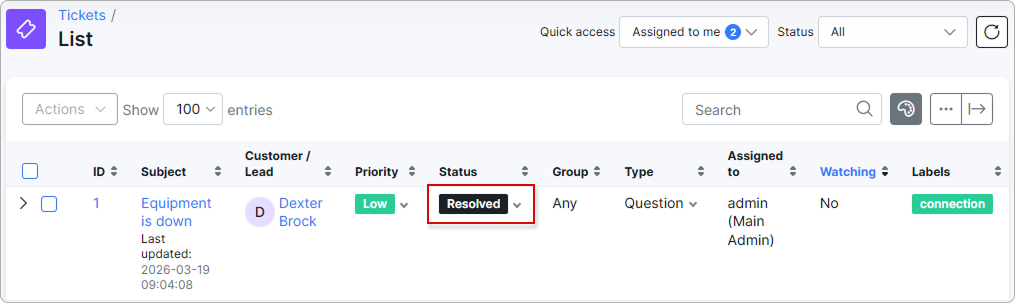
Once the issue reported in the ticket is resolved, click the small arrow next to the Update button to open additional options.
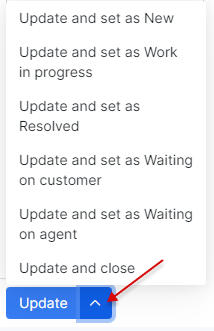
Then click Update and set as Resolved; the status will be set to Resolved:
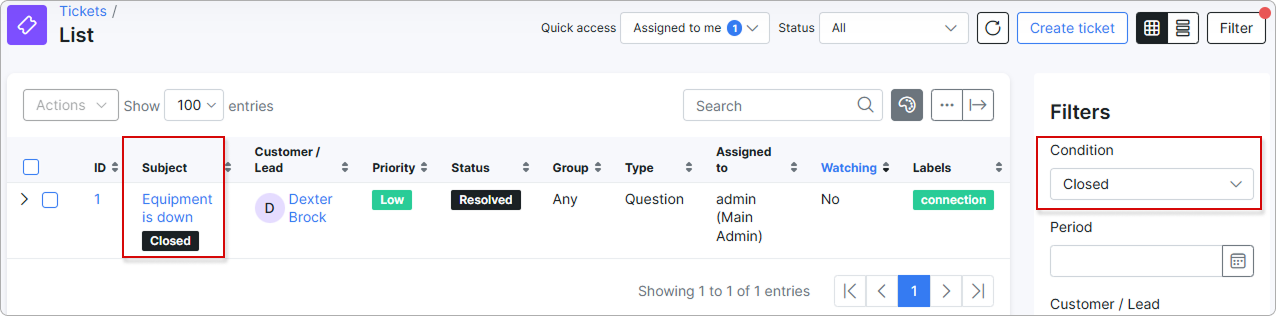
To close the ticket, click Update and close. The ticket will be moved to the list of closed tickets:
¶ AI Summary
When AI ticket summaries are enabled, Splynx adds an AI summary block at the top of the ticket, above the ticket parameters. It condenses the whole conversation into a few sentences, so you can pick up a long ticket without reading every message.
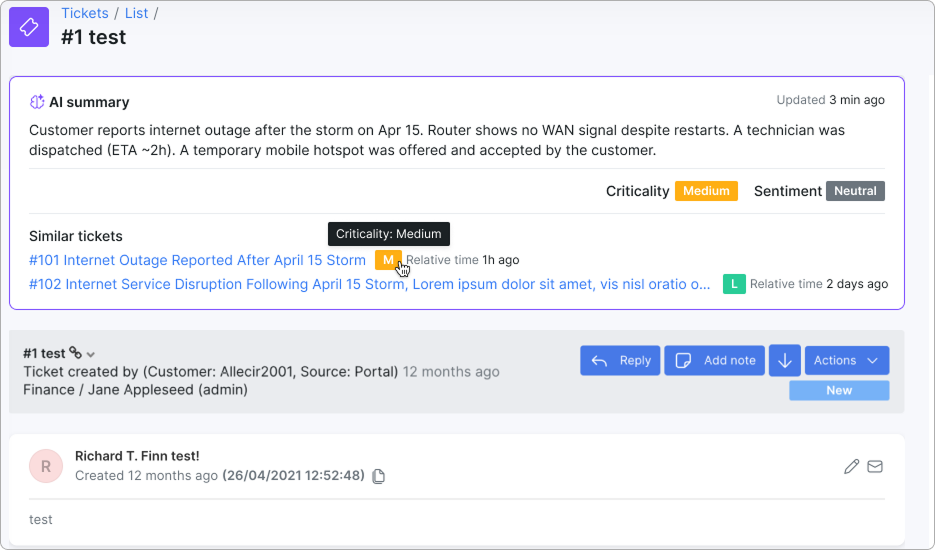
The block shows:
- Summary text — a short recap of what the customer reported, what has been checked, and what was agreed or scheduled. The Updated label in the top-right corner shows when the summary was last regenerated.
- Criticality — how urgent the request looks to the AI:
Low,Medium, orHigh. - Sentiment — the tone of the customer's messages:
Positive,Neutral, orNegative. - Similar tickets — up to a few earlier tickets with a comparable subject. Each entry is a link to that ticket, with its criticality badge and how long ago it was created. Hover over a badge to see the full criticality value.
The summary is regenerated automatically when new messages arrive in the ticket, so it stays current as the conversation continues.
AI summary appears only while Enable AI features and Enable AI ticket summary are on under Config → Main → AI. With either toggle off, the block is hidden.
¶ AI text actions
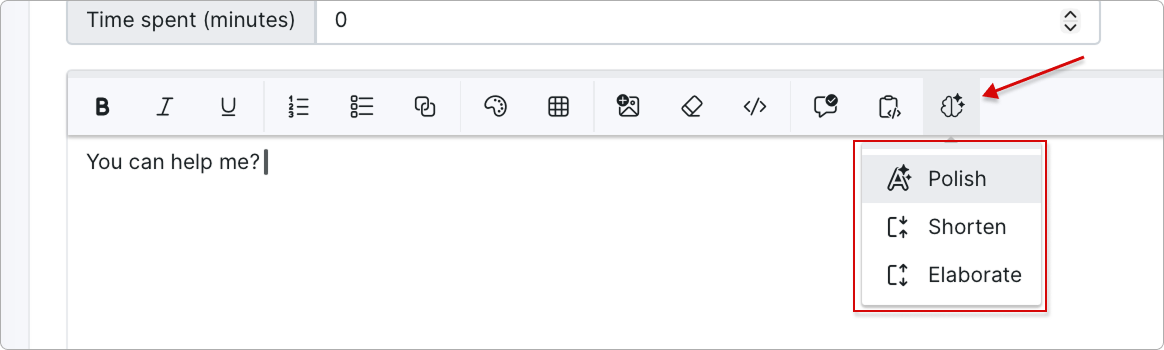
When AI text actions are enabled, the reply form on the ticket page gets an AI control with three options — Polish, Shorten, and Elaborate. Write your reply, pick an option, and compare your draft with the AI version before you accept it. The control works both for replies to the customer and for internal notes, and your signature is kept unchanged.
For the full description of each action and the settings they require, see AI text actions.
¶ List
In this section you will find a list/table of all new, opened and closed tickets in Splynx. For administrators who are part of the support team and respond to customer requests, this is their workspace in the ticketing module.
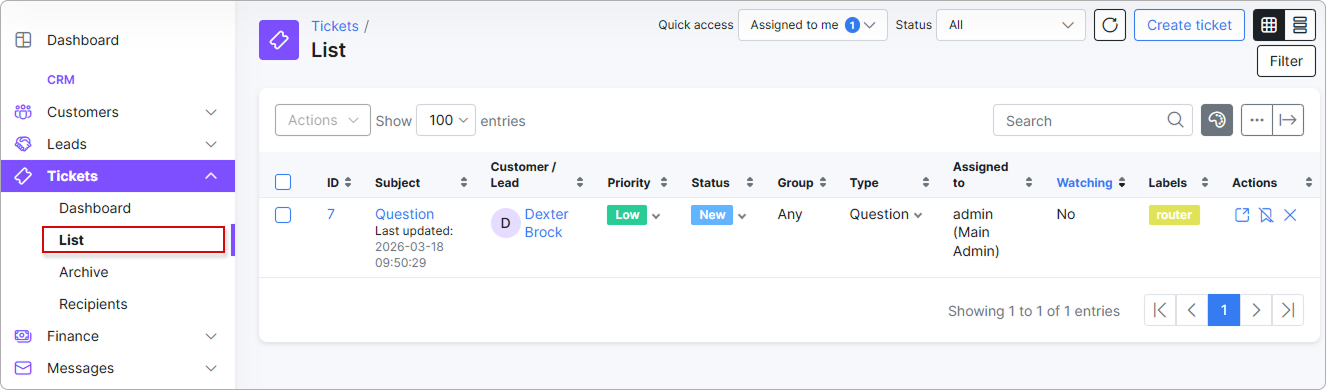
In the filter above the table, you can choose to display tickets assigned to a specific administrator, unassigned tickets, or all new tickets in the system. You can also filter tickets by status after selecting a ticket source. For ease of access, the Refresh and Create ticket buttons are provided, along with a button to hide or show the filter sidebar.

The Filter button opens the main sidebar, where you can configure filters to view specific tickets based on the selected options. Click Apply to apply the changes:
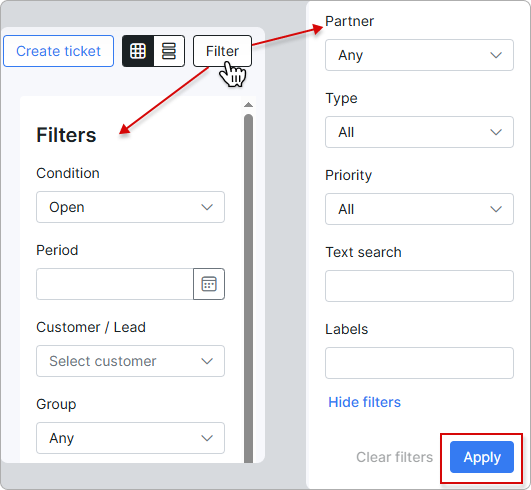
Click the Clear filters button to reset all filters to their default values.
The red dot on the Filter button means that the filter is applied:

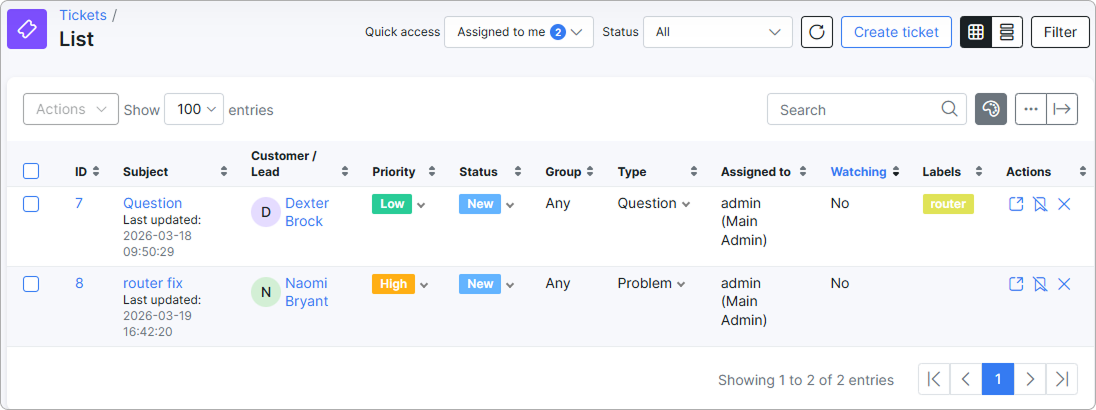
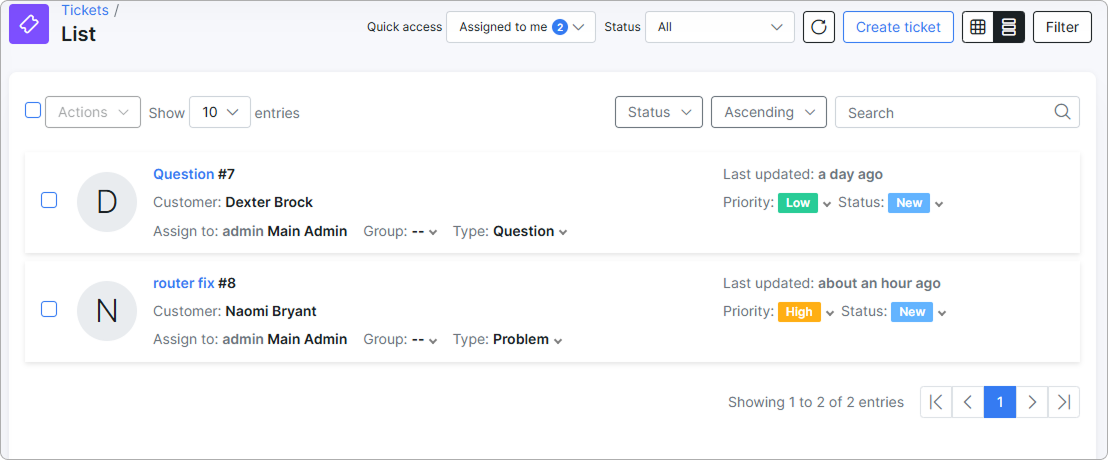
The layout of each table in the Tickets section in Splynx can be changed using two buttons: Table view and Card view according to personal preference.
The Show/hide columns
options are available only in the Table view layout.
 Table view
 Card view
¶ List of closed
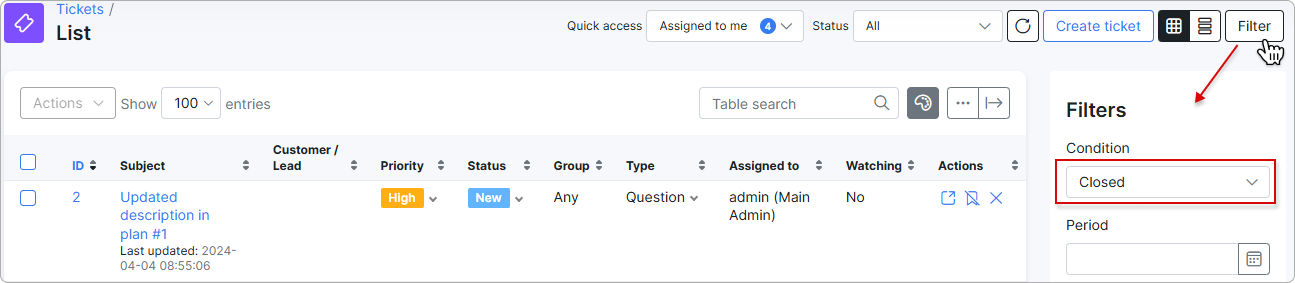
To access closed tickets, select 'Closed' in the Condition filter and apply the changes:
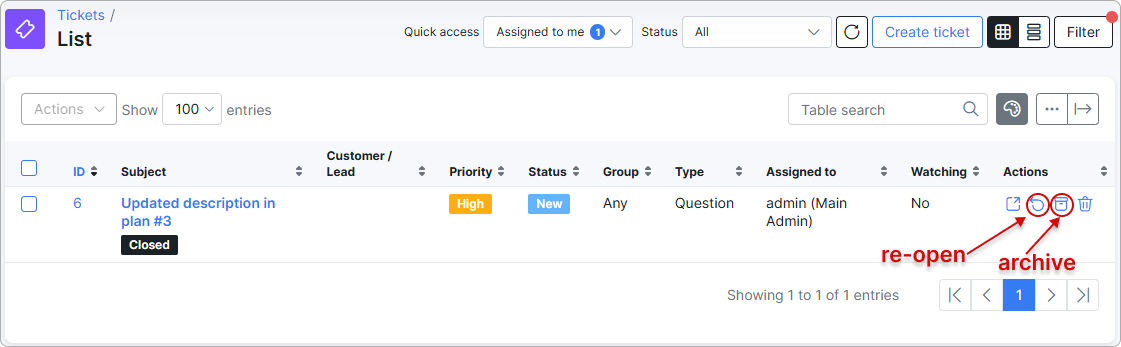
You can perform various actions on closed tickets (View, Re-open, Archive, and Delete) as well as filter them by Assignee and Status:
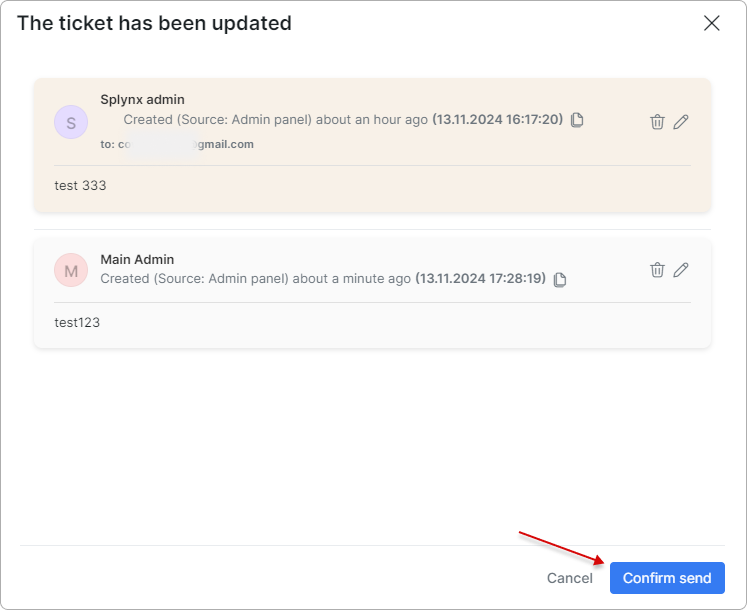
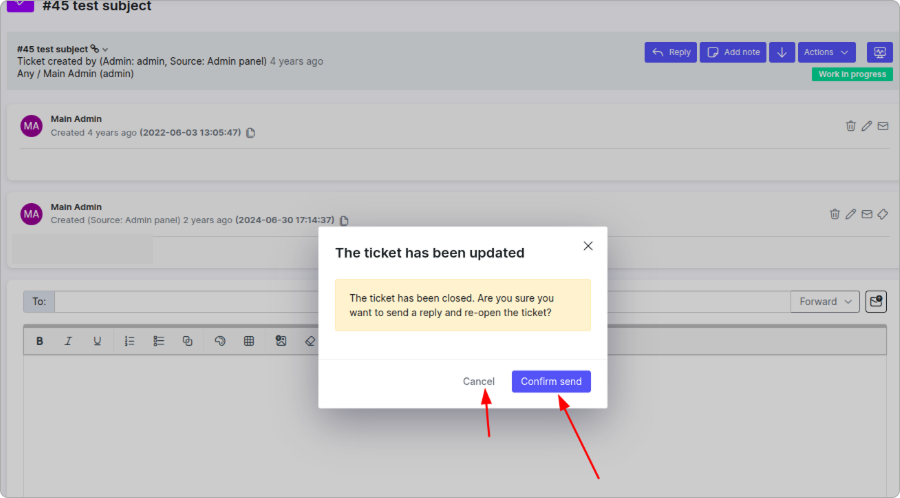
Replying to a closed ticket re-opens it automatically. To prevent re-opening tickets by mistake, Splynx shows a confirmation modal before sending the reply. Click 'Confirm send' to send the reply and re-open the ticket, or 'Cancel' to discard it:
¶ Archive
In this section you will find a list/table of all archived tickets in Splynx.
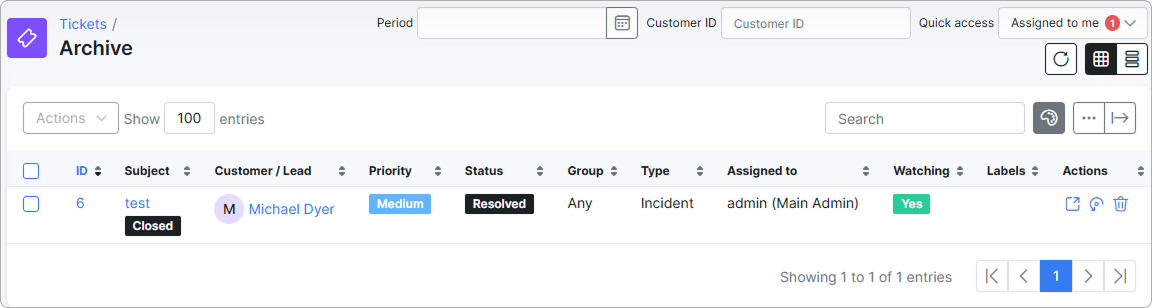
The archived ticket list also be filtered to view the contents of a specific time period, by the client ID, by assignee to a specific administrator, by unassigned or by all tickets in the system.
To restore ticket or apply other actions, use the Actions mass-selection menu or click the appropriate icon in the corresponding table column.
¶ CUSTOMERS
¶ How customers can create tickets
Your customers can create tickets in three ways:
- By sending a query to your incoming email (support@yourdomain.com); the ticket will be created automatically in the system.
Suggested read: How to configure your Inboxes.
- By creating a ticket on the Customer portal in
Tickets → Create ticket.
For more details, please read Customer's tickets.
- By creating a ticket from MyISP customer mobile app.
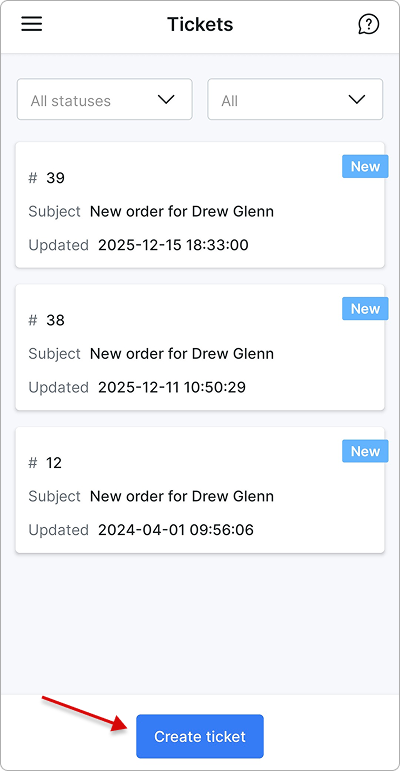
-
Once a customer or administrator creates a ticket, notifications are sent to them via email.
-
Depending on the ticket template in use, tickets may contain a main message. This feature provides convenience, as customers and administrators can respond directly to the ticket via email.
-
If the template lacks a ticket main message, customers and administrators can log in to their respective portals using the link provided in the ticket notifications.
Additional information:
- Helpdesk
- Labels (select the Tickets module from the select menu)
- Templates (select the Tickets type from the select menu)
- Ticket automation
- Ticket notifications