¶ Customer information
- Overview
- Top bar
- Information
- Contact book
- Communication preferences
- Map
- Inventory
- Updates
- Related pages
¶ Overview
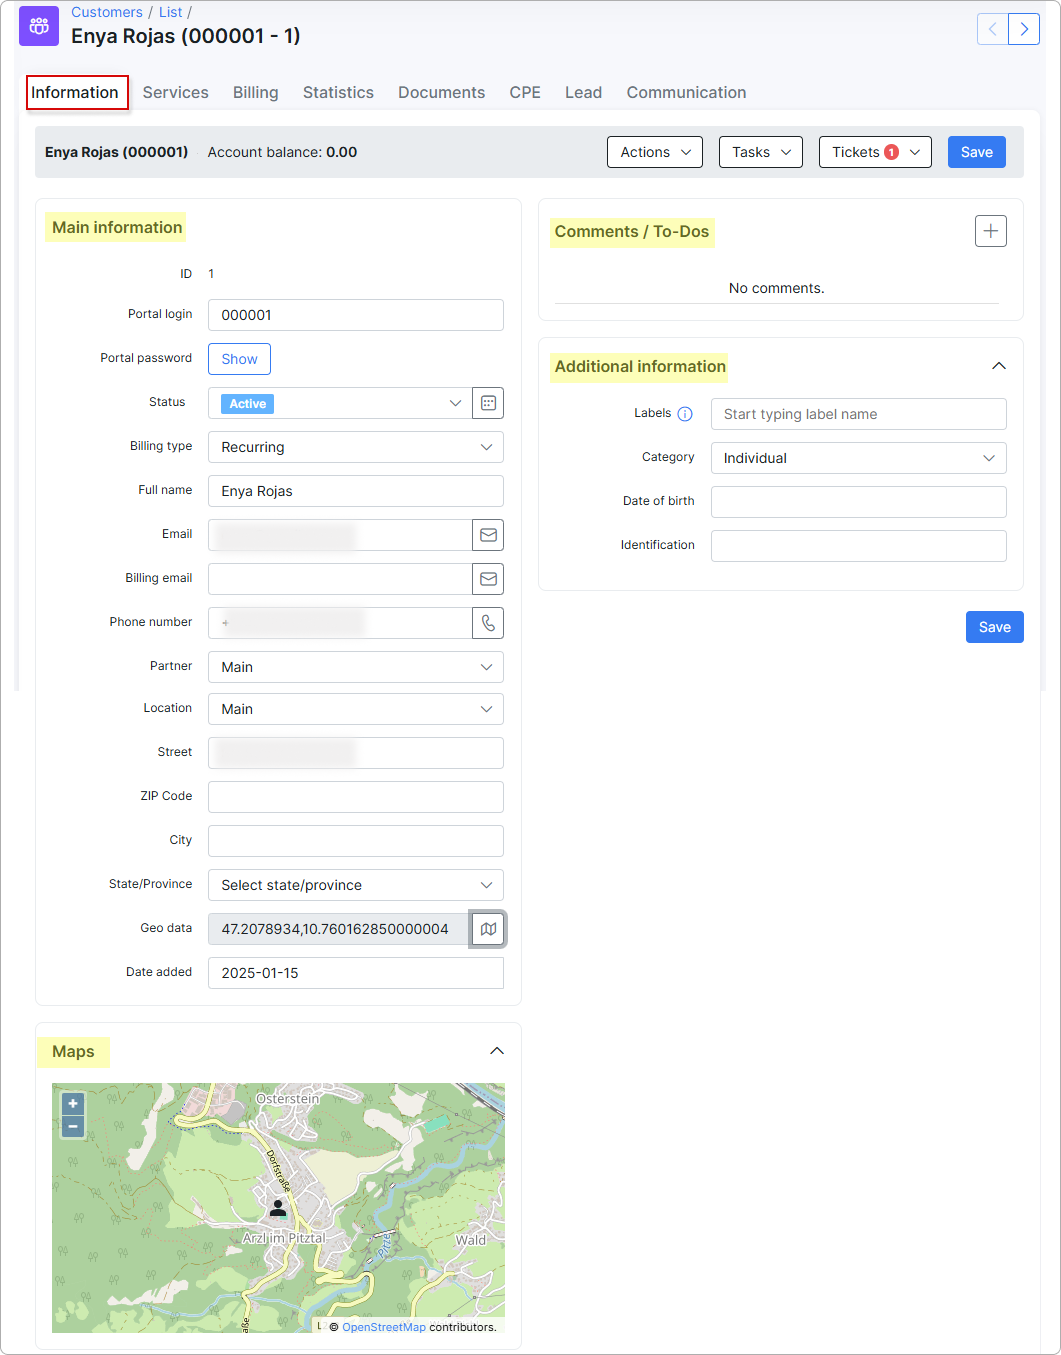
The Information tab is the main view of a customer's profile. It consists of a top bar and four sections: Information, Map, Inventory, and Updates (with Activity, To-Dos, and Comments tabs).
To open a customer's profile, navigate to Customers → List and select the customer (click the Full name, ID, or Portal login value in the table).
¶ Top bar
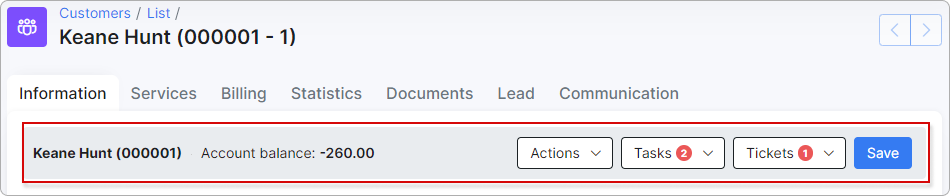
The top bar shows the customer's name, their ID and Partner ID in parentheses, the account balance, and a colored status badge (for example, Active or Blocked). On the right, there are three drop-down menus — Tasks, Tickets, and Actions — and a Save button that applies any changes made in the Information tab.
¶ Tasks
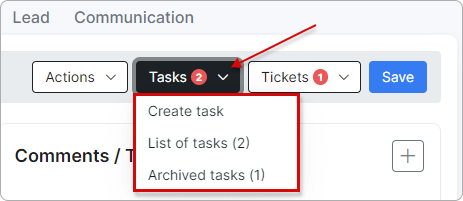
From the Tasks menu, you can Create a task, view the list of tasks related to this customer, or access archived tasks if there are any. The number next to the menu shows how many active tasks the customer has.
¶ Tickets
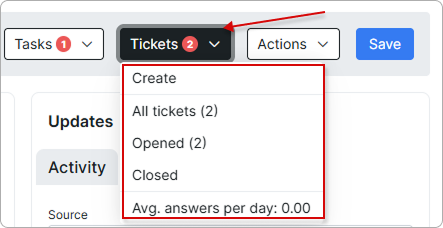
From the Tickets menu, you can Create a ticket, view all of the customer's tickets, or filter by Opened / Closed status. At the bottom of the menu, you'll find statistics on the average number of answers per day. The number next to the menu shows how many tickets the customer has.
¶ Actions
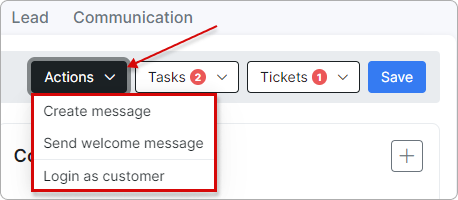
- Create message — create and send a message to the customer on their portal or via email/SMS.
The sending of emails and SMSes has to be preconfigured first.
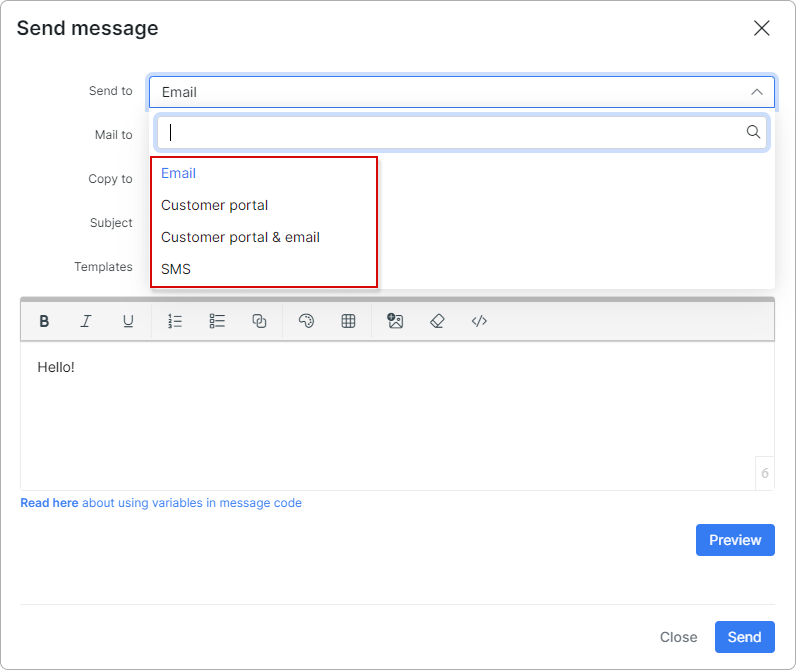
When the message type is Email, the form contains:
- Type - delivery channel: Email, SMS, Customer portal, or Customer portal & Email.
- Mail to - recipient email address (pre-filled with the customer's main address; can be edited).
- Send from - choose which outgoing mailbox the message is sent from. Options follow the
{Sender email} ({Category})format — for example, support@isp.com (Support). Only mailboxes available to the current admin (and the customer's partner where applicable) are listed. - Subject, Message - standard message fields.
The Send from field is shown only when Type is set to Email and at least one outgoing mailbox is enabled on Config → Main → Email → Outgoing mailboxes. Switching the type to SMS or Customer portal hides the field.
- Send welcome message — send a welcome message to the customer, which appears on their portal.
 Ensure that the Messages section is enabled in the Menu section of the Customer portal configuration.
When the message type is Email, the Send welcome message form contains:
- Send via - delivery channel: Email or SMS.
- Send from - choose which outgoing mailbox the welcome email is sent from. Options follow the
{Sender email} ({Category})format. Shown only when Send via includes Email and at least one outgoing mailbox is enabled. - Copy to - additional address that receives a copy of the email.
- Template - welcome message template, configured under Config → System → Templates.
To learn more about messages in the Customer portal, refer to Messages.
- Link main account — make this account a sub-account linked to a main account.
- Link sub-account — make this account the main account with a linked sub-account.
For more information, please read Linked accounts

- Login as customer — opens the Customer portal logged in as this customer.
¶ Information
The Information section contains the customer's account, contact, billing, and personal details. Fields are arranged in two columns:
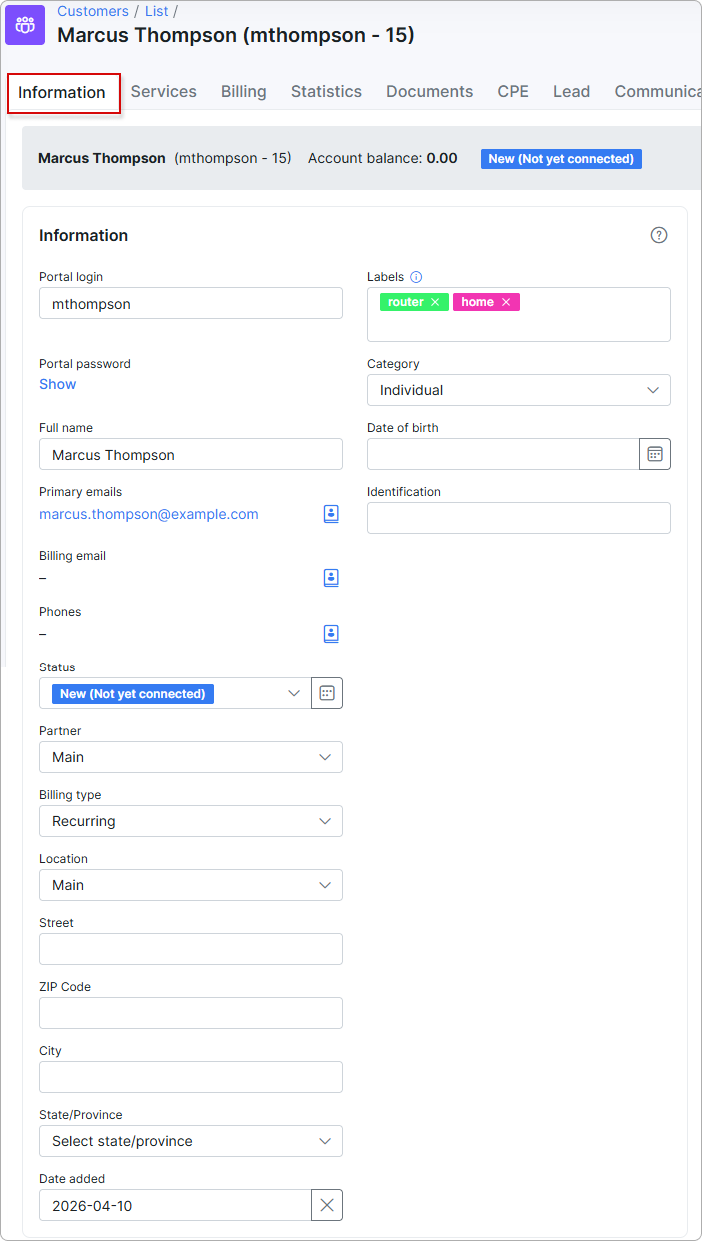
The order of the fields in the two columns, and how many rows are shown before the rest of the fields are hidden, come from your own field layout. Administrators who have not arranged their own form see the Default one. Click the options icon next to the fields, then 'Configure', to open My Profile → Customer fields and arrange the form — see Customer fields. The icon is dark and shows the 'Configure' text until you open the settings for the first time, then it turns gray and the text disappears.
-
Portal login — username used to log into the Customer portal.
-
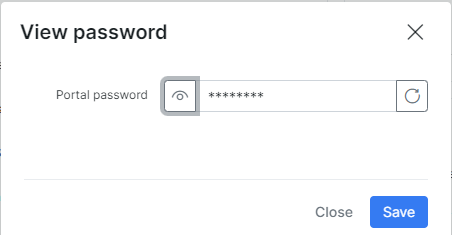
Portal password — password used to log into the Customer portal. Passwords are masked by default; click
Showto view the password in plain text.
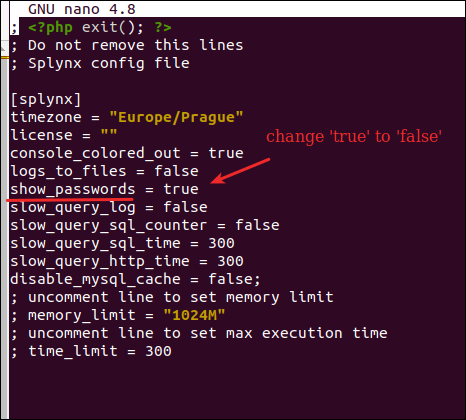
 To prevent the display of customer passwords for admin accounts, change the
 show_passwords parameter from true to false in the config file:
nano /var/www/splynx/config/config.php
-
Full name — full name of the customer.
-
Status — options are New, Active, Inactive, and Blocked. Some functions are available only to Active customers (for example, for the customer to use services). The customer must be Inactive to be deleted (Inactive → Save → Actions → Delete).
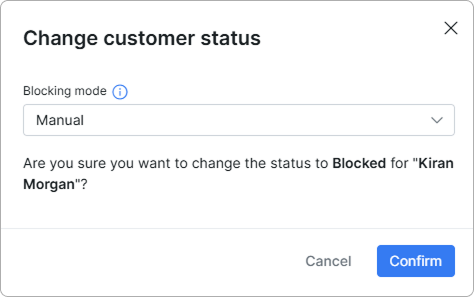
When you set Status to Blocked and click
Save, Splynx opens the Change customer status window before applying the change:
Blocking mode — how the block is recorded: Manual (blocked by an administrator) or Auto (blocked by the system, as Splynx does for an unpaid invoice or an expired service).
See also Blocked: Auto or Manual.
If there is at least one scheduled status change for the customer, the calendar icon next to the Status field changes color from gray to orange. Clicking it displays the scheduled task(s):
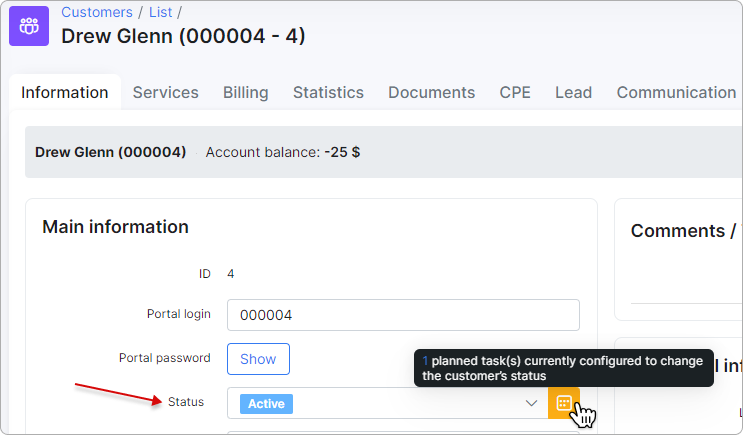
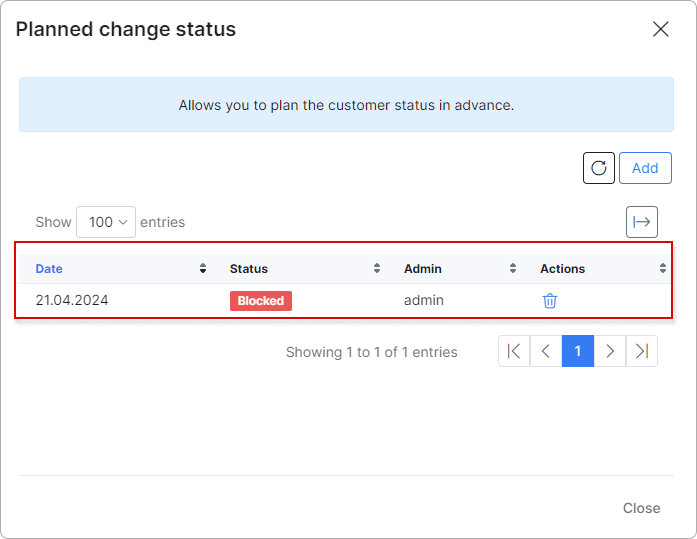
To learn more, read
Statuses
-
Partner — partner that the customer belongs to.
-
Billing type — options are Recurring and Prepaid (Custom):
- Recurring — billing for a full period in a fixed cycle, paid either by prepay or post-pay.
- Prepaid (Custom) — billing set to a custom period, paid in advance.
-
Date added — date the customer was added to Splynx.
-
Labels — select applicable label(s). Labels define new service order availability alongside tariff plans. You can filter customers by labels and decide which services are available for ordering on the Customer portal depending on the customer's label(s).
-
Category — customer's category: Individual or Business.
-
Identification — customer's identification number.
-
Email — email address(es) of the customer; multiple emails separated by a comma (
,). The field shows the primary contact's primary email address. If the primary contact has no primary email but does have a billing email, the billing address is shown here instead. -
Billing email — email address used only for billing correspondence. Multiple addresses are separated by a comma (
,). The two fields are independent: you can fill in one, both, or neither. A billing email can be saved even when the Email field is empty. This field works as follows:- If the Billing email field is empty, all emails are sent to the address(es) from the main Email field.
- If there is an address in the Billing email field, all billing notifications are sent to that billing email and all other emails are sent to the address from the main Email field. Splynx does not duplicate the billing notifications to the main Email field.
- If only the billing email is set (the Email field is empty), the customer still receives all billing notifications at that address; other messages are not sent by Splynx.
-
Phone number — phone number(s) of the customer; multiple numbers separated by a comma (
,). -
Location — location that the customer belongs to.
-
Street, ZIP Code, City — physical address fields.
-
State/Province — select a state or province preconfigured under Config → Main → Localization (State/Province).
-
Date of birth — customer's date of birth.
It is possible to create additional fields for any extra information required in your system with the Additional fields function. Additional fields are displayed within the Information section.
¶ Clarification of statuses relation:
Click here for more information
-
If the customer has an
unpaidinvoice (for example, an invoice was created on theBilling daydate) and the customer does not pay it before theBilling duedate, the customer status is changed toBlocked, but the service (for example, an Internet service) is still active. -
The invoice status between
Billing dayandBilling dueisunpaid; fromBilling duetoDeactivation periodand afterDeactivation periodthe invoice is consideredoverdue. -
If a customer with
Blockedstatus pays theoverdueinvoice, the customer's status changes toActive. -
If a customer with
Blockedstatus does not pay the invoice before theDeactivation perioddate, the status changes toInactive (doesn't use service). After the customer pays the invoice, the status becomesActive. -
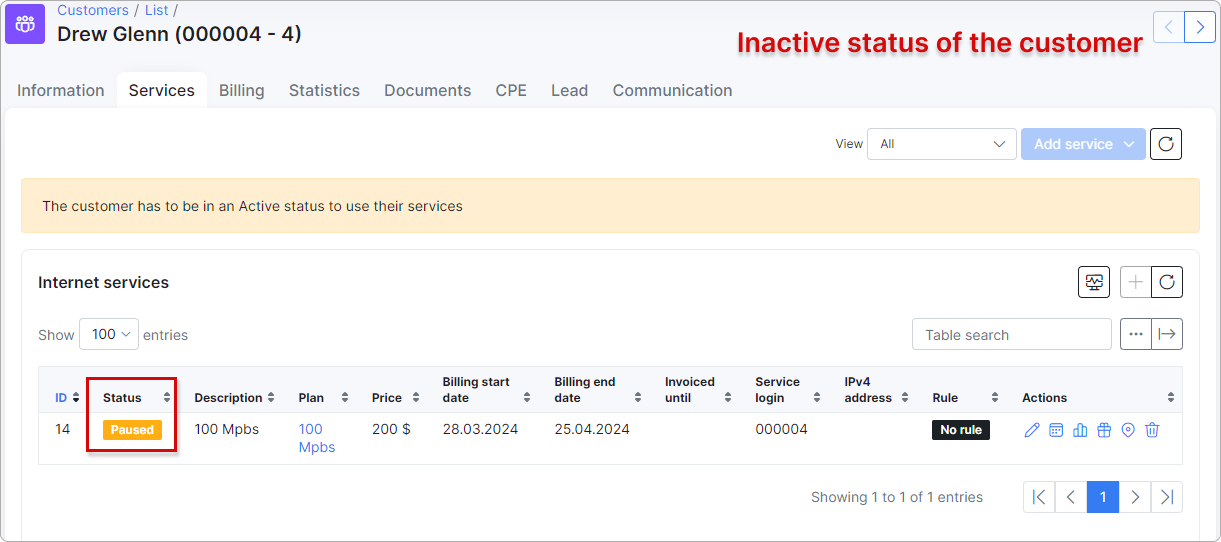
If the customer has
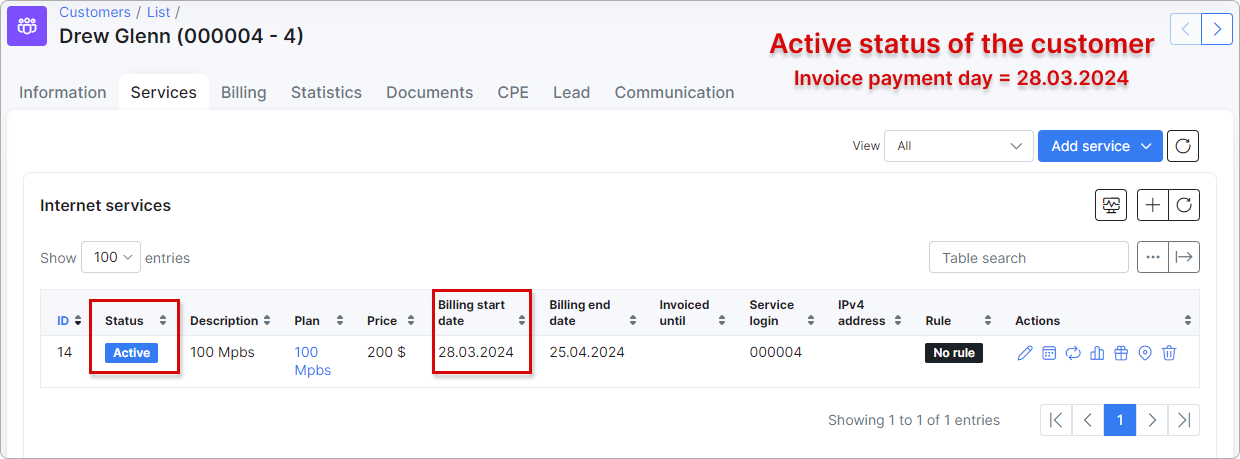
Inactive (doesn't use service)status, their service (for example, an Internet service) isdisabled(withBilling start date=Billing dayandBilling end date=Deactivation period) and a duplicate of the previous service is created withPausedstatus; itsBilling start date= the date ofDeactivation period.
After the customer pays theoverdueinvoice, the duplicate service becomesActive, and itsBilling start dateis changed to the invoice payment date.
¶ Contact book
The Contact book stores all the people associated with a customer — the primary contact plus any additional people such as a spouse, technical contact, or accountant. Each contact holds its own email addresses, phone numbers, role, and communication preferences, so you can reach the right person through the right channel.
¶ Opening the contact book
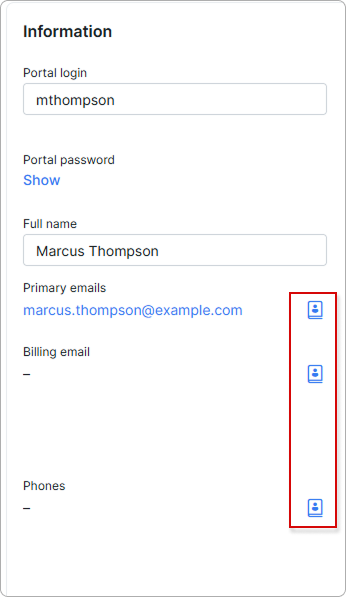
On the customer's Information tab, the Primary emails, Billing email, and Phones fields each show a contact book icon on the right. Click any of these icons to open the Contact book panel.
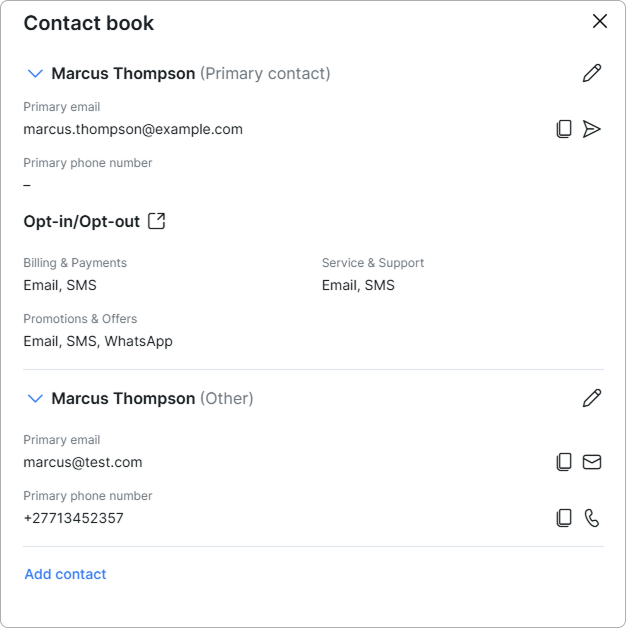
The panel slides in from the right and lists every contact saved for the customer.
¶ Contact roles
Every contact has a role that describes their relationship to the account:
- Primary contact — the main person on the account. Their primary email and phone number populate the fields shown on the Information tab. There is one primary contact per customer.
- Other — any additional contact (for example, a partner, technical contact, or billing contact).
To change a contact's details or role, click the pencil icon next to the contact's name.
¶ Contact details
For each contact, the panel displays the Primary email and Primary phone number.
Email addresses are typed: each address a contact holds is either the Primary email, the Billing email, or another type. These are independent of each other — a contact can have a primary email, a billing email, both, or neither, and a billing email can be saved without a primary one. The Email field on the Information tab shows the contact's primary email, or the billing email when no primary address is set.
Use the icons beside each value to work with it quickly:
- Copy the value to your clipboard.
- Send an email to the address, or start a call to the phone number.
A dash (–) means the value has not been filled in for that contact.
¶ Copying and exporting contact details
The three-dots icon opens an actions menu for working with a contact's saved emails and phone numbers without retyping them.
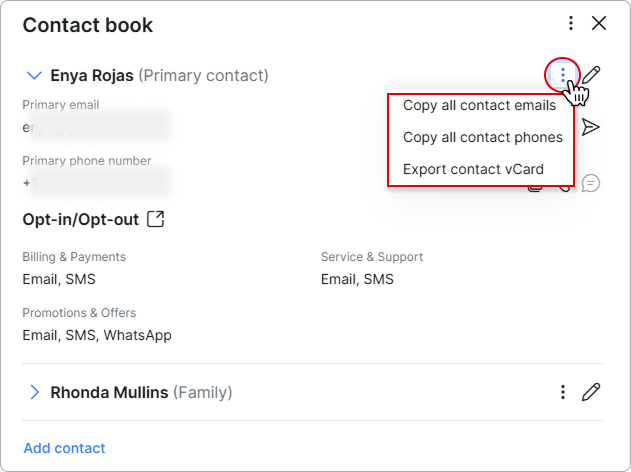
The menu next to a contact's name applies to that contact:
- Copy all contact emails — copies every email address saved for the contact as a comma-separated list, ready to paste into the To field of a mail client.
- Copy all contact phones — copies every phone number saved for the contact as a comma-separated list.
- Export contact vCard — downloads a
.vcffile with a single vCard record for the contact, containing the name, emails, and phone numbers.
When the customer has more than one contact, the same actions are also available at account level, at the top of the Contact book panel. There they cover all contacts at once: the copy actions produce one comma-separated list of every contact's emails or phones, and the export produces a single .vcf file with one vCard record per contact. With only one contact saved, the account-level icon is not shown — use the menu on the contact itself.
A Copied message confirms that the values are on your clipboard.
The '.vcf' file uses the standard vCard format, so it can be imported into common mail clients and mobile phones.
¶ Opt-in / Opt-out preferences
Under each contact, the Opt-in/Opt-out block shows which channels the contact has agreed to be contacted through, grouped by communication purpose:
- Billing & Payments — e.g. Email, SMS
- Service & Support — e.g. Email, SMS
- Promotions & Offers — e.g. Email, SMS, WhatsApp
Click the external-link icon next to Opt-in/Opt-out to open the full preferences. These preferences are configured in the Customer portal (Profile Notifications), where the customer chooses which channels they agree to be contacted through for each purpose. See also Communication preferences.
These preferences control which channels Splynx uses to contact the customer for each purpose. Respect the contact's opt-out choices to stay compliant with communication regulations.
¶ Adding a contact
- In the Contact book panel, click
Add contact. - Enter the Full name.
- Choose a Role from the drop-down (for example, Other).
- Enter an Email address and set its Type (Primary, Billing, or another type). Click
Add emailto add more addresses. The types are independent — you can add a Billing address without a Primary one, both, or leave the email rows empty entirely. - Select the Country code, enter the Phone number, and set its Type. Click Add phone to add more numbers.
- Click
Save.
Use the trash icon beside an email or phone row to remove that row. The icon is not shown when only one empty email or phone row is left, because at least one row of each is always kept in the form.
Billing notifications are always sent to the Billing address when one is saved. A contact whose only email address is a Billing one still receives billing notifications; other message types are not sent to that contact.
¶ Editing and deleting a contact
Click the pencil icon next to a contact's name to open Edit contact. The dialog holds the same fields as Add contact — change the Full name, Role, emails, or phone numbers, then click Save, or Cancel to discard the changes.
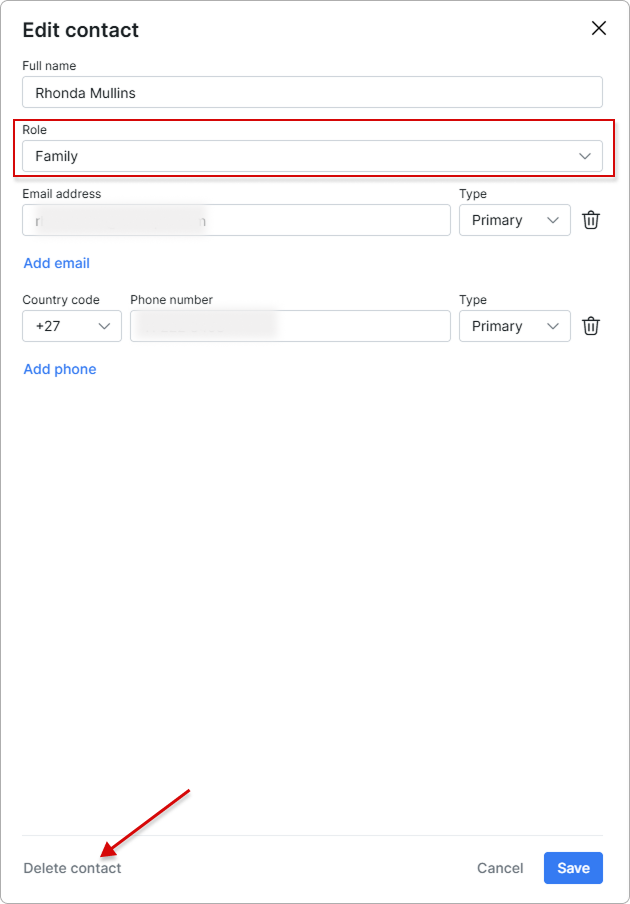
To remove a contact, click Delete contact in the bottom-left corner of the dialog.
Only additional contacts can be deleted. The Primary contact has no Delete contact option, because every customer keeps one primary contact — to hand the role over, edit another contact and set its Role to Primary contact first.
¶ Communication preferences
Splynx tags every outgoing message with a notification category, and each customer can opt in or out of these categories. Their choices are stored on the customer profile and respected automatically on every send: recipients who have opted out of a category are excluded from any message — including mass sends — tagged with it.
Customers can manage their own preferences and opt out in Profile settings on Customer portal.
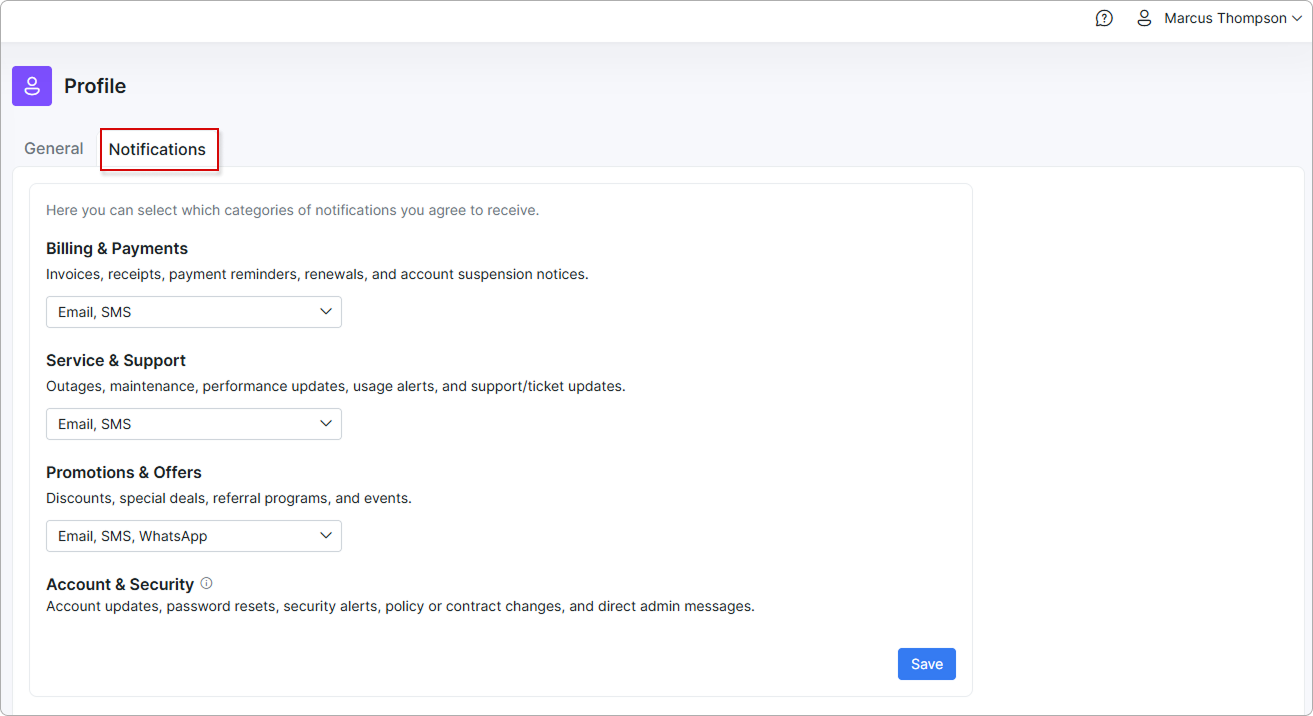
The notification categories are:
| Category | What it covers |
|---|---|
| Promotions & Offers | Marketing campaigns, discounts, new-plan announcements. |
| Billing & Payments | Invoices, payment reminders, payment confirmations, overdue notices. |
| Service & Support | Service outages, maintenance windows, ticket updates, technical advisories. |
| Sub-accounts notification | Messages addressed to linked sub-accounts. |
| Account & Security | Password resets, login alerts, account-status changes, two-factor reminders. |
| Administrative notifications | Internal system messages to administrators. Not selectable when sending and not shown to customers. |
¶ Map
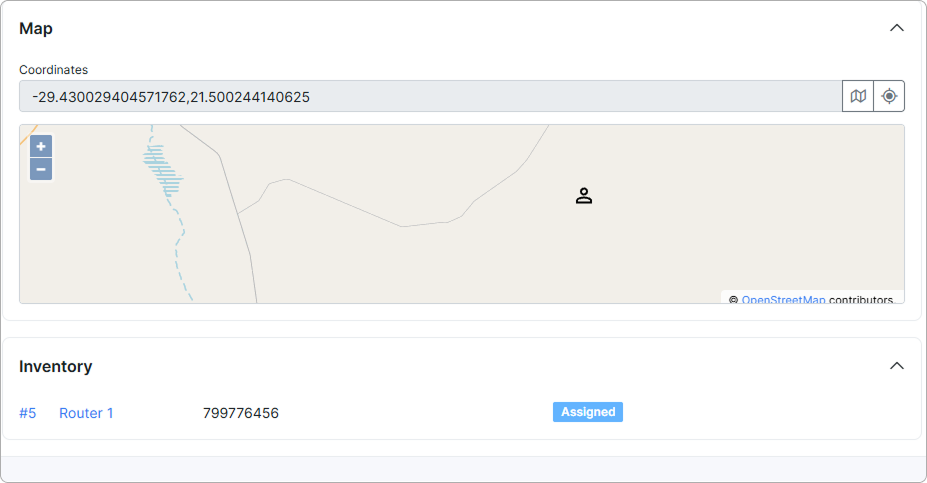
The Map section displays the customer's physical location based on the Coordinates field. If the address is set and maps are configured, the customer's location is shown on the map:
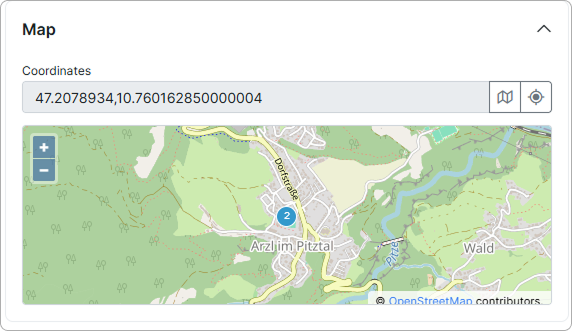
Maps can be configured in Config → Main → Maps.
¶ Inventory
The Inventory section lists any inventory items linked to the customer (for example, equipment issued to the customer). If no items are linked, the section displays No inventory linked to the customer.
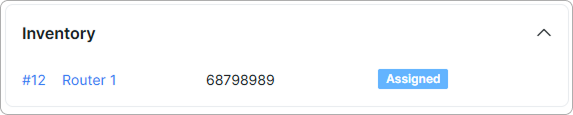
To learn more, refer to Inventory (Items)
¶ Updates
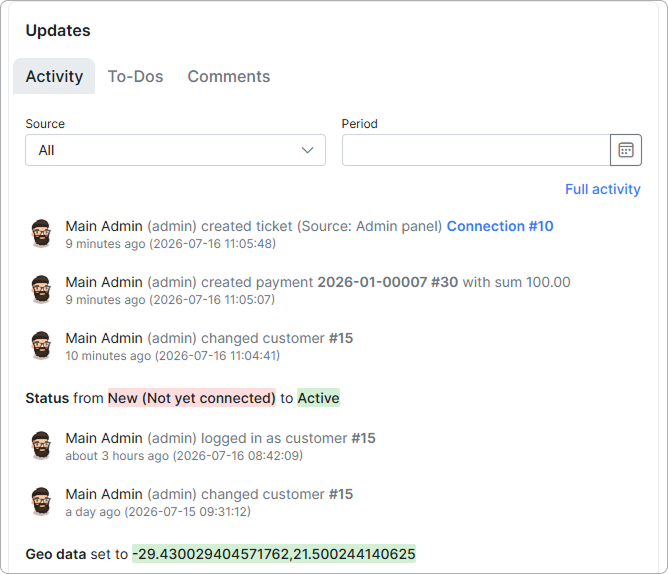
The Updates panel is displayed on the right side of the Information tab. It has three tabs — Activity, To-Dos, and Comments — and provides a chronological view of changes and notes related to the customer account.
¶ Activity
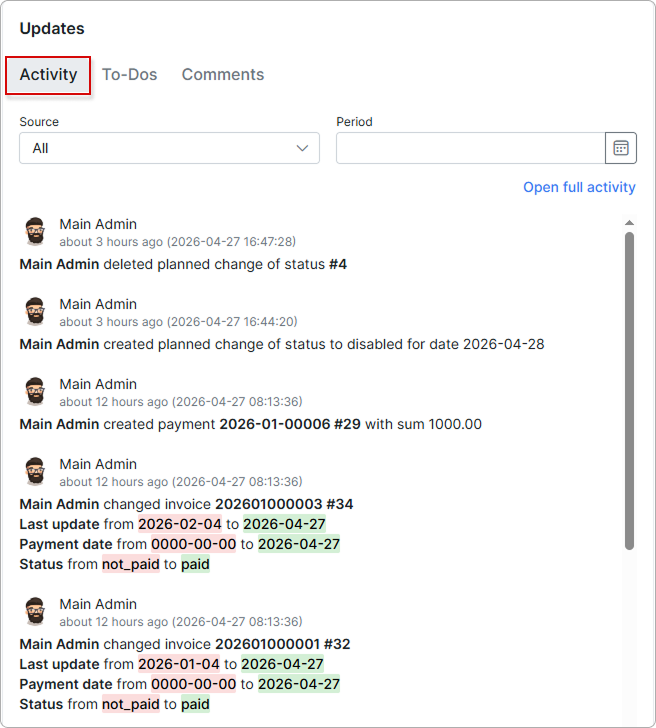
The Activity tab lists all actions applied to the customer account in chronological order. Each entry shows the source (administrator, customer, or system), the timestamp, and a description of the change (for example, Status from Blocked to Active or Billing type from Prepaid (Custom) to Recurring).
Entries can be filtered using the Source and Period drop-downs above the list.
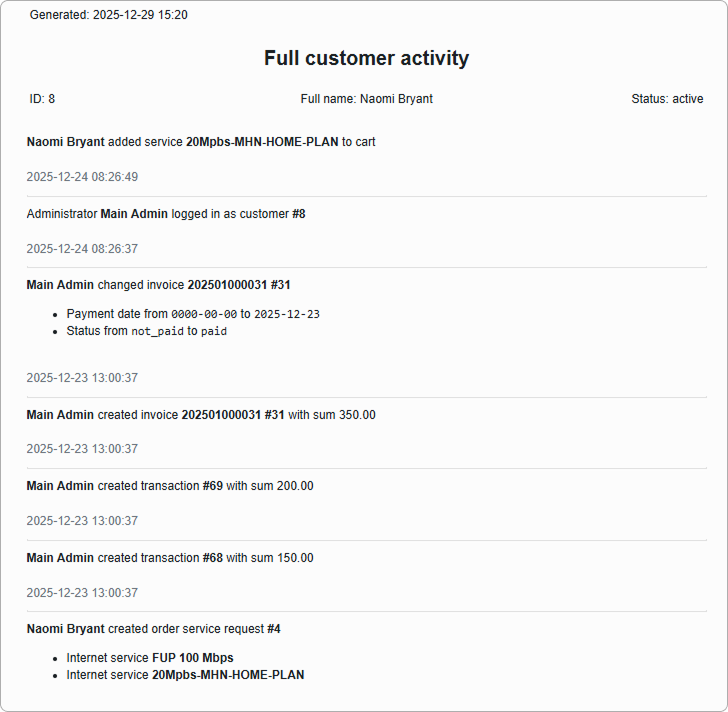
Click Open full activity to open the complete activity page associated with the customer in a separate browser tab as an HTML page.
¶ To-Dos
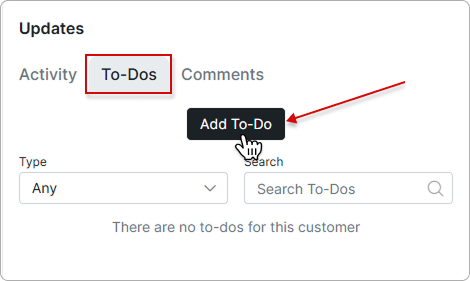
The To-Dos tab lets you create and track to-do tasks for the customer. Tasks set in this tab are visible to other administrator accounts as well. To create a to-do task, set a date in the Scheduled field:
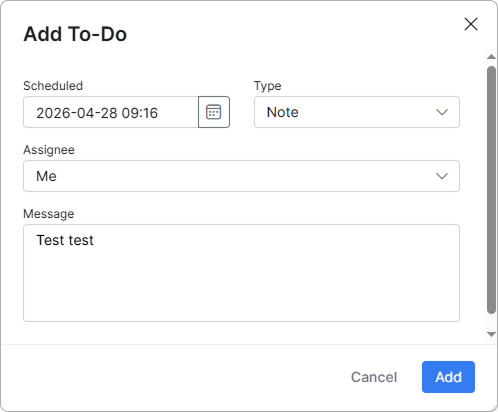
Use the Add To-Do dialog to schedule a reminder or task linked to the current record. Fill in the following fields:
- Scheduled — the date and time when the to-do should be done. Click the calendar icon to pick a date and time.
- Type — the kind of to-do: Note, Customer, Support, etc.
- Assignee — the administrator responsible for the to-do. Defaults to Me (the current user).
- Message — a short description of what needs to be done.
Click Add to save the to-do.
Once a to-do is created, it appears in the To-Dos tab.
Click the three-dot menu on the right of a to-do to open the actions menu:
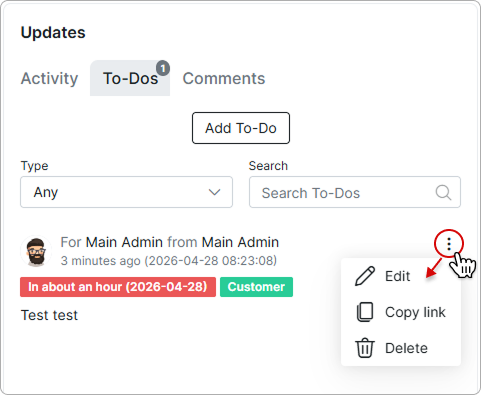
- Edit — modify the scheduled date, type, assignee, or message.
- Copy link — copy a direct link to the to-do (useful for sharing with other administrators).
- Delete — permanently remove the to-do from the list.
You can also filter the list by Type or use the Search field to find a specific to-do by its message.
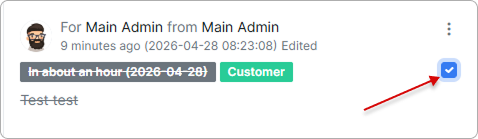
Once the checkbox for a task is selected, it is marked as completed:
¶ Comments
The Comments tab lets you add, edit, or remove quick comments for the customer. Comments are visible to other administrator accounts. When creating a comment, you can specify its type and category:
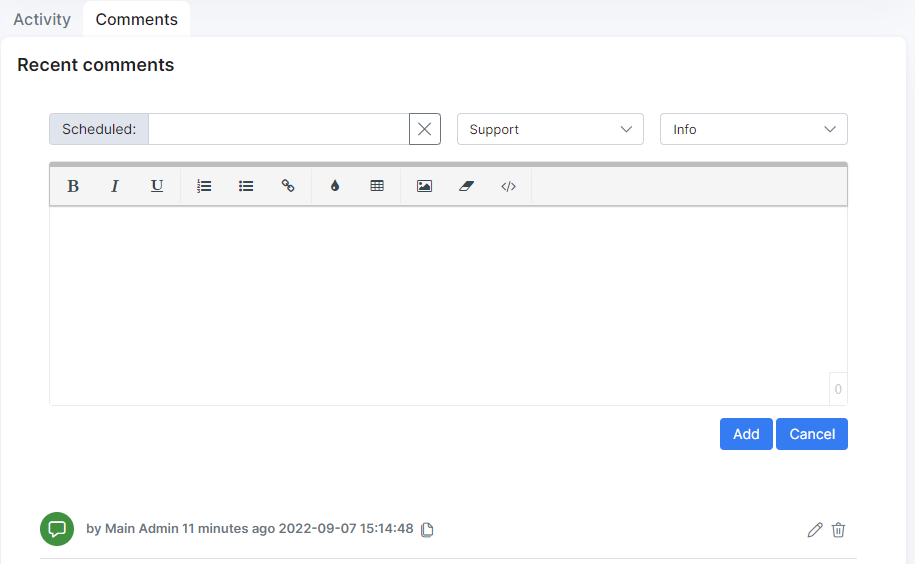
Recent comments:
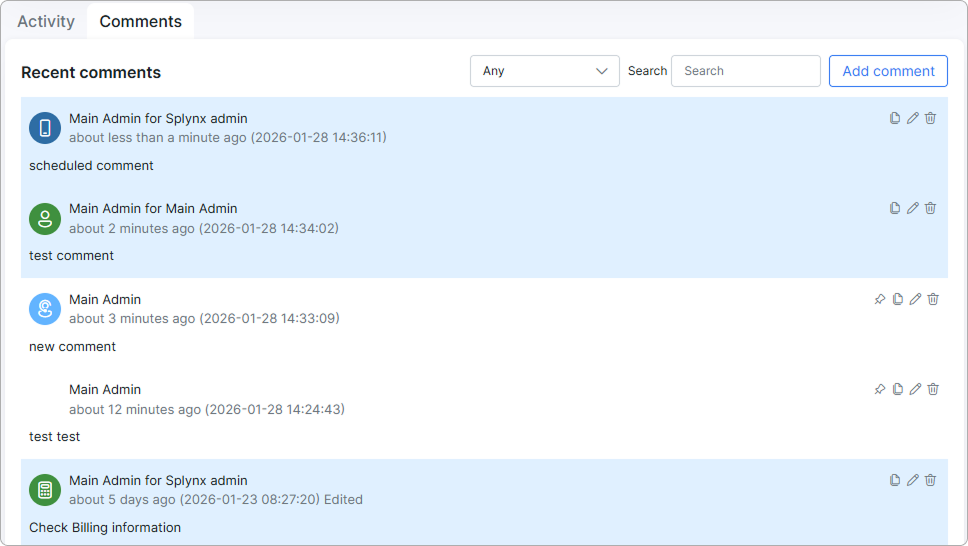
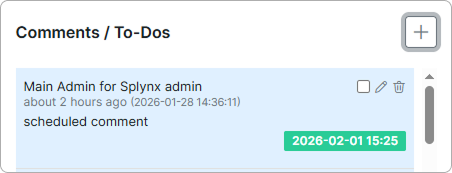
If you set a date in the Scheduled field when creating a comment, it is automatically transferred to the To-Dos tab as a to-do task: